12 Dog Harness Sewing Patterns You Can Make at Home
If you love making things for your dog, dog harness sewing patterns are one of the most fun and useful projects you can try. A harness is something your dog wears almost every day, so why not make it exactly the way you want?
In this article, we’re sharing 12 real-life free dog harness pattern ideas, each one inspired by an actual handmade harness. Some are perfect for total beginners. Others use special stitching, padding, or braiding skills. Every idea includes what you’ll need, how to actually put it together, and which dogs it works best for.
Whether you want a simple diy dog harness sewing pattern for your first project or something fancier for a special photo shoot, there’s an idea here for you. Let’s get started.
1. Classic Step-In Y-Front Harness
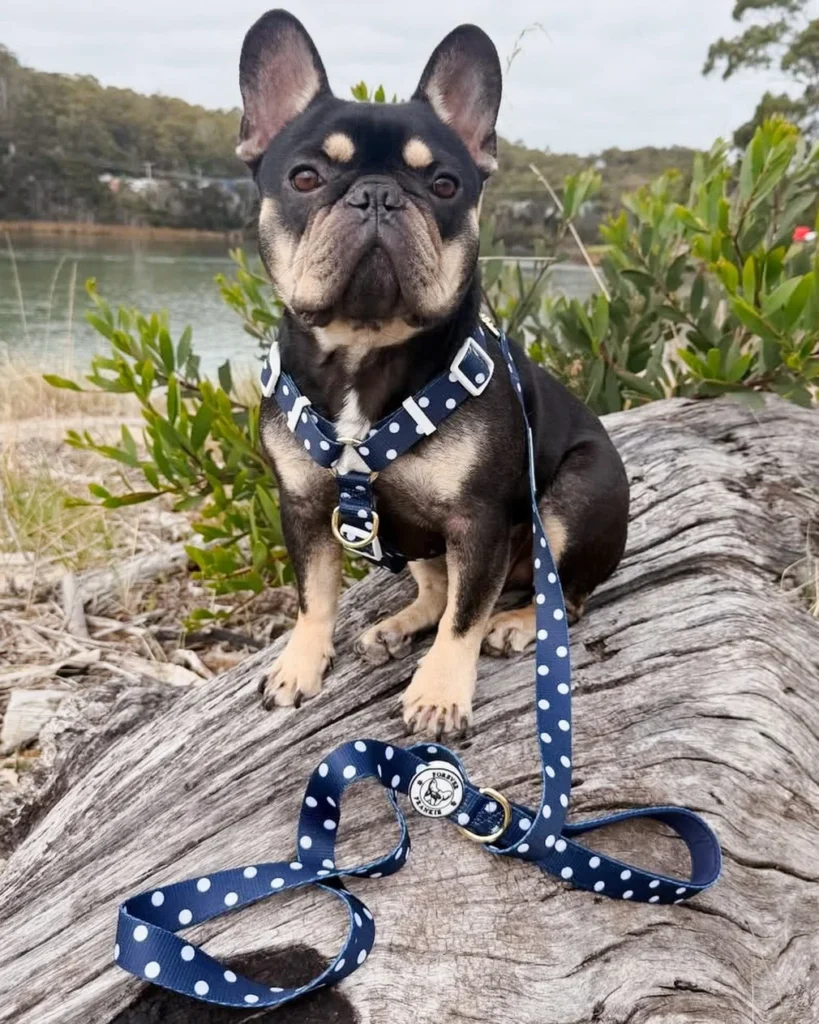
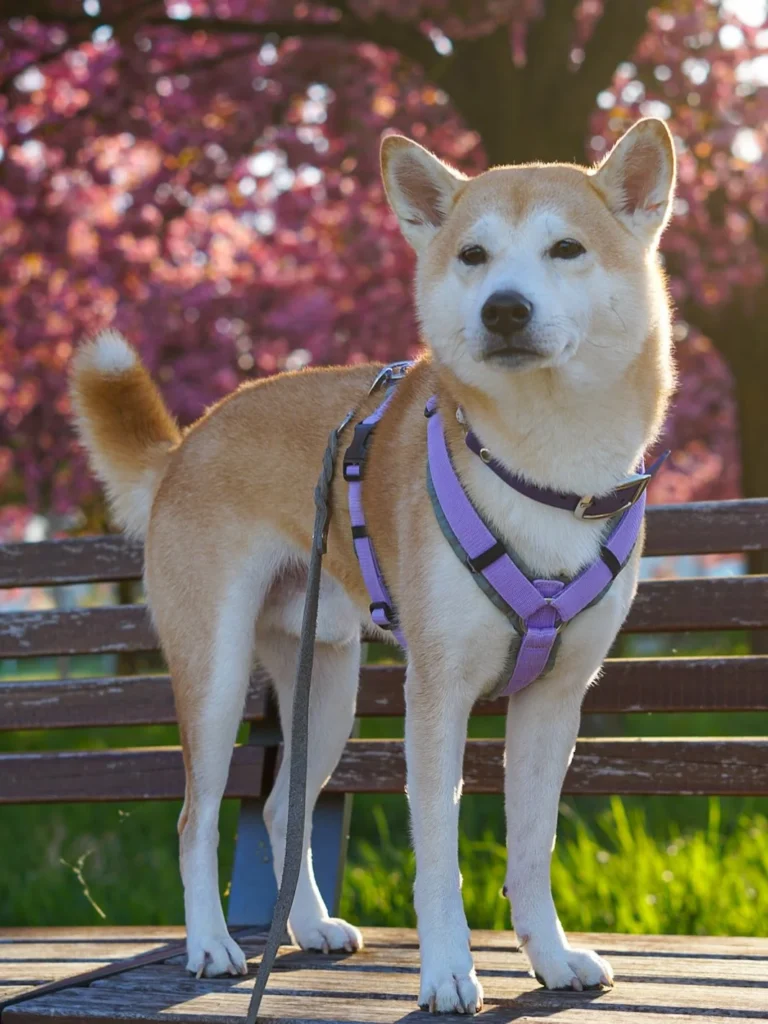
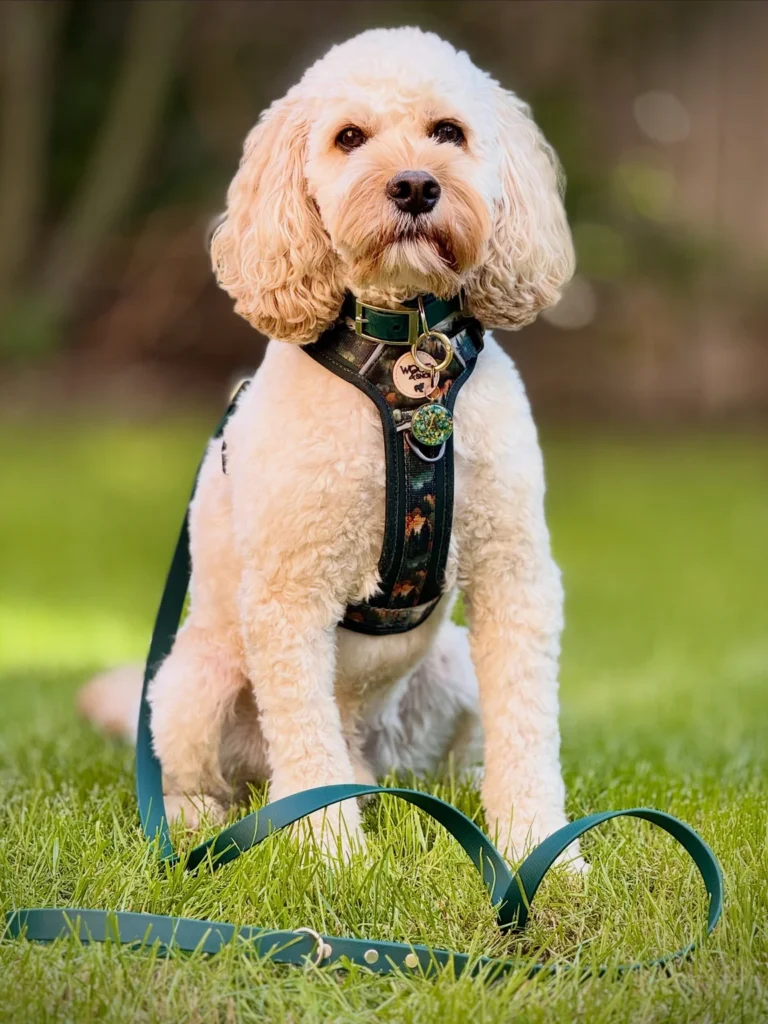
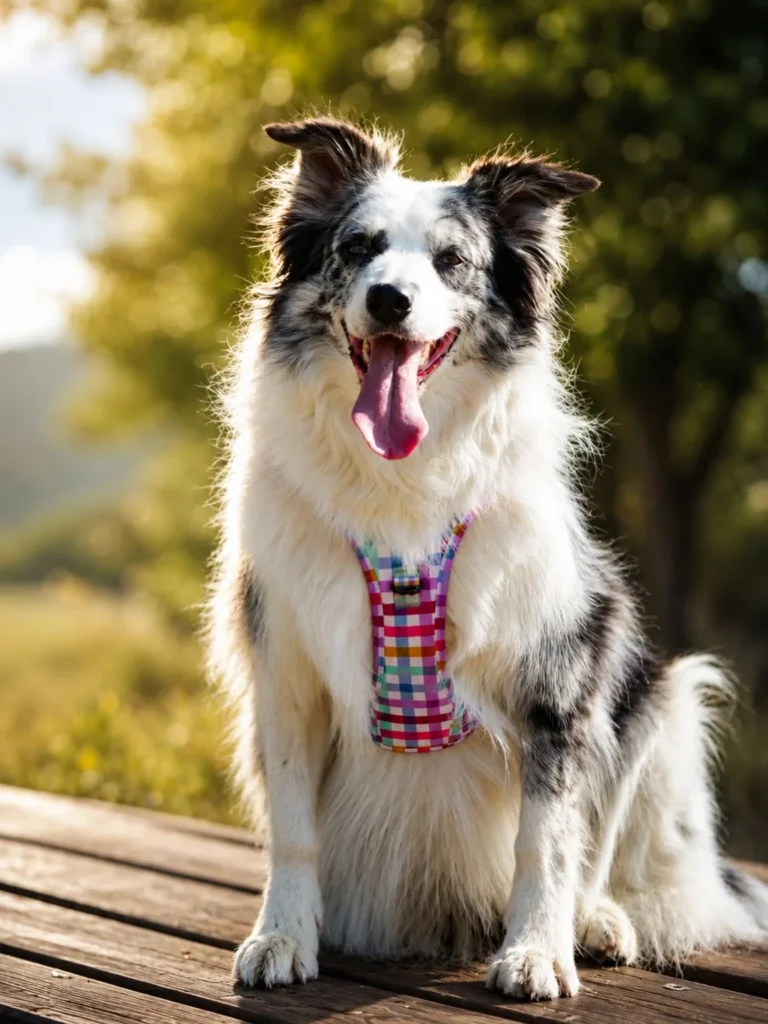
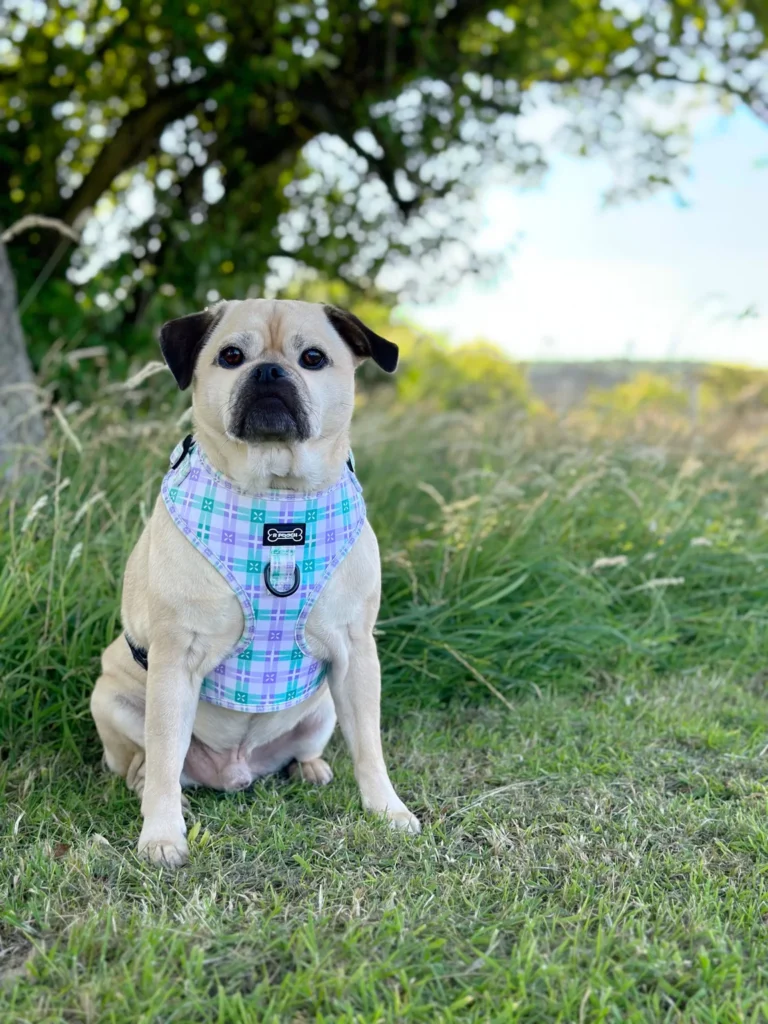
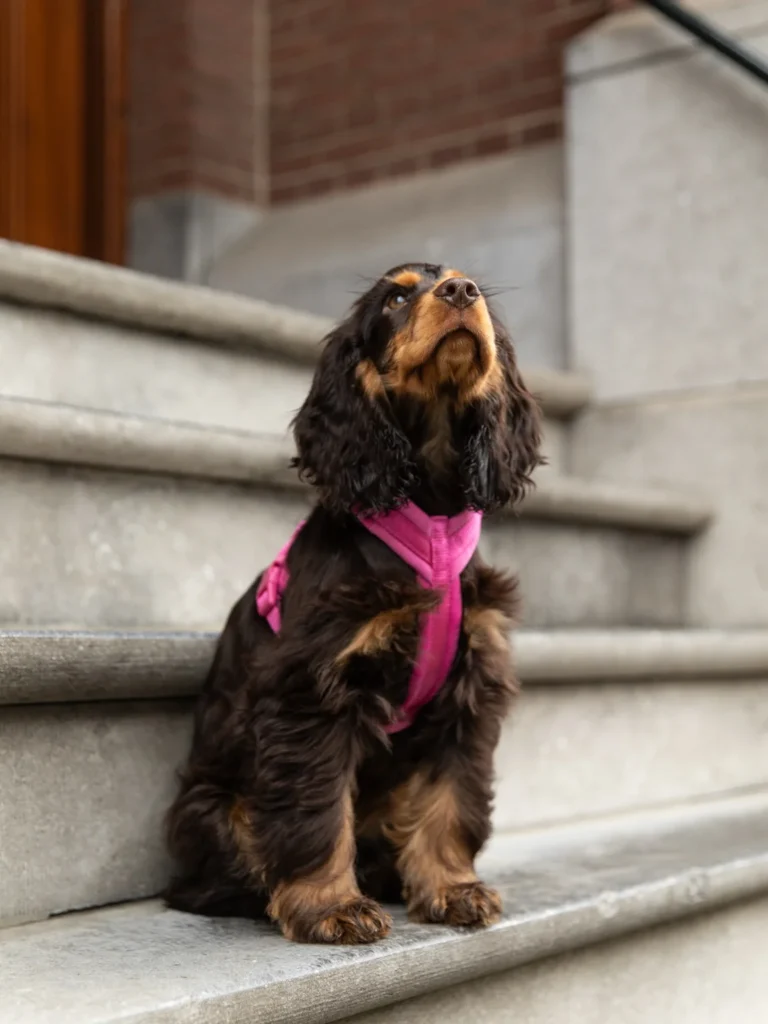
This is the easiest harness style to sew, which is why it’s the most popular beginner pattern. Your dog simply steps into the harness, and you clip it closed on their back. There are no complicated closures, curved seams, or extra padding layers to deal with, which makes it a forgiving first project even if your stitching isn’t perfectly straight yet.
To make this pattern, start with a strip of nylon webbing or heavy cotton strap about one inch wide. Cut one long piece that will run from the back of the neck, down one side of the chest, and up the other side to form the “Y” shape. Fold and stitch the top point where the two straps meet, and sew a D-ring into that same seam so it’s reinforced from the start. Add a second, shorter strap that wraps around the belly just behind the front legs, and attach a side-release buckle to one end so the harness can open and close easily.
The Y-shape sits flat across the chest without rubbing under the legs, which is exactly why this pattern has stayed popular for so long. Because it only uses a few pieces of fabric, it’s quick to cut and stitch, even if this is your very first time sewing pet gear. Beginners often finish an entire harness in under an hour once the fabric is cut and measured correctly.
This pattern works best for small to medium dogs who don’t pull hard on the leash. Breeds like French Bulldogs, Border Collies, Cockapoos, and Pugs tend to do well in this simple design since it doesn’t need heavy reinforcement to hold up.
One of the best things about this pattern is that it’s a blank canvas. You can use gingham, plaid, or solid fabric, and the shape will still look neat and tidy no matter what print you choose. If you’re working with a young or newly leash-trained dog, pairing this simple harness with good habits from our guide to essential puppy training tips can make walks much smoother from day one.
📸 Photo credit: Instagram @lady.bordercollie, @frankieandfriendsx, @unbeshibable_meowments, @reggiethepugjug, @scottysdoggoods, @ally_and_albie
2. No-Pull Dual-Clip Harness with Padded Chest
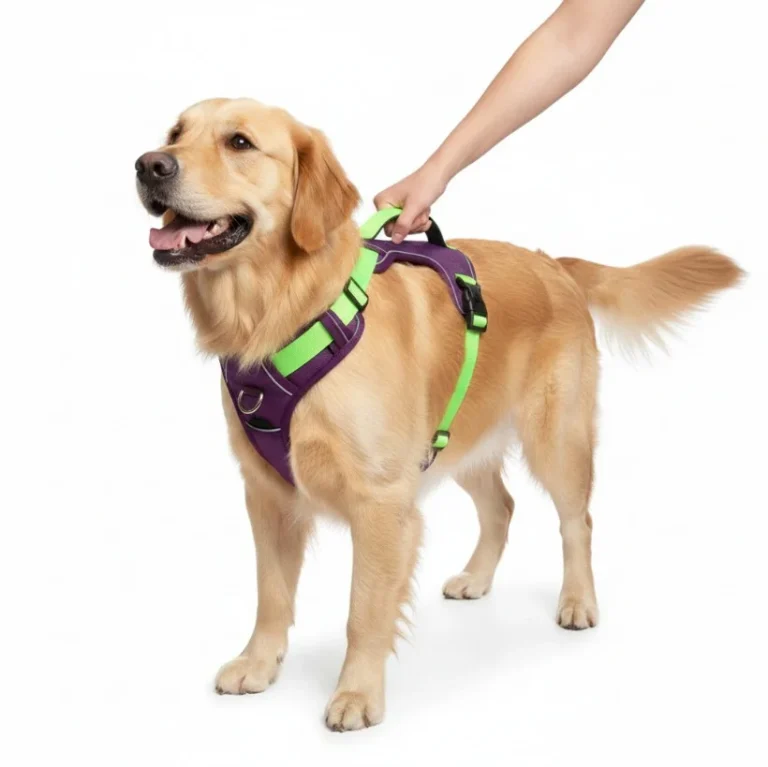
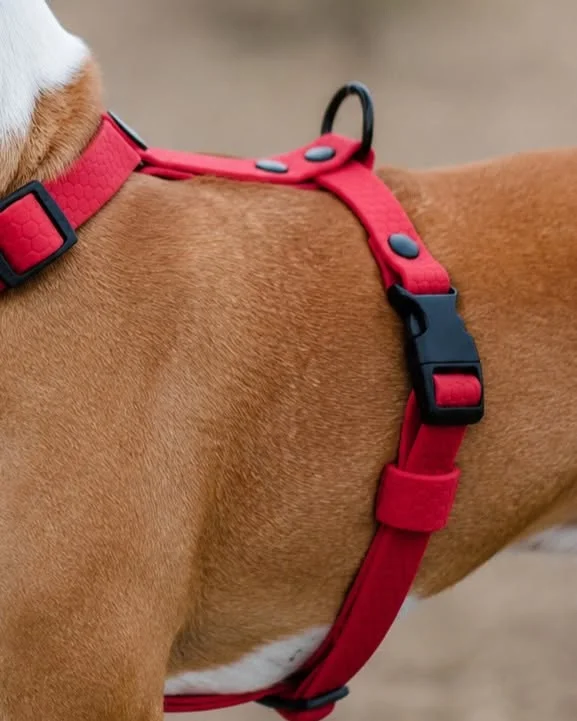
If your dog tends to pull, this is the pattern to try next. It has two leash attachment points: one on the back and one on the chest. The chest clip helps redirect a pulling dog gently to the side instead of letting them drag you forward, which makes daily walks far less of a workout for your arms.
To build this pattern, you’ll need a wider piece of padded or mesh fabric for the chest panel, since this is the part that takes the most pressure. Cut two matching panels, one for the chest and one for the back, and sandwich a layer of soft foam or batting between the outer fabric and a soft lining fabric before stitching around the edges. Leave a small gap to insert the padding if you’re hand-stuffing it, then top-stitch the whole panel closed for a clean finish. Attach adjustable webbing straps between the two panels so the harness can be resized as your dog grows or changes shape slightly with the seasons. Sew one D-ring onto the back panel and a second D-ring onto the front chest panel so you have two working clip points.
The padded chest panel spreads pressure evenly instead of putting all the force on the dog’s neck or throat the way a thin strap might. The dual clips give you more control on walks without needing a separate no-pull collar, which many dogs find uncomfortable anyway.
This pattern works well for strong or excited dogs, including larger breeds like Golden Retrievers, and any dog still learning loose-leash walking. It’s also a smart choice for multi-dog households where one dog is much stronger than the other and needs a bit more structure.
A nice styling touch is to add contrast-colored webbing, like green on purple or bright red on black, so the D-rings and buckles stand out and are easy to find quickly, even in low light or a messy bag.
📸 Photo credit: Instagram @snugglepetofficial, @thegoodboy.lv
3. Full-Coverage Vest-Style Harness
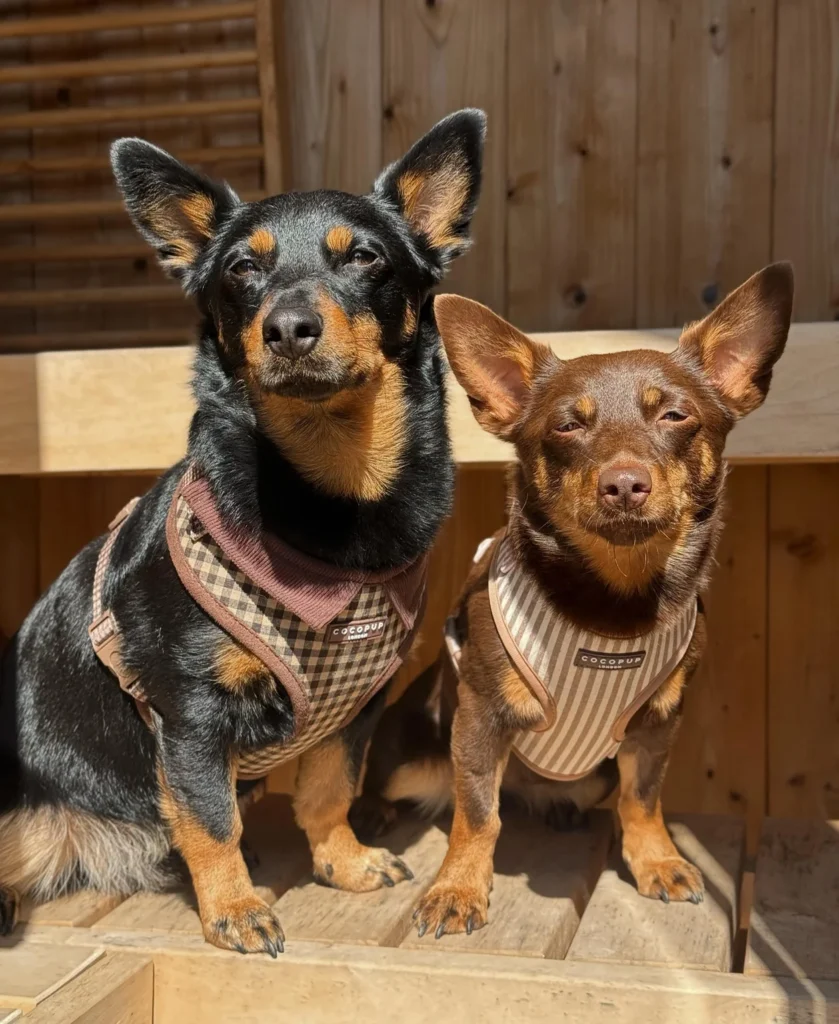
This pattern looks more like a little jacket than a strap harness. Instead of thin webbing, it uses wider fabric panels that cover most of the dog’s chest and back, which gives it a completely different feel and appearance from the strap-style designs above.
To sew this pattern, you’ll need two main fabric panels shaped roughly like a rounded rectangle, one sized for the back and one slightly narrower for the belly and chest area. Cut a matching lining piece for each panel so the inside stays soft against your dog’s coat. Sew the outer fabric and lining together, right sides facing in, then flip them right-side out through a small gap and top-stitch around the edges to close it up neatly. Join the two panels along the sides using either sewn seams, hook-and-loop strips, or small buckles, depending on how much adjustability you want. Finish by adding one sturdy D-ring at the top of the back panel for the leash.
Because more fabric touches the dog’s body in this pattern, the weight of any leash pressure is spread out even more than a basic strap harness allows. It also tends to stay in place better on dogs with a lot of loose skin or fur, since there’s simply more surface area holding it in position.
This style suits small to medium dogs especially well, including breeds prone to a delicate throat or trachea, like Australian Kelpies, Heelers, and other short-coated working breeds that benefit from extra chest support.
This pattern is also great for showing off seasonal prints like plaid or stripes, since there’s so much more visible fabric compared to a thin strap harness. Many people use this exact style to create matching harness sets for two dogs from the same household.
📸 Photo credit: Instagram @barneybrieheelers
4. Fashion Harness with a Removable Bow
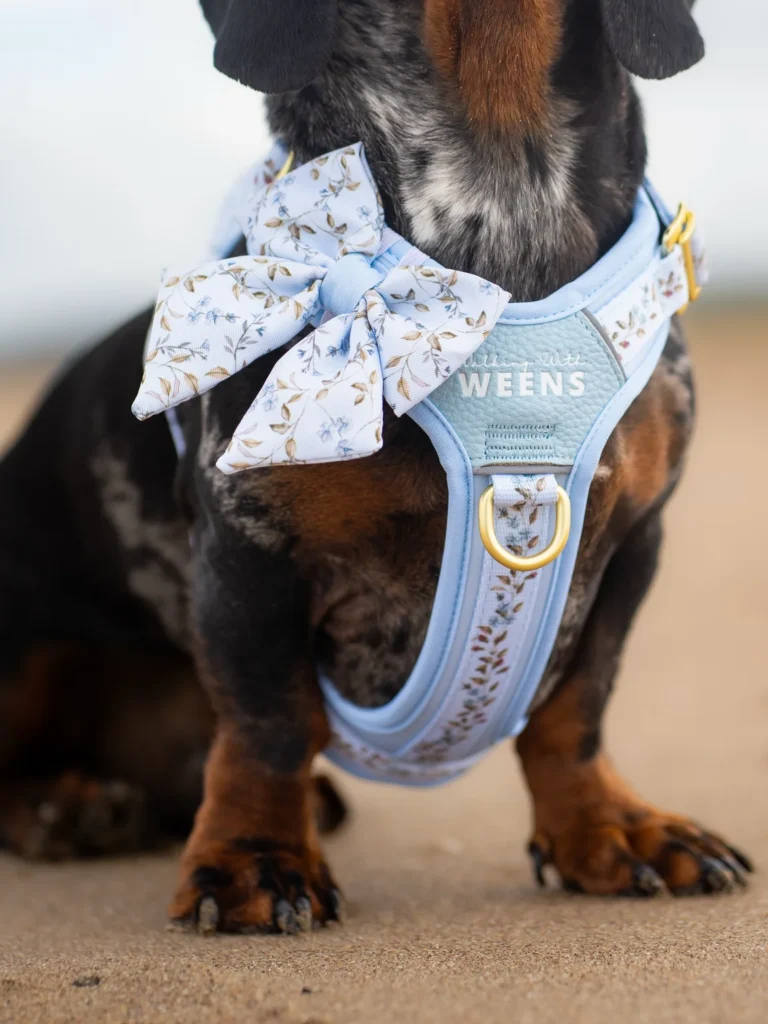
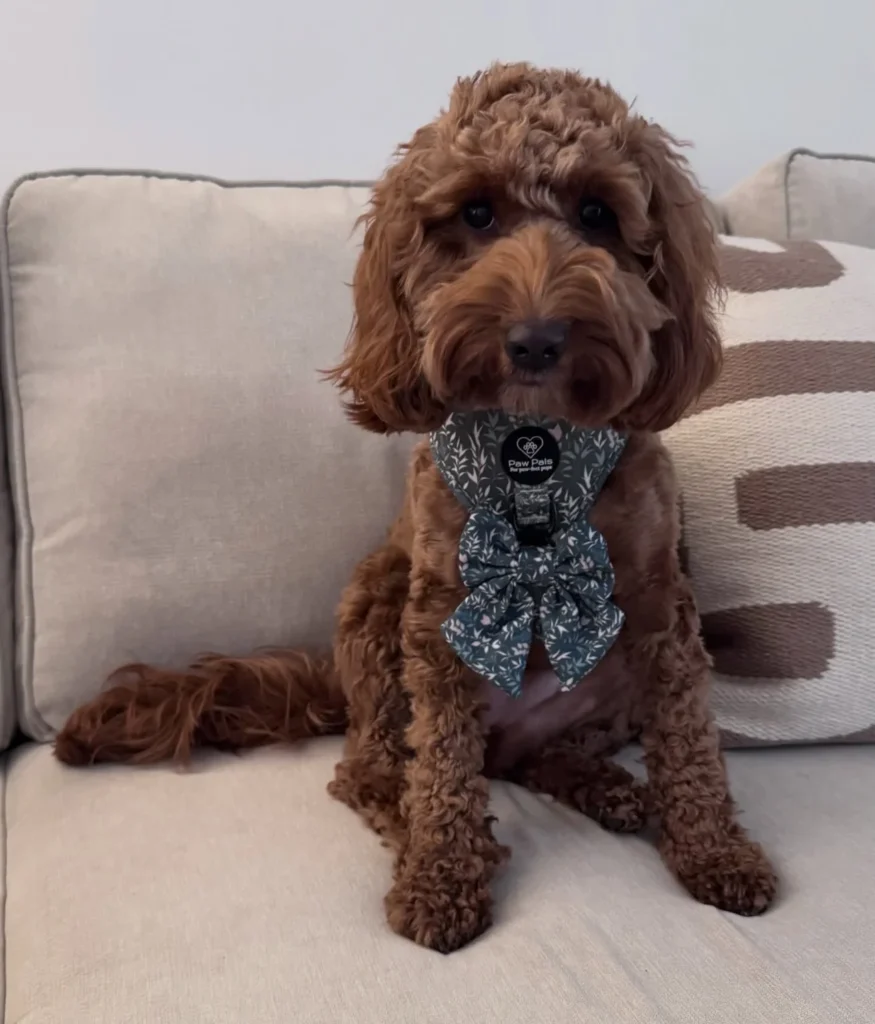
Sometimes a harness is about function, and sometimes it’s about looking adorable. This pattern takes a standard step-in or vest-style base and adds a detachable fabric bow sewn or clipped onto the front, giving you a harness that can switch from plain to fancy in seconds.
Start with any base harness pattern you’re comfortable with, whether that’s the Y-front from Idea 1 or the vest style from Idea 3. For the bow itself, cut a long rectangle of fabric, fold it in half lengthwise, and stitch along the open edge, leaving both ends open. Turn it right-side out, then fold the strip accordion-style into a bow shape and wrap a small strip of matching fabric around the center to hold the folds in place. Instead of sewing the bow directly onto the harness, attach a small elastic loop or a tiny snap to the back of the bow so it can slide onto a strap or clip on and off easily.
Making the bow removable means you can wash the base harness without ever ruining the bow, and you can swap bows for different occasions, holidays, or seasons without making a whole new harness each time.
This idea works for any dog, but it’s especially popular for smaller, fluffier breeds like Dachshunds and Cockapoos that suit a “dressed up” look for outings or photos.
A great styling trick is to match your bow fabric to your dog’s leash for a coordinated look in pictures. Many small dog owners searching for best small dog breeds also enjoy accessorizing their pups this way, since smaller dogs tend to carry bows and prints especially well.
📸 Photo credit: Instagram @rileyrooandottotoo, @nala_the_cockapoo5
5. Corduroy Colorblock Harness
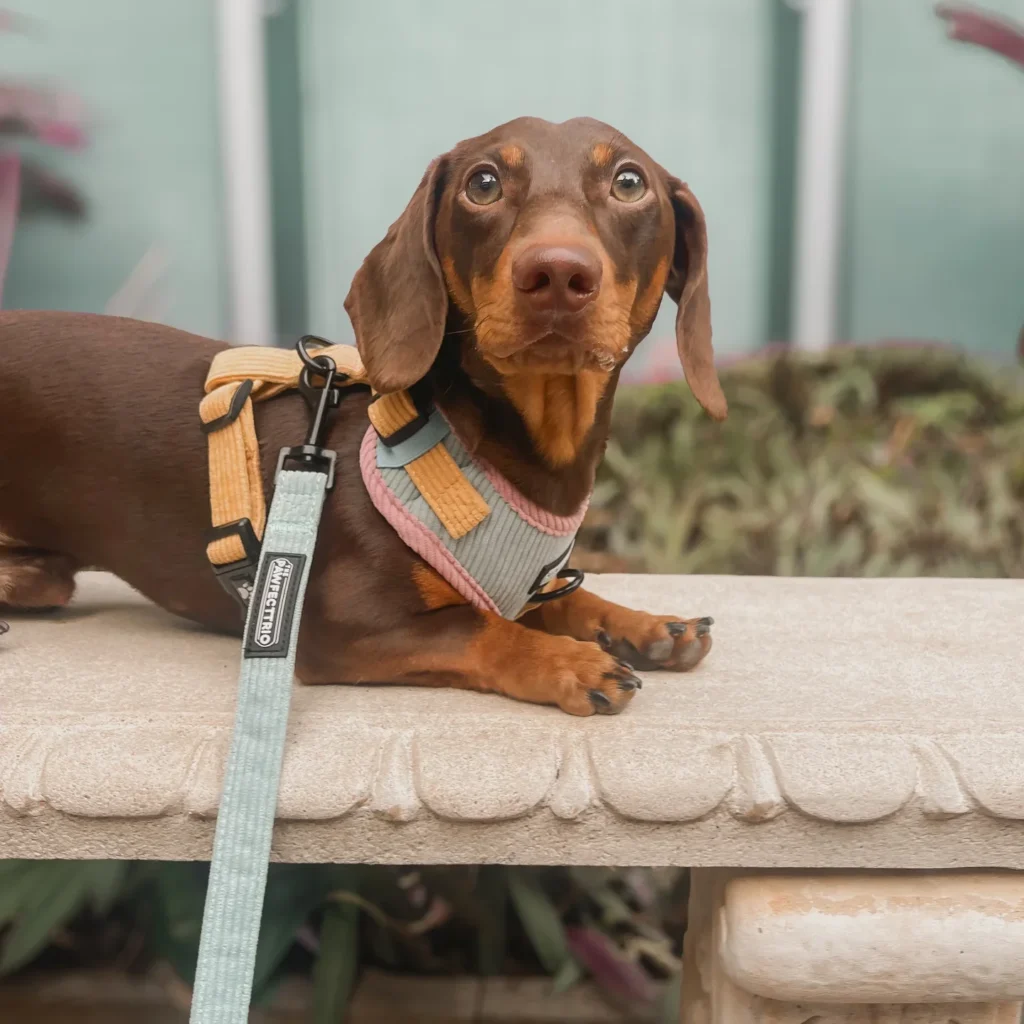
This idea mixes textures instead of just colors. Corduroy fabric is combined with smoother cotton or canvas panels to create a soft, cozy harness that still looks structured and put-together rather than mismatched.
To make this pattern, cut your corduroy fabric into strips for the main body panels, then cut a contrasting smooth fabric, like canvas or cotton twill, for the side panels or trim. Before sewing, iron a layer of fusible interfacing onto the back of the corduroy pieces, since corduroy can stretch and lose its shape over time without this extra support. Stitch the corduroy and smooth fabric panels together along their edges to create the colorblocked effect, then attach this combined outer piece to a soft lining fabric the same way you would for the vest-style harness. Finish with standard buckle and D-ring hardware sewn securely into the top seam.
Corduroy adds grip and texture, which can help the harness sit still on smaller or slippery-coated dogs that tend to twist out of smoother fabric harnesses. Mixing fabric types also makes the harness feel more “designer” without needing complicated sewing techniques.
This pattern suits small dogs and puppies especially well, since corduroy is soft against sensitive skin. Dachshunds in particular do well in this style because of their long, low bodies, which this kind of fitted panel harness supports nicely.
For the best look, stick to two or three colors maximum so the mixed fabrics don’t look busy or cluttered. Soft, muted tones like mustard, blush, and sage work beautifully together and photograph well outdoors.
📸 Photo credit: Instagram @thepawfectrio
6. Printed Fabric Step-In Harness
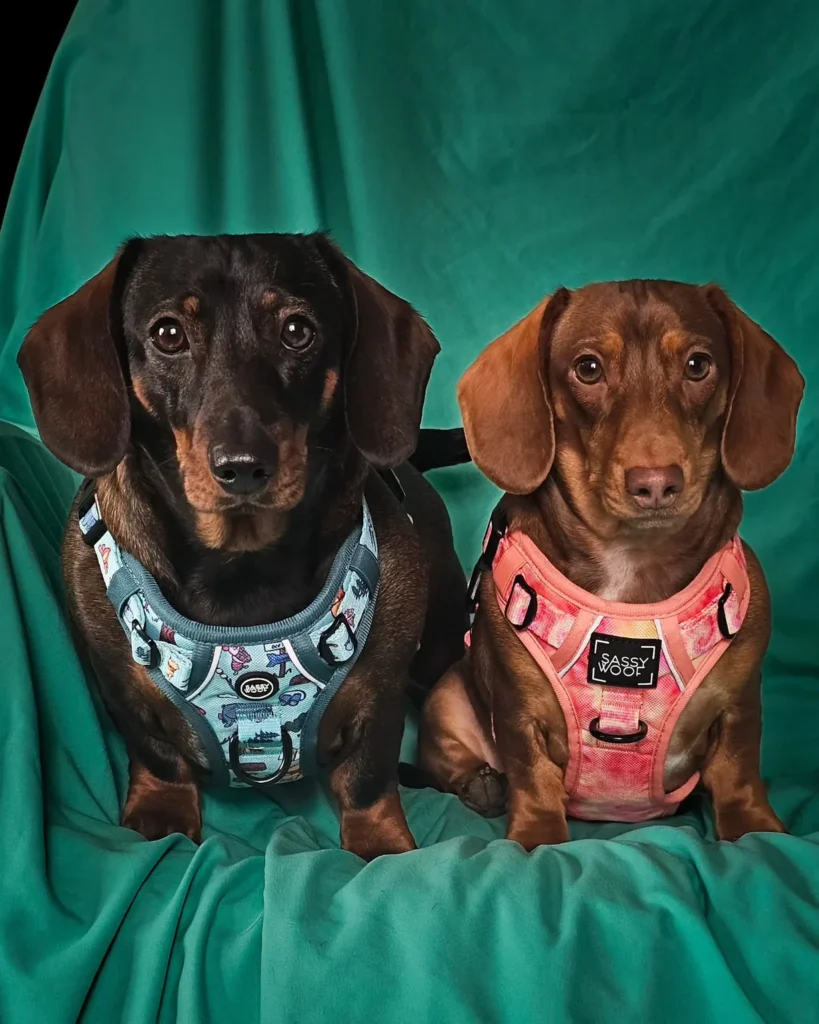
This idea takes the classic step-in pattern from Idea 1 and focuses entirely on the fabric print instead of changing the shape. Think camping scenes, tie-dye, or seasonal patterns layered onto the exact same simple construction.
Because the pattern shape stays the same as Idea 1, the sewing steps are nearly identical: cut your Y-shaped main strap, add a belly strap with a buckle, and sew in a D-ring at the top seam. The only real difference here is fabric choice. Instead of a solid color, use a printed cotton or canvas fabric as your top layer, and back it with a strip of plain webbing underneath for structure, since printed cotton alone isn’t always strong enough to handle regular pulling on its own.
This is a great way to reuse the same simple pattern shape for many different harnesses. Once you’re comfortable with the basic Y-front or vest shape, you can experiment with endless fabric designs without changing any of the construction steps, which saves a lot of time if you like making multiple harnesses.
This pattern works for any dog, especially if you like to switch harnesses seasonally or for different outfits. It’s also popular for dogs with siblings, since matching or coordinating prints look great in family photos.
If you have more than one dog, try making each harness in a different print from the same fabric collection. It creates a “matching but not identical” look that photographs beautifully and still lets each dog have their own personality.
📸 Photo credit: Instagram @windycitytailz
7. Bold Wide-Chest-Panel Print Harness
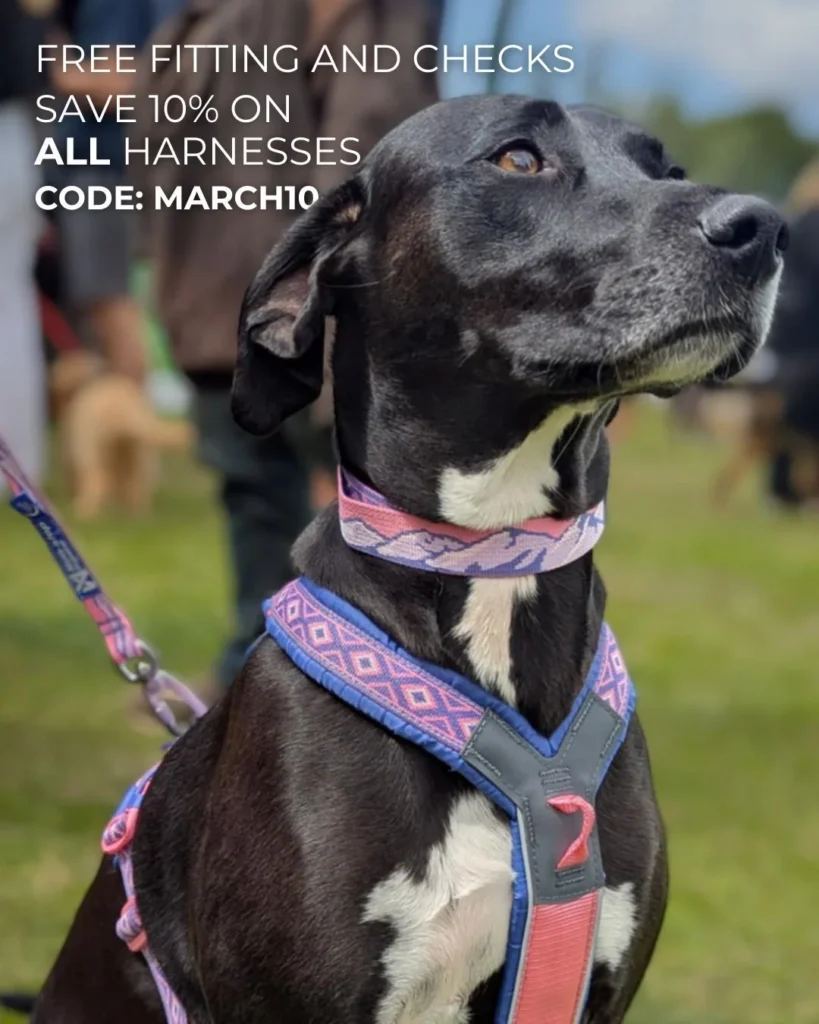
This pattern uses a wider front chest panel than the basic step-in style, giving you more space to show off bold prints, like tribal patterns, mountain scenes, or geometric designs, without the print getting lost in a thin strap.
To sew this version, cut your chest panel from wide printed webbing or fabric, at least two inches across, and back it with a sturdier fabric like canvas or heavyweight cotton for extra support. Since this panel handles more visual weight and more pulling force, stitch around the edges twice for reinforcement, and consider adding a center seam down the middle of the panel for extra strength. Attach the back strap and belly strap the same way you would in a standard step-in pattern, then finish with a buckle and D-rings.
Because the chest panel is wider, it can handle more pulling force without stretching or fraying compared to a thin strap design. Wider panels also make it much easier to add a small woven label, patch, or even embroidery in the center without it looking cramped.
This pattern is a good fit for medium to large dogs who need a slightly tougher harness for daily walks or outdoor adventures, since the added width naturally adds durability.
Adding a small woven label or patch with your dog’s name in the center of the chest panel turns a simple pattern into something that looks genuinely custom-made rather than homemade.
📸 Photo credit: Instagram @snowpawstore
8. Sherpa Fleece-Lined Comfort Harness
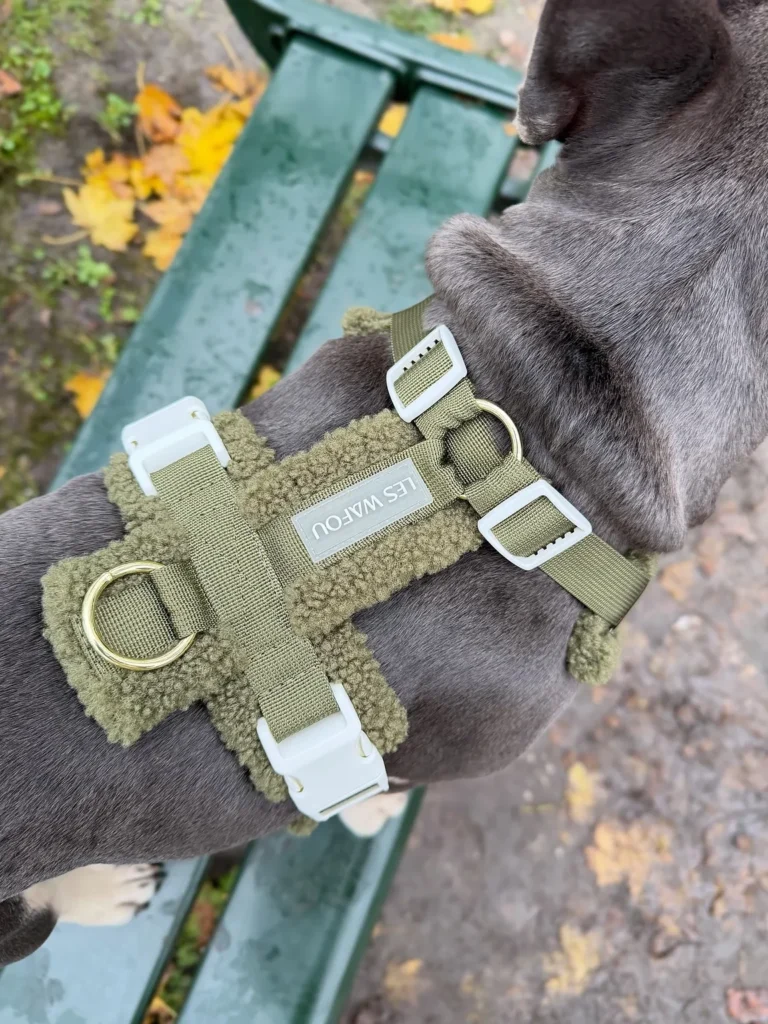
This idea is built for cold weather. The harness frame is made from strong webbing, but it’s backed with a soft sherpa or fleece lining for extra warmth and comfort during chilly walks.
To make this pattern, start with your usual harness shape, whether that’s a Y-front or a wider panel design, and cut the outer pieces from sturdy nylon webbing. Instead of a thin cotton lining, cut matching pieces from sherpa fleece fabric and stitch them directly to the back of each webbing piece before assembling the harness. Because fleece can be thick, use a slightly longer stitch length on your machine to avoid bunching, and trim any extra bulk from the seams before turning the pieces right-side out. Finish with plastic side-release buckles, which tend to hold up better in cold weather than metal hardware that can feel icy against your dog’s skin.
The fleece layer prevents chafing, especially around the armpits and neck, where thinner harnesses can rub uncomfortably. It also adds a small amount of insulation on chilly walks, which short-haired dogs especially appreciate.
This pattern is ideal for short-haired dogs or breeds that get cold easily, especially during fall and winter months when a bit of extra warmth around the chest makes a real difference.
Choosing an earthy color like olive, tan, or rust for the outer webbing helps the harness hide dirt and mud stains far better than lighter colors during muddy season walks.
📸 Photo credit: Instagram @_jackthefrenchiee
9. Macrame Knotted Rope Harness
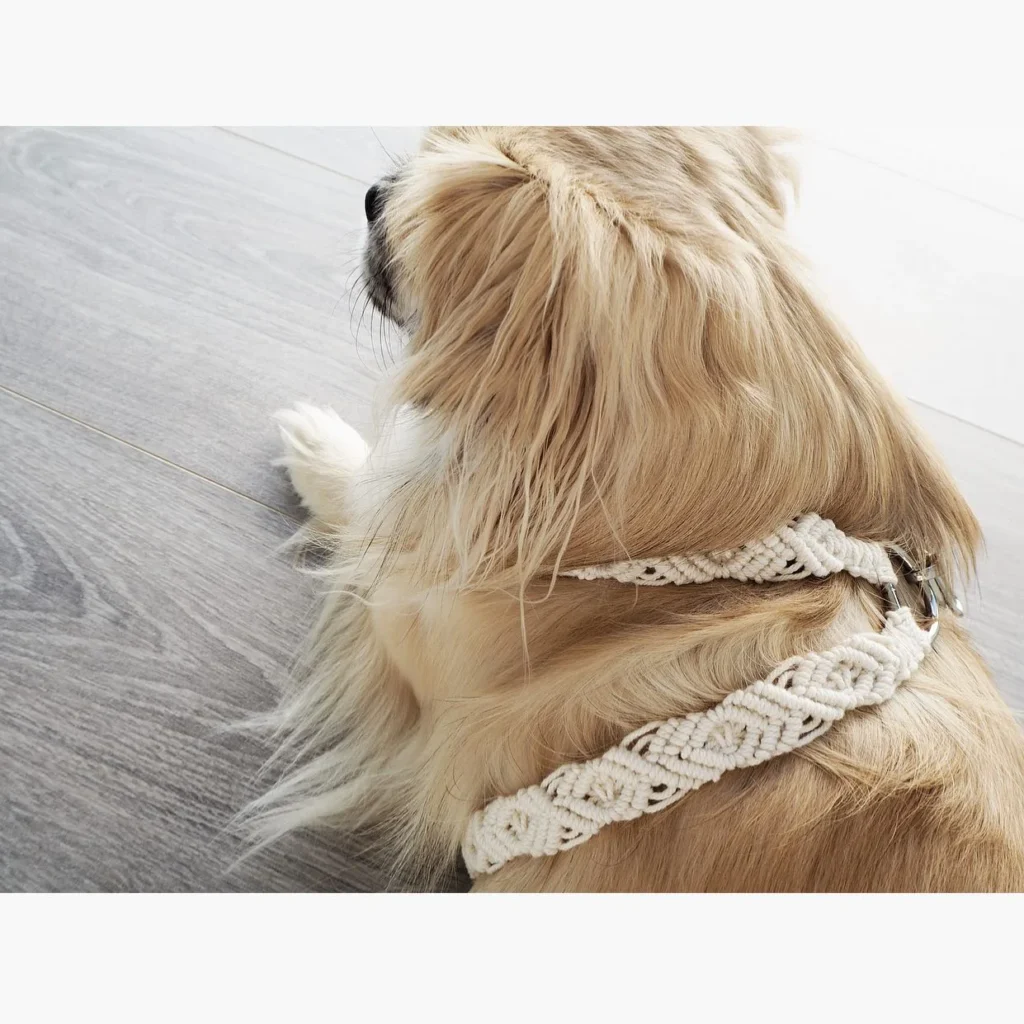
Not everyone owns a sewing machine, and that’s okay. This pattern skips fabric entirely and uses knotted cotton cord instead, similar to macrame wall hangings, so there’s no cutting fabric or hemming edges at all.
To make this harness, cut several long lengths of soft cotton macrame cord, then use basic square knots and spiral knots to build two straps: one that goes around the neck and one that wraps around the chest and belly. Connect the two straps using a metal ring at the point where they cross over the back, tying the cord securely around the ring several times before knotting it off. Continue knotting each strap to your dog’s measured length, then attach a small metal clip or O-ring at the end for the leash connection.
Because there’s no fabric to cut or hem, this is one of the most beginner-friendly ideas on this entire list, even for people who have never sewn anything before in their life. The knots also naturally adjust to fit snugly around the body as you tie them, which makes sizing a little more forgiving than fabric patterns.
This pattern works best for small to medium dogs with a calm walking style, since rope harnesses generally offer less structured support than padded fabric designs.
Natural, undyed cotton cord gives a soft, boho look that pairs nicely with simple leather leashes and works especially well for indoor photos or casual neighborhood walks.
📸 Photo credit: Instagram @creating_is_my_therapy
10. Paracord Braided Harness
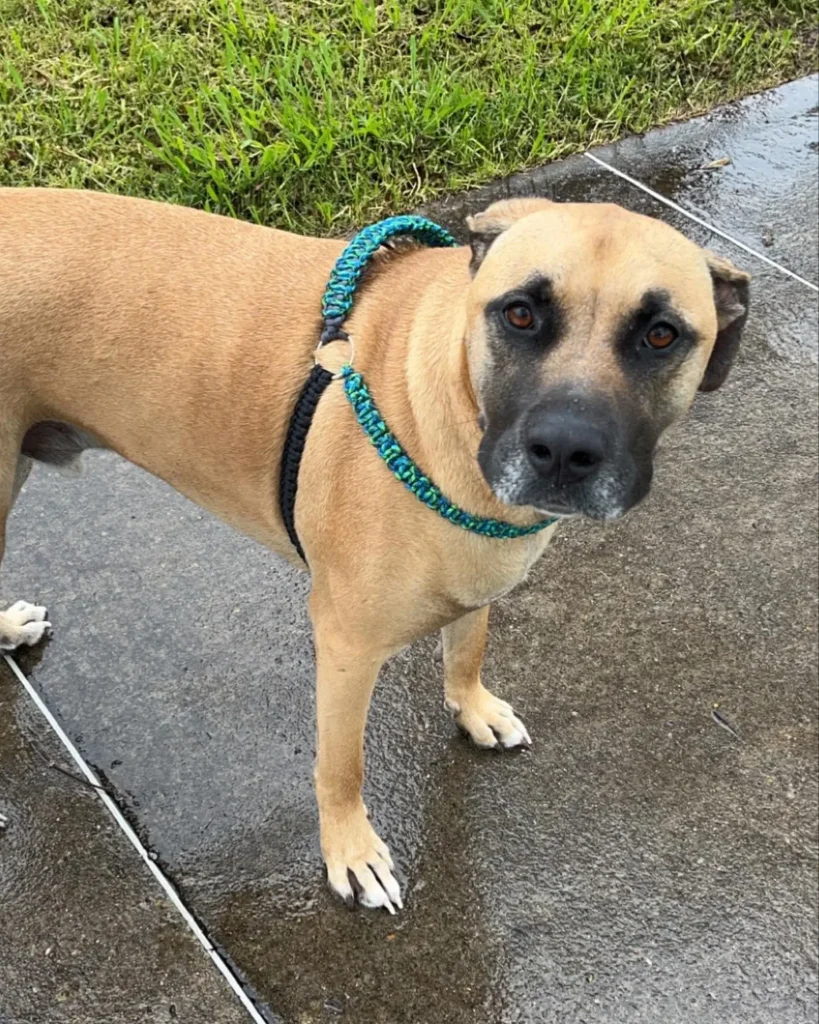
Similar to the macrame idea above, this pattern uses braiding instead of knotting. Paracord is stronger and more weather-resistant than cotton cord, making it a good choice for outdoor use in wet or rough conditions.
To build this harness, cut two or three colors of paracord to matching lengths and secure them together at one end using a lighter to melt and fuse the tips together, which prevents fraying. Braid the cords together in a simple three-strand braid to form the neck loop and chest loop separately, then join both braided pieces at a central point using a metal D-ring or O-ring, wrapping the cord ends tightly around the ring before sealing them again with a lighter. Adjust the length of each braided section to fit your dog’s measurements before finishing the ends.
Braided paracord is very strong for its size, which makes this pattern a good option for dogs who spend a lot of time outdoors or on hikes and need gear that can handle rough terrain. It also dries quickly if it gets wet, unlike cotton rope or padded fabric designs.
This style is best suited for active, medium-sized dogs, especially those who go on hikes or outdoor adventures regularly. If you’re outfitting a dog for the trails, our guide to best dog breeds for hiking pairs well with this kind of durable, low-maintenance gear.
Two-tone braiding, like black and teal, creates a sporty look that also makes the harness easier to spot if it’s ever misplaced in a backpack or car.
📸 Photo credit: Instagram @kylescreates
11. Costume-Style Novelty Harness
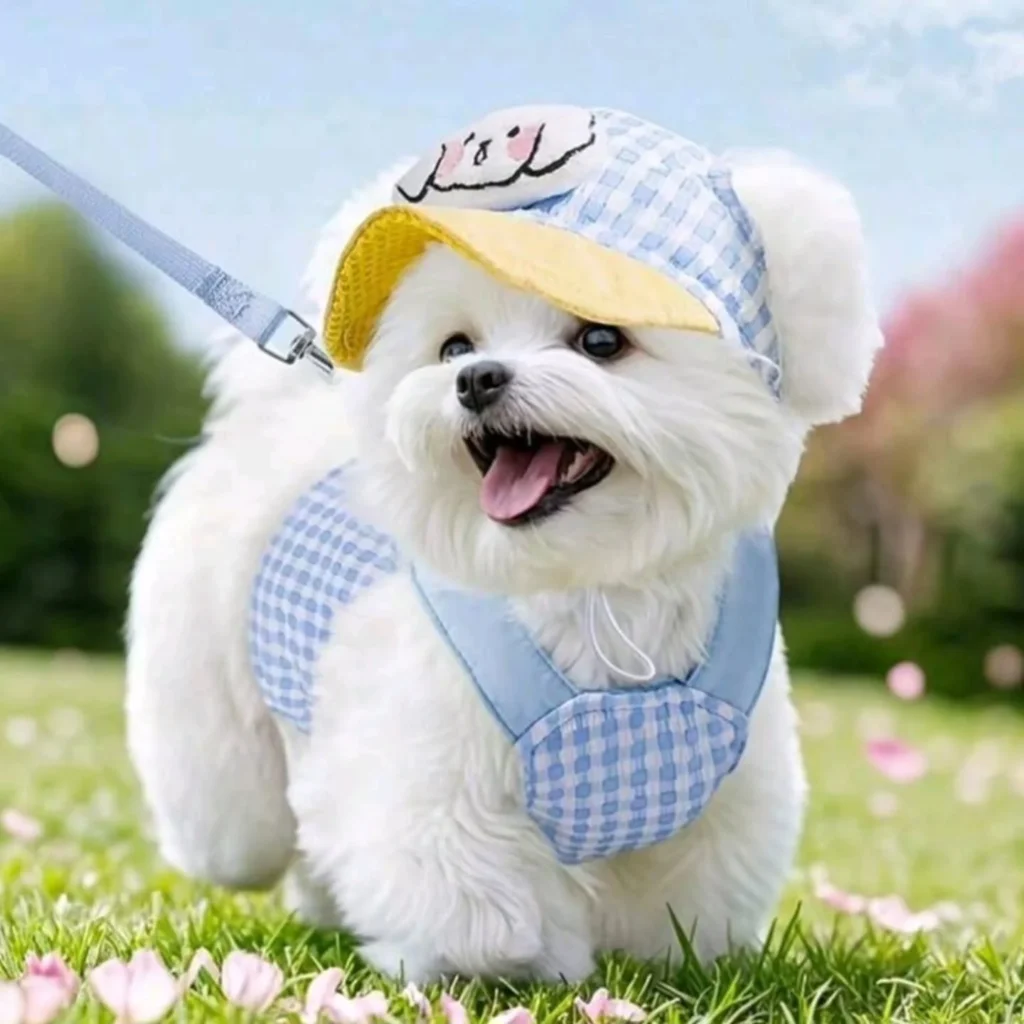
This idea is more playful than functional. Instead of a traditional strap harness, it’s built more like a tiny wearable outfit, complete with a hat or extra fabric shapes attached on top.
To make this design, start by building a basic, hidden harness underneath using simple webbing and a buckle, similar to the step-in pattern from Idea 1. Then, separately, sew a costume layer from soft cotton or gingham fabric shaped like a little vest or overall piece that slips over the dog’s body and attaches with elastic straps rather than tight buckles. If you want to add a small hat or hood piece, cut two matching fabric pieces in a rounded shape, sew them together leaving a small opening for the head, and attach thin elastic loops that hook gently around the ears or chin without pulling.
Because this pattern focuses on appearance rather than heavy-duty pulling support, it’s meant for short walks, photos, or special occasions rather than everyday use, so the elastic pieces should always stay loose and comfortable.
This style is best suited for small, calm dogs who don’t mind wearing extra layers, such as Maltese or other fluffy toy breeds that are used to being dressed up.
Keeping the actual functional harness clip hidden underneath the costume fabric helps it stay out of view, so the fun design on top isn’t competing with buckles or straps in photos.
📸 Photo credit: Instagram @tomfur_d
12. Reflective Utility Harness for Outdoor Walks
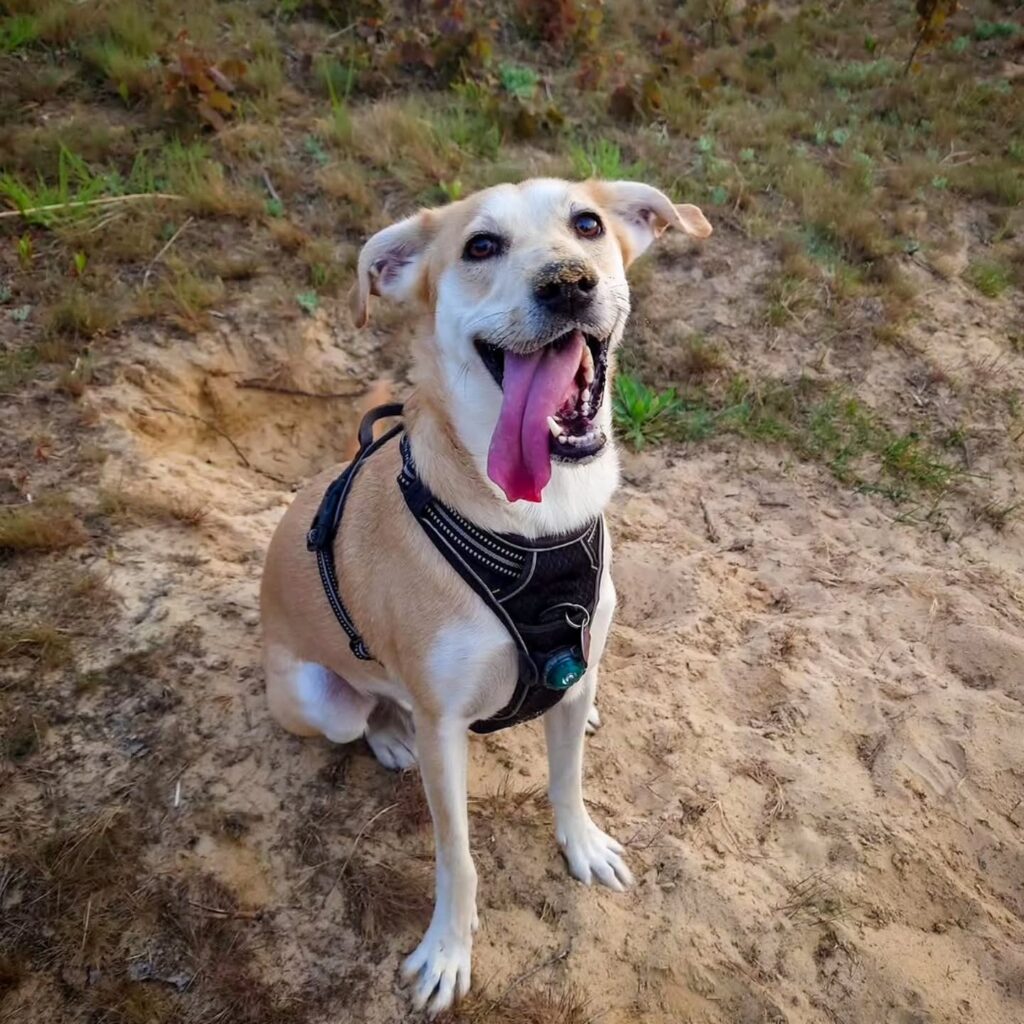
This last idea focuses purely on function and visibility. It’s built using tougher materials and reflective stitching so your dog stays safe and visible during early morning or evening walks.
To sew this pattern, use heavy-duty nylon webbing as your main fabric, since it holds up well to daily outdoor wear. Along the outer edges of each strap, either stitch on reflective tape strips using a zigzag stitch to keep them secure, or use reflective thread directly in your top-stitching for a more subtle effect. Add a sturdy handle loop across the top of the back panel by folding a short piece of webbing into a loop and reinforcing it with an X-box stitch pattern, which is the same reinforcement method used on backpack straps. Finish with a heavy-duty plastic or metal buckle rated for your dog’s size and weight.
The reflective elements catch light from car headlights or streetlights, making your dog easier to see in low-light conditions, which is especially important during darker winter months. The added back handle also gives you a quick way to grab and guide your dog if needed during sudden situations.
This pattern is ideal for dogs who go on frequent outdoor walks, hikes, or trail adventures, especially in rural or low-light areas without much street lighting.
Picking a darker base color like black or navy helps the reflective stitching stand out clearly against the fabric, rather than blending in with lighter colored webbing.
📸 Photo credit: Instagram @mond_pfoten
Tips for Sewing a Safe and Comfortable Dog Harness
Before you start cutting fabric, keep these safety basics in mind:
Always measure your dog’s chest and neck at least twice before cutting any fabric or webbing, since a harness that’s too tight or too loose can slip off or cause discomfort. Reinforce stress points near buckles and D-rings with double stitching, since these spots handle the most pulling force over time. Any seam that touches your dog’s skin should be smooth and flat to prevent chafing, so trim excess fabric and press seams open before adding the lining.
Choosing quality hardware matters just as much as the fabric you pick. Cheap plastic buckles can snap under pressure, so pick sturdy hardware rated for your dog’s size and strength, especially for larger or stronger breeds. Checking the fit regularly is also important, since puppies grow quickly. Any puppy veterinary needs checklist should include re-measuring for a properly fitted harness every few months as your dog grows.
If you’re also comparing other gear like collars, it helps to understand hardware safety in general, similar to how you’d choose a safe flea collar for your dog — always prioritize quality clasps and non-toxic materials, whether you’re making a harness or buying one.
Free Dog Harness Pattern vs. Store-Bought: Which Is Better?
Both options have their place, depending on your goals.
Homemade patterns are better when you want a completely custom fit for an unusual body shape, matching colors or themes across your household, a fun hobby project with your dog as the model, or simply want to save money on multiple harnesses in different styles instead of buying several separately.
Store-bought harnesses are better when you want guaranteed load-testing and safety certification, especially for very strong or large breeds. They’re also the better choice if you don’t own sewing tools or need a harness right away without any project time involved.
If you enjoy crafting and want full control over comfort, fit, and style, a diy dog harness sewing pattern is almost always the more rewarding choice. Many dog owners keep both options on hand: a sturdy store-bought harness for tough outdoor days, and a handmade one for everyday walks or photos. You can find more ideas for combining function and style in our guide to dog accessories tips.
Final Thoughts on Dog Harness Sewing Patterns
From simple step-in designs to fully braided paracord builds, there’s a dog harness sewing pattern here for every skill level and every type of dog. Beginners can start with the classic Y-front or macrame rope idea, while more experienced sewists can try padded no-pull designs, vest-style builds, or reflective utility harnesses for the trail.
The best part about making your own harness is that you’re never stuck with just one look. Once you understand the base pattern, you can remix it with new fabrics, colors, and small details like bows or patches to create something that’s uniquely your dog’s.
Pick one idea from this list, gather your materials, and give it a try. Your dog will be ready for their next walk in a harness made just for them.

Izzy is an experienced ranch worker who has a passion for exploring nature and getting up close to wildlife. With her connections to various animal organizations, Izzy is well-versed in animal care and rehabilitation.