Dog Crochet Scarf Pattern Free — Bobble Texture, Wooden Buttons
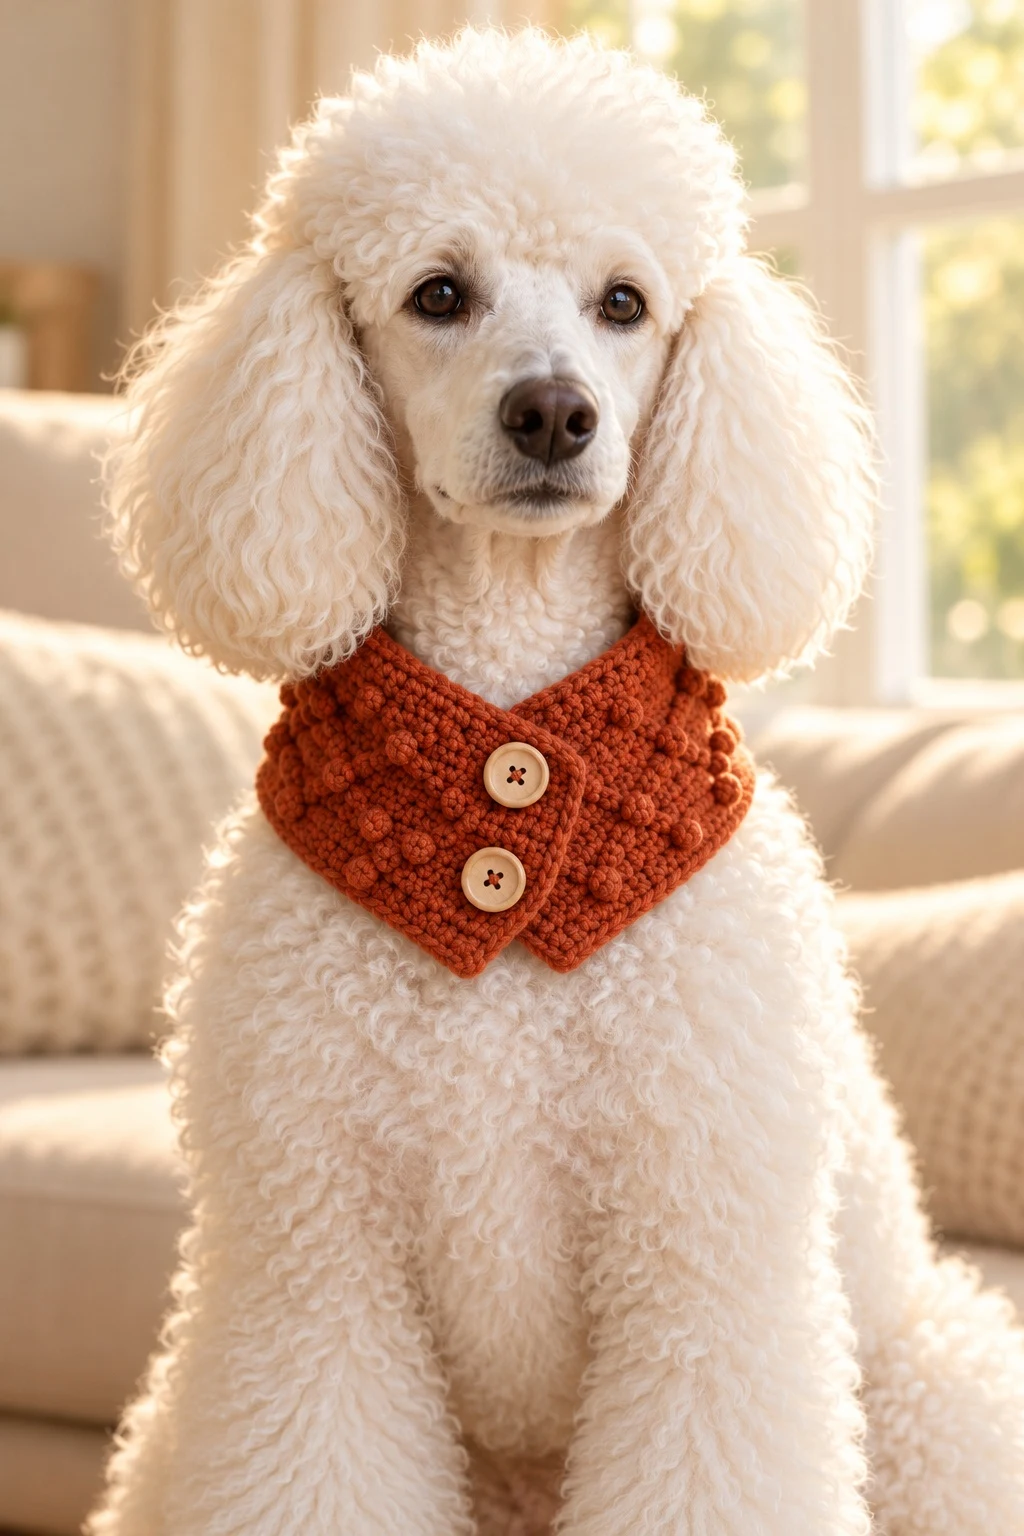
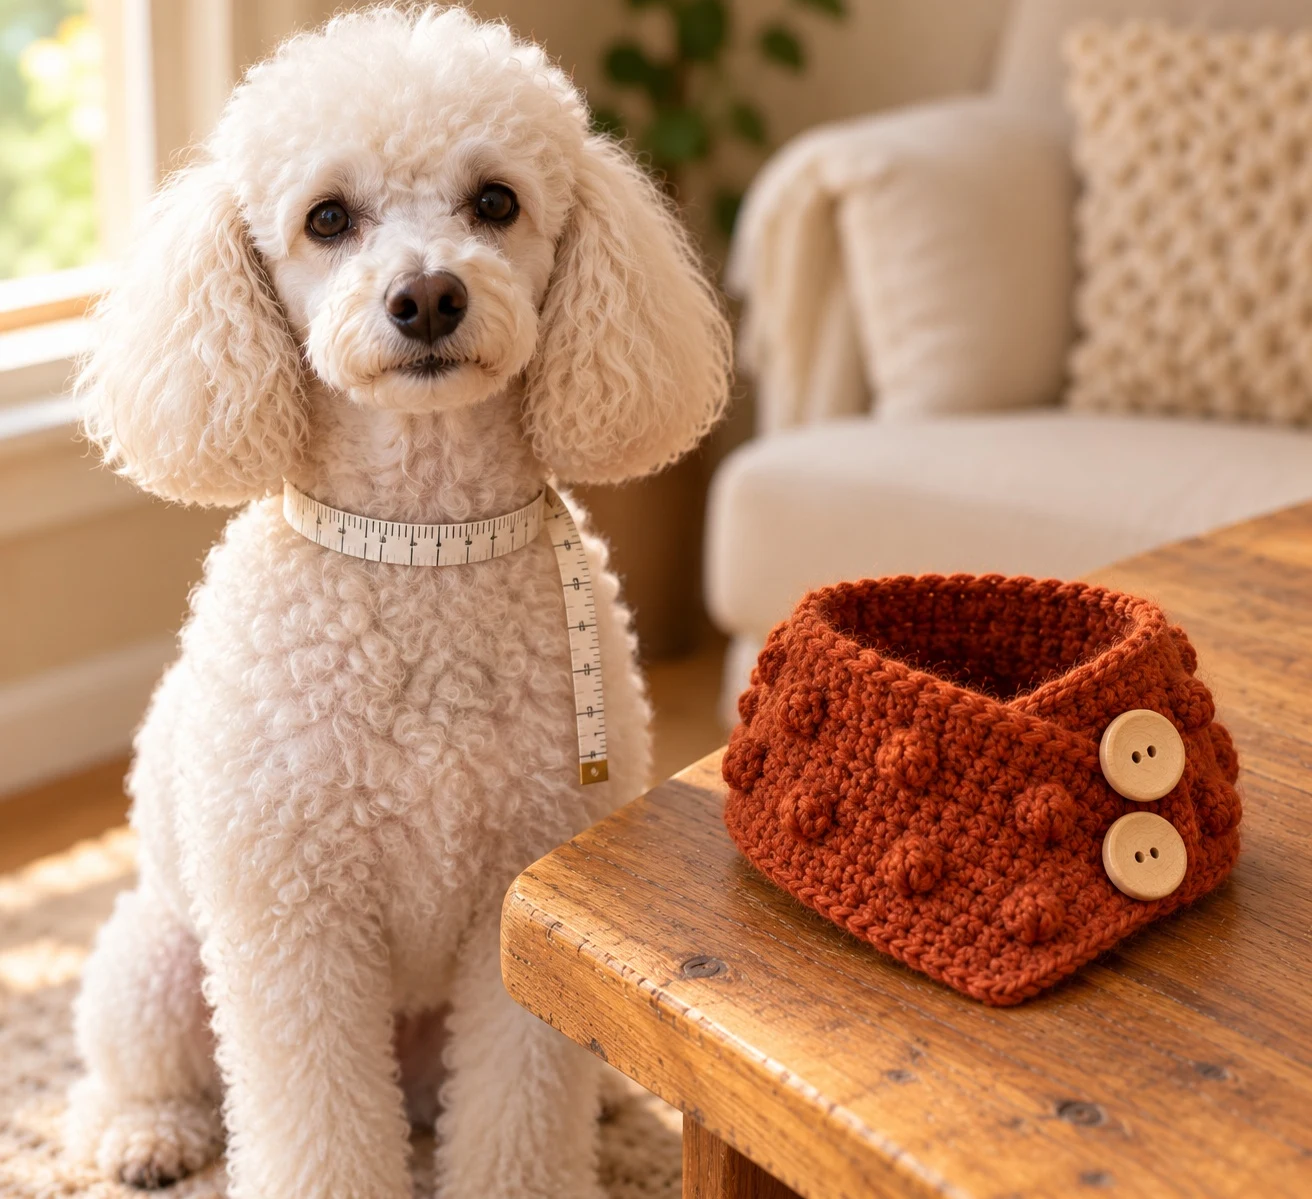
Some dog accessories are worn. This one is styled. The rust-orange scarf in our photos wraps around the neck like a little knitted kerchief, drapes to a soft point at the front, and fastens with two big wooden buttons — no tying, no Velcro, no wrestling. On the white Poodle wearing it, the effect is somewhere between a country gentleman and a very small, very warm poet, and the bobble-cluster texture is what makes it: rows of small raised bobble clusters that catch the light across the chest.
The pattern is worked flat in turned rows from the top edge down, shaped with a single center increase that forms the point, and finished with the buttons sewn on last. It comes in three sizes by neck measurement, uses only half double crochet and one bobble stitch, and works up in an evening. If your dog already has opinions about bandanas, wait until they meet the scarf.
Why a Buttoned Scarf Beats a Bandana
A bandana ties, and ties loosen, twist, and end up as a bib by the end of the walk. This scarf buttons. Two wooden buttons through two proper buttonholes hold the wrap exactly where you put it — point centered, top edge sitting where a collar sits — through head shakes, sniffing investigations, and full-body wiggle greetings. It also goes on in about four seconds, which anyone who has tried to tie a knot on an excited dog will appreciate.
The shaping does the styling. A single increase in the center stitch of every early row grows the fabric into a shallow crescent with a gentle downward point, so the front drapes instead of bunching, and the tapered final rows keep the back of the neck slim under a coat or harness. The bobbles are placed on a diamond grid — center, then offset — which reads as a deliberate pattern rather than random texture. It is the dressed-up cousin of our Cozy Waves Dog Bandana: same neck, fancier party.
Wearing it is equally thought-through. The top edge sits exactly where a collar sits, so a harness worn over the top does not fight it, and a coat can layer above without the scarf disappearing. Because the closure is at the front, you can fasten it after the harness and coat are already on — no undressing the dog to add the finishing touch. And when the walk is over, two buttons undo faster than any knot, which matters more than pattern writers usually admit at the end of a muddy afternoon.
Choose Your Colors
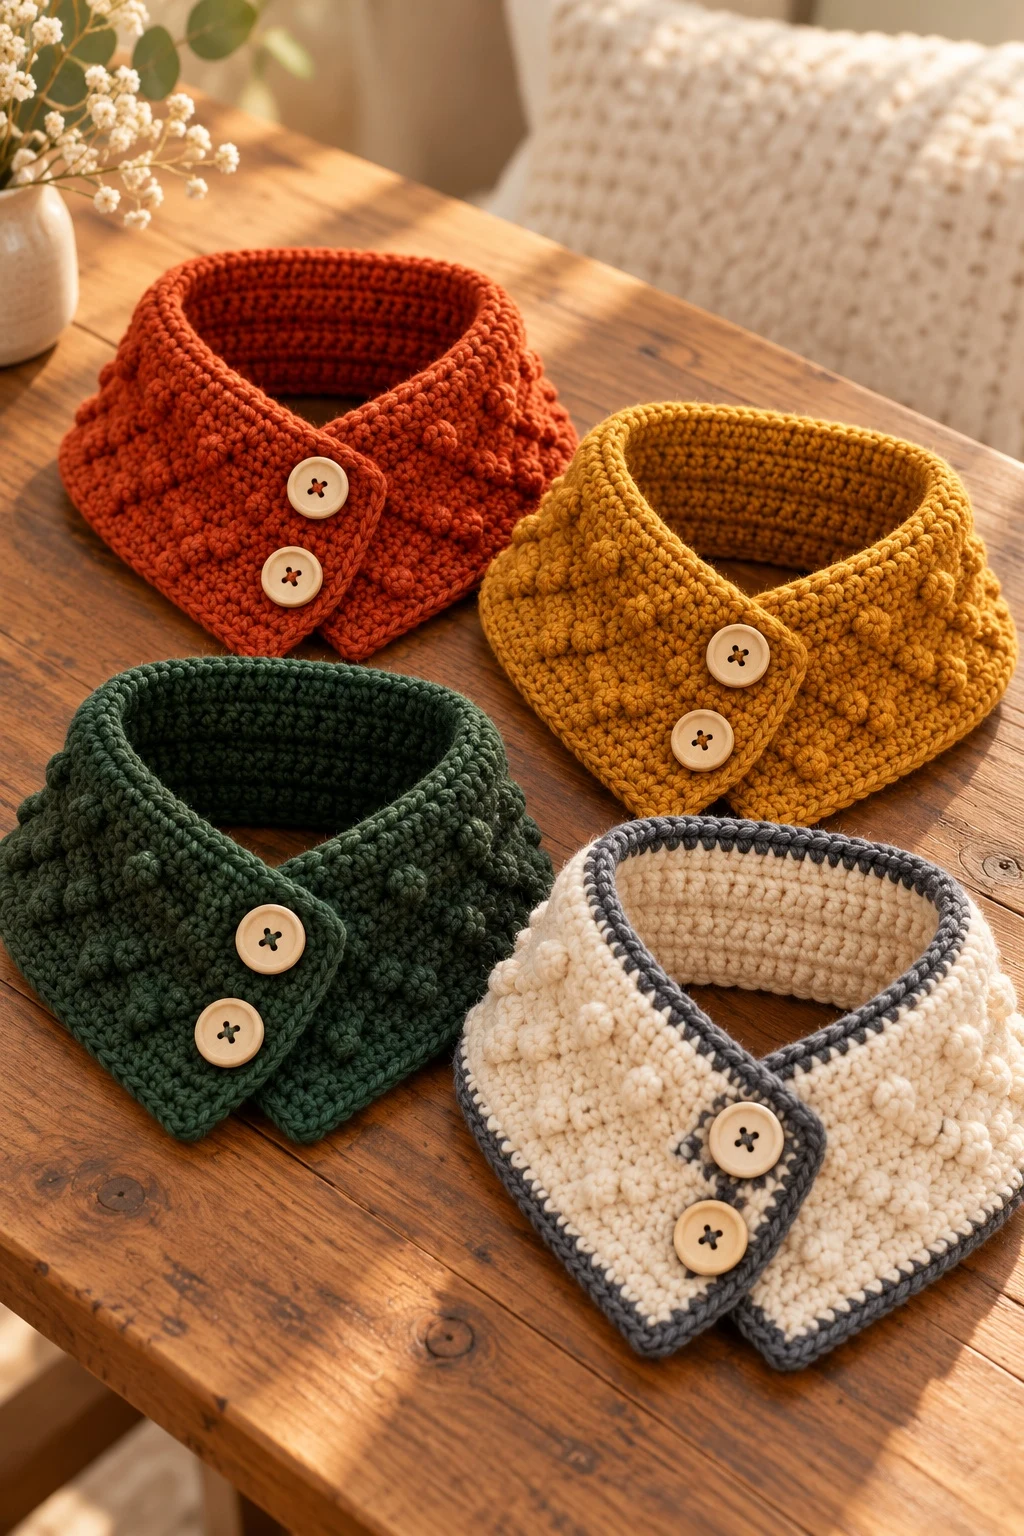
The original is one rich burnt orange from edge to edge, and the wooden buttons warm it up beautifully. The design also loves a seasonal palette — here are the four we make most, including one two-tone option where just the edging changes color.
Classic Rust
Body: burnt orange / rust
Buttons: natural wood
The original. Autumn in a scarf — stunning on white, cream, and black coats.
Mustard Gold
Body: mustard yellow
Buttons: dark walnut wood
Sunny and retro. The bobble grid reads like brocade — lovely on red and chestnut dogs.
Forest Walk
Body: deep forest green
Buttons: natural wood
The woodland palette. Handsome on tan, brindle, and grey coats, and very festive in December.
Cream & Charcoal Edge
Body: warm cream
Edging: charcoal (edging round only)
The tailored one. Work the body in cream, then switch to charcoal for the final edging round — instant definition.
For the two-tone version you need only a few yards of the edging color. Every palette keeps the wooden buttons — their warmth against the yarn is half the charm — but dark horn-style buttons on the rust or mustard versions look wonderfully vintage if you prefer them.
Before You Get Started
The scarf is worked flat in turned rows from the top (neck) edge. The first phase increases in the center stitch to grow the point; the second phase decreases at the edges to taper the corners; a final plain row carries the two buttonholes. One round of single-crochet edging finishes the whole piece, and the buttons are sewn on at the very end — the only sewing in the project.
Skills used are chain, half double crochet, half-double-crochet decreases, and the 5-double-crochet bobble stitch, which is fully explained in the Pattern Notes the first time it appears. If you made the Snowman Dog Bandana, you already know the neck-first logic — this scarf simply takes it somewhere dressier.
Fit & comfort check: you should be able to slide two fingers between the scarf’s top edge and your dog’s neck all the way around. The scarf should sit where a collar sits — if it rides up toward the jaw, go up a size.
Safety notes: buttons are a chew hazard if they come off, so sew them through several stitches of fabric with strong thread and check them before every wear. For puppies and determined chewers, skip real buttons entirely: the pattern includes an embroidered yarn-button alternative that fastens the same way with nothing hard to swallow. As with all wearables, supervise your dog while the scarf is on.
Tools & Materials Needed
Yarn
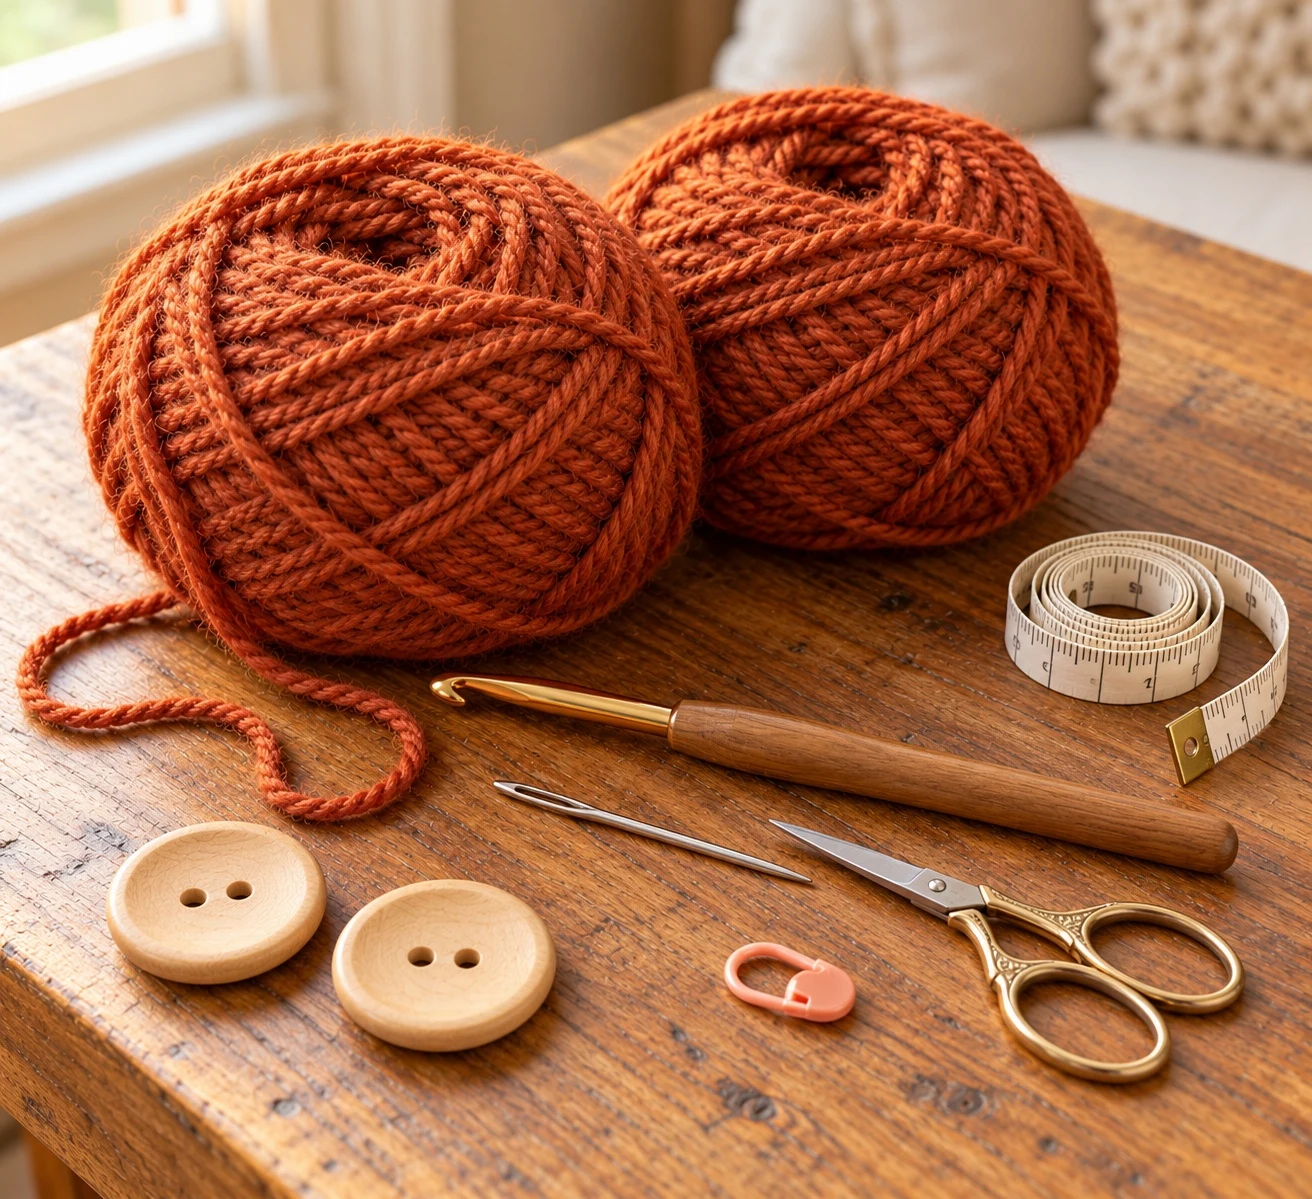
- Worsted-weight (#4) acrylic or acrylic-blend yarn, soft and machine-washable.
- Burnt orange / rust: approx 130 (155, 180) yd for sizes S (M, L)
- Optional edging color for the two-tone version: approx 10 yd
Hook & Notions
- US H-8 (5.0 mm) crochet hook, or size needed to obtain gauge
- 2 wooden buttons, approx 1″ (25 mm)
- Yarn needle with a large eye, scissors, flexible tape measure, 1 stitch marker
Size Info and Gauge
S
Neck: 10–12″
Finished: 13″ long × 6″ deep
Dachshunds, Chihuahuas, small terriers
M
Neck: 13–15″
Finished: 15.5″ long × 6.75″ deep
Poodles, Cavapoos, Beagles
L
Neck: 16–18″
Finished: 17.75″ long × 7.5″ deep
Spaniels, Basset Hounds, Border Collies
Gauge: 14 hdc × 10 rows = 4″. Make a swatch first — every stitch count in this pattern depends on it.
Measure the neck where a collar sits, tape snug but not tight. Sizes are written S (M, L) throughout. The finished scarf is longer than the neck measurement because the front overlaps to button — that overlap is included in the counts, so choose the size by the neck alone. Between sizes, go up: the buttons give you a little adjustment, and a scarf that drapes beats a scarf that pulls.
Abbreviations (US Terms)
ch chain · sc single crochet · hdc half double crochet · dc double crochet · st(s) stitch(es) · hdc2tog half double crochet 2 together · bobble 5-dc bobble stitch (explained in Pattern Notes)
Pattern Notes
Center stitch: mark the middle stitch of the foundation row and move the marker up as you work — the center stitch is always the middle stitch of the row you are on. On increase rows it is the second stitch of the center increase.
The bobble: work 5 dc into the same stitch, leaving the last loop of each dc on your hook — 6 loops on the hook — then yarn over and pull through all 6 loops, and ch 1 to secure. The bobble sits as a small, neat bump with gentle relief on the front of the work — drawn together, not folded like a popcorn, so it stays small — and replaces the hdc that would otherwise sit in that stitch.
Turning chains: the ch 1 at the start of each row does not count as a stitch, except on the foundation row, where the skipped chains count as the first hdc.
Buttonhole end: the buttonholes are worked at one end of the final row. Right-handed and left-handed crocheters will end up with them on opposite ends — it makes no difference to the finished scarf.
Pattern Instructions
Scarf Body
- Foundation row (Row 1): Ch 47 (55, 63). Hdc in the 3rd ch from the hook (the skipped chains count as the first hdc) and in each ch across. (46, 54, 62 sts) Mark the 23rd (27th, 31st) stitch as the center stitch.
- Phase 1 — shape the point, Rows 2–10 (2–11, 2–12): Ch 1, turn. Hdc in each st up to the marked center st, work 2 hdc in the center st, hdc in each st to the end. The count grows by 1 st every row: 46 → 55 (54 → 64, 62 → 73) sts.
- Phase 2 — taper the corners, Rows 11–14 (12–16, 13–18): Ch 1, turn. Hdc2tog, hdc in each st up to the center st, work 2 hdc in the center st, hdc in each st to the last 2 sts, hdc2tog. The count drops by 1 st every row: 55 → 51 (64 → 59, 73 → 67) sts.
Bobble Rows
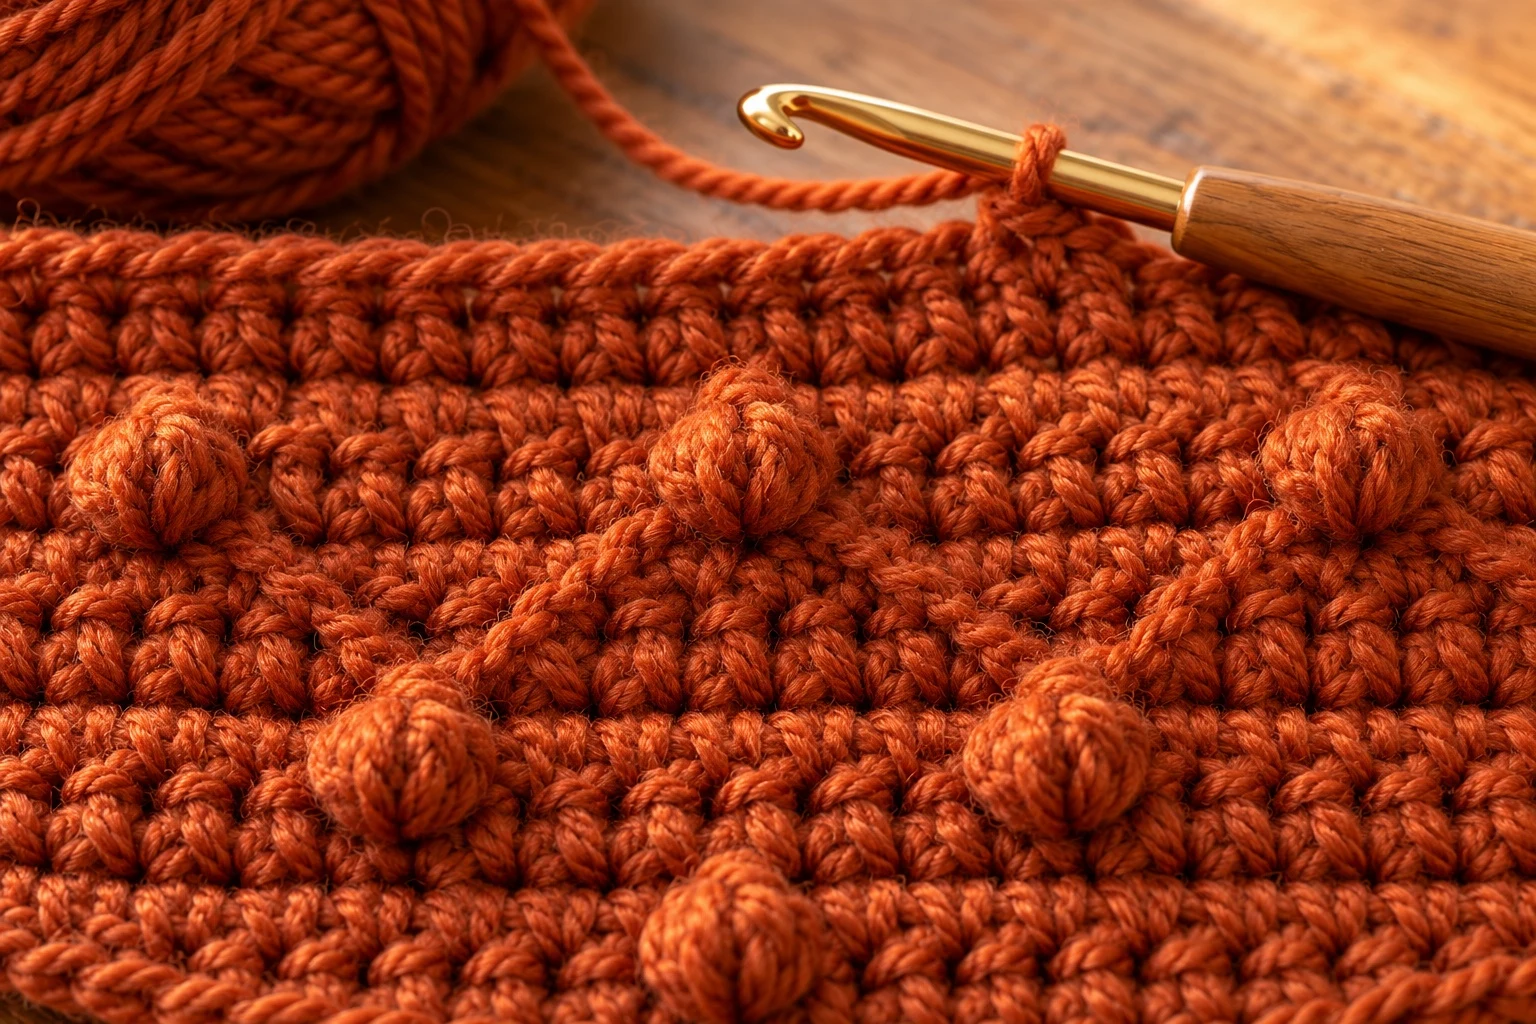
Rows 3, 6, 9, 12, 15 (M only), and 18 (L only) are bobble rows. Work the row’s Phase 1 or Phase 2 shaping exactly as written above, but replace the hdc with a bobble at these positions:
- Set A rows (3, 9, 15): a bobble in the center st, and in every 8th st to each side of the center. Work the center increase as (bobble, hdc) in the center st.
- Set B rows (6, 12, 18): a bobble 4 sts to each side of the center st, and in every 8th st beyond those. Work the center increase as the usual 2 hdc.
- Edge decreases on a Phase 2 bobble row are always worked as plain hdc2tog — never as bobbles.
Buttonhole Row
- Row 15 (17, 19): Ch 1, turn. Hdc in the first 3 sts, ch 3, skip 3 sts (first buttonhole), hdc in the next 5 sts, ch 3, skip 3 sts (second buttonhole), hdc in each st to the end. (51, 59, 67 sts, counting each ch-3 as 3)
Edging
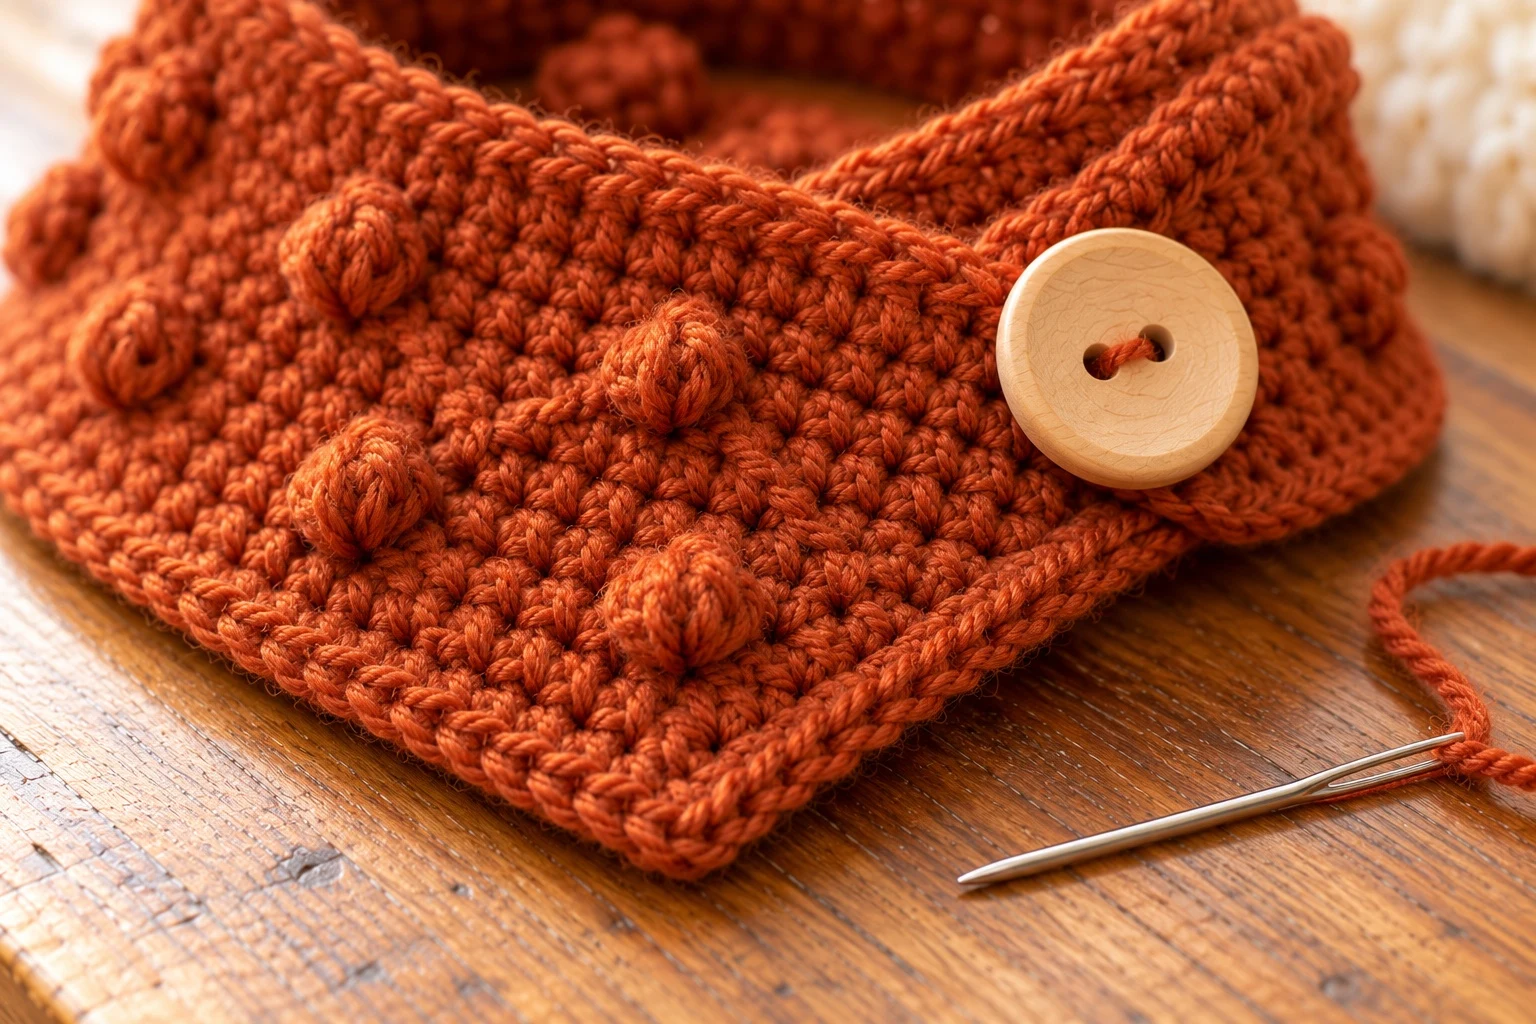
- Do not fasten off. Ch 1 and work 1 round of sc evenly around the whole scarf: across the shaped bottom edge, up the ends, and across the top edge. Work 3 sc in the center point stitch to turn the point neatly, and 1 sc into the center chain of each buttonhole. Sl st to the first sc, fasten off, and weave in the ends.
Buttons
- Lay the scarf flat and wrap it as it will be worn, with the buttonhole end overlapping the plain end at the front. Push a pin through each buttonhole to mark the fabric beneath.
- Sew one wooden button at each mark on the front face of the plain end, stitching firmly through several stitches of fabric so the buttons cannot work loose.
- Yarn-button alternative: for puppies and chewers, work a tight disc of 6 sc in a magic ring, increased to 12 sts, and sew it flat at each mark instead of a real button. It fastens through the buttonholes the same way.
Finishing
Weave in every end and give the scarf a light steam or a few hours lying flat — the crescent relaxes into its drape and the bobble grid evens out. The fitting takes ten seconds: wrap it around the neck, point centered at the front, and button both buttons without pulling. The top edge should sit exactly where a collar sits, and your dog should be able to lower its head to a water bowl without the point dipping in. Once the fit is right, this is the piece that goes with the Crochet Dog Hat with Pom-Pom for the full autumn-outfit photograph.
Customizing the Fit
Longer wrap: for deep-chested breeds, add 4 sts to the foundation chain (2 at each side of the center) and keep every other instruction the same — the shaping grows from the new count.
Deeper point: work 2 extra Phase 1 rows before starting Phase 2 (and 2 extra Phase 2 rows to balance them). The front drapes lower and the bobble grid gains a row.
Chunkier winter version: work the same counts with a bulky (#5) yarn and a US K-10.5 (6.5 mm) hook. Every measurement grows by roughly a third — in practice, each size fits the next neck size up. The Dandy Dog Sweater uses the same one-size-up trick for its winter version.
Frequently Asked Questions
Final Thoughts
Every dog wardrobe needs a piece that makes people smile before they have even said hello, and the buttoned scarf is ours. It is an evening of easy crochet, it fits like it was tailored, and the two wooden buttons give it the finished, bought-in-a-good-shop look that most crochet dog wear never quite reaches.
Make the first one in Classic Rust, like the photo. It is the version that turns heads at the farmers market.
Then make the Forest Walk for December and the Cream & Charcoal for the dog with a formal calendar — and when you are ready for the neck-up companion piece, the Frog Dog Snood is waiting for a completely different kind of attention.
Izzy is an experienced ranch worker who has a passion for exploring nature and getting up close to wildlife. With her connections to various animal organizations, Izzy is well-versed in animal care and rehabilitation.


