Crochet Bunny Dog Snood Pattern: Long Ears, Warm Neck, 3 Sizes
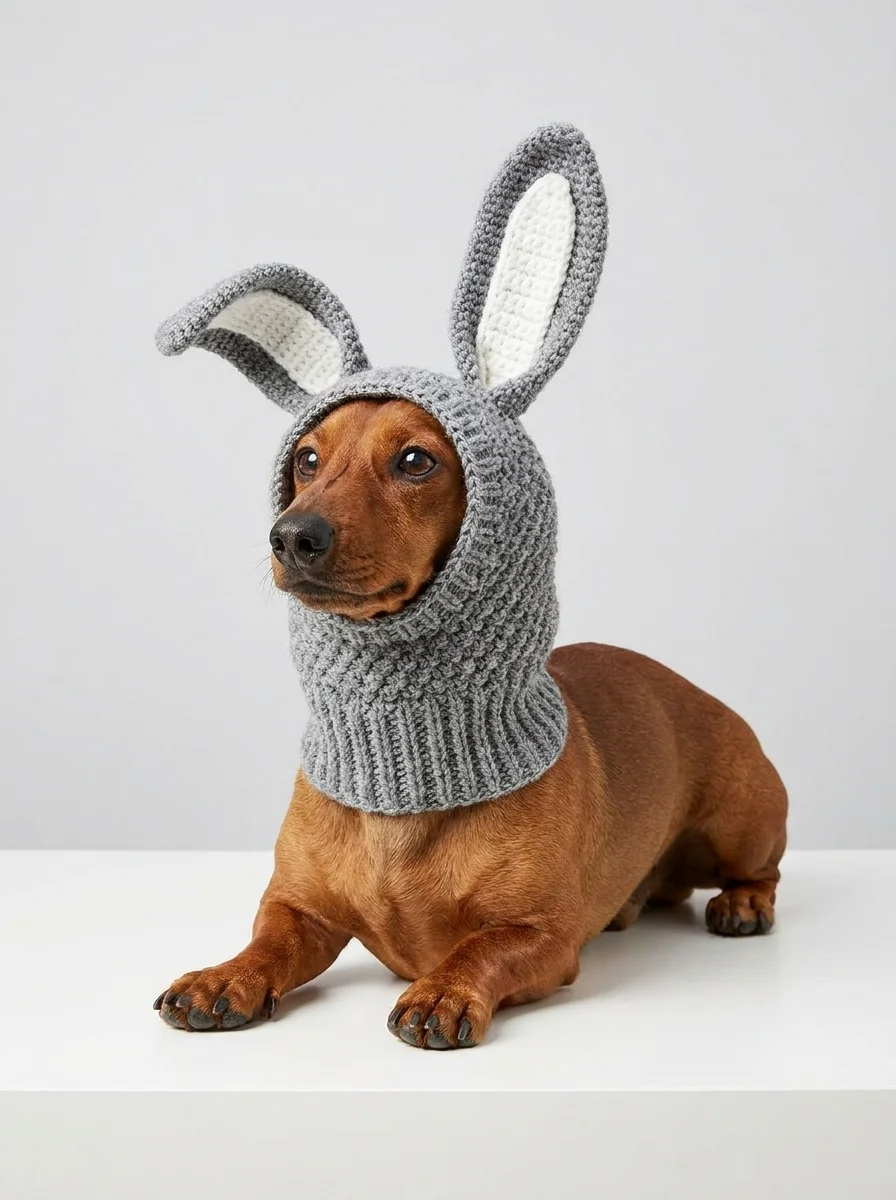
There is a particular joy in crocheting for long-eared dogs, and few projects capture it as completely as a snood topped with a pair of tall, upright bunny ears. On the dachshund in our photo — sleek red-brown coat, face framed by a cozy heather-grey hood — the two grey-and-white ears stand straight up over his own. It is instantly charming, endlessly photographable, and, just as importantly, genuinely useful.
A snood keeps long ears warm, clean, and out of the food and water bowls. This pattern is worked in one piece from the neck up in lemon peel stitch, comes in three sizes by neck measurement, and finishes with two flat bunny ears sewn to the crown. If you can work in the round and count stitches, you can make a bunny.
Why a Bunny Snood Works So Well
The first advantage is ear protection. Dachshunds, beagles, basset hounds, and spaniels carry ears that drape well past the jaw, which means those ears catch grass, mud, kibble, and water all day long. A snug hood tucks them up into a soft, contained space and keeps the feathered hair clean and dry.
The second is warmth with gentle, even pressure. The lemon peel fabric is dense and insulating without being heavy, and a well-fitted snood settles around the neck and head the way a familiar blanket does — many dogs visibly relax into it. It is the same principle behind our Pom-Pom Hat, with the ears doing the protecting instead of a brim.
And then there is the obvious: two standing bunny ears turn a practical accessory into a showpiece — Easter egg hunts, spring garden photos, or just a Tuesday that needed improving. Because the ears stand up off the head instead of flopping around the neck, the silhouette stays crisp in every photo.
Choose Your Colors
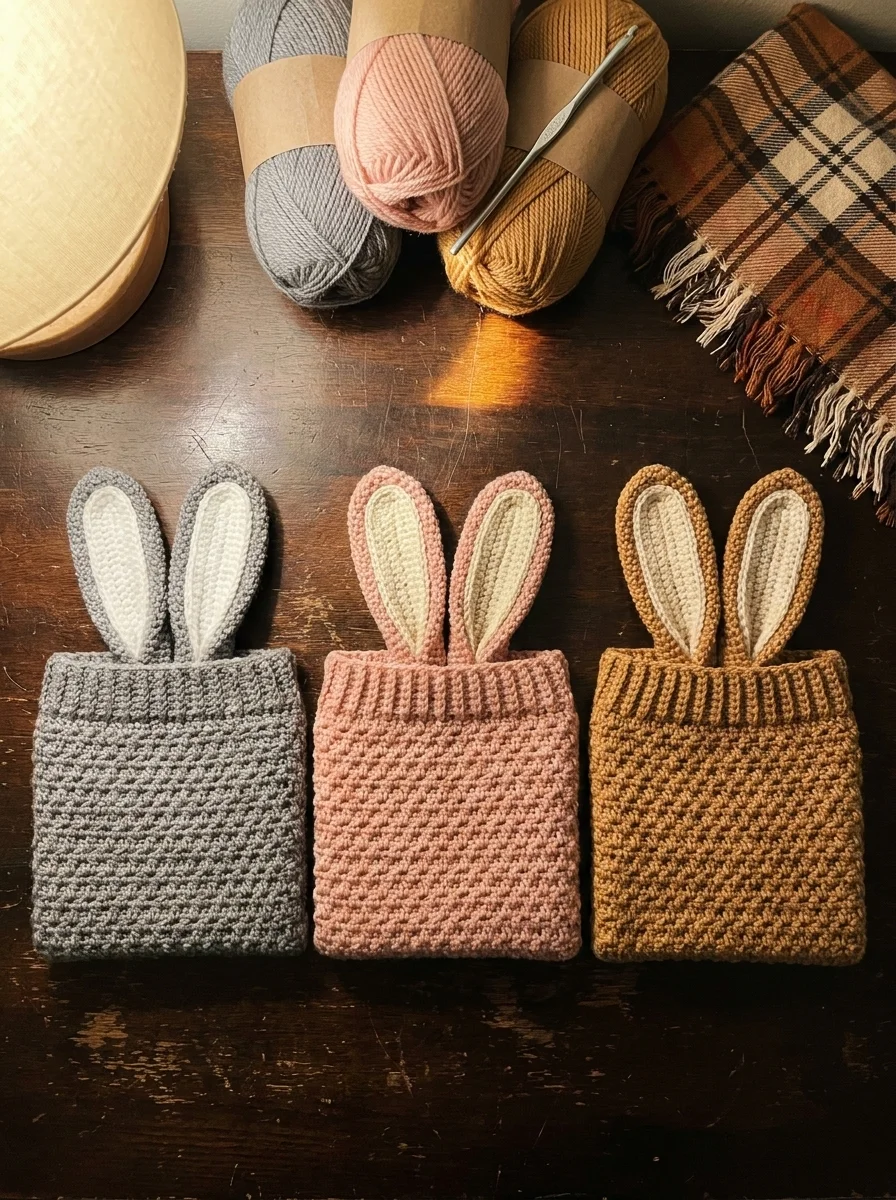
The photo snood is heather grey with white inner ears, but the two-panel ear design takes new colors beautifully. Keep the inner ear pale — it is what makes the bunny read at a distance — and let the body color set the mood.
Classic Heather Grey
Heather grey with clean white inner ears — the photo version. Goes with every coat color and hides park dust well.
Blush Bunny
Soft blush pink with cream inner ears — the full Easter look, sweet on white and light-gold coats.
Sky Bunny
Powder blue body and outer ears with white inner ears. Crisp and cheerful against dark coats.
Honey Bunny
Warm honey-camel body and outer ears with cream inner ears. Autumn-toned and handsome on red and chocolate coats.
Before You Get Started
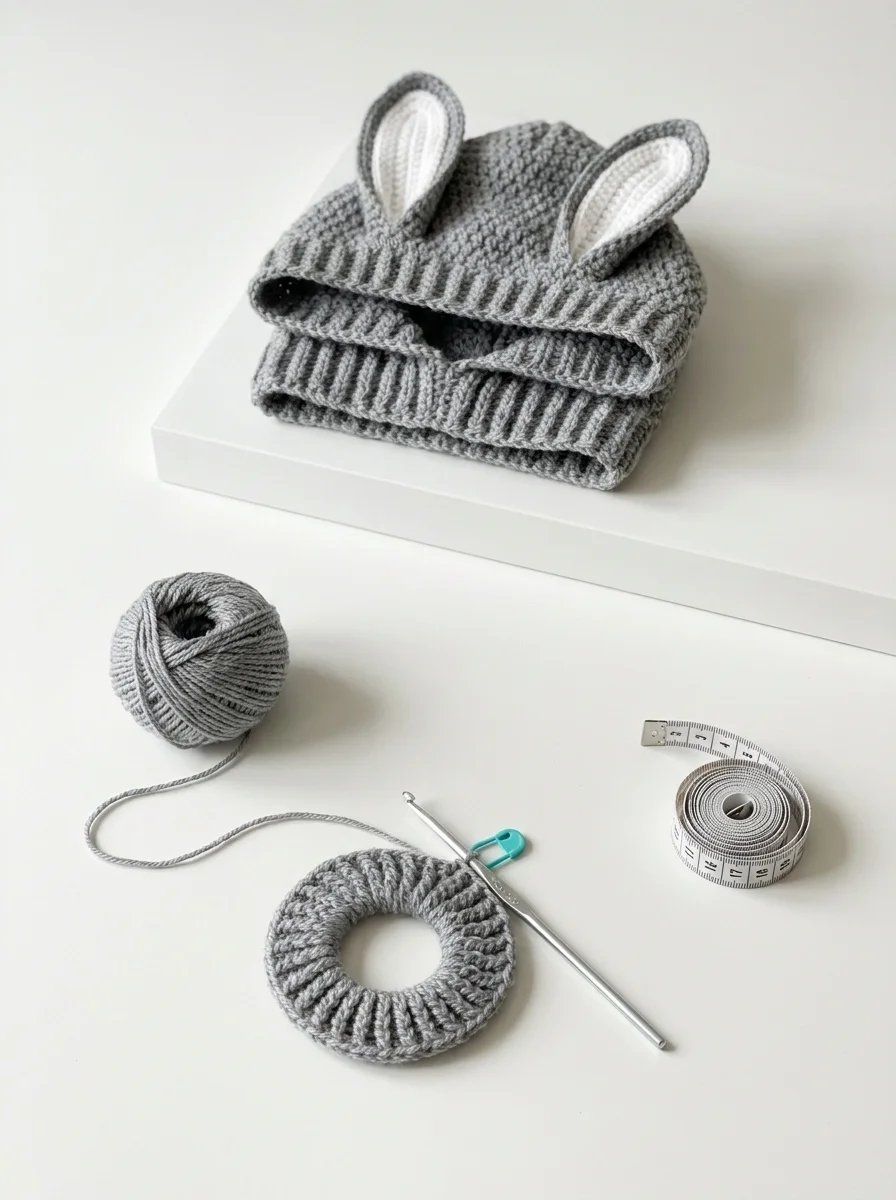
The snood is worked in one piece from the bottom up: a ribbed neck band in the round, a short body section, the face opening worked in turned rows over the back stitches only, a decreased crown that closes the top, and a neat single-crochet edging around the face opening. The bunny ears are made separately, in two flat panels each, and sewn on last.
Skills used are single crochet, double crochet, front- and back-post double crochet (for the ribbing), single-crochet decreases, and simple sewing. The body stitch is lemon peel — alternating single and double crochet — which gives the hood its nubby, shape-keeping texture. Any smooth worsted-weight yarn that meets gauge works; soft acrylic is kindest against the neck and washes easily. If you have made the Frog Snood before, you will recognize the construction — this pattern swaps the stalk eyes for ears.
Fit & comfort check: you should be able to slide two fingers comfortably between the neck band and your dog’s neck at all times. Measure the neck before choosing a size, and if your dog is between sizes, make the larger one — a snood should drape, never squeeze. Check that your dog’s own ears sit flat and comfortable inside the hood, never folded back hard against the head.
Safety notes: the bunny ears are sewn on, so stitch through each ear’s base several times and check the stitching before every wear. Always supervise your dog while it wears the snood, and take it off for sleep and rough play.
Tools & Materials Needed
Yarn
- Worsted-weight (#4) acrylic or acrylic-blend yarn, soft and machine-washable.
- Heather grey: approx 130 (150, 170) yd for sizes S (M, L)
- White: approx 25 yd (inner ears, all sizes)
Hook & Notions
- US H-8 (5.0 mm) crochet hook, or size needed to obtain gauge
- Yarn needle with a large eye, scissors, flexible tape measure
- 2 stitch markers
Size Info and Gauge
S
Neck: 10–12″
Finished: 12″ around × 7.25″ tall
Chihuahuas, Dachshunds, small terriers
M
Neck: 13–15″
Finished: 14″ around × 7.5″ tall
Beagles, Boston Terriers, French Bulldogs
L
Neck: 16–18″
Finished: 16″ around × 7.75″ tall
Spaniels, Basset Hounds, Corgis
Gauge: 16 sts × 13 rows = 4″ in lemon peel stitch. Make a swatch first — every stitch count in this pattern depends on it.
The finished circumference is a little larger than the neck range because the snood must pass over the head; the ribbed band is what holds it in place once it is on. The ears add about 4.5 inches above the crown in every size. For a flatter neck piece in the same yarn weight, the Buttoned Scarf is the natural companion pattern.
Abbreviations (US Terms)
ch chain · sc single crochet · dc double crochet · sl st slip stitch · st(s) stitch(es) · inc 2 sc in one stitch · dec single crochet 2 together (sc2tog) · FPdc front-post double crochet · BPdc back-post double crochet
Pattern Notes
Construction order: neck band, body, face opening, crown, face edging, then the ears.
Center back: the joining seam sits at the center back of the neck. The markers for the face opening are placed by counting from that seam.
Lemon peel rhythm: alternate sc, dc around. At the row turns of the face opening, the alternation may shift by one stitch — this disappears into the texture and is not a mistake.
Crown finish: the crown rounds switch to single crochet so the decreases stay smooth and even. The ears sit on top and cover the transition completely.
Pattern Instructions
Neck Band
Ch 48 (56, 64). Join with a sl st to the first ch to form a ring, being careful not to twist the chain.
- Round 1: Ch 2 (does not count as a st), dc in each st around, sl st to the first dc. (48, 56, 64 sts)
- Round 2: Ch 2, (FPdc in the next st, BPdc in the next st) around, sl st to the first FPdc. (48, 56, 64 sts)
- Round 3: Repeat Round 2. (48, 56, 64 sts)
Body
- Rounds 4–6: Ch 1 (does not count), (sc in the next st, dc in the next st) around, sl st to the first sc. (48, 56, 64 sts)
Face Opening
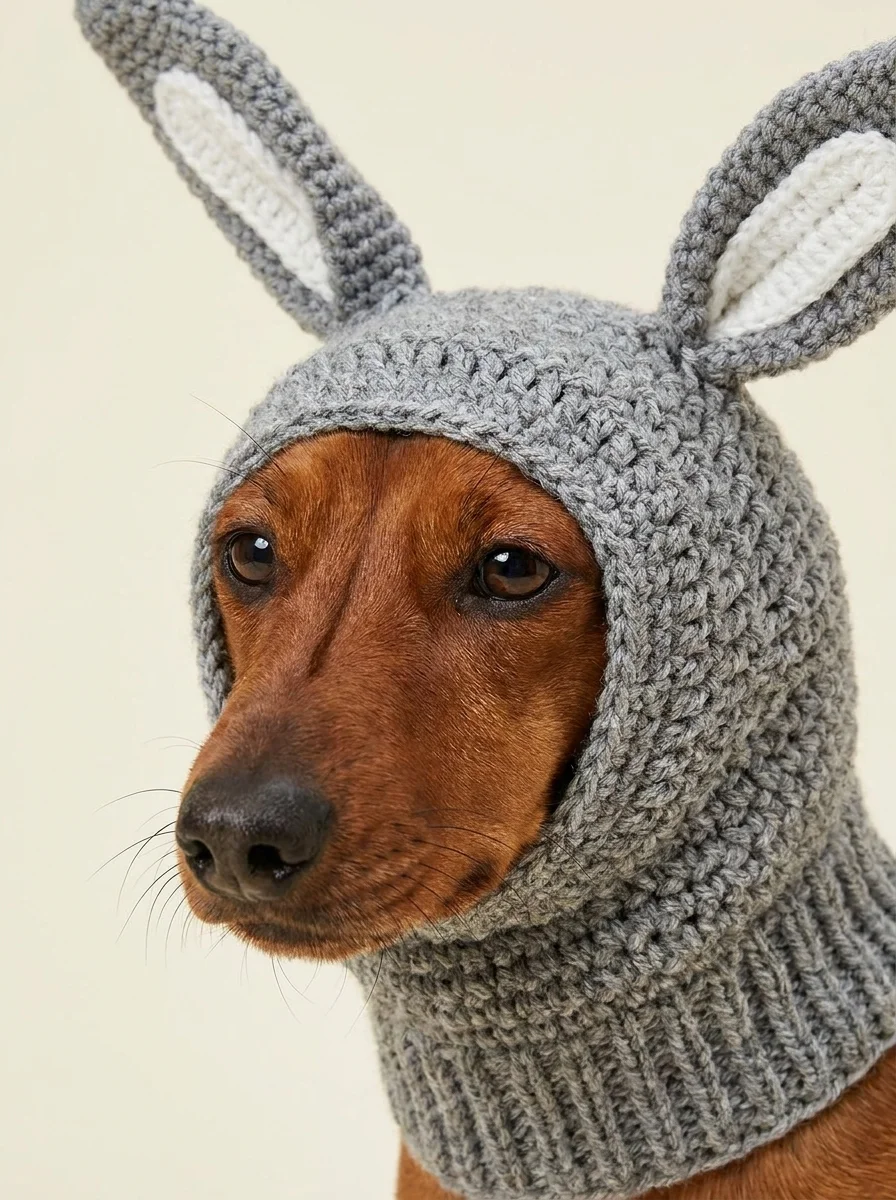
Count the back 32 (38, 44) sts centered on the joining seam and place a marker in the first and last back st. The front 16 (18, 20) sts between the markers form the face opening and are not worked in this section.
- Row 1: Continue in lemon peel from the last body round, working across the back sts only from the first marked st: (sc, dc) across, turn. (32, 38, 44 sts)
- Rows 2–10 (11, 12): Repeat Row 1, turning at the end of each row. (32, 38, 44 sts)
Crown
- Round 1: Ch 1, work lemon peel across the back sts, then continue in lemon peel across the front 16 (18, 20) sts to close the round, sl st to the first sc. (48, 56, 64 sts)
- Round 2: Ch 1, (sc in the next 6 sts, sc2tog) 6 (7, 8) times. (42, 49, 56 sts)
- Round 3: Ch 1, (sc in the next 5 sts, sc2tog) 6 (7, 8) times. (36, 42, 48 sts)
- Round 4: Ch 1, (sc in the next 4 sts, sc2tog) 6 (7, 8) times. (30, 35, 40 sts)
- Round 5: Ch 1, (sc in the next 3 sts, sc2tog) 6 (7, 8) times. (24, 28, 32 sts)
- Round 6: Ch 1, (sc in the next 2 sts, sc2tog) 6 (7, 8) times. (18, 21, 24 sts)
- Round 7: Ch 1, (sc in the next st, sc2tog) 6 (7, 8) times. (12, 14, 16 sts)
- Round 8: Ch 1, sc2tog around. (6, 7, 8 sts)
Fasten off, leaving a long tail. Thread the tail through the remaining 6 (7, 8) sts, pull to cinch the top closed, and secure.
Face Edging
- Join the grey yarn at one bottom corner of the face opening. Ch 1 and work sc evenly all the way around the opening — up the row ends on one side, across the front sts, and down the other side — about 36 (40, 44) sc in total. Add or skip a stitch or two if needed to keep the edging lying flat. Sl st to the first sc.
- Optional: work a second round of sc for a firmer, rounder edge. Fasten off and weave in the ends.
Bunny Ears (Make 2)
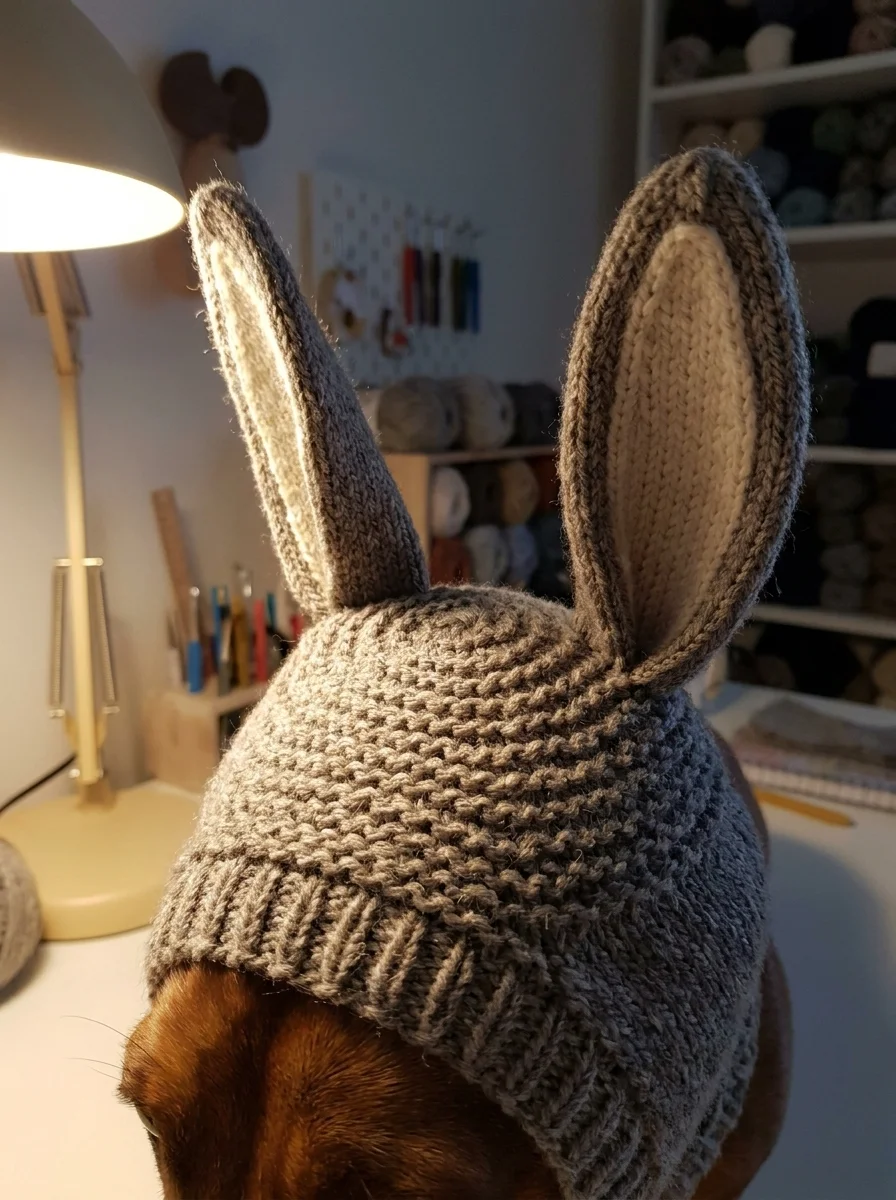
Outer ear (heather grey), worked flat:
- Row 1: Ch 8, sc in the 2nd ch from the hook and in each ch across, turn. (7 sts)
- Row 2: Ch 1, inc in the first st, sc in the next 5 sts, inc in the last st, turn. (9 sts)
- Row 3: Ch 1, inc in the first st, sc in the next 7 sts, inc in the last st, turn. (11 sts)
- Rows 4–12: Ch 1, sc in each st across, turn. (11 sts)
- Row 13: Ch 1, sc2tog, sc in the next 7 sts, sc2tog, turn. (9 sts)
- Row 14: Ch 1, sc2tog, sc in the next 5 sts, sc2tog, turn. (7 sts)
- Row 15: Ch 1, sc2tog, sc in the next 3 sts, sc2tog. (5 sts) Fasten off and weave in the ends.
Inner ear (white), worked flat:
- Row 1: Ch 6, sc in the 2nd ch from the hook and in each ch across, turn. (5 sts)
- Row 2: Ch 1, inc in the first st, sc in the next 3 sts, inc in the last st, turn. (7 sts)
- Row 3: Ch 1, inc in the first st, sc in the next 5 sts, inc in the last st, turn. (9 sts)
- Rows 4–10: Ch 1, sc in each st across, turn. (9 sts)
- Row 11: Ch 1, sc2tog, sc in the next 5 sts, sc2tog, turn. (7 sts)
- Row 12: Ch 1, sc2tog, sc in the next 3 sts, sc2tog, turn. (5 sts)
- Row 13: Ch 1, sc2tog, sc in the next st, sc2tog. (3 sts) Fasten off, leaving a tail for sewing.
Assembly
Sew one white inner ear to the center front of each grey outer ear with small neat stitches around the panel’s edge — a slim grey border frames it, exactly as in the photo. Pinch the base of each finished ear so the two bottom corners meet at the back, and stitch that fold closed: the pinch is what gives the ear its gentle three-dimensional curve and helps it stand.
Sew the two ears to the front of the crown, bases about 2 (2.5, 3) inches apart and angled slightly outward. Stitch through several crown rows, not just the top row, so the ears stay upright when your dog moves. Weave in all remaining ends.
Finishing
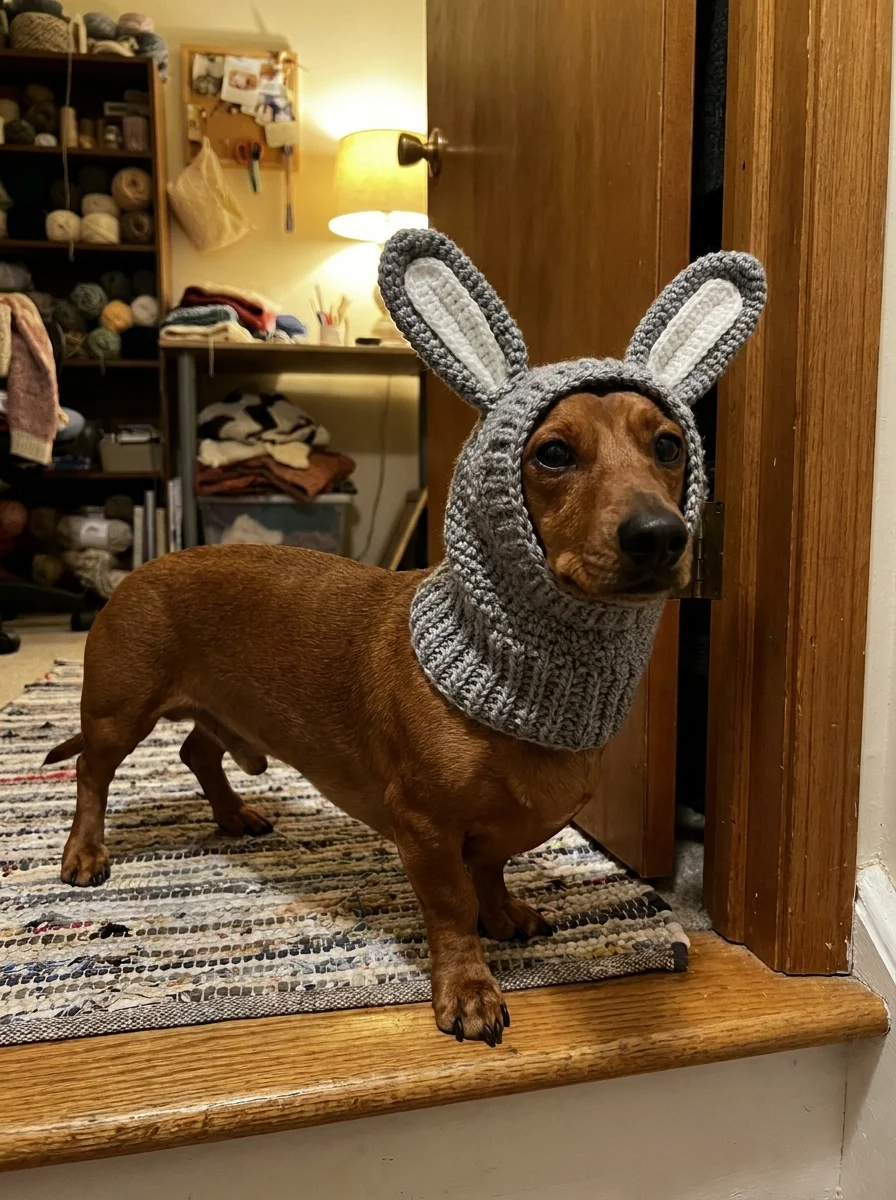
Weave in every end, checking the inside of the hood where little mouths explore. The snood needs no hard blocking — a gentle steam or a few hours folded flat will relax the lemon peel texture if your gauge ran tight, and you can shape the ears upright with your fingers while it rests. Try the snood on your dog before the first outing: it should slip over the head easily, the band should sit on the neck without sliding forward over the muzzle, and your dog should be able to open its mouth, bark, and shake its head freely. For a full cold-weather set, pair it with the Dandy Dog Sweater Crochet Pattern.
Customizing the Fit
Taller hood: for long-headed breeds like Greyhounds and Dachshunds, add 1–2 extra lemon peel rounds to the body before starting the face opening.
Wider face opening: for broad-headed breeds, work the face rows over 2 fewer back sts and leave 2 more front sts unworked — 30 (36, 42) back sts instead. The total stitch count, and the crown, stay exactly the same.
Taller or shorter ears: the ear height lives in the straight rows. Add or remove rows from Rows 4–12 of the outer ear to taste, and add or remove the SAME number of rows from Rows 4–10 of the inner ear so the panels still match. Stopping the straight section early gives the shorter, rounder ear; extending it gives the tall show-bunny look.
Frequently Asked Questions
Final Thoughts
There are more serious crochet projects in the world, and most of them are less fun than this one. The bunny snood takes an evening, a ball of grey yarn, and a dog willing to be looked at — and it pays you back every single walk, in warm clean ears, in smiles from strangers, and in photos you will keep forever. Underneath the silliness, it is a genuinely useful garment for long-eared dogs.
Make the first one in classic heather grey, like the photo. It is the version everyone recognizes instantly.
Then try a Blush or a Honey from the color cards — the hood never changes, only the yarn. That is the beauty of a good base pattern.
Izzy is an experienced ranch worker who has a passion for exploring nature and getting up close to wildlife. With her connections to various animal organizations, Izzy is well-versed in animal care and rehabilitation.