12 Paracord Dog Leash Tutorials for Every Skill Level
If you love dogs and you love crafting, paracord dog leash tutorials are one of the most fun projects you can try. A paracord leash is strong, colorful, and completely custom. You choose the colors, the hardware, and the length. Best of all, most paracord dog leash patterns don’t require fancy tools or years of experience.
This guide walks you through 12 real paracord dog leash ideas, each based on an actual handmade design. Every idea includes step-by-step instructions so you can follow along and make it yourself, no matter your skill level.
Before you start a big project, it helps to know your dog’s personality and habits. A calm senior dog and a strong puller need very different leash setups. If you’re still learning your dog’s needs, our guide on puppy veterinary needs is a good place to start, especially if you’re raising a new pup alongside this craft project.
Quick Basics Before You Start
You don’t need much to begin. Most paracord dog leash patterns use these basic supplies:
- Paracord (type III, 550 cord) in two or more colors
- A metal clip or trigger snap to attach to the collar
- A D-ring or O-ring if you want a hands-free loop
- A lighter to seal cord ends
- A fid or blunt needle to help pull cord through tight weaves
- A clipboard or paracord jig to hold your project steady while you work
That’s it. Everything else in this article is about the pattern itself, not the tool list. Once you have the basics, you’re ready to try any of the 12 ideas below.
If your dog is still learning leash manners, a homemade leash works best once basic training is already in place. Check out these essential puppy training tips before testing a new handmade leash on walks.
12 Paracord Dog Leash Tutorials Ideas
Here are 12 paracord dog leash ideas, each with a difficulty level, who it’s best for, and a detailed walkthrough of how it’s made.
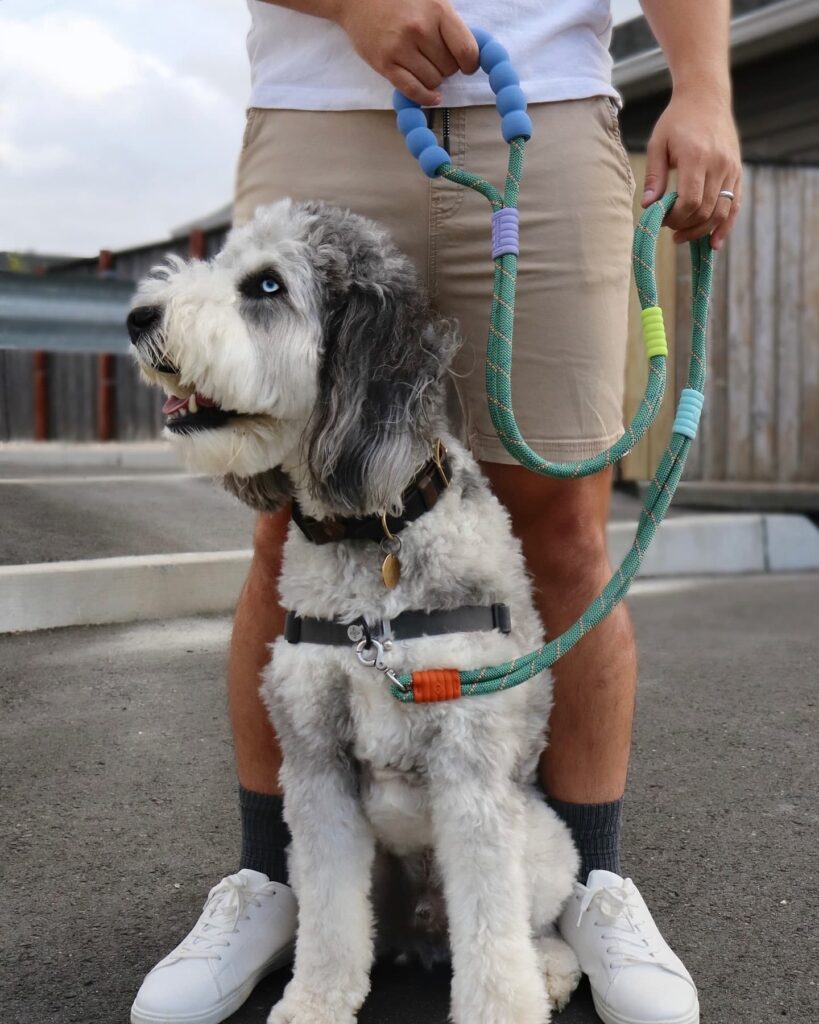
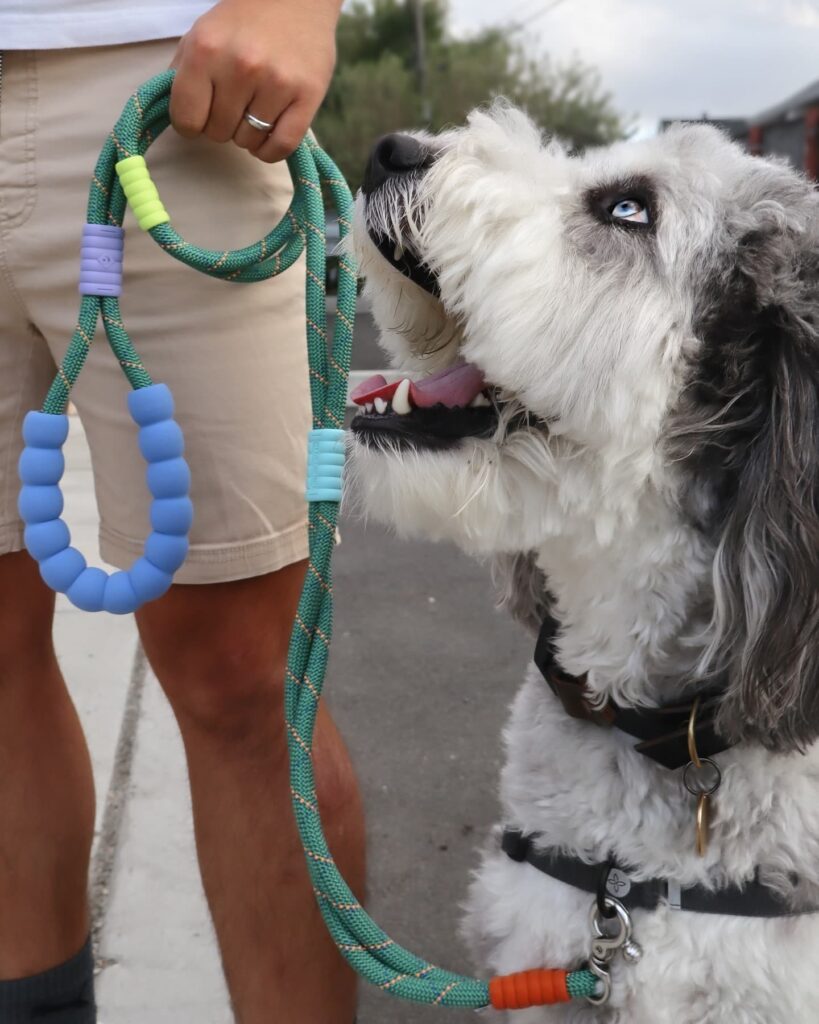
1. Rope Leash with Silicone Bead Grip Sliders
Difficulty: Beginner Best for: Everyday walks, dogs of any size
This idea swaps a fully braided handle for a smooth rope leash with large silicone pony beads slid onto the handle end. The beads act as a soft, padded grip, so your hand doesn’t get sore on long walks.
How to make it:
- Cut a length of round paracord or climbing-style rope about 5 to 6 feet long, depending on your desired leash length.
- Melt one end of the rope slightly with a lighter to prevent fraying, then thread on your silicone pony beads. Push 8 to 10 beads onto the rope to form the grip section of the handle.
- Fold the rope end back on itself to create a loop big enough for your hand, then secure it with a tight paracord wrap. Wrap a 12-inch piece of thinner paracord around both layers of rope, going around 8 to 10 times, then tuck the ends through the wrap using your fid.
- Slide a few small rubber cord stoppers down the length of the leash as color accents. Space them out every foot or so.
- At the clip end, attach a metal trigger snap using another short paracord wrap, the same technique as the handle.
- Seal all cut ends with your lighter to finish.
This is a great first project because you’re mostly working with sliders and simple wraps, not intricate braids or knots.
📸 Photo credit: Instagram @harleyandremi_theaussiedoods
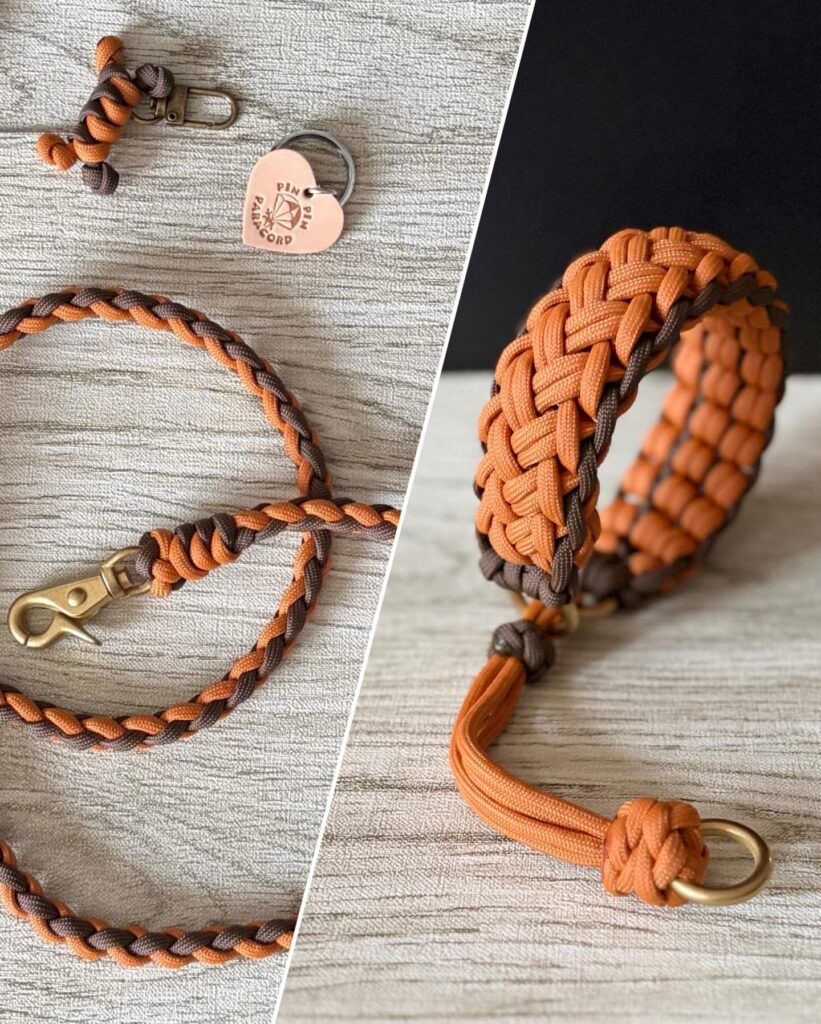
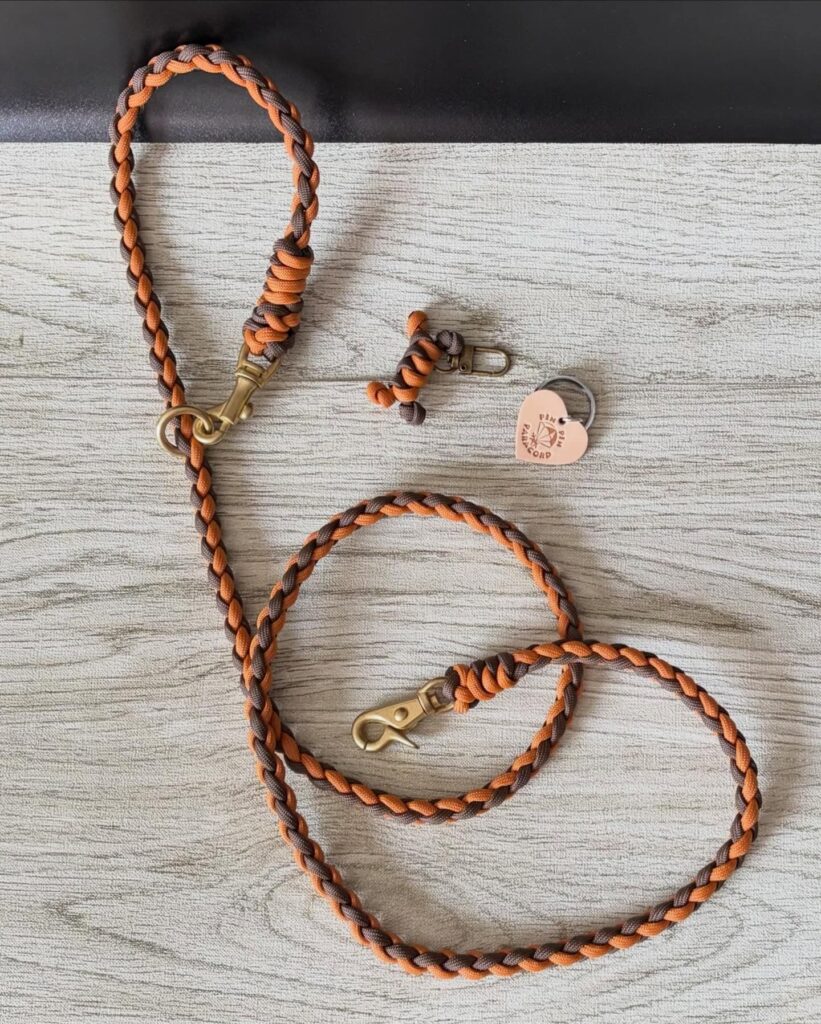
2. Classic Box Braid Leash with Matching Bracelet
Difficulty: Beginner to Intermediate Best for: Gift sets, matching owner-and-dog accessories
This paracord dog leash pattern uses a tight four-strand box braid, sometimes called a Solomon braid or square braid. It creates a rounded, rope-like leash that feels solid in your hand, plus a matching bracelet made the same way.
How to make it:
- Cut four strands of paracord, two in each of your two chosen colors, each about four times the finished leash length to account for the braid taking up extra cord.
- Tie all four strands together at one end with an overhand knot, then attach this end to your clipboard or jig, or loop it around a stationary object so you can pull the cords taut while braiding.
- Arrange the cords so colors alternate: color A, color B, color A, color B.
- Begin the box braid by crossing the outer left strand over the two middle strands, then crossing the outer right strand over the two middle strands. Repeat this pattern, always crossing from the outside in, keeping tension even.
- Continue braiding until you reach your desired leash length, then finish with another overhand knot.
- Attach a brass clip to one end using a lark’s head knot or a wrapped finish, and create a handle loop at the other end the same way.
- For the matching bracelet, repeat steps 1 through 6 using much shorter strands, sized to fit comfortably around your wrist. Finish with a small clip and a leather tag if you want a personal touch.
This is a good project if you want to make gifts. A leash and bracelet combo feels thoughtful and personal, especially with a custom tag attached.
📸 Photo credit: Instagram @pinpin_paracord
3. Round Rope vs. Flat Braid Comparison Leash
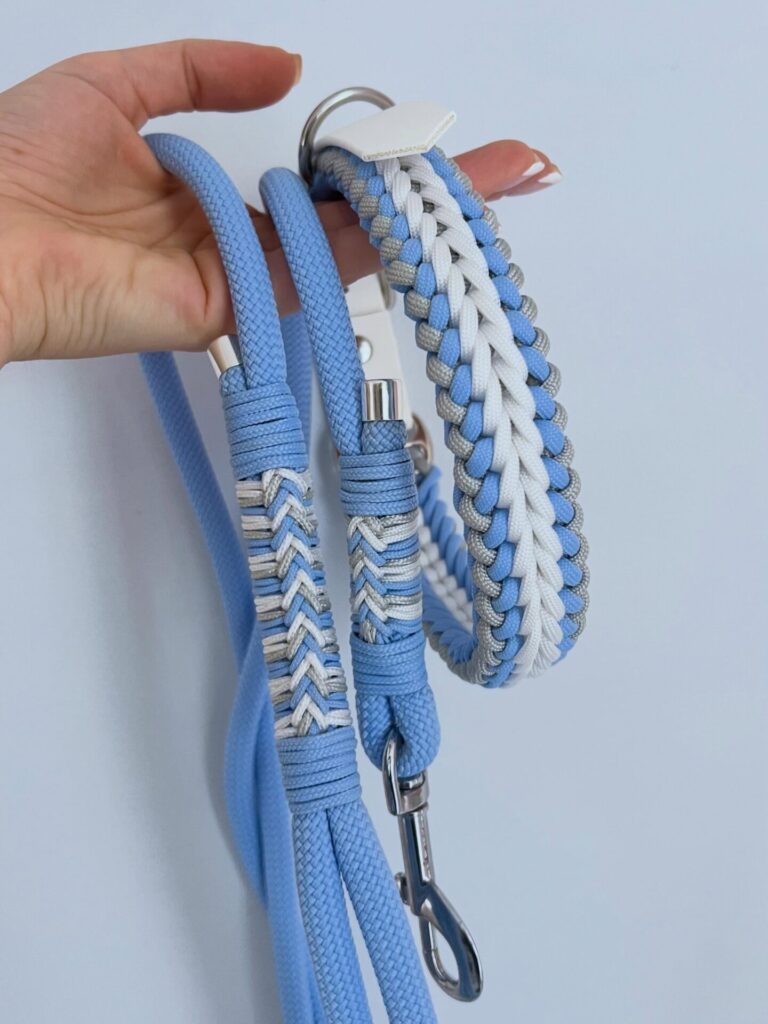
Difficulty: Beginner Best for: Trying two paracord dog leash patterns side by side
If you can’t decide which paracord dog leash pattern you like more, this idea solves that problem by making two leashes at once, one round and one flat, in matching colors.
How to make it for the round rope version:
- Cut one length of round rope or paracord to your desired leash length, plus extra for the handle loop and clip attachment.
- Fold one end into a loop for the handle and secure it with a whipped paracord wrap, the same wrapping method used in idea 1.
- Attach your clip at the opposite end with another wrap, then seal all ends.
How to make it for the flat herringbone braid version:
- Cut four to six strands of paracord in your two chosen colors, each about three to four times your target leash length.
- Secure the strands at the top with a knot, then arrange them in pairs, alternating colors across the row.
- Weave the herringbone pattern by taking the outermost strand on one side and crossing it over the strand next to it, then under the next, weaving it all the way to the opposite edge. Repeat this from the other side, alternating sides each row.
- Keep the weave tight and even as you go, checking every few rows that the pattern looks symmetrical.
- Finish with a wrapped loop handle and clip, just like the round rope version.
Making both versions side by side is a smart way to practice two skills at once. You’ll quickly see which style you prefer for your own dog before committing to a longer project.
📸 Photo credit: Instagram @doce_huellas
4. Two-Tone Herringbone Braid Leash
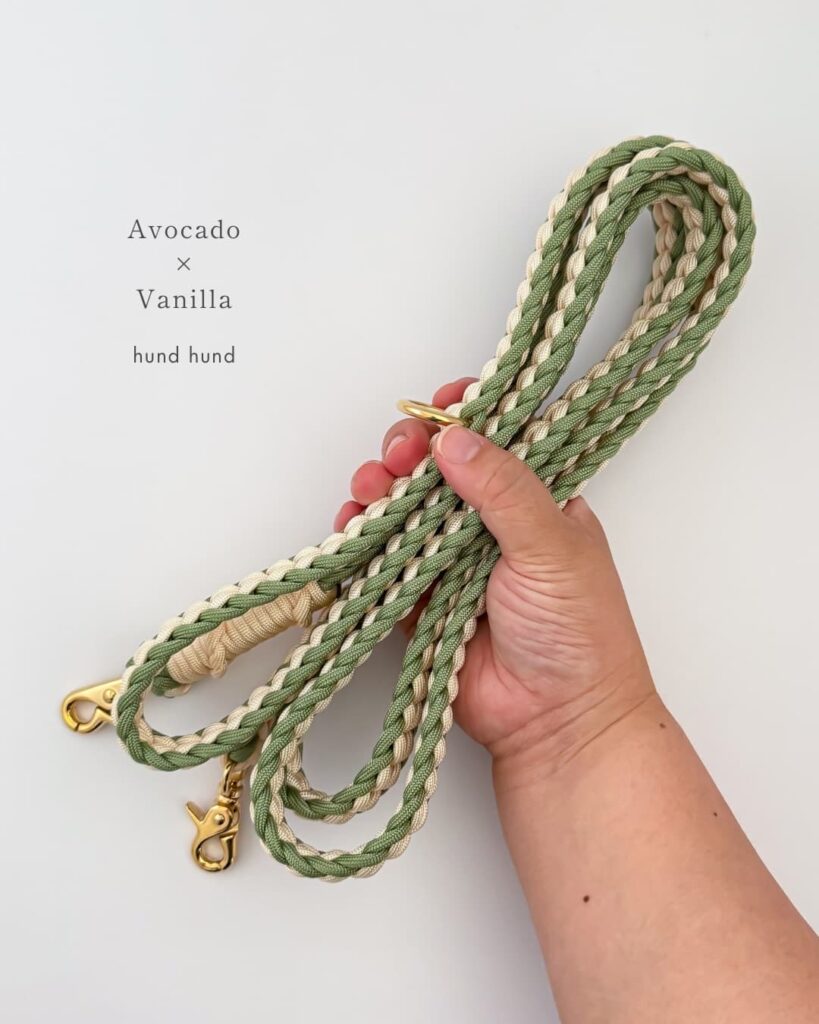
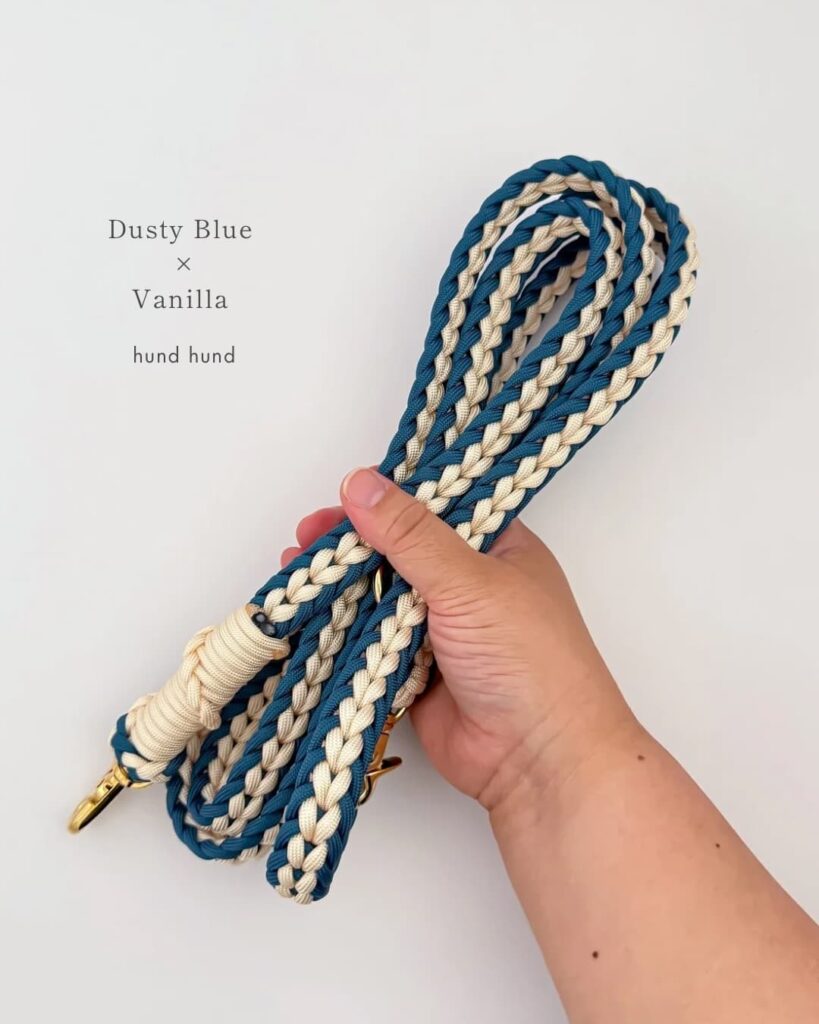
Difficulty: Intermediate Best for: Dogs who need a strong daily leash with style
The herringbone braid, also called a fishtail braid, is one of the most popular paracord dog leash patterns because it creates a flat, chevron-style pattern that looks neat and professional.
How to make it:
- Cut four strands of paracord, two in your first color and two in your second color, each about four times your finished leash length.
- Fold the strands in half over a clip or ring so you now have eight cord ends hanging down, four of each color, and secure the fold with a wrap.
- Divide the cords into two groups of four, with colors mirrored on each side.
- Take the outer strand from the left group and cross it over the strand next to it, then place it into the right group along the inner edge.
- Take the outer strand from the right group and cross it over the strand next to it, then place it into the left group along the inner edge.
- Repeat this crossing pattern, alternating sides, pulling each strand snug after every cross so the braid stays tight and even.
- Continue until you reach your desired length, then gather all strands and secure them with a wrapped finish before attaching your handle loop or clip.
- Seal and trim any excess cord.
Once you learn the herringbone braid, you can repeat it in any two colors you like. It’s worth mastering because it works for leashes, collars, and even bracelets.
📸 Photo credit: Instagram @hundhund_paracord
5. Multi-Position Hands-Free Adjustable Leash
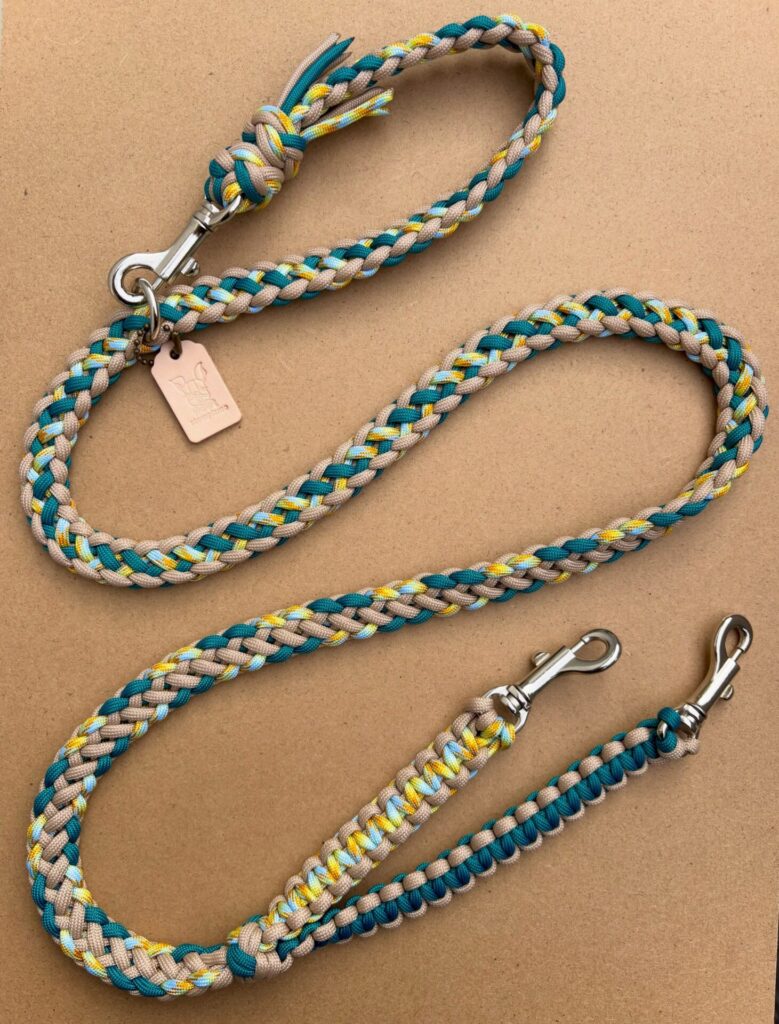
Difficulty: Intermediate to Advanced Best for: Hikers, runners, and multi-dog households
This idea takes the herringbone braid a step further by adding rings and multiple clips along the leash, creating a hands-free, multi-position design.
How to make it:
- Plan your leash layout first. Decide where you want rings placed, typically one near the handle end and one about a third of the way down, so the leash can be shortened or worn across the body.
- Braid the herringbone pattern from idea 4 in sections, stopping at each planned ring location.
- At each stopping point, thread a metal D-ring onto the working strands before continuing the braid. This locks the ring into the weave permanently.
- Continue braiding past each ring until you reach the final length.
- Attach a swivel clip at the very end of the main braid, then create a second, shorter braided section with its own clip. This second piece can connect to one of the mid-braid rings to shorten the leash or clip to a second dog.
- Test the leash by wearing it across your body and adjusting the clip positions until the length feels right for both hands-free and hand-held use.
This is a bigger project than a basic leash, but it’s worth it if you’re active with your dog. If you’re managing daily routines with multiple leashes and collars around the house, our post on dog accessories tips has more ideas on gear that makes daily dog care easier.
📸 Photo credit: Instagram @tonchan.0808
6. Herringbone Braid Leash with Rose Gold Hardware
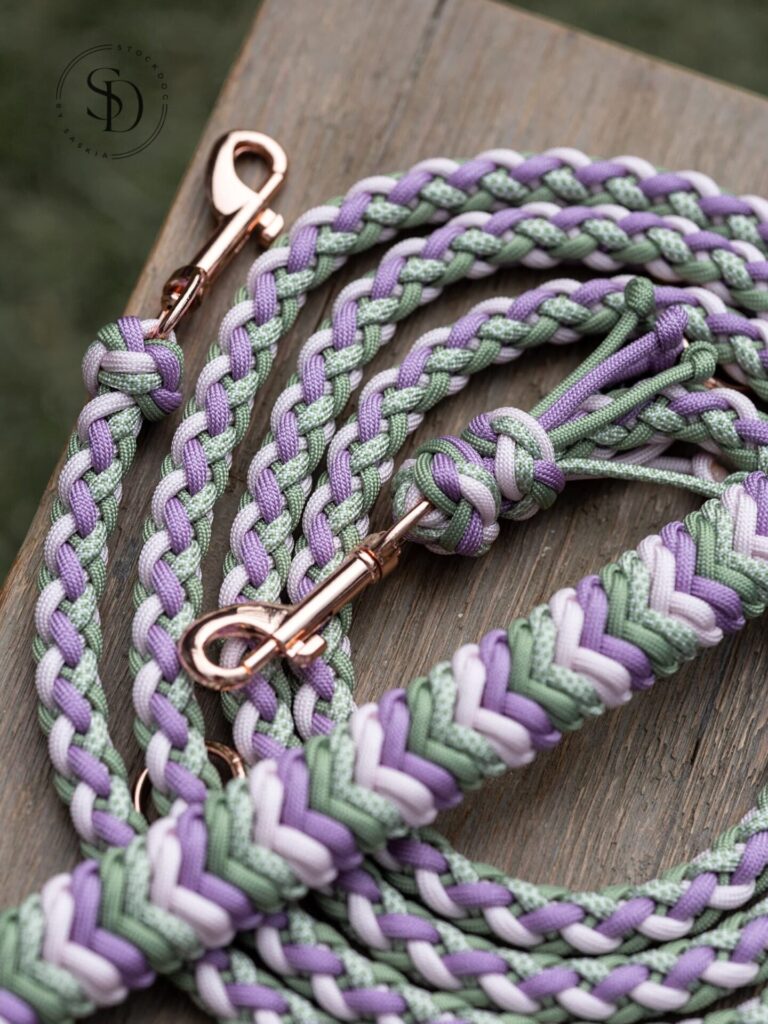
Difficulty: Intermediate Best for: Owners who want a soft, feminine color palette
This idea proves that hardware color matters just as much as cord color. It uses the same herringbone technique as idea 4, but pairs it with rose gold clips instead of silver or brass.
How to make it:
- Choose three coordinating colors, for example lavender, sage green, and soft white, so the braid has more visual depth than a simple two-tone design.
- Cut six strands total, two of each color, each about four times your finished leash length.
- Fold the strands over your rose gold ring and secure with a wrap, just as described in idea 4, step 2.
- Braid using the same herringbone crossing method, but keep track of your three-color order so the pattern repeats evenly. A common approach is to treat two colors as a pair on each side and alternate which color sits on the outside edge every few rows for a more blended look.
- Finish the handle loop and attach your rose gold clip using a wrapped or lark’s head finish.
- Trim and seal all ends.
If you’re picking colors for a specific dog, try matching the cord to their collar or your own wardrobe. It’s a simple way to make the leash feel designed on purpose, not random.
📸 Photo credit: Instagram @stockdog_bysaskia
7. Paracord-Wrapped Handle on a Biothane Leash
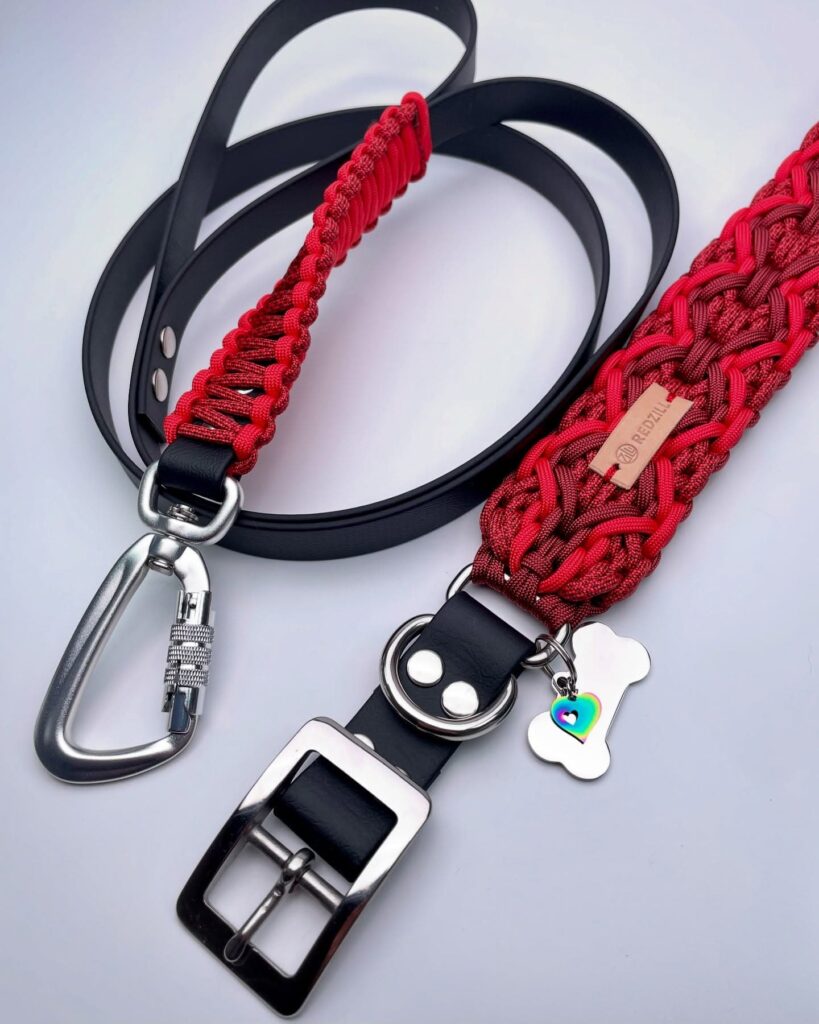
Difficulty: Beginner Best for: Strong pullers, working dogs, wet or muddy walks
Not every paracord dog leash idea needs to be fully braided. This design uses a biothane leash, a waterproof, wipeable strap, and adds a paracord cobra-knot wrap only at the handle.
How to make it:
- Start with a pre-made biothane leash strap, or cut biothane webbing to your desired length and attach a clip at one end using a rivet or snap.
- Cut two strands of paracord in contrasting colors, each about six times the length of the handle section you want to wrap.
- Lay both strands underneath the biothane strap at the top of the handle area, with equal lengths hanging on each side.
- Begin the cobra knot by bringing the left strand over the strap and through the loop formed by the right strand, then pulling snug.
- Bring the right strand over the strap and through the loop formed by the left strand, then pull snug. This completes one cobra knot.
- Repeat this pattern down the handle section, alternating which side starts each knot, until the entire handle area is wrapped.
- Tuck the remaining cord ends underneath the last knot using your fid, trim any excess, and seal with a lighter.
This idea is great if you want the toughness of biothane but still want a handmade touch. It’s also faster to finish than a full braided leash, since you’re only wrapping the handle section.
📸 Photo credit: Instagram @redzill_design
8. Herringbone Braid on a Biothane Hybrid Leash
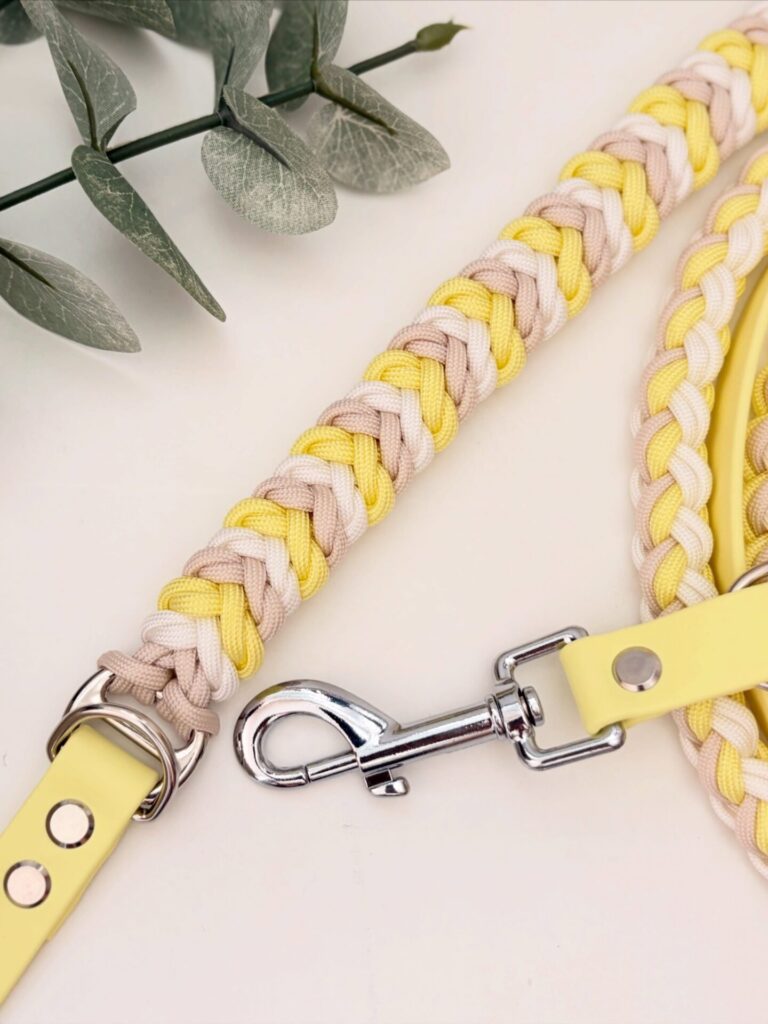
Difficulty: Intermediate Best for: Dogs that need extra durability with a soft color palette
This idea combines the herringbone braid with a biothane leash base, running the braid the full length of the leash instead of just wrapping the handle.
How to make it:
- Cut a length of biothane strap to your desired leash length and attach hardware at both ends, a clip on one side and a D-ring or handle loop on the other.
- Cut six strands of paracord in your chosen colors, for example soft yellow, cream, and light tan, each long enough to cover the full length of the biothane strap plus extra for finishing.
- Anchor the strands at the top of the biothane strap using a wrap or a few secured stitches through the strap’s pre-punched holes if available.
- Braid the herringbone pattern directly over the biothane strap, weaving the strands so the strap sits underneath as a hidden support structure.
- Keep the tension consistent so the braid lies flat against the biothane and doesn’t bunch or twist.
- When you reach the end, secure the final strands with a wrap or stitch, then trim and seal.
This hybrid approach is popular with makers who want the look of paracord without sacrificing the practical benefits of biothane, like water resistance and easy cleaning.
📸 Photo credit: Instagram @leinfachschoen
9. Round Solid Braided Tactical Leash
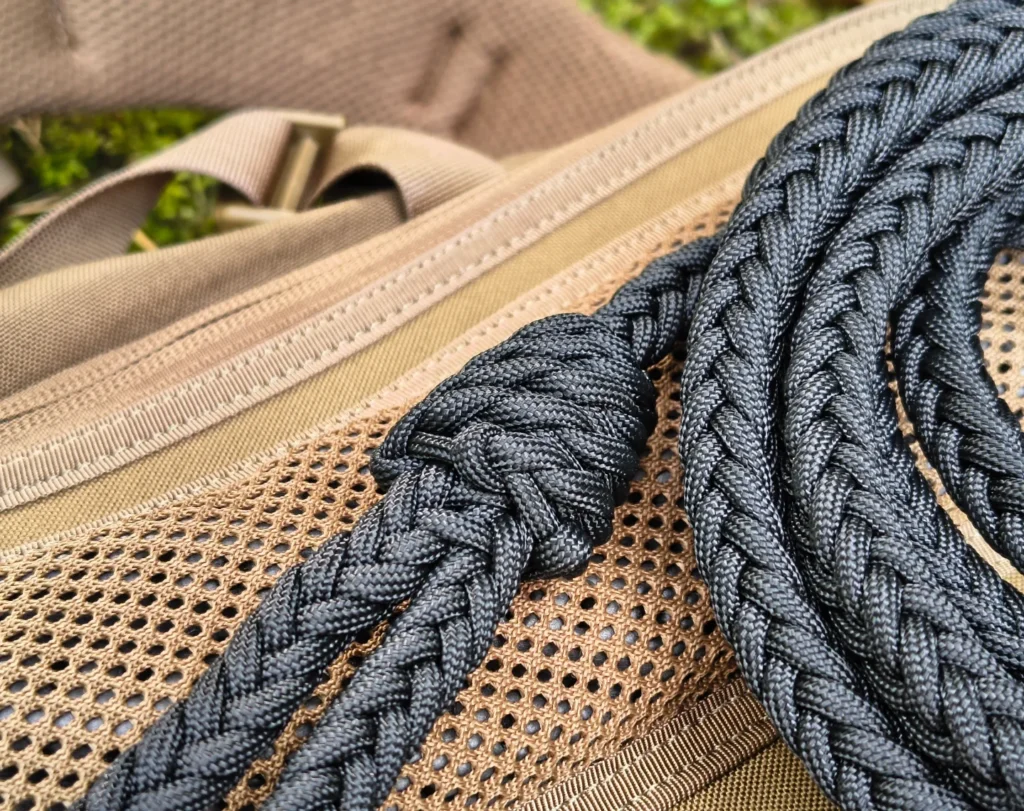
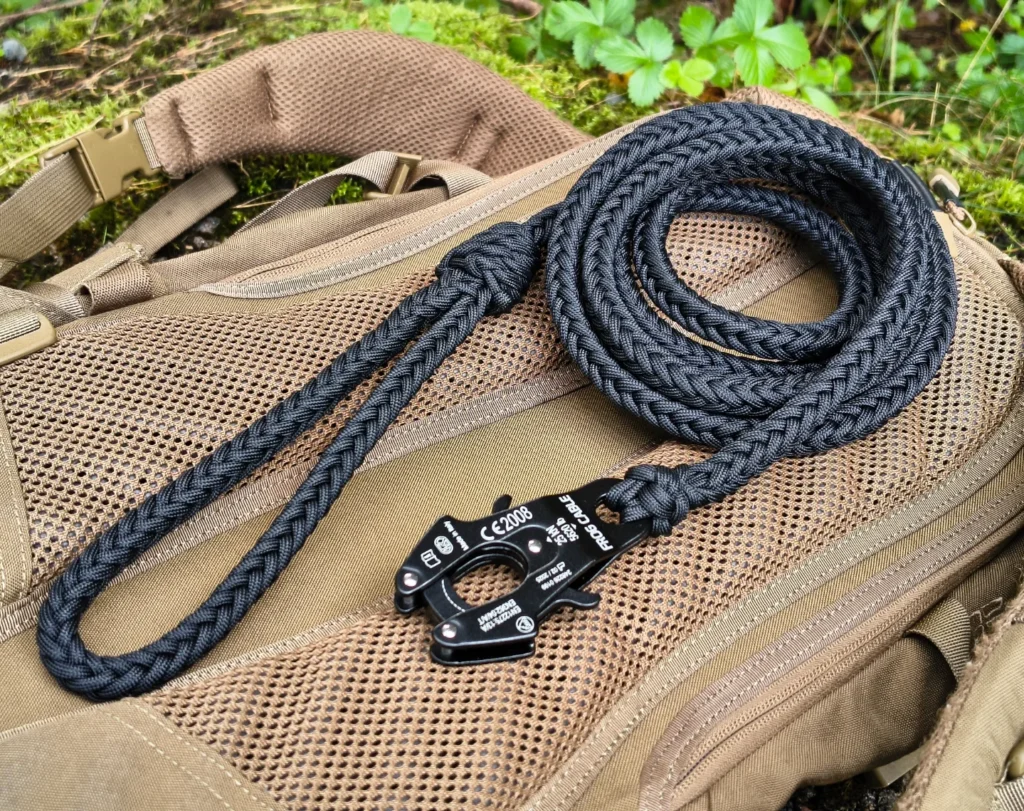
Difficulty: Advanced Best for: Large dogs, working breeds, outdoor and hiking use
If you need a leash that can handle serious pulling power, this idea uses a thick, round, multi-strand braid in solid black, creating a rope-like leash that looks almost tactical.
How to make it:
- Cut eight to twelve strands of paracord, all in one solid color, each about five times your finished leash length. More strands mean a thicker, stronger leash.
- Secure all strands together at one end, either by melting them into a single fused point or by wrapping them tightly with a separate cord.
- Divide the strands into three or four working groups for a round braid, similar to a traditional rope braid but with multiple cords per group instead of single strands.
- Cross the groups over one another in a consistent rotation, always moving in the same direction, for example left group over center, then right group over new center, repeating continuously.
- Keep tension very even throughout, since any loose section will be visible and weaker in a thick braid like this.
- Continue until you reach your desired length, then secure the end the same way you secured the start.
- Attach heavy-duty hardware, such as a rescue-rated clip or carabiner, rated for higher weight loads than standard pet store clips.
This is one of the more advanced paracord dog leash patterns on this list, but it results in one of the strongest leashes you can make by hand.
📸 Photo credit: Instagram @wittynose
10. Convertible Multi-Ring Herringbone Leash
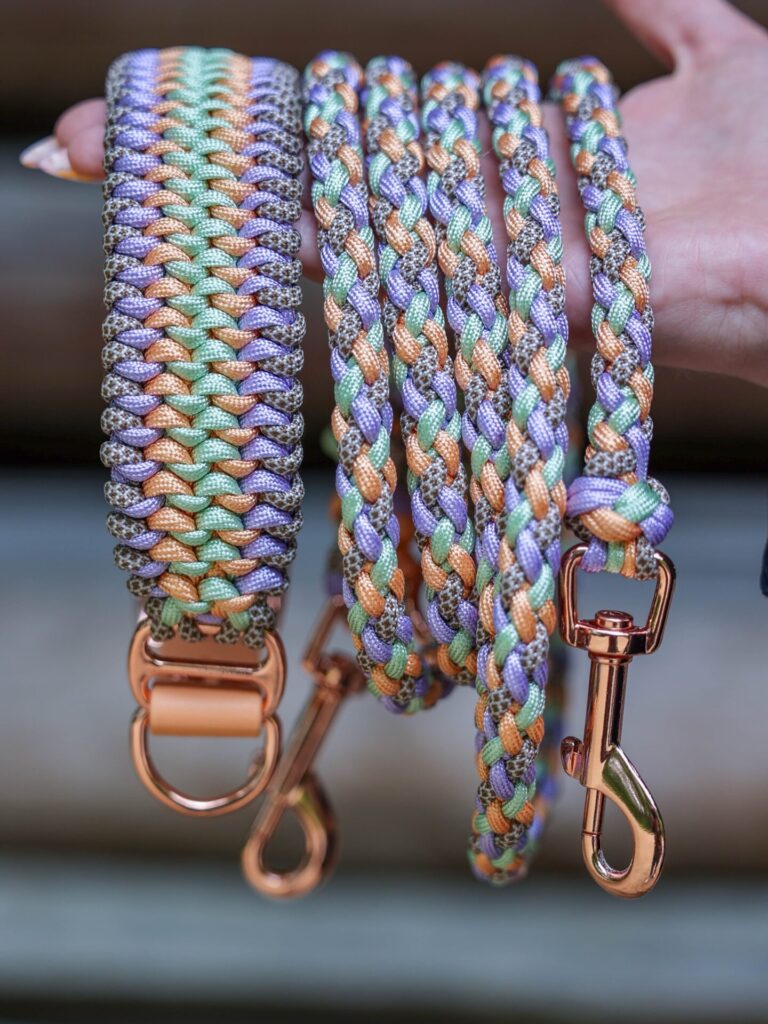
Difficulty: Advanced Best for: Owners who want one leash for multiple uses
This idea builds on the hands-free design from idea 5, using a bold two-tone herringbone braid with several metal rings placed along the length for maximum flexibility.
How to make it:
- Sketch out your ring placement before starting. A common layout includes one ring near the handle, one at the midpoint, and one near the clip end.
- Cut six to eight strands of paracord in two bold contrasting colors, such as teal and orange, each sized generously to allow for the multiple ring insertions.
- Begin the herringbone braid as described in idea 4, working in short sections between each planned ring location.
- At each ring point, thread the ring onto the current working strands, then continue braiding immediately after so the ring is locked firmly into the weave and can’t slide out.
- After the final ring, continue the braid to the end and attach your main clip.
- Create one or two additional shorter braided extensions, each with its own clip, so you can reconfigure the leash length by connecting to different rings depending on the situation.
- Test each configuration, hands-free, short lead, and long lead, before considering the project finished.
Because this design uses more hardware and a longer braid, it takes more planning. Sketching your ring placement first keeps the finished leash symmetrical and functional.
📸 Photo credit: Instagram @stockdog_bysaskia
11. Matching Family of Braided Leashes in One Colorway
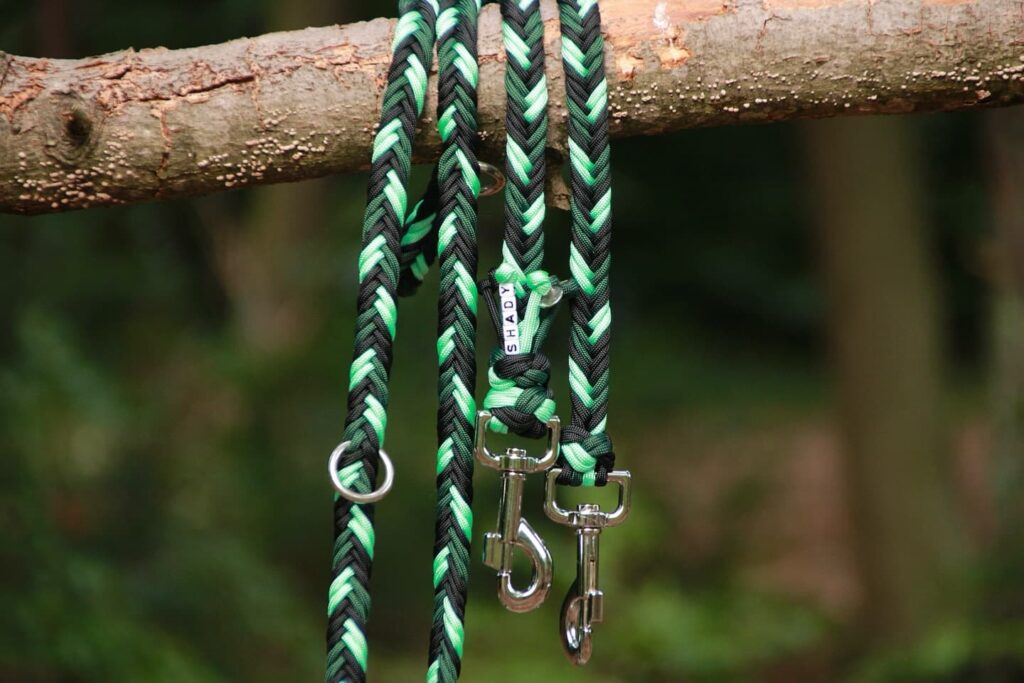
Difficulty: Intermediate Best for: Multi-dog households, dog walkers, gift sets
This idea isn’t just one leash. It’s a whole family of leashes made in the same three-color palette, lavender, sage green, and burnt orange, mixed with a neutral fleck pattern.
How to make it:
- Choose your three-color palette first, then decide how many leashes you want to make and what thickness each one needs based on the dog it’s for.
- For the heavy-duty leash, follow the round solid braid method from idea 9, using all three colors in a repeating sequence around the braid.
- For the everyday leashes, follow the simpler herringbone method from idea 4, using the same three colors so the pattern visually matches the thicker leash.
- Keep your color sequence consistent across every leash. For example, always place lavender on the outer edge, sage green in the middle, and burnt orange as the accent thread.
- Finish every leash with the same rose gold hardware so the whole set looks intentional and coordinated.
- Label or tag each leash if you’re making them for multiple dogs, so they don’t get mixed up.
This is a smart project if you have more than one dog, or if you want to make leashes to sell or gift. Once you’ve picked your colorway, you can scale the same idea up or down depending on the dog’s size.
📸 Photo credit: Instagram @knuepfgold.ch
12. Fishtail Braid Leash with Personalized Name Beads
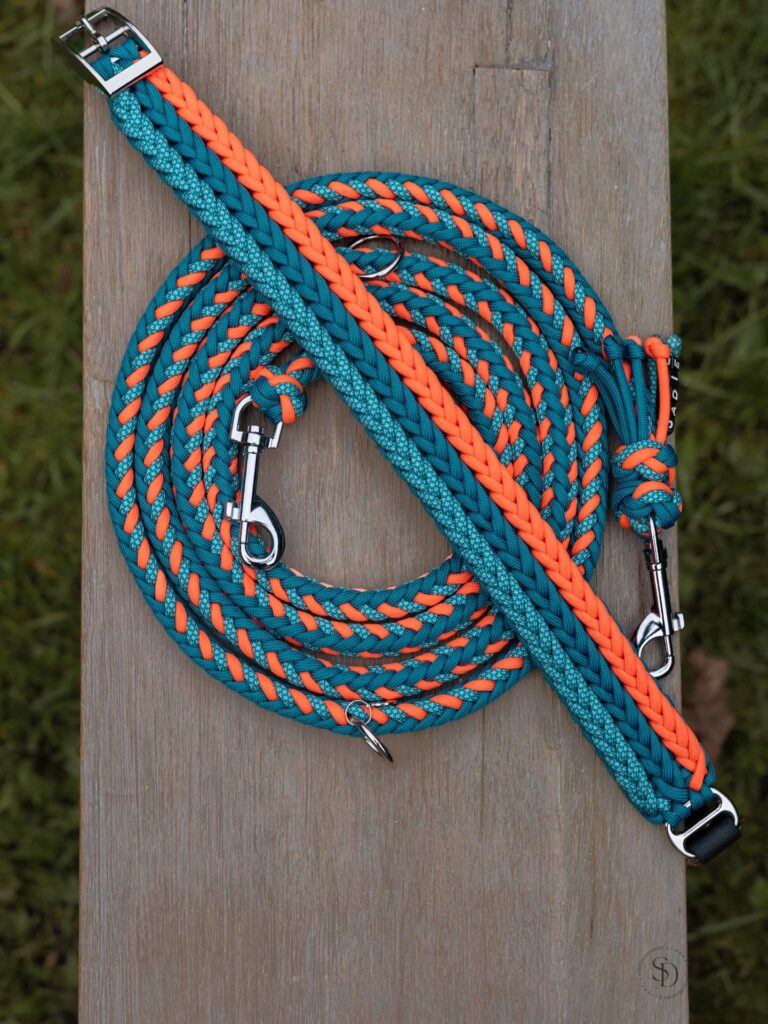
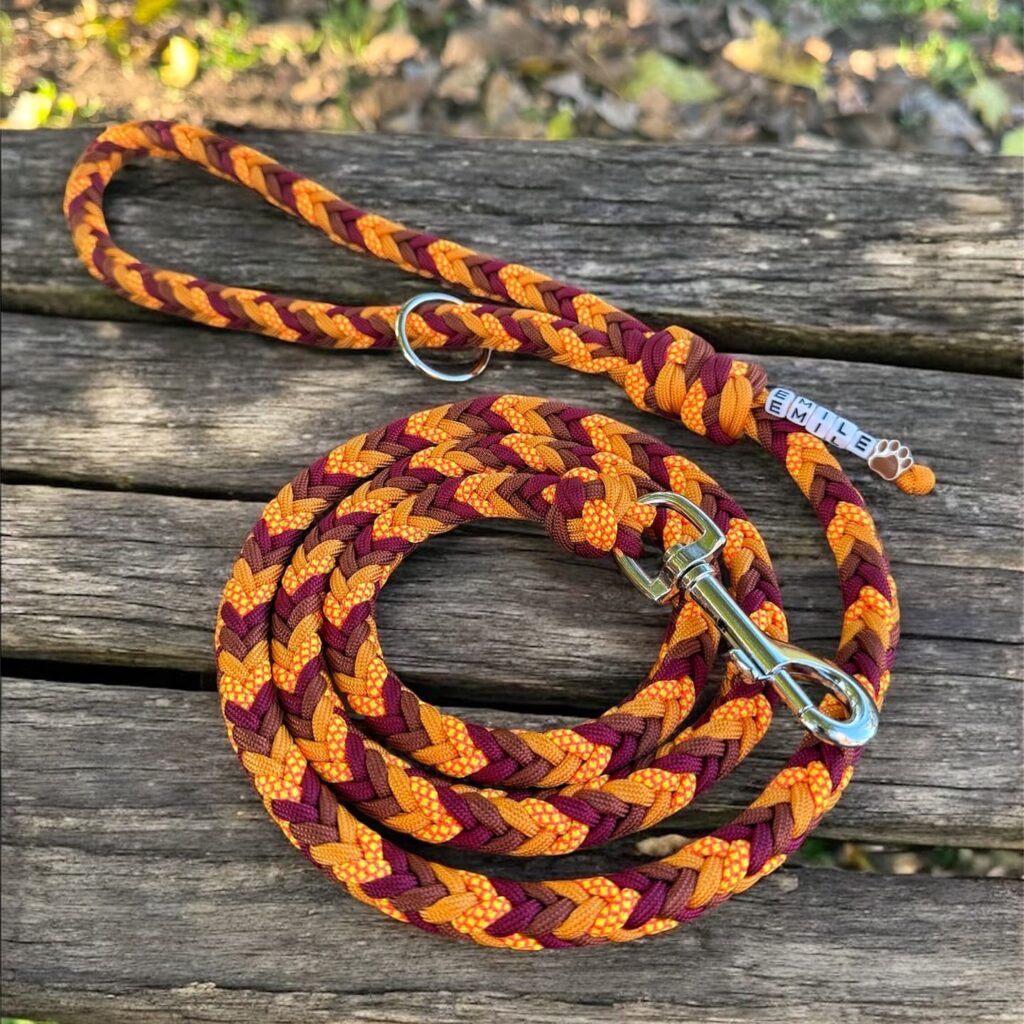
Difficulty: Intermediate Best for: Personalized gifts, dogs with unique names or charms
The final idea on this list is all about personalization. It uses a fishtail or herringbone braid with small alphabet beads spelling out the dog’s name, plus a charm at the end.
How to make it:
- Braid your leash using the herringbone method from idea 4, choosing colors that suit the dog, for example black and bright green, or warm orange, maroon, and brown.
- Before finishing the handle end, decide where you want the name beads to sit, usually just below the handle loop or near the clip.
- Cut a short separate strand of thin paracord or cord specifically for the beads.
- Thread on alphabet cube beads to spell the dog’s name, then add a paw print charm or bead at the end for a finishing touch.
- Attach this beaded strand to the main leash body by tying it on securely at your chosen spot, then trimming any excess cord into a small tassel.
- Seal the tassel ends with a lighter so they don’t fray over time.
- Double check the name beads are secure and won’t slide off during regular use.
This idea works well because it turns a functional leash into something personal. It’s especially popular for gifts, since the name beads make it clear the leash was made just for that dog.
📸 Photo credit: Instagram @biggieandsam @mamely_petboutique
How to Mix and Match These Paracord Dog Leash Ideas
You don’t have to pick just one idea from this list. Many of these paracord dog leash patterns can be combined.
For example, you could take the herringbone braid from idea 4, add the silicone bead grip from idea 1, and finish it off with the name beads from idea 12. Mixing techniques is a great way to make a leash that’s truly one of a kind.
A good rule of thumb: pick one main braid or rope style as your base, then layer in one or two accent details, like beads, charms, or a wrapped handle. Too many techniques at once can make the leash look busy instead of polished. Start simple, get comfortable with the base pattern, and only add extras once the core braid feels solid.
Choosing the Right Paracord Dog Leash Pattern for Your Dog
Not every paracord dog leash pattern fits every dog. Here are a few quick tips to help you choose:
- Small or senior dogs do well with lighter rope leashes or thinner braids, like idea 1 or idea 3.
- Strong pullers or working breeds need thicker, tightly woven braids, like idea 9 or idea 11’s heavy-duty version.
- Active families who hike or run benefit most from hands-free, multi-ring designs, like idea 5 or idea 10.
- First-time makers should start with idea 1, idea 3, or idea 7, since these use the simplest techniques.
If you’re also updating your dog’s gear collection at the same time, it helps to think about the full setup, not just the leash. Our article on dog leash station ideas shows simple ways to organize leashes, collars, and harnesses at home once you’ve made a few.
Caring for Your Handmade Paracord Leash
Paracord is tough, but a little care keeps your handmade leash looking good for years.
First, always seal the cut ends of your paracord with a lighter. This stops the strands from fraying over time. Second, avoid leaving paracord leashes soaking wet for long periods, since trapped moisture can weaken the fibers eventually, even though paracord resists water well on its own.
If you made a hybrid leash with biothane, like idea 7 or idea 8, you can simply wipe the biothane sections clean with a damp cloth. This is one reason hybrid designs are so popular among people who want low-maintenance gear.
Finally, check the hardware regularly. Clips and rings take the most wear, especially on leashes used for strong pullers. If a clip starts to loosen or rust, it’s worth replacing before it fails on a walk. This is especially important for advanced patterns like idea 9 and idea 10, where hardware carries more weight and stress.
A Few Extra Tips Before You Start Braiding
Learning a new paracord dog leash pattern takes patience, especially with braids like the herringbone or the multi-strand tactical style. Here are a few tips to make the process smoother:
- Practice your chosen braid on a short scrap piece before starting the full leash. This helps you get the rhythm down without wasting cord on mistakes.
- Keep tension even throughout the braid so the pattern doesn’t look loose in some spots and tight in others.
- Use painter’s tape or a clipboard to hold your starting knot steady while you work, especially for multi-strand braids like idea 9.
- Pick colors that match your dog’s collar or your own daily gear for a coordinated look.
- Work in good lighting. Many of these patterns rely on spotting small color differences row by row, and poor lighting makes mistakes easy to miss.
- Count your rows as you go, especially for symmetrical designs like idea 4 and idea 6, so both sides of the braid match evenly.
If you’re new to dog ownership in general and still building your daily routine, it’s worth pairing your new leash with good training habits. A well-made leash works best when paired with proactivity vs. passivity training, since a strong leash won’t fix pulling habits on its own.
Final Thoughts
Paracord dog leash tutorials offer something for every skill level, from simple rope leashes with bead grips to advanced tactical braids built for strong pullers. The 12 ideas in this guide show just how flexible paracord can be, whether you want a quick beginner project or a detailed, personalized gift.
Start with a style that matches your comfort level, then work through the step-by-step instructions for that pattern before experimenting with colors, hardware, and accents. Once you’ve got one or two base techniques down, you can mix and match freely, creating leashes that are as unique as the dogs who wear them.

Izzy is an experienced ranch worker who has a passion for exploring nature and getting up close to wildlife. With her connections to various animal organizations, Izzy is well-versed in animal care and rehabilitation.