
Dog Bucket Hat Free Crochet Pattern (5 Sizes, Beginner Friendly)
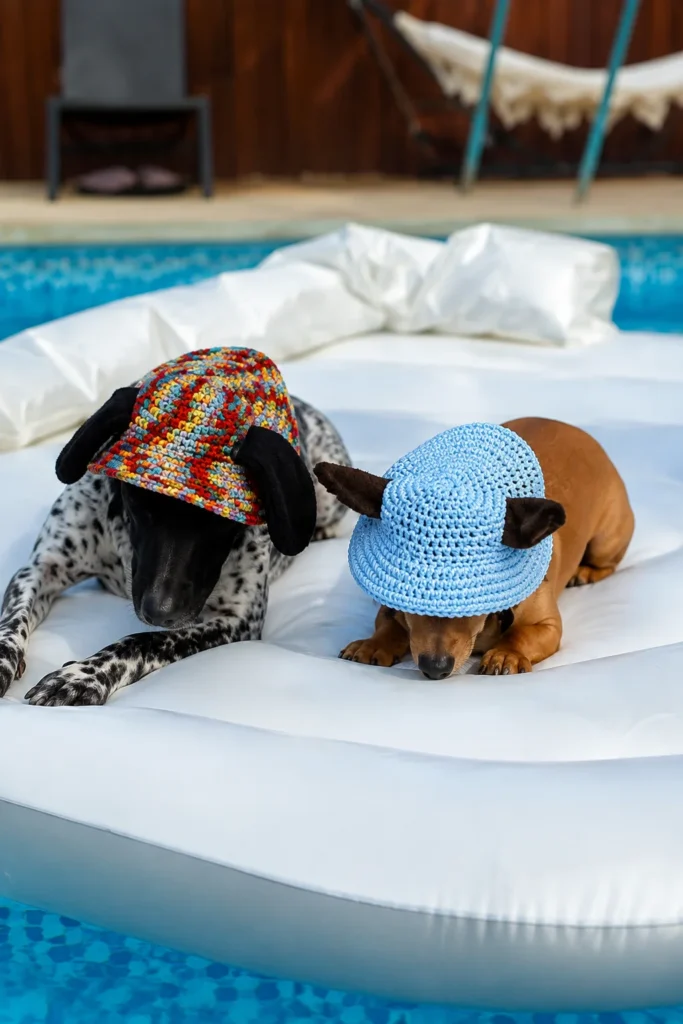
Does your dog love wearing clothes? If so, this dog bucket hat free crochet pattern is about to become your new favorite project. It’s cute, it’s quick to make, and your dog will look adorable wearing it on walks, at the beach, or just lounging in the backyard.
This guide gives you everything you need. You’ll get the full pattern in five sizes, tips on picking the right yarn, and simple instructions even a beginner can follow. No confusing crochet jargon. No guessing games with sizing.
By the end, you’ll have a soft, breathable hat that fits your dog comfortably and looks great in photos. Let’s get your hook ready and start crocheting.
1. What You Need Before You Start
Before diving into the pattern, gather your supplies. Having everything ready makes the project go much faster, and it means you won’t have to stop halfway through to dig around for a yarn needle.
1.1 Yarn and Materials
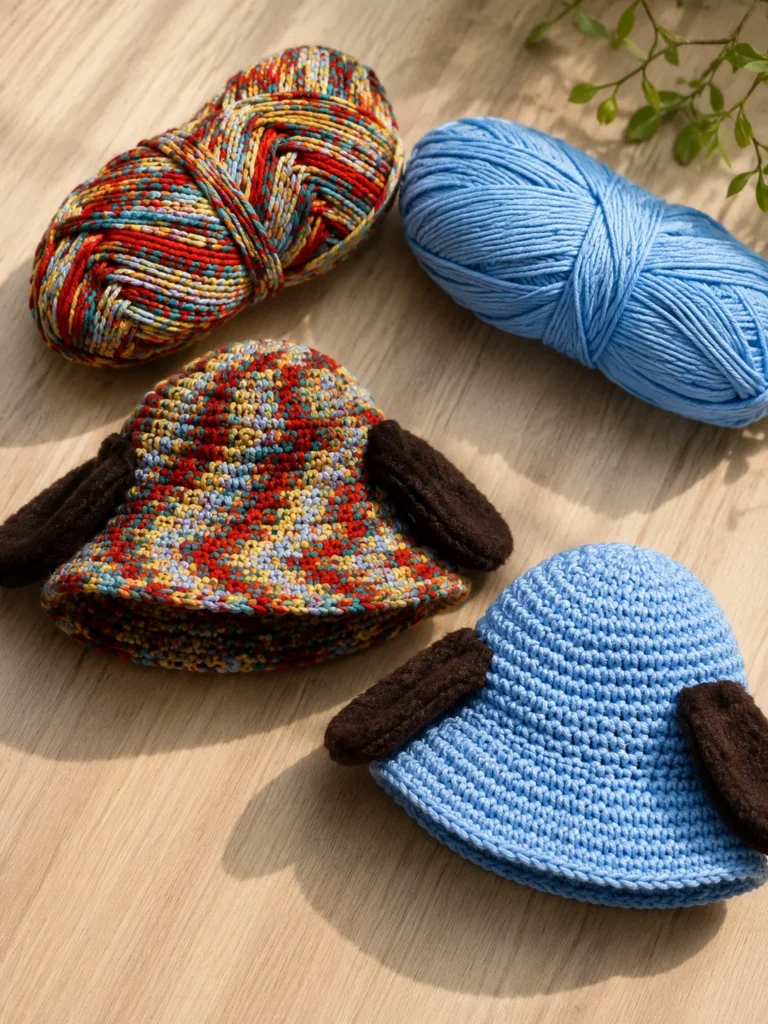
You’ll want a soft, breathable yarn since this hat sits directly on your dog’s head. Here’s what to gather:
- Worsted weight (Size 4) 100% cotton yarn — roughly 40 to 110 yards depending on your dog’s size
- A 4mm (US G/6) crochet hook
- A yarn needle for weaving in ends
- A stitch marker (a small safety pin or scrap of contrasting yarn works too)
- Optional: 1/8-inch elastic cord and a cord lock, or ribbon, for the chin strap
- Scissors
Cotton yarn is a smart choice for pet accessories. It’s breathable, machine washable, and gentle on skin. Avoid scratchy acrylic blends if your dog has sensitive skin, and stay away from novelty or fuzzy yarns that could shed fibers your dog might lick or chew.
If you want a two-tone look like a color-blocked crown and brim, grab a second color now. You’ll switch colors partway through the pattern, and it’s much easier to have both skeins ready from the start.
1.2 Hook Size and Gauge
Gauge matters more for fit than for exact stitch counts. A rough guide is 4 hdc stitches per inch. If your finished crown looks noticeably larger or smaller than 3 inches across after the first four rounds, try a different hook size.
Going up a hook size makes stitches looser and the hat bigger. Going down makes stitches tighter and the hat smaller. Don’t stress too much about perfect gauge here. Dog heads have some flexibility, and a slightly loose or snug fit still usually works fine with the adjustable strap.
1.3 Skill Level
This pattern works well for confident beginners. If you already know how to make a magic ring, work half double crochet (hdc), and increase stitches in continuous rounds, you’re ready to go.
If you’re brand new to crochet, this project is still doable. Just expect it to take a little longer as you get comfortable with the stitches, and consider practicing a small magic ring swatch before diving into a full size.
2. How to Measure Your Dog for a Bucket Hat
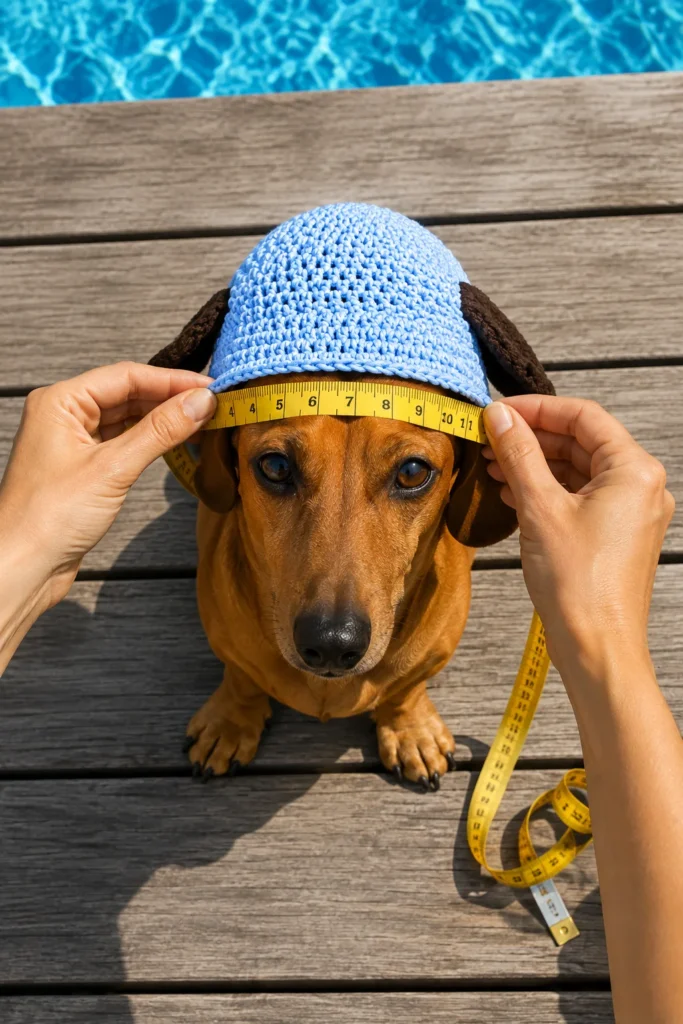
Getting the size right is the most important step. A hat that’s too tight will bother your dog. One that’s too loose will slide right off, usually at the worst possible moment on a walk.
2.1 Measuring Head Circumference
Grab a soft measuring tape (or a piece of string and a ruler). Wrap it around the widest part of your dog’s head, just above the ears. This is usually right where a hat naturally sits.
Add about half an inch for comfort. Dogs need a little wiggle room, especially if they’re going to wear the hat for a while. If your dog is squirmy, try measuring while they’re relaxed or distracted with a treat.
2.2 Matching Measurements to Sizes
Once you have your dog’s measurement, match it to the closest size below:
| Size | Best For | Head Circumference |
|---|---|---|
| XS | Chihuahua, Yorkie, Toy Poodle | 10–11 inches |
| S | Dachshund, Pug, Shih Tzu | 12–13 inches |
| M | Beagle, Cocker Spaniel, Corgi | 14–15 inches |
| L | Labrador, Golden Retriever | 16–18 inches |
| XL | Great Dane, Mastiff, Bernese Mountain Dog | 19–21 inches |
If your dog’s measurement falls between two sizes, size up rather than down. A slightly loose hat is more comfortable than a tight one, and you can always tighten the chin strap.
If you’re outfitting a smaller pup, it also helps to know general sizing trends across breeds. This guide on best small dog breeds is a useful reference if you’re shopping or planning accessories beyond just this hat.
3. Dog Bucket Hat Free Crochet Pattern (Step-by-Step)
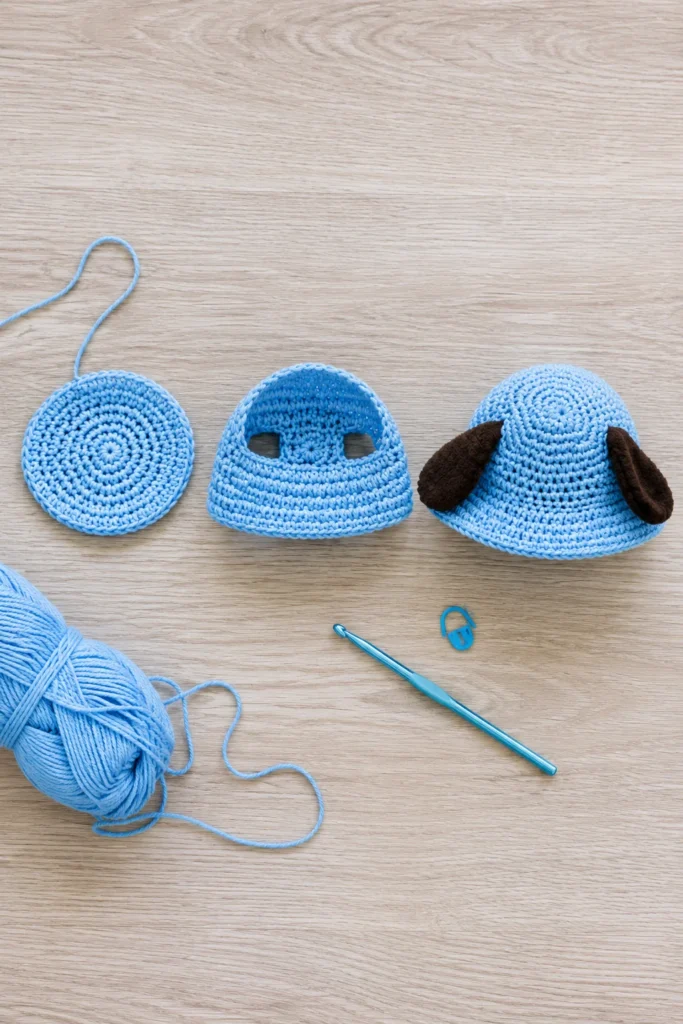
Here’s the full pattern, broken into clear sections so you always know where you are. Numbers appear in this order throughout: (XS, S, M, L, XL). Find your size before you start, and consider circling or highlighting your numbers so you don’t lose your place mid-round.
A quick note on style: if you want a hat with a solid-colored crown and a contrasting brim, work the crown and ear-hole sections in your main color, then switch to your accent color right before the brim increase round. It’s an easy way to make the hat pop without changing a single stitch technique.
Abbreviations used below:
- ch = chain
- hdc = half double crochet
- sl st = slip stitch
- sc = single crochet
- st(s) = stitch(es)
- BLO = back loop only
- rnd(s) = round(s)
- [ ] = repeat the instructions inside the brackets
Before you begin, quick checklist:
- Work in continuous rounds (a spiral) — do NOT join unless told to.
- Place a stitch marker in the first stitch of each round and move it up as you go. This is the single easiest way to avoid losing count.
- Count your stitches at the end of every round before moving on. Fixing a mistake one round late is much easier than fixing it five rounds late.
- Lay your work flat every few rounds to check it’s staying flat, not cupping or ruffling.
3.1 Crown Rounds
Start at the top of the hat and work outward, one increase round at a time.
- Rnd 1: Magic ring, ch 1 (doesn’t count as a stitch), 6 hdc into the ring. (6 sts)
- Rnd 2: 2 hdc in each stitch around. (12)
- Rnd 3: [hdc in next st, 2 hdc in next st] around. (18)
- Rnd 4: [hdc in next 2 sts, 2 hdc in next st] around. (24)
- Rnd 5: [hdc in next 3 sts, 2 hdc in next st] around. (30) — XS: stop here and skip to Ear Holes
- Rnd 6: [hdc in next 4 sts, 2 hdc in next st] around. (36) — S: stop here
- Rnd 7: [hdc in next 5 sts, 2 hdc in next st] around. (42) — M: stop here
- Rnd 8: [hdc in next 6 sts, 2 hdc in next st] around. (48) — L: stop here
- Rnd 9: [hdc in next 7 sts, 2 hdc in next st] around. (54) — XL: stop here
Checkpoint: Notice the pattern? Each round, the number of plain stitches between increases goes up by one, and every round has exactly 6 increases total. If your stitch count doesn’t match the number listed, stop and recount before continuing. It’s much faster to fix now than to unravel three rounds later.
Lay your work flat every couple of rounds. It should look like a flat circle without cupping (too tight) or ruffling (too loose). A little bit of natural curve is normal since it will eventually become a dome shape, but it shouldn’t look like a bowl or a wavy plate.
3.2 Ear Hole Rounds
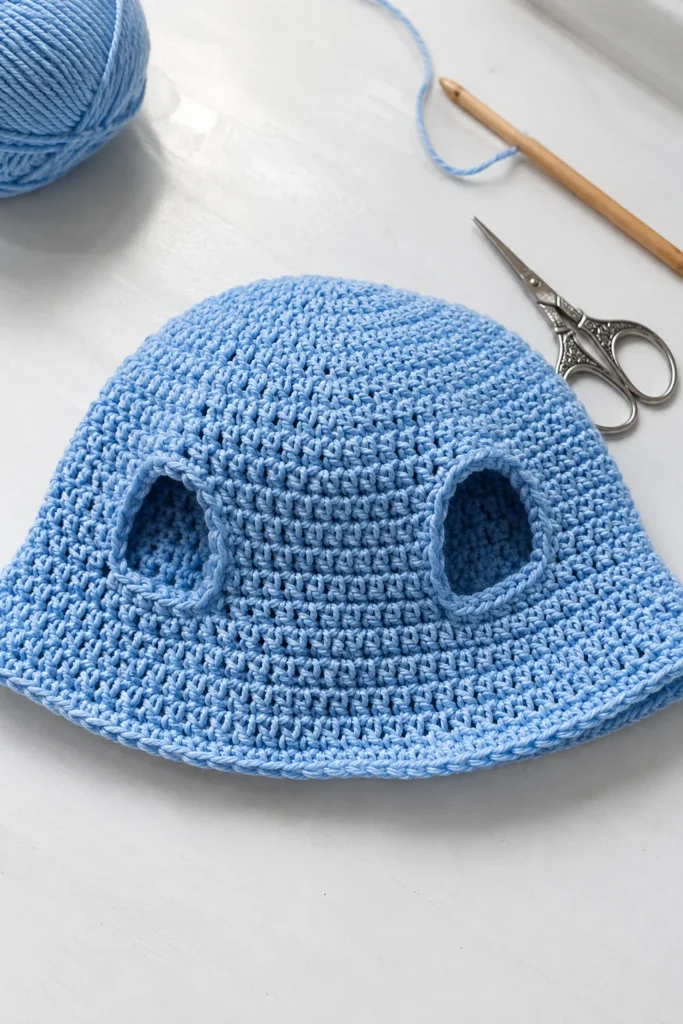
This is the part that lets your dog’s ears poke through comfortably instead of being covered by the hat. It looks tricky on paper, but it’s really just hdc stitches, a chain, and a skip, repeated twice. Numbers below follow the (XS, S, M, L, XL) order.
- Rnd (6, 7, 8, 9, 10): hdc in next (9, 11, 13, 15, 17) sts, ch (7, 8, 9, 10, 11), skip (6, 7, 8, 9, 10) sts, hdc in next (9, 11, 13, 15, 17) sts, ch (7, 8, 9, 10, 11), skip (6, 7, 8, 9, 10) sts. (32, 38, 44, 50, 56)
- Rnd (7, 8, 9, 10, 11): hdc in each stitch and chain space around. Work one hdc into each chain from the previous round, just like you would into a regular stitch. (32, 38, 44, 50, 56)
- Rnd (8, 9, 10, 11, 12): Working in the back loop only, sl st in each stitch around. This creates a soft fold line between the crown and the brim, similar to the seam line on a real bucket hat. (32, 38, 44, 50, 56)
Where do the ear holes land? Because you’re skipping stitches at two points exactly opposite each other in the round, the two openings end up roughly across from one another. That’s what you want. Before moving on, hold the piece up and check that the two gaps line up across the circle, not bunched close together.
A tip for bigger ears: dogs like Beagles, Dachshunds, or Cocker Spaniels have longer ears than the standard sizing accounts for. If that’s your dog, add one or two extra stitches to both the chain and the skip count on the ear hole round. This gives a slightly larger opening without throwing off the rest of the pattern.
Common mistake to avoid: it’s easy to accidentally skip the wrong number of stitches here, especially the first time through. Count twice before you skip. If your total after this round doesn’t match the number listed, the most likely culprit is a miscount on the skip.
3.3 Brim and Finishing Edge
Now you’ll flare the brim outward, just like the brim of a real bucket hat.
- Rnd (9, 10, 11, 12, 13): hdc around, increasing 8 stitches evenly spaced (work 2 hdc into roughly every 4th to 7th stitch, spacing the increases out as evenly as you can by eye). (40, 46, 52, 58, 64)
- Rnd (10, 11, 12, 13, 14): hdc in each stitch around, no increases. This round just adds a little height to the brim so it doesn’t look too shallow. (40, 46, 52, 58, 64)
- Finishing Rnd (11, 12, 13, 14, 15): Working left to right instead of your usual direction (this is called reverse single crochet, or crab stitch), sc in each stitch around. Fasten off and weave in all ends.
About the reverse single crochet edge: this technique feels a little awkward the first few stitches since you’re crocheting “backwards.” Go slowly. The result is a neat, corded-looking edge that holds its shape well and won’t curl. If you’d rather skip it, a regular sc round finishes cleanly too, just with a flatter look instead of the corded texture.
Optional second brim round: for the L and XL sizes especially, you can repeat the plain hdc round (3.3, second bullet) one extra time before the finishing round if you want a deeper brim. This is a matter of personal preference and doesn’t affect the fit.
3.4 Chin Strap Options
A strap keeps the hat from sliding off during walks or windy days. Pick whichever option suits your dog best.
Simple chain strap: Attach yarn at the center of one ear hole. Chain (24, 28, 32, 36, 40), then fasten off. Sew the loose end to the center of the opposite ear hole. Weave in ends.
Adjustable elastic strap: Thread 1/8-inch elastic cord through both ear holes instead of a chain. Finish with a cord lock so you can loosen or tighten it as needed. This option works great for wiggly dogs or dogs who are new to wearing hats.
Two-tie strap: Attach yarn at the center of each ear hole. Chain (12, 14, 16, 18, 20) from each side, then tie the two ends together under your dog’s chin. This version is easy to adjust on the fly and simple to untie in a hurry if needed.
3.5 Pattern at a Glance
Once you’ve made your first hat, this quick-reference table can save you time on future ones:
| Size | Crown Rounds | Total Rounds | Approx. Yardage |
|---|---|---|---|
| XS | 1–5 | 11 | 40 yards |
| S | 1–6 | 12 | 55 yards |
| M | 1–7 | 13 | 70 yards |
| L | 1–8 | 14 | 90 yards |
| XL | 1–9 | 15 | 110 yards |
4. Tips for a Comfortable, Safe Fit
A cute hat is only good if your dog is actually comfortable wearing it.
4.1 Avoiding a Tight Fit
Check that the ear holes sit naturally over your dog’s ears, not pressing down on them. If the hat pulls at the base of the ears, size up or loosen the strap.
Watch your dog’s body language the first time they wear it. Pawing at the hat, head-shaking, or trying to back away are all signs it needs adjusting. Give your dog a chance to sniff and investigate the hat before putting it on, and keep the first few wears short and positive.
4.2 Choosing Dog-Safe Yarn
Stick with natural fibers like cotton whenever possible. They’re breathable and less likely to trap heat, which matters if your dog wears the hat outdoors.
Also think about your dog’s other accessories when picking materials. If your dog already wears a collar or flea prevention gear, it’s worth reviewing how to choose a safe flea collar for your dog so everything they wear, from head to neck, is comfortable and skin-safe.
5. Styling Ideas: 3 Ways to Customize the Hat
Once you’ve mastered the basic pattern, have fun with it.
1) Color-blocking: Switch colors between the crown and brim, like in the reference photo with a solid crown and a contrasting brim color. It’s a simple swap that makes the hat look much more polished, and it’s a great way to use up leftover yarn from other projects.
2) Add a bow or patch: A small crocheted bow or fabric patch sewn onto the side adds personality. This works especially well for gifting, and it’s an easy way to tell two hats apart if you’re making one for each dog in the house.
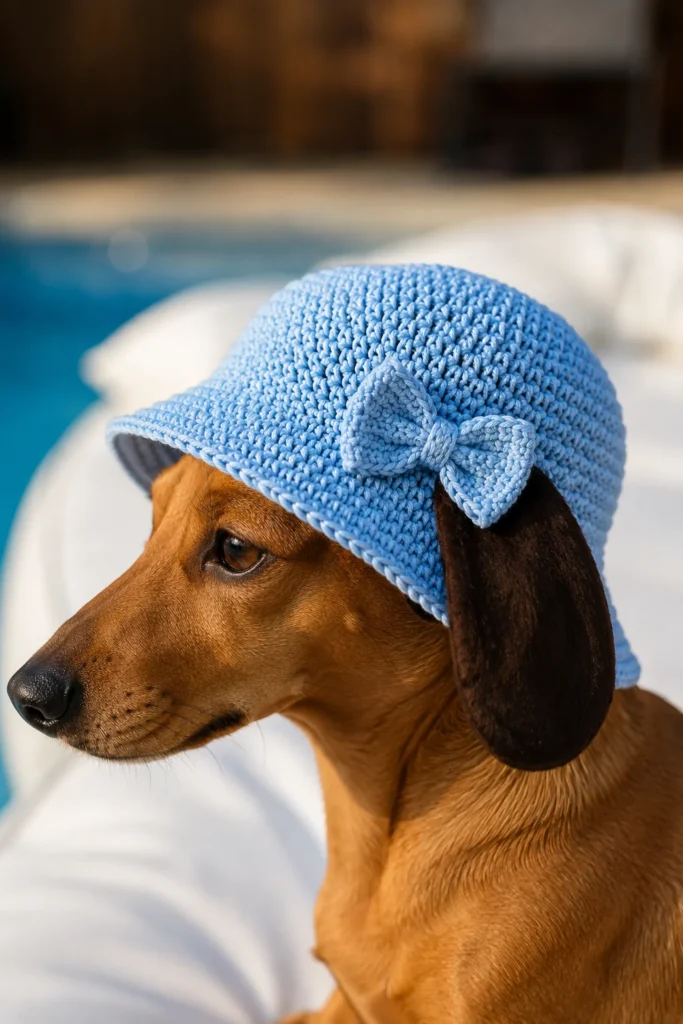
3) Match hats for multi-dog households: If you have more than one dog, make hats in coordinating colors. It’s a fun way to dress the whole pack for photos or holidays, without making the hats identical.
Speaking of gifting, a handmade hat also makes a sweet addition to a trendy dog Christmas gift lineup if you’re planning ahead for the holidays.
6. When and Where Your Dog Can Wear Their New Hat
A crocheted bucket hat isn’t just for looks. It can genuinely help on sunny walks by shading your dog’s eyes and the top of their head.
It’s also a fun addition to beach days, pool trips, or outdoor patio hangouts. Just don’t leave it on for extended periods in very hot weather, since any hat, even a breathable cotton one, can trap some heat.
If you’re the kind of pet parent who likes to plan ahead, this hat is a great addition to your dog’s travel wardrobe. Check out these travel essentials to pack for your dog next time you’re heading out of town together.
7. Frequently Asked Questions
8. Final Thoughts
This dog bucket hat free crochet pattern is proof that a simple project can make a big impact. With just a few balls of cotton yarn and an evening or two, you’ll have a hat your dog can wear for walks, photos, or lazy afternoons by the pool.
Take your time with the first size you try. Once you get a feel for the stitch counts and ear hole placement, the rest of the sizes come together quickly, and you’ll likely find yourself making one in every color. And if your dog ends up loving accessories as much as this hat, there’s plenty more inspiration on dog accessories to explore next.
Grab your hook, pick your favorite color, and get started. Your dog’s new favorite hat is just a few rounds away.

Izzy is an experienced ranch worker who has a passion for exploring nature and getting up close to wildlife. With her connections to various animal organizations, Izzy is well-versed in animal care and rehabilitation.


