20 DIY Dog Bandana Ideas With Easy No-Sew and Sewing Patterns
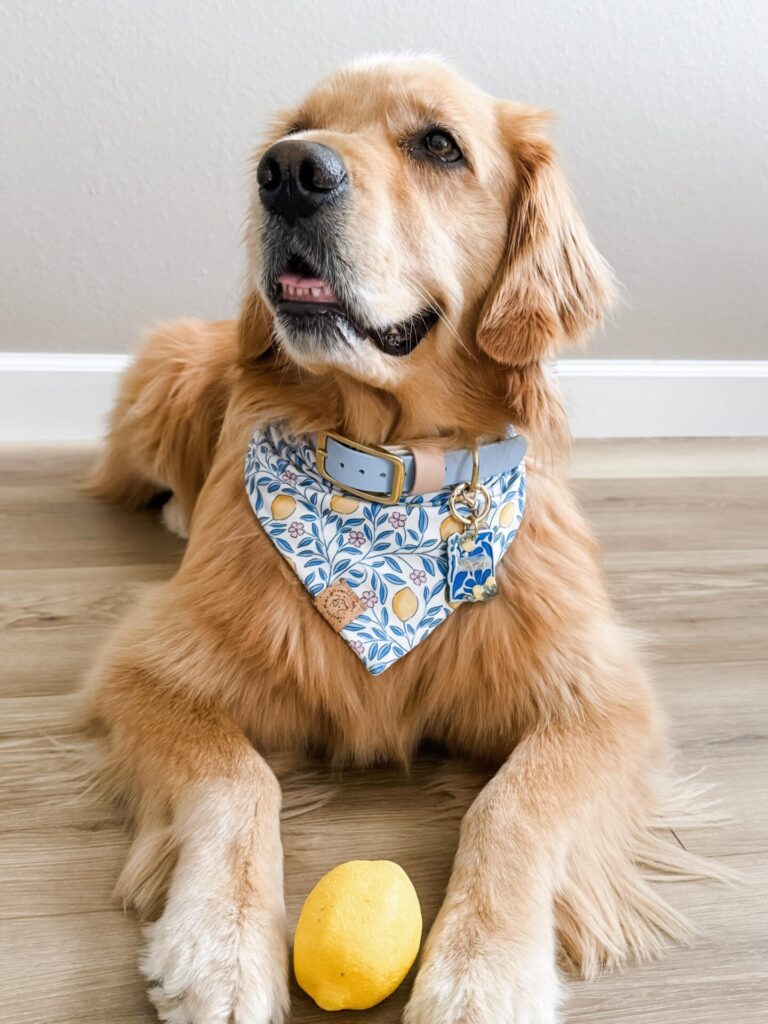
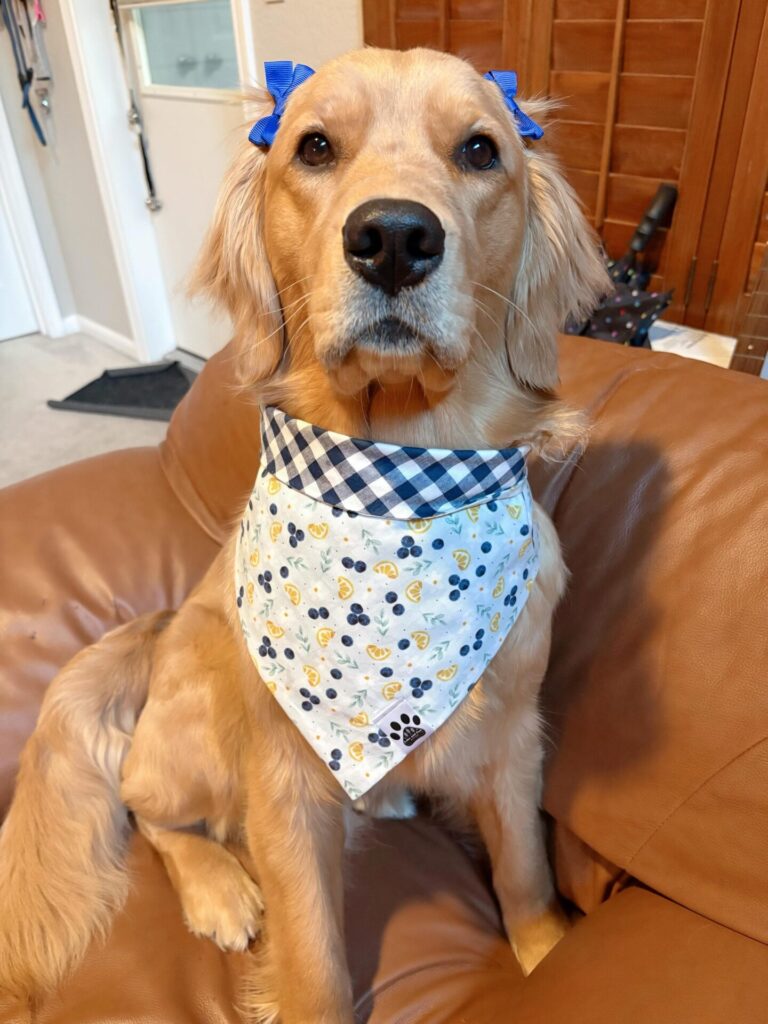
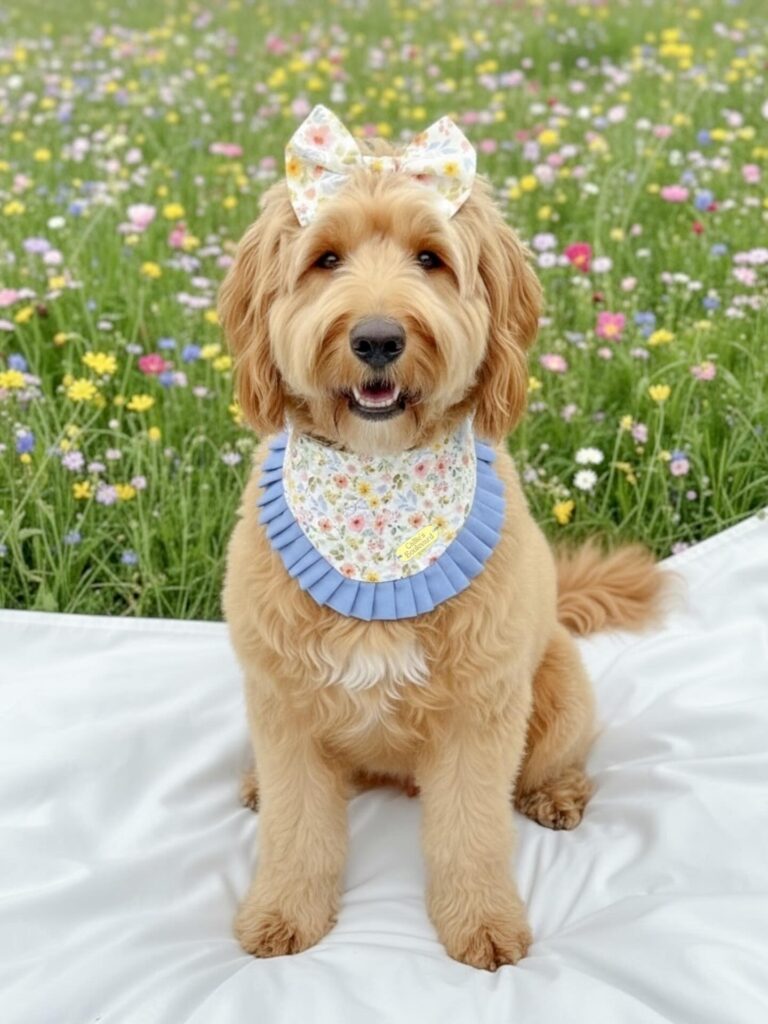
If you’ve ever scrolled through dog accounts and stopped to stare at a pup wearing the cutest little bandana, you already know how much personality a small piece of fabric can add. A bandana can turn an everyday walk into a tiny fashion moment, mark a holiday, celebrate a birthday, or simply make your dog look as snuggly as they already feel.
The good news? You don’t need to be a professional seamstress or a crochet expert to make one. With a basic understanding of fabric, a few simple tools, and a little patience, you can create dozens of styles right at home. This list of DIY dog bandana ideas covers everything from beginner-friendly sewing projects to no-sew and crochet options, personalized designs, and matching accessory sets.
Each idea below includes a simple materials list, step-by-step instructions, and a quick tip to help you get it right the first time. Whether you’re a total beginner or you’ve made a few bandanas before, there’s something here for every skill level. Let’s get into it.
Contents
- Why DIY Dog Bandana Ideas Are Worth Trying
- 1. Easy Sewing Patterns for DIY Dog Bandanas
- 2. No-Sew and Crochet Dog Bandana Ideas
- 3. Personalized and Lettered Bandana Ideas
- 4. Themed and Novelty Bandana Ideas
- 5. Matching Sets and Statement Styles
- How to Choose the Right Fabric and Size for Any Pattern
- Final Thoughts
Why DIY Dog Bandana Ideas Are Worth Trying
Making your own bandana isn’t just about saving money, though that’s a nice bonus. It also lets you control the fit, the fabric, and the exact look you want.
Store-bought bandanas are often a “one size fits most” situation, which usually means they’re too big or too small for smaller and larger breeds. When you make your own, you measure your dog’s actual neck size and adjust the pattern accordingly.
DIY also opens the door to personalization. You can embroider your dog’s name, match a holiday theme, or coordinate the bandana with their collar and leash. If you’re already curious about other ways to dress up your pup’s everyday gear, this guide on dog accessories tips is a good next stop after you finish this one.
Now, let’s look at the techniques. We’ll start with classic sewing patterns, move into no-sew and crochet methods, then cover personalization, themed designs, and matching sets.
1. Easy Sewing Patterns for DIY Dog Bandanas
If you have a sewing machine (or even just a needle and thread), this section is for you. These are the most common DIY dog bandana patterns, and they’re a great starting point if you’ve never made one before.
1.1 Classic Triangle Tie-On Bandana
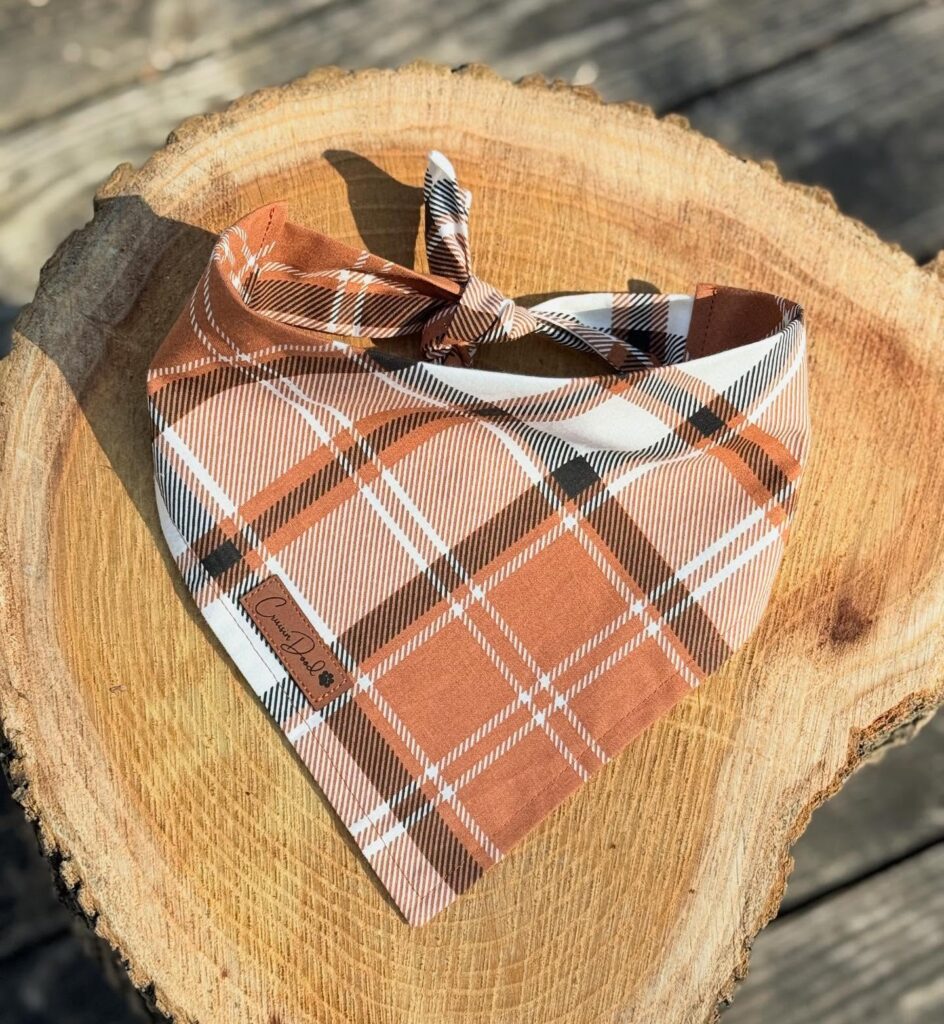
This is the bandana style most people picture first. It’s a simple triangle of fabric that ties at the back of the dog’s neck, similar to a small kerchief.
It’s beginner-friendly, requires very little fabric, and works with almost any cotton print, from plaid to solid colors.
What You’ll Need:
- ½ yard of cotton or flannel fabric
- Matching thread
- Scissors or a rotary cutter
- Sewing machine or needle
- Iron (for pressing seams)
How to Make It:
- Cut a square of fabric, then cut it diagonally to form two triangles (you’ll only need one).
- Fold the long edge over by about ¼ inch and press it flat with an iron.
- Sew along the folded edge to create a clean hem all the way around the triangle.
- Cut two long fabric strips (or use ribbon) and stitch one to each top corner of the triangle to form ties.
- Try it on your dog and trim the ties to the right length.
Pro Tip: Flannel works especially well for fall and winter bandanas because it doesn’t fray as easily as thinner cotton.
📸 Photo credit: Instagram @cruisin_dood_boutique
1.2 No-Tie Slip-On Bandana
If your dog hates the feeling of knots near their neck, this slip-on style is the better option. Instead of tying, it slides directly over your dog’s existing collar.
This style usually has a small folded “sleeve” at the top where the collar threads through, so the bandana stays in place without any extra knots.
What You’ll Need:
- ½ yard of cotton fabric
- Matching thread
- Sewing machine
- Fabric scissors
- A ruler or fabric marker
How to Make It:
- Cut a triangle the size you want the finished bandana to be.
- Fold over the top straight edge by about 1.5 inches to create a sleeve, and pin it down.
- Sew along the bottom edge of the folded sleeve, leaving the sides open so the collar can pass through.
- Hem the remaining edges of the triangle so they don’t fray.
- Slide your dog’s regular collar through the sleeve before clipping it back on.
Pro Tip: Make the sleeve slightly wider than your dog’s collar so it’s easy to slide on and off without forcing the fabric.
📸 Photo credit: Instagram @barks_by_harps
1.3 Reversible Two-Fabric Bandana
Why settle for one print when you can have two? A reversible bandana uses two different fabrics sewn together, so you can flip it for a totally different look without making a second bandana.
This is a great option if you want a bandana that works for two seasons, like a floral print on one side and a plaid on the other.
What You’ll Need:
- Two coordinating cotton fabrics (¼ yard each)
- Matching thread
- Sewing machine
- Pins
- Scissors
How to Make It:
- Cut two identical triangles, one from each fabric.
- Place the fabrics right sides together and pin around the edges.
- Sew around the edges, leaving a small gap (about 2 inches) unsewn for turning.
- Turn the bandana right side out through the gap, then press flat.
- Topstitch close to the edge all the way around to close the gap and give it a finished look.
Pro Tip: Choose two fabrics with a similar weight and stretch so the bandana lies flat instead of puckering.
📸 Photo credit: Instagram @winniethegoldie30
1.4 Ruffled Trim Bandana
A ruffle around the edge instantly makes a bandana look more “boutique” than basic. It’s a small touch that adds a lot of charm, especially for special occasions or photos.
This style works well for girl dogs or any pup whose owner wants something a bit fancier than a plain triangle.
What You’ll Need:
- Main fabric (¼ yard)
- Contrasting fabric strip for the ruffle (long strip, about 2–3 inches wide)
- Thread
- Sewing machine
- Pins
How to Make It:
- Cut and hem your main triangle as you would for a classic bandana.
- Fold the ruffle strip in half lengthwise and press.
- Run a gathering stitch along the raw edge of the strip, then gently pull the thread to create ruffles.
- Pin the ruffled strip along the bottom curved or straight edge of the triangle.
- Sew the ruffle in place, then add ties or a sleeve at the top.
Pro Tip: Use a contrasting color for the ruffle so it stands out clearly against the main fabric.
📸 Photo credit: Instagram @calliesboulevard
1.5 Faux Shirt-Collar Bandana
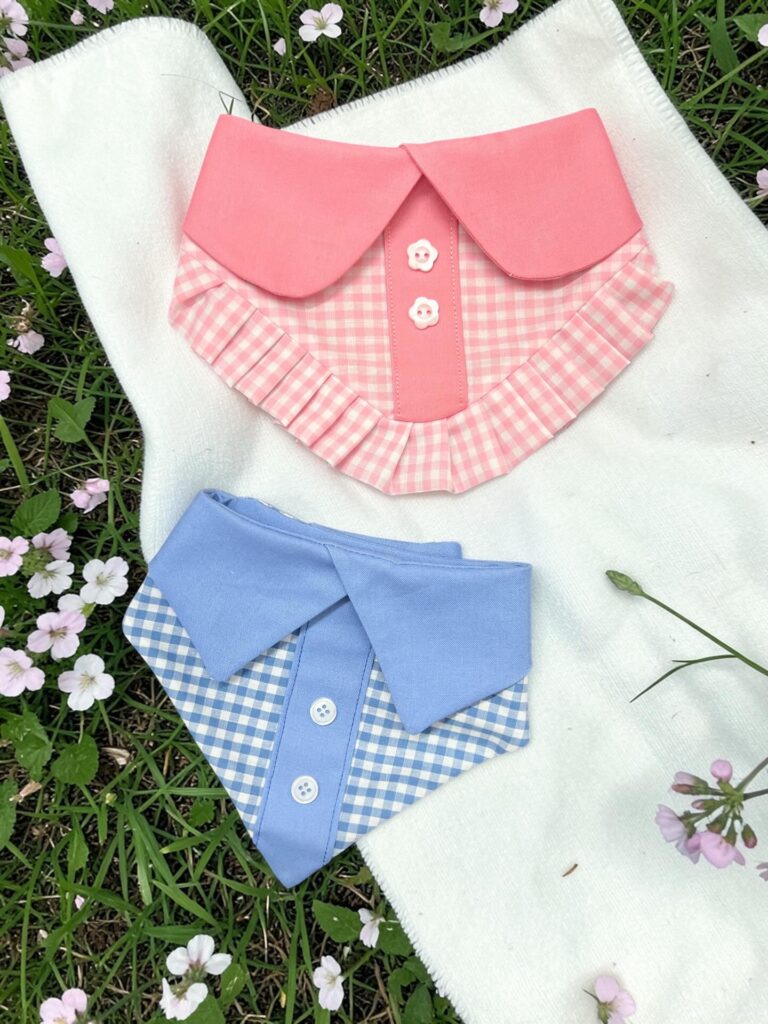
This is one of the more clever DIY dog bandana patterns out there. Instead of a simple triangle, the fabric is folded and stitched to look like a tiny collared shirt, complete with a folded collar and faux buttons down the front.
It’s a fun project if you want your dog to look dressed up without an actual shirt.
What You’ll Need:
- Two coordinating fabrics (solid for the collar, gingham or check for the body)
- Small decorative buttons
- Thread
- Sewing machine
- Fabric glue (optional, for buttons)
How to Make It:
- Cut a triangle base from your check or gingham fabric.
- Cut two small curved pieces from the solid fabric to act as the “collar” points.
- Fold and sew the collar points onto the top corners of the triangle so they overlap slightly in the middle, like a real shirt collar.
- Sew a narrow strip of solid fabric down the center to mimic a button placket.
- Hand-sew or glue small buttons onto the placket for the finishing touch.
Pro Tip: Use buttons with a flat back or sew-through holes so they don’t catch on fur.
📸 Photo credit: Instagram @calliesboulevard
If you’d rather skip sewing altogether, the next section is exactly what you need.
2. No-Sew and Crochet Dog Bandana Ideas
Not everyone owns a sewing machine, and that’s perfectly fine. This section covers dog bandana DIY no sew options, along with crochet patterns for anyone who prefers yarn and a hook over fabric and thread.
2.1 No-Sew Ribbed Crochet Bandana
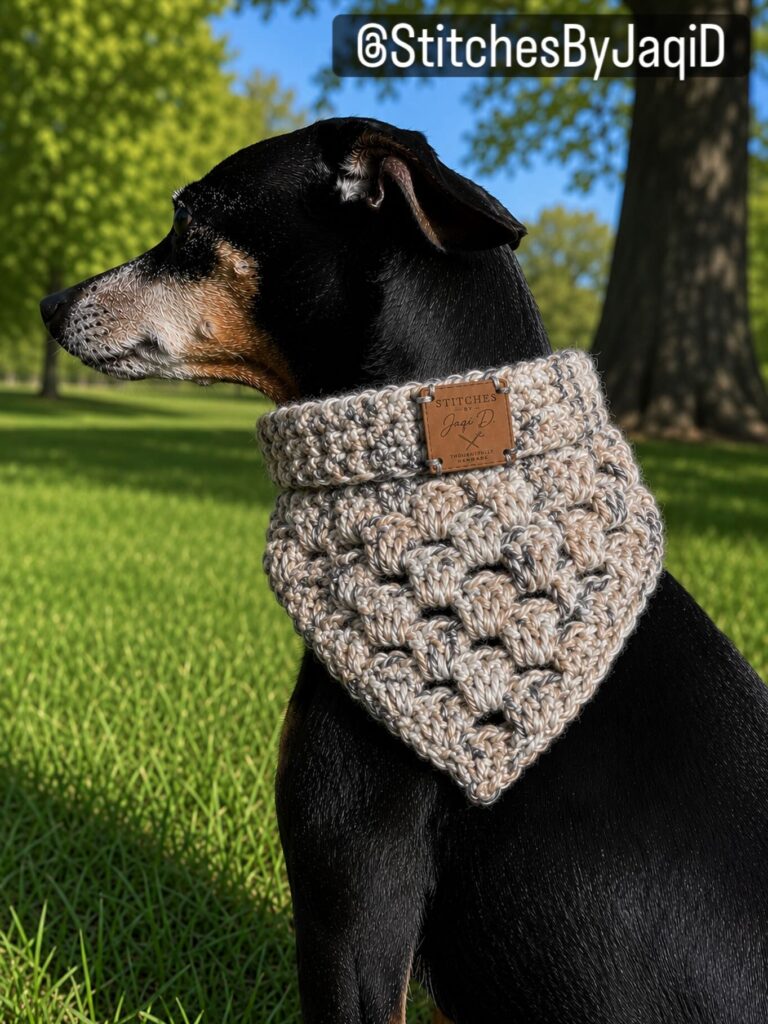
This bandana skips fabric entirely and uses simple crochet stitches to build a thick, ribbed triangle that folds neatly around the neck.
It’s a cozy option for cooler months, and once you know basic single and double crochet stitches, it comes together quickly.
What You’ll Need:
- Worsted weight yarn (one or two colors)
- Crochet hook (size H or I works well)
- Yarn needle
- Scissors
- Optional: small fabric label for a personalized tag
How to Make It:
- Chain enough stitches to match the width you want at the top of the bandana.
- Work rows of single or double crochet, decreasing one stitch at each end of every row.
- Continue decreasing until the rows taper into a point, forming the triangle shape.
- Add a row of single crochet around the entire outer edge for a clean finish.
- Weave in all loose ends with a yarn needle.
Pro Tip: Use a stitch marker on your first row so you always know which side is the top when you start decreasing.
📸 Photo credit: Instagram @stitchesbyjaqid
2.2 Crochet Granny-Square Floral Bandana
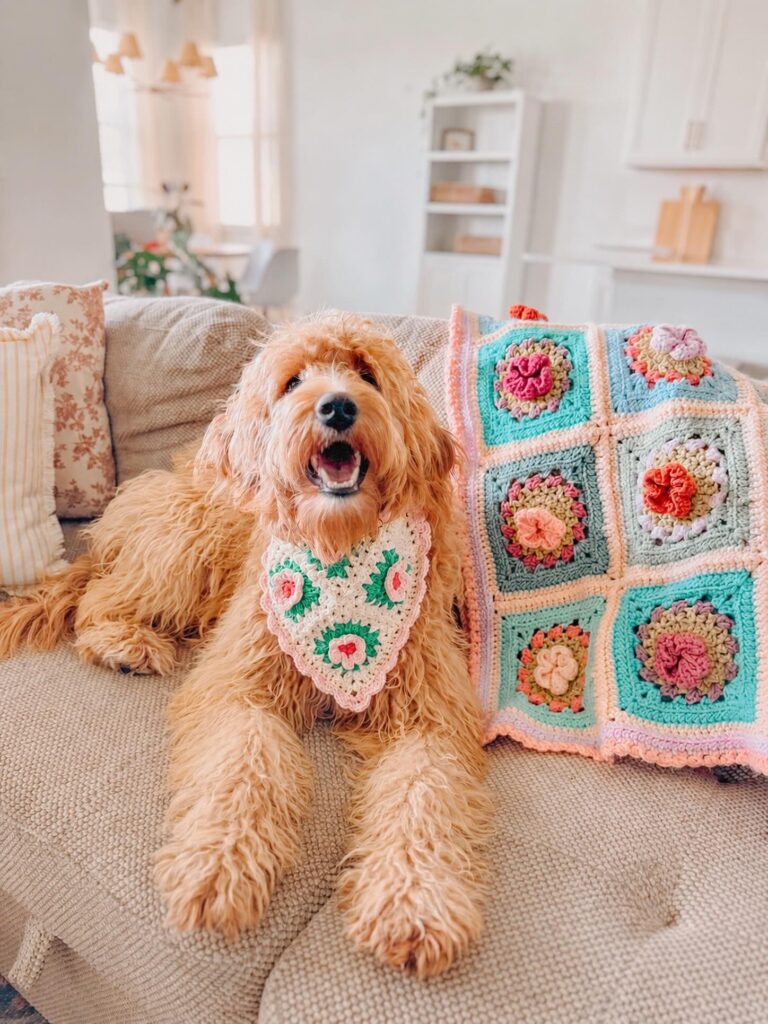
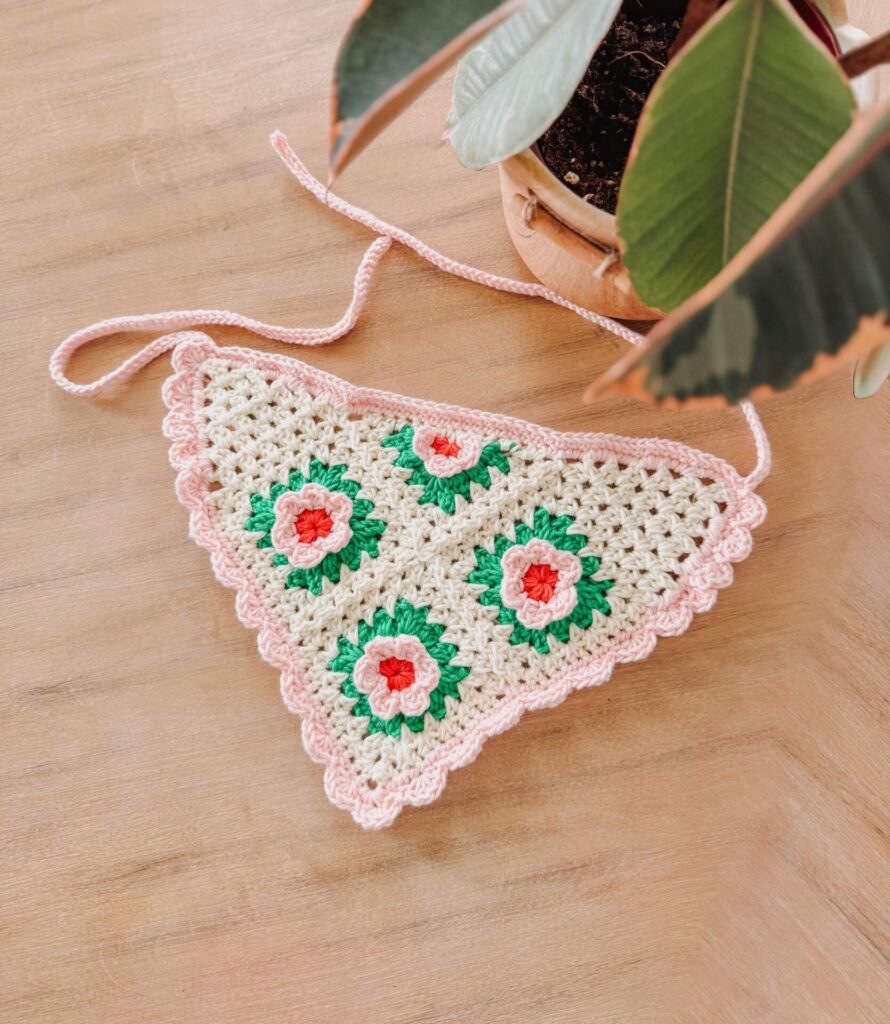
If you love a vintage, cottagecore look, this one is worth the extra effort. It combines a granny-stitch triangle base with small crocheted flower motifs attached on top, finished with a scalloped picot edge.
It looks intricate, but it’s really just basic granny squares and simple flower appliqués sewn onto the base.
What You’ll Need:
- Cotton yarn in cream, pink, green, and red (or your preferred palette)
- Crochet hook (size suited to your yarn weight)
- Yarn needle
- Stitch markers
How to Make It:
- Crochet a granny-stitch triangle using your main color as the base.
- Separately, crochet 3–4 small flower motifs using contrasting colors (a simple 2-round flower works fine).
- Sew the flowers onto the triangle base using a yarn needle, spacing them evenly.
- Add a scalloped or picot border stitch around the edges of the triangle for a delicate finish.
- Crochet a long chain for the tie and attach it to the top corners.
Pro Tip: Cotton yarn holds its shape better than acrylic for this style and feels softer against your dog’s neck.
📸 Photo credit: Instagram @threadsinbloomco
2.3 Crochet Granny-Stripe Colorblock Bandana
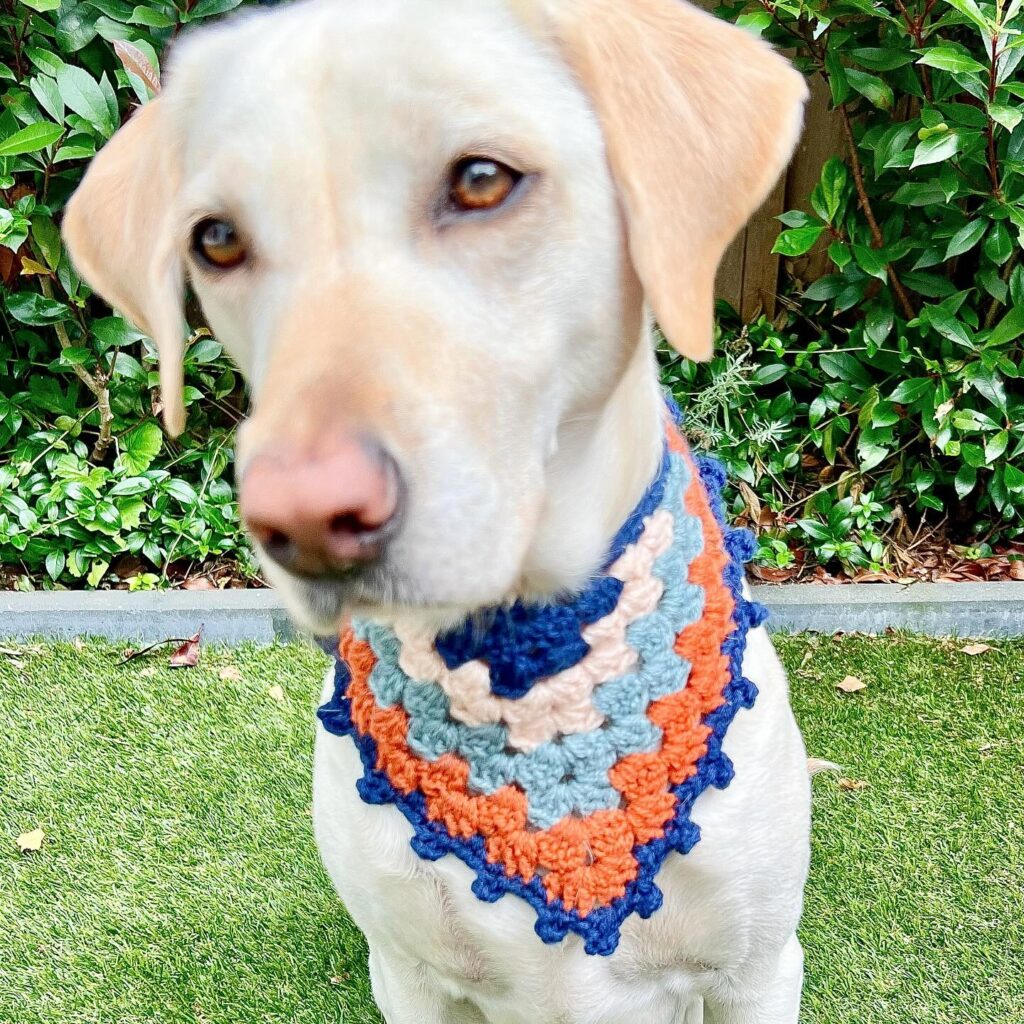
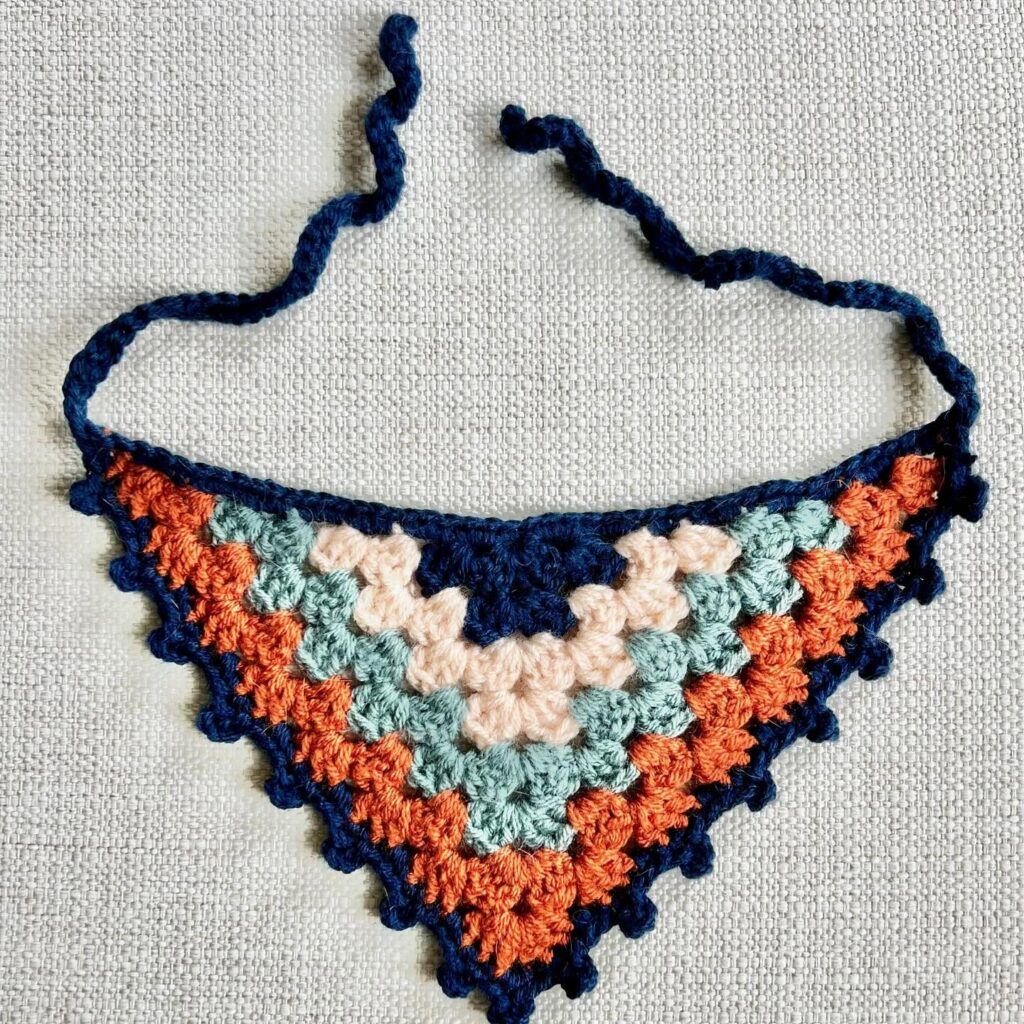
This version takes the granny-stitch technique in a bolder direction. Instead of florals, you work in corner-to-corner color stripes, almost like a mini striped shawl, finished with a contrasting picot trim.
It’s a great way to use up leftover yarn from other projects since each stripe only needs a small amount.
What You’ll Need:
- 3–4 colors of worsted weight yarn
- Crochet hook
- Yarn needle
- Scissors
How to Make It:
- Start at the center top point and work a basic granny triangle, switching colors every one or two rows.
- Keep your color order consistent (for example: cream, sage, orange, navy) so the stripes repeat cleanly.
- Continue adding rows until the triangle reaches your desired size.
- Finish with one or two rows in your darkest color for contrast, then add a picot edge.
- Crochet two ties and attach them to the top corners, matching your final stripe color.
Pro Tip: Lay out your color order on paper before you start so you don’t lose track of the stripe sequence halfway through.
📸 Photo credit: Instagram @cathedralsandcafes
These crochet and no-sew methods are perfect if you’re working with limited tools, but they also open the door to something else: personalization. Let’s look at that next.
3. Personalized and Lettered Bandana Ideas
A name, a slogan, or a custom graphic instantly makes a bandana feel one-of-a-kind. This section covers different ways to add text and imagery using tools most crafters already have or can easily find.
3.1 Embroidered Text or Graphic Bandana
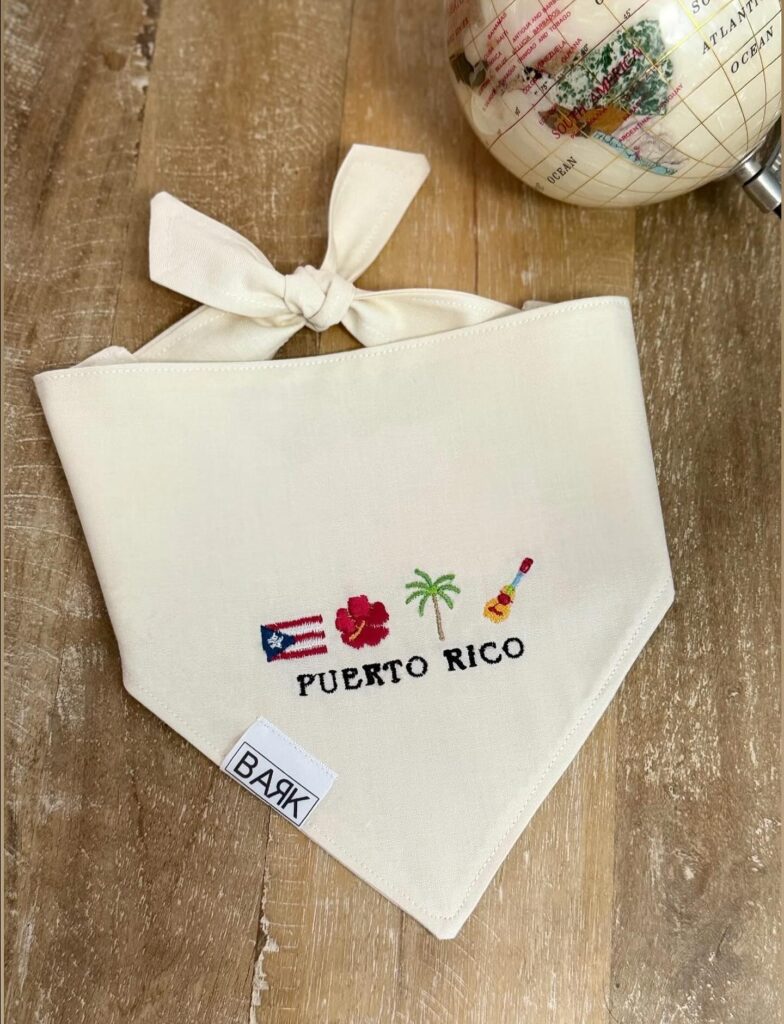
Embroidery adds a polished, almost professional look to a simple bandana. You can stitch your dog’s name, a small icon, or even a tiny scene, like a flag and palm tree for a travel-themed design.
This works on a plain canvas or cotton bandana and can be done by hand or with an embroidery machine if you have one.
What You’ll Need:
- Plain cotton or canvas fabric
- Embroidery floss or machine thread
- Embroidery hoop
- Embroidery needle
- Water-soluble fabric marker (to sketch your design first)
How to Make It:
- Cut and hem your bandana shape as you normally would.
- Sketch your design lightly on the fabric using a water-soluble marker.
- Stitch over your design using a simple backstitch or satin stitch for filled areas.
- Rinse out any visible marker lines once the embroidery is complete.
- Let the fabric dry fully before sewing on ties.
Pro Tip: Keep your design simple. Small icons and short words embroider much more cleanly than detailed images.
📸 Photo credit: Instagram @bark_bandanas_pr
3.2 Printed Line-Art Illustration Bandana
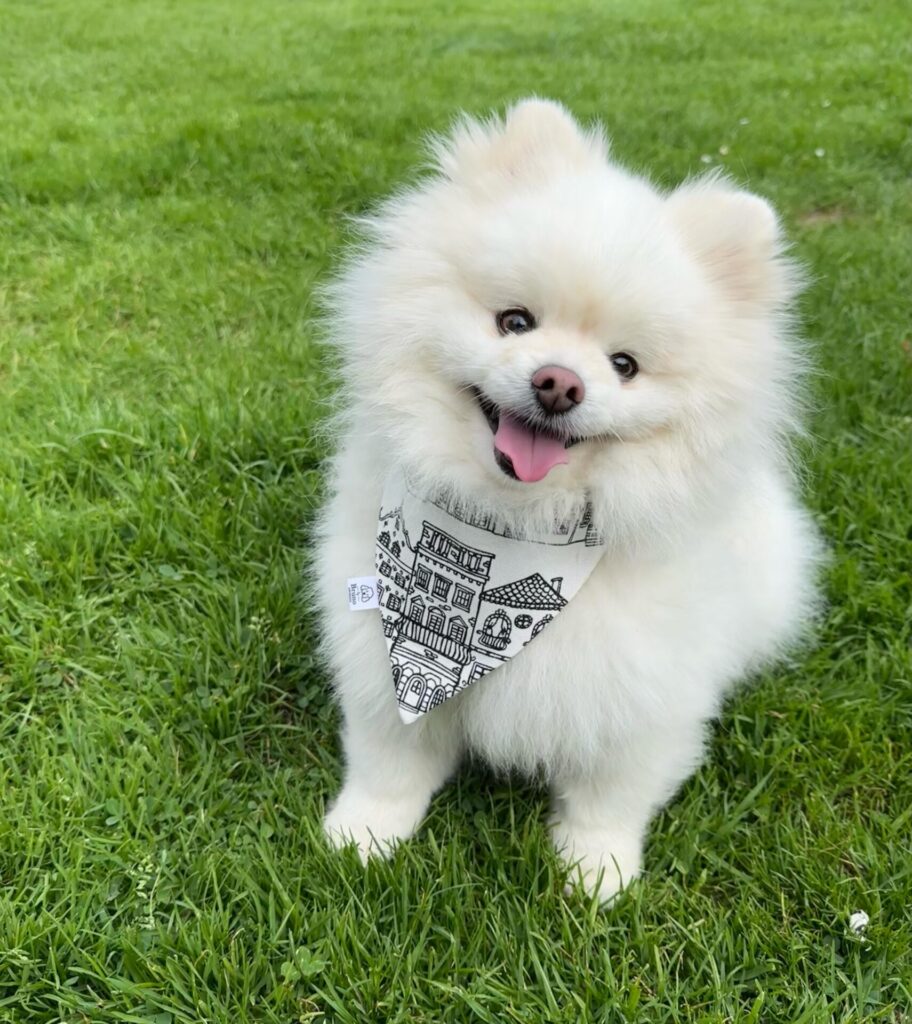
If embroidery feels too time-consuming, printed fabric is a great shortcut. You can use fabric transfer paper and a home printer to add detailed line-art illustrations, like a row of tiny buildings or houses, directly onto plain fabric.
This method works especially well for intricate designs that would be hard to embroider by hand.
What You’ll Need:
- Plain light-colored cotton fabric
- Fabric transfer paper (inkjet-compatible)
- Home printer
- Iron
- Scissors
How to Make It:
- Find or design your line-art image and print it onto transfer paper, following the product’s instructions.
- Cut around your design, leaving a small fabric border.
- Iron the transfer onto your fabric following the manufacturer’s heat and time settings.
- Peel away the backing once it has cooled.
- Cut and hem the fabric into your bandana shape.
Pro Tip: Always test your transfer paper on a fabric scrap first, since heat settings vary between brands.
📸 Photo credit: Instagram @lego_the_pom
3.3 Sewn-In Label Patch Bandana
Sometimes the simplest personalization is the most effective. A small woven or printed label sewn onto the corner of a plain gingham bandana can carry a slogan, a business name, or a meaningful phrase.
This is a popular choice for rescue organizations and small dog boutiques because it adds a branded touch without overwhelming the design.
What You’ll Need:
- Cotton fabric in your chosen pattern
- A pre-made woven label or printable fabric label
- Thread
- Sewing machine or needle
How to Make It:
- Cut and hem your bandana base as usual.
- Fold the raw edges of your label under slightly if it isn’t pre-finished.
- Pin the label onto one corner of the bandana, near the bottom point.
- Stitch around all four edges of the label to secure it firmly.
- Press the finished bandana flat.
Pro Tip: Position the label where it will be visible in photos, usually the bottom point or just below the tie.
📸 Photo credit: Instagram @the_doodle_therapist_
3.4 Sports Jersey Name and Number Bandana
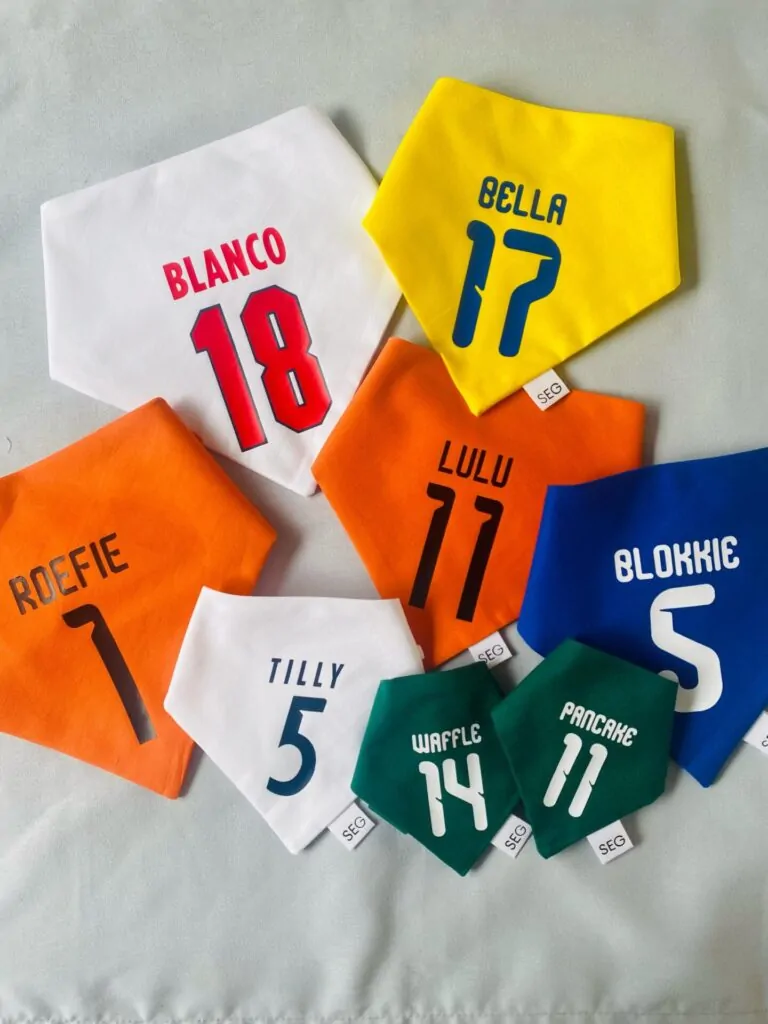
This idea borrows directly from real sports jerseys. A bold solid-color bandana gets a printed name and number on the back, just like a tiny player jersey.
It’s an especially fun project during major sporting events, or as a personalized gift using your dog’s name and a “lucky number.”
What You’ll Need:
- Solid-color cotton fabric (team colors work great)
- Heat transfer vinyl (HTV) or fabric paint
- Cutting machine (optional, for vinyl) or stencils
- Iron (if using HTV)
- Scissors
How to Make It:
- Cut and hem your bandana triangle in your chosen solid color.
- Design your text and number layout on your cutting software, or trace stencils onto the fabric.
- Cut your vinyl letters and numbers, then weed away the excess material.
- Position the design on the bandana and iron it on following the vinyl’s heat settings.
- Let it cool fully before handling.
Pro Tip: Keep the number large and the name short for the best “jersey” effect, just like real sports uniforms.
📸 Photo credit: Instagram @colourfulpup
Personalized touches are great for everyday wear, but sometimes you want something built specifically around a theme. That’s where the next set of ideas comes in.
4. Themed and Novelty Bandana Ideas
These designs are built around a specific occasion, character, or aesthetic. They’re perfect for holidays, costumes, or just adding some seasonal fun to your dog’s wardrobe. If you’re already planning ahead for the holidays, this list of trendy dog Christmas gifts pairs nicely with a themed bandana project.
4.1 Character or Costume Bandana
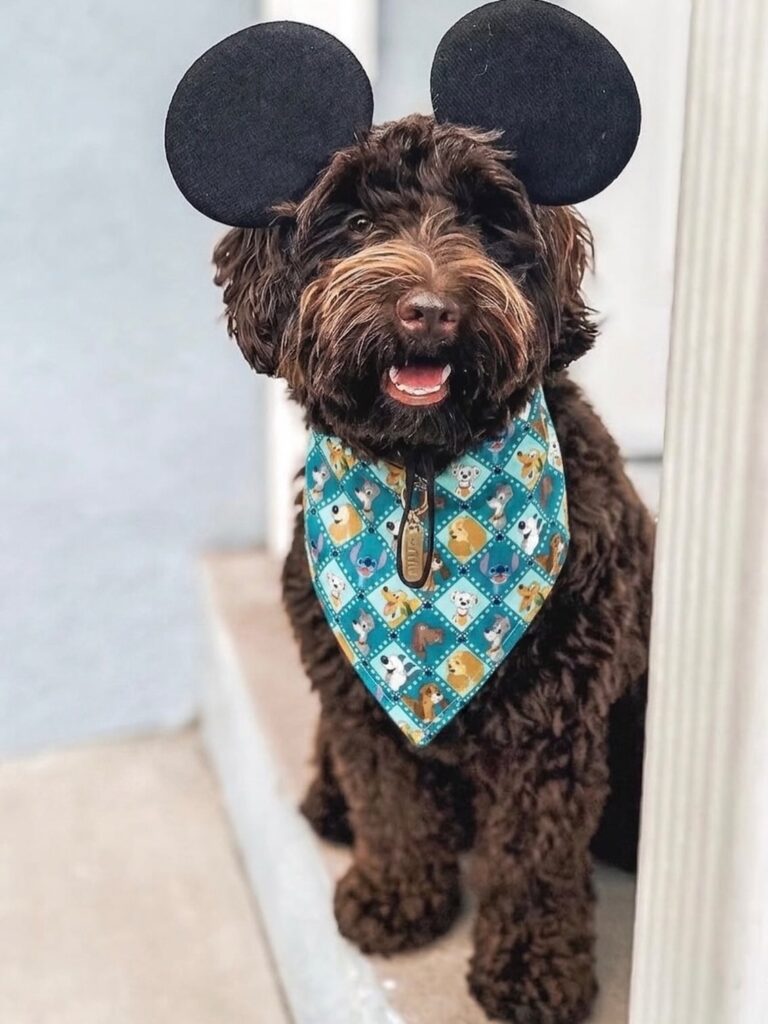
This style combines a printed character fabric with a small costume accessory, like a set of fabric ears attached to a headband, for an instant costume look without a full outfit.
It’s an easy way to dress up your dog for a themed event without committing to a bulky costume.
What You’ll Need:
- Character-print or licensed-style fabric (or a plain fabric with iron-on character patches)
- A plastic or wire headband
- Black or dark felt for ears
- Hot glue gun
- Thread and scissors
How to Make It:
- Cut and hem your bandana from the printed fabric.
- Cut two ear shapes from felt for the headband.
- Hot glue the felt ears onto the headband, spacing them evenly.
- Fit the headband over your dog’s head and adjust as needed for comfort.
- Pair the headband with the matching bandana for photos.
Pro Tip: Only use the headband for short photo sessions. Most dogs aren’t comfortable wearing one for extended periods.
📸 Photo credit: Instagram @threadsbydewett
4.2 Novelty Animal-Print Bandana
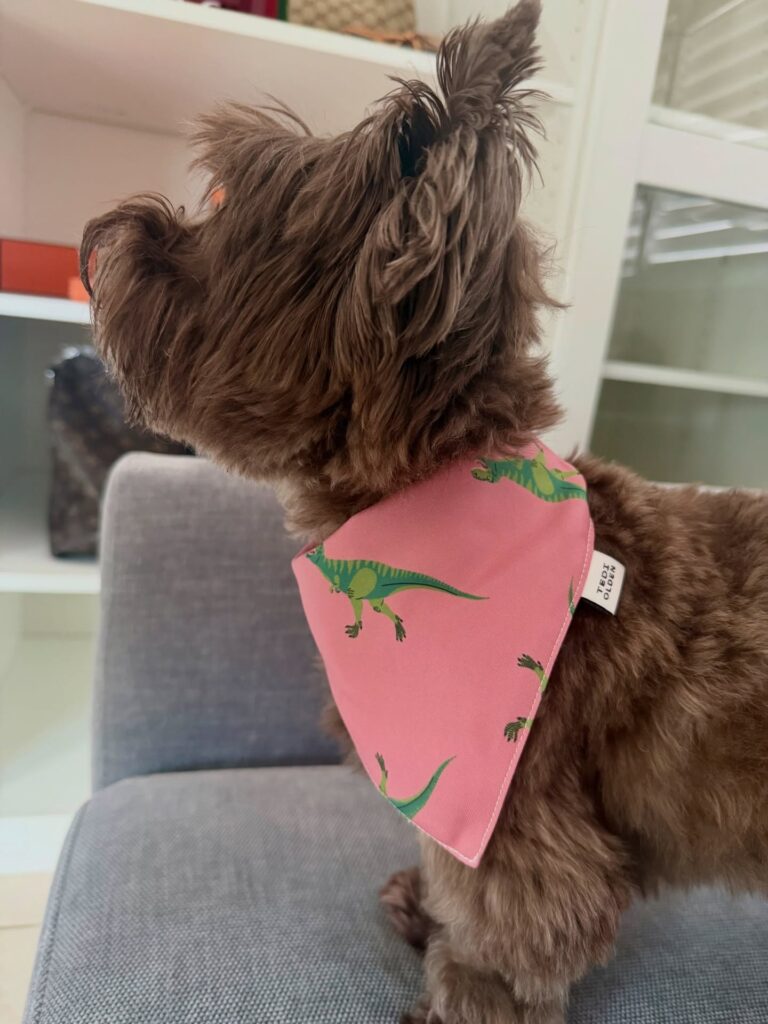
Sometimes the simplest idea is the most fun. A bold novelty print, like dinosaurs, sharks, or other playful animals, instantly gives a bandana personality without any extra embellishment.
This is a great beginner project since the fabric itself does most of the visual work.
What You’ll Need:
- Novelty-print cotton fabric
- Matching thread
- Sewing machine
- Scissors
- A small fabric label (optional)
How to Make It:
- Cut your triangle from the novelty fabric, centering the print so the main image is visible.
- Hem all edges to prevent fraying.
- Add ties or a slip-on sleeve, depending on your preferred closure style.
- Sew on a small brand or name label if desired.
- Press the finished bandana flat before use.
Pro Tip: Bright background colors like pink or yellow make the printed design pop more than neutral backgrounds.
📸 Photo credit: Instagram @tediolden
4.3 Retro Travel and Country Text Bandana
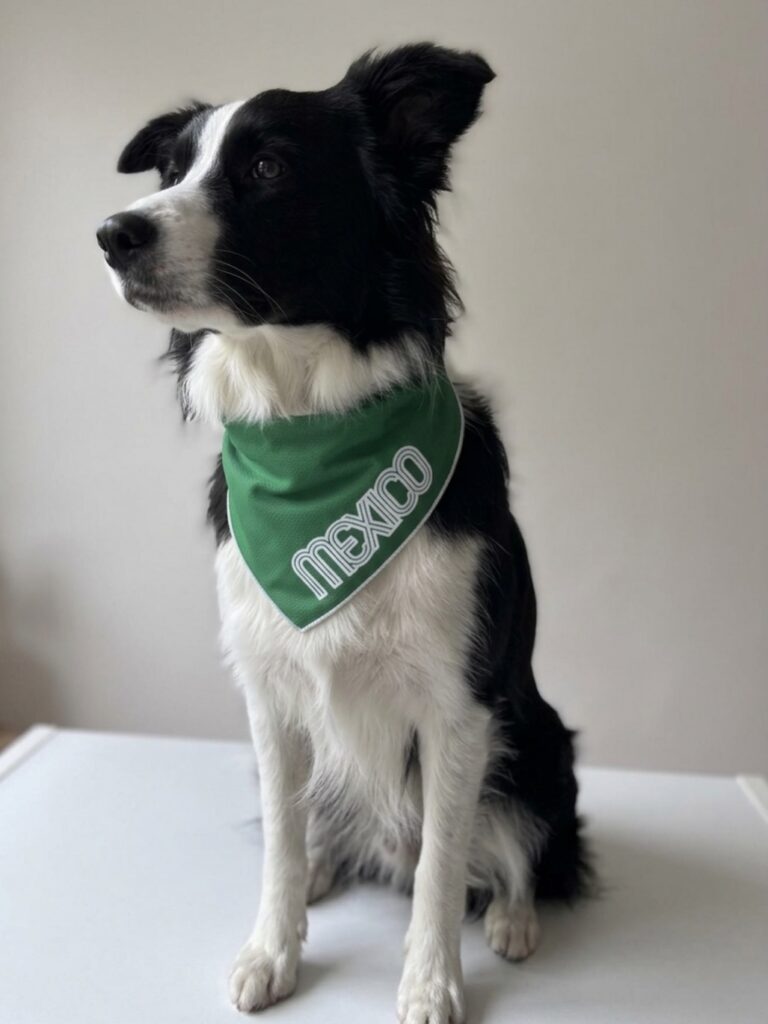
This style uses bold, retro-style lettering to spell out a place name, like a country or city, often paired with a simple piped edge for a clean, modern finish.
It’s a fun idea for dogs who travel a lot, or simply as a nod to a favorite destination.
What You’ll Need:
- Solid-color cotton fabric
- Contrasting piping or bias tape
- Heat transfer vinyl or fabric paint for lettering
- Sewing machine
- Iron
How to Make It:
- Cut your triangle and pin contrasting piping along all the raw edges before sewing.
- Sew the piping in place, then hem to secure it fully.
- Design your text in a bold retro font using cutting software or a stencil.
- Apply the lettering using vinyl or fabric paint, centered on the bandana.
- Add a slip-on sleeve or ties at the top.
Pro Tip: Outlined block letters tend to read more clearly from a distance than thin script fonts.
📸 Photo credit: Instagram @meksidogs
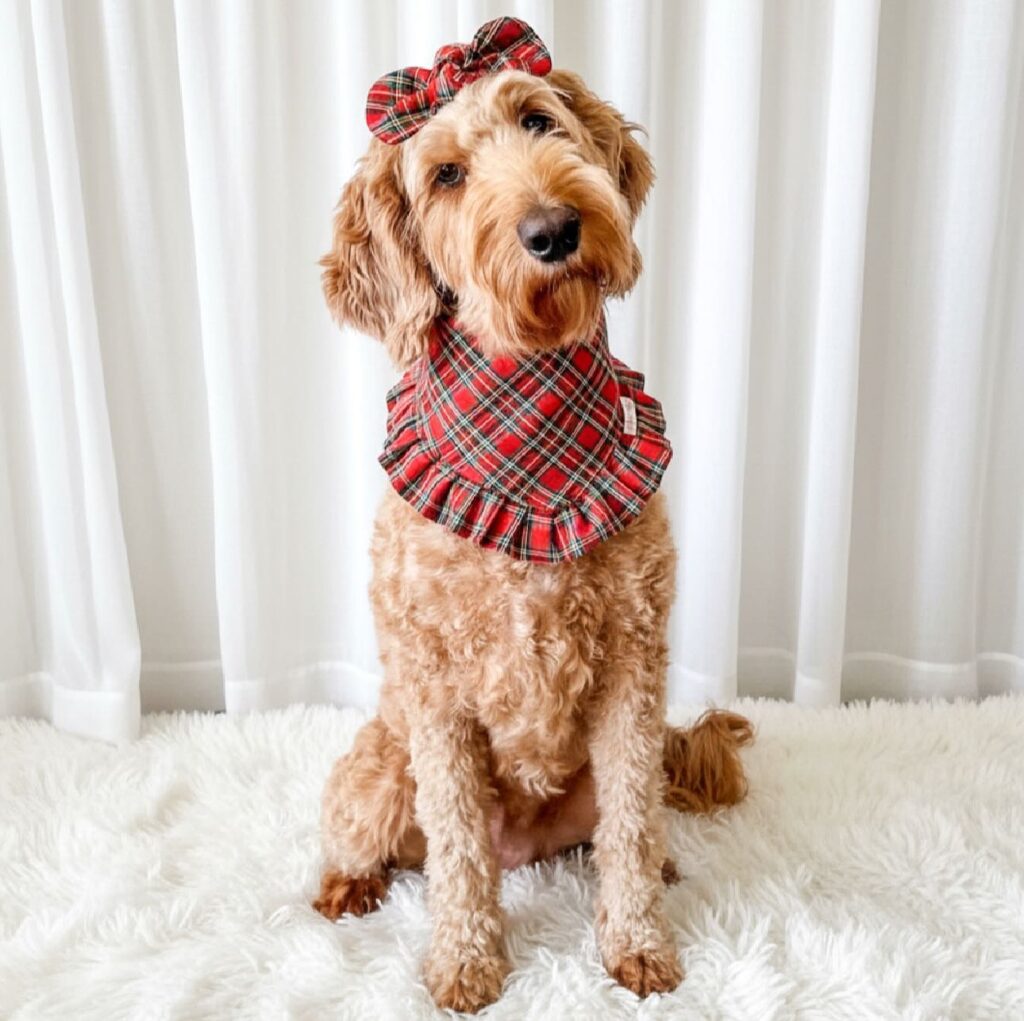
4.4 Designer-Inspired Plaid Bandana
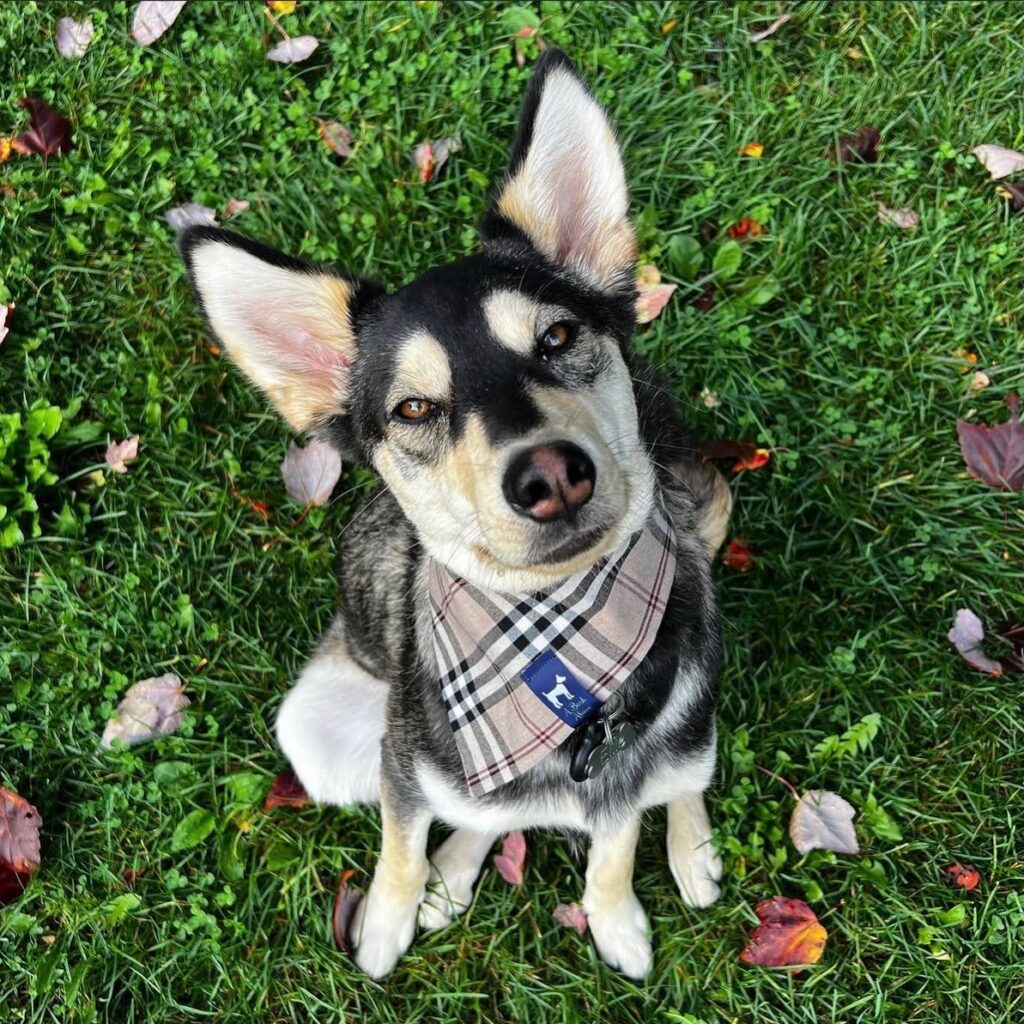
A classic plaid pattern, especially one inspired by recognizable designer check patterns, gives off an instant “luxury pet” look. This style is simple to make but reads as polished and put-together.
What You’ll Need:
- Plaid cotton fabric
- Matching thread
- Sewing machine
- Scissors
- A small fabric or brand label
How to Make It:
- Cut your triangle from the plaid fabric, lining up the pattern so it looks intentional rather than random.
- Hem all edges carefully, since plaid lines make uneven stitching more noticeable.
- Sew on ties or a slip-on sleeve.
- Attach a small label in a contrasting color, like navy, near the bottom point.
- Press thoroughly for a crisp, finished look.
Pro Tip: Cut directly along the plaid lines whenever possible. It keeps the pattern looking neat once sewn.
📸 Photo credit: Instagram @abarkabove
Themed bandanas are great for standalone projects, but if you want to take things a step further, you can coordinate the bandana with other accessories. That’s exactly what the next section covers.
5. Matching Sets and Statement Styles
These final ideas focus on building a complete look, either by pairing the bandana with another accessory or by choosing a shape that goes beyond the standard triangle.
5.1 Matching Bandana and Hair Bow Set
If you’re already cutting fabric for a ruffled bandana, you likely have enough scraps left over to make a matching hair bow. This is one of the easiest ways to create a coordinated set without buying extra material.
What You’ll Need:
- Leftover fabric from your bandana project
- A small hair clip or elastic
- Thread
- Hot glue gun
- Scissors
How to Make It:
- Cut a rectangle of fabric roughly 6 by 3 inches.
- Fold the rectangle in half lengthwise, sew along the open edge, then turn it right side out.
- Pinch the fabric strip in the center to form a bow shape and secure it with a few hand stitches.
- Wrap a small strip of fabric around the center pinch point to hide the stitching.
- Glue the finished bow onto a small clip or elastic band.
Pro Tip: Use the same ruffle or trim fabric from your bandana for the bow’s center wrap to tie the set together visually.
📸 Photo credit: Instagram @barkonpup
5.2 Matching Bandana and Collar Set
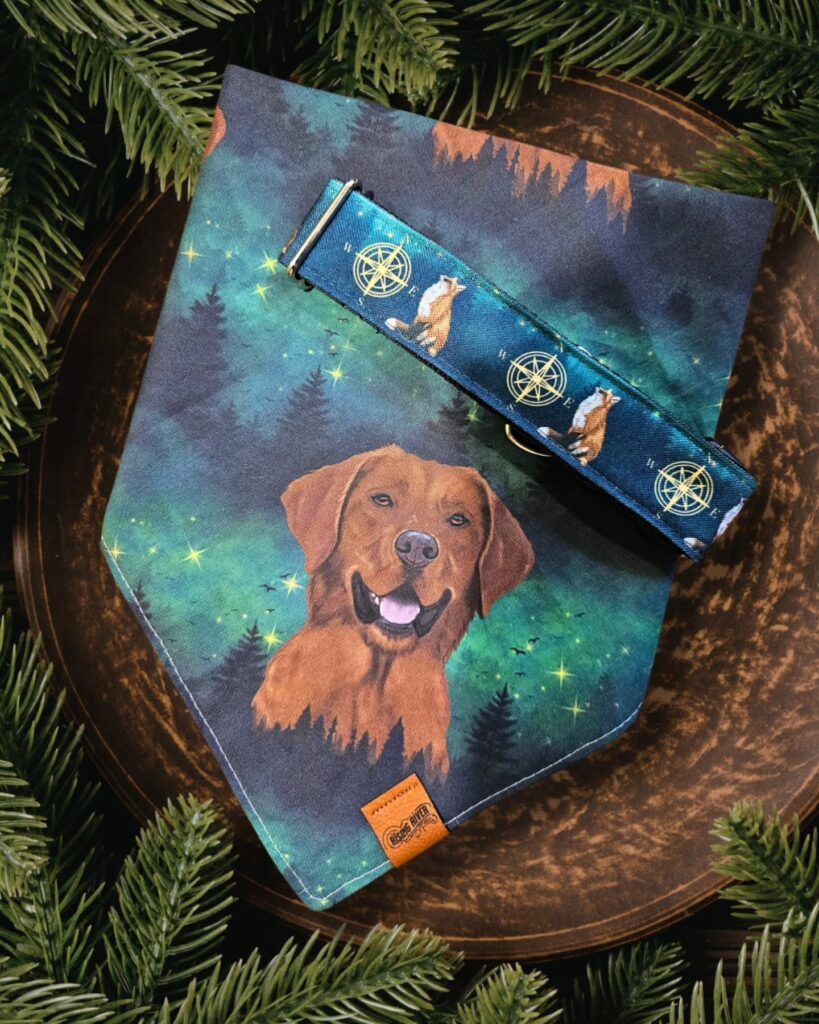
For a more advanced project, you can coordinate a printed bandana with a matching fabric collar strap or leash accent. This is often done using sublimation printing, where a custom image (like a pet portrait) is printed directly onto fabric.
What You’ll Need:
- Sublimation printer and blank fabric (or a printing service if you don’t own equipment)
- Custom artwork or photo for the print
- Plain collar hardware (buckle, D-ring, slider)
- Sewing machine
- Scissors
How to Make It:
- Design or order your custom print design sized for both the bandana and a collar strap.
- Print or order the fabric printed with your chosen design.
- Cut and hem the bandana piece as usual.
- Cut a long strip for the collar, fold it around the hardware, and stitch it closed.
- Attach the buckle and D-ring securely, double-stitching for durability.
Pro Tip: If you don’t have a sublimation printer, many small print shops offer custom fabric printing at a reasonable cost for one-off projects like this.
📸 Photo credit: Instagram @risingriverllc
5.3 Boho Scarf-Tie Bandana
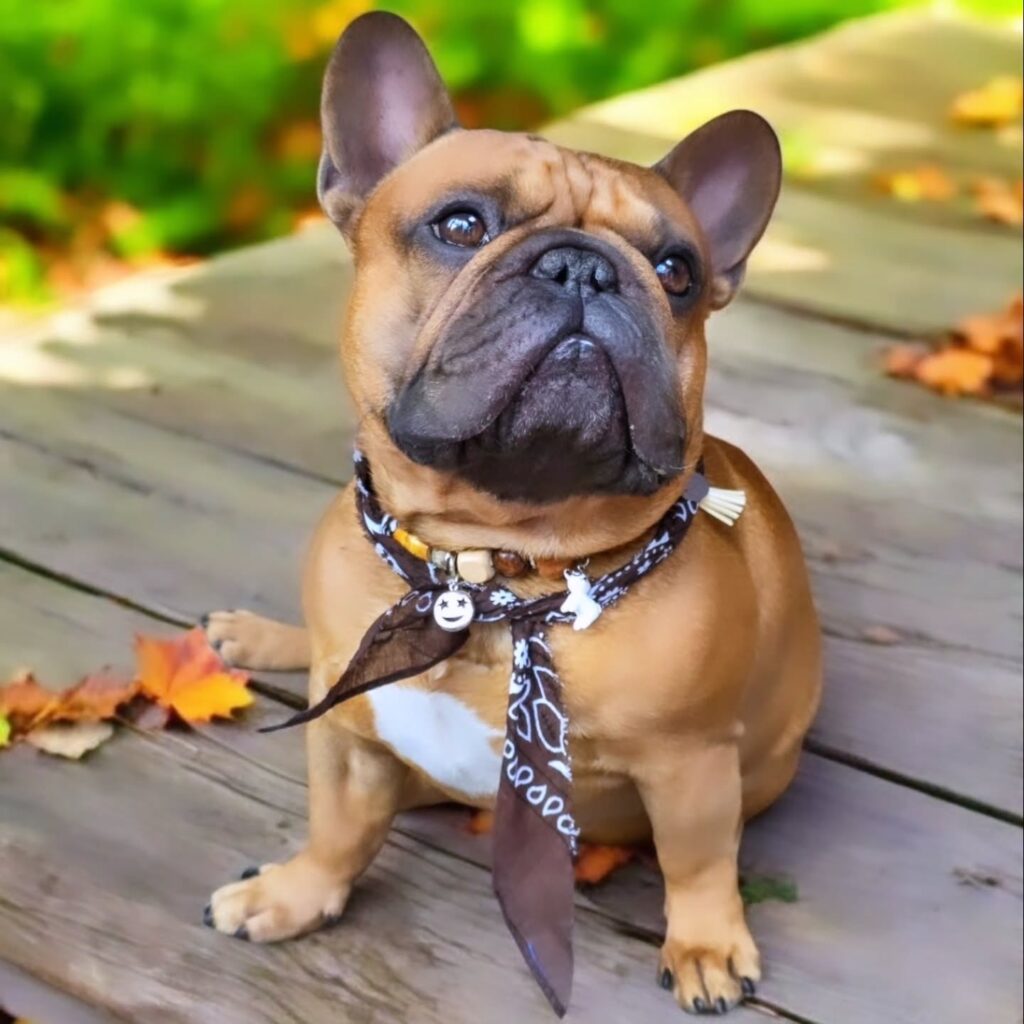
Not every bandana has to be a triangle. This style uses a long, thin strip of fabric tied loosely around the neck, almost like a tiny scarf, often decorated with wooden beads and small charms threaded onto the ends.
It has a relaxed, boho feel that works especially well for smaller breeds.
What You’ll Need:
- A long strip of lightweight cotton or bandana-print fabric
- Wooden beads
- Small decorative charms
- Thread
- Scissors
How to Make It:
- Cut a long fabric strip, roughly 2 inches wide and long enough to tie comfortably around your dog’s neck with extra length to hang down.
- Hem the long edges and ends so the fabric doesn’t fray.
- Thread one or two wooden beads onto each tail end of the scarf.
- Knot the fabric below the beads to hold them in place.
- Attach a small charm to one end using a jump ring or thread loop.
Pro Tip: Keep beads and charms large enough that they can’t be a choking hazard, and always supervise your dog while they’re wearing one.
📸 Photo credit: Instagram @sjefandmax_thefrenchies
5.4 Cottagecore Floral Slip-On Bandana
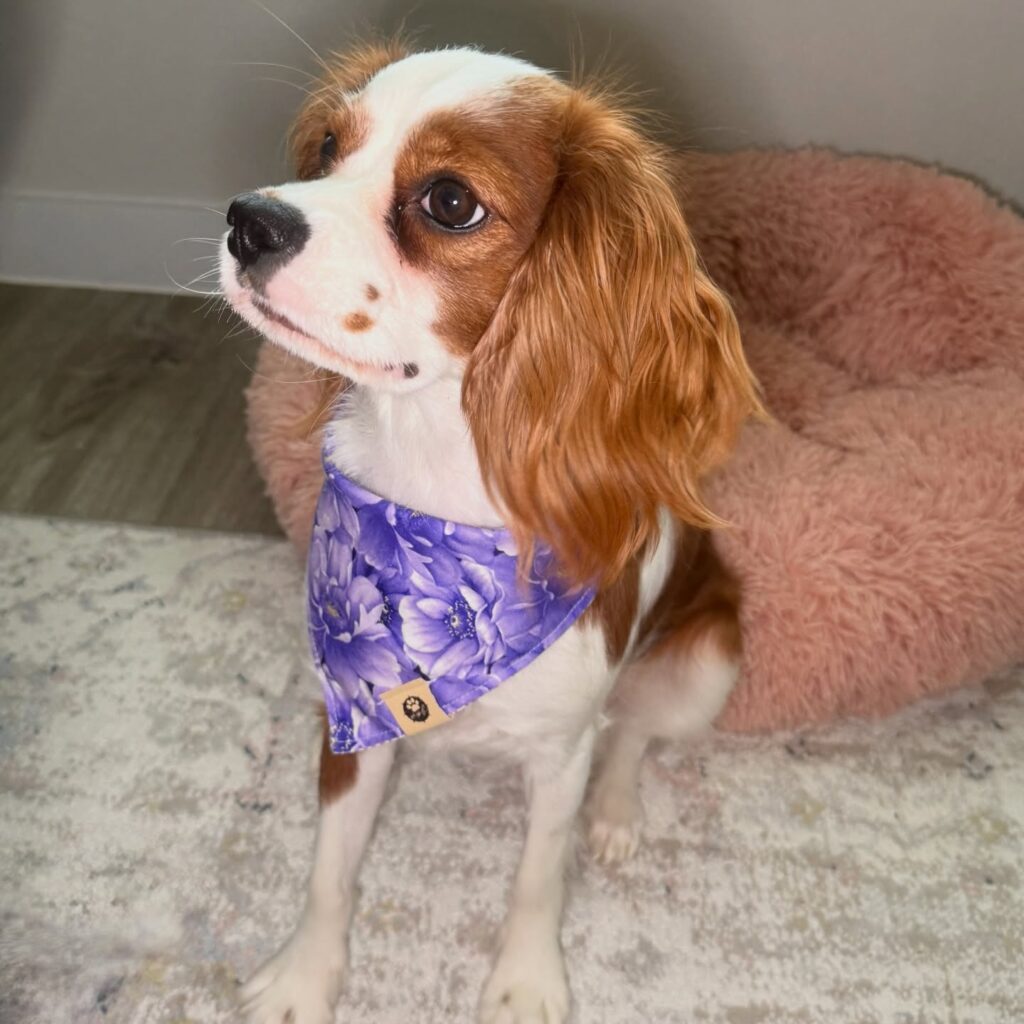
This final idea combines a soft floral print with a relaxed slip-on construction, giving it a delicate, romantic feel. It’s especially popular for spring and summer photos, often shown against grassy or garden backdrops.
What You’ll Need:
- Floral cotton fabric
- Matching thread
- Sewing machine
- Scissors
- A small fabric label (optional)
How to Make It:
- Cut your triangle from the floral fabric, centering any large flower motifs.
- Fold the top edge into a sleeve, as described in the no-tie slip-on tutorial earlier.
- Sew the sleeve closed at the bottom, leaving the sides open for the collar.
- Hem the remaining edges of the triangle.
- Slide the finished bandana onto your dog’s existing collar.
Pro Tip: Pastel florals photograph especially well in natural daylight, so outdoor shots tend to look the best with this style.
📸 Photo credit: Instagram @itsrubythecavi
How to Choose the Right Fabric and Size for Any Pattern
Now that you’ve seen 20 different styles, let’s talk about getting the basics right, since the best DIY dog bandana patterns still depend on fit and fabric choice.
Measuring your dog’s neck. Use a soft measuring tape and wrap it around your dog’s neck where their collar usually sits. Add about an inch for comfort, then use that measurement to size your bandana’s top edge.
Choosing fabric weight. Lightweight cotton works well for warm weather and slip-on styles, while flannel or quilting cotton with interfacing holds its shape better for structured designs like the shirt-collar bandana.
Picking the right closure. Tie-style bandanas are more adjustable, which is helpful for growing puppies. Slip-on styles are gentler around sensitive necks but need to be made to fit a specific collar width.
Caring for your finished bandana. Most cotton bandanas can be machine washed on a gentle cycle. Crochet bandanas usually do better hand-washed and laid flat to dry, since machine washing can stretch or felt the yarn.
If you’re working through your first few bandana projects, it also helps to think about how this fits into your dog’s overall routine and comfort. This guide on enjoying life with a new puppy covers some broader tips that pair well with these smaller styling projects.
Final Thoughts
There’s no single “right” way to make a dog bandana. Some of the ideas on this list take fifteen minutes with a needle and thread, while others, like the crochet granny-stripe design, are weekend-long projects. Either way, the result is something personal that you made yourself, fitted exactly to your dog.
If you’re new to this kind of project, start with the classic triangle tie-on or a basic no-sew crochet style before moving into more advanced designs like the matching collar set or embroidered lettering. Once you’ve got the basics down, the rest of these DIY dog bandana ideas become much easier to customize and build on.
Whatever style you choose, the most important part is making sure it fits comfortably and safely. From there, it’s really just about having fun with fabric, color, and your dog’s personality.

Izzy is an experienced ranch worker who has a passion for exploring nature and getting up close to wildlife. With her connections to various animal organizations, Izzy is well-versed in animal care and rehabilitation.


