
Dog Bow Tie Sewing Pattern Basics Plus 14 Free Design Ideas
If you’ve been searching for a dog bow tie pattern free guide, you’re in the right place. Making your own bow tie for your dog is one of the easiest and most rewarding DIY pet projects out there. It doesn’t require expensive tools, fancy sewing machines, or years of experience. All you need is a little fabric, some basic supplies, and about 20-30 minutes of your time.
Dog bow ties have become a huge trend on social media, and it’s easy to see why. They instantly dress up any dog for birthdays, holidays, weddings, or just a cute everyday look. But store-bought bow ties can get pricey, especially if you want multiple colors and styles for different occasions.
That’s where a dog bow tie diy project comes in handy. Once you learn the basic technique, you can whip up a new bow tie in minutes using fabric scraps you already have at home. In this article, we’re sharing 14 unique and creative dog bow tie ideas, complete with photo inspiration, so you can pick the perfect style for your pup.
Whether you’re a total beginner or you’ve sewn a few things before, there’s an idea here for you. Let’s get started.
What Is a Dog Bow Tie Pattern and Why Make Your Own?
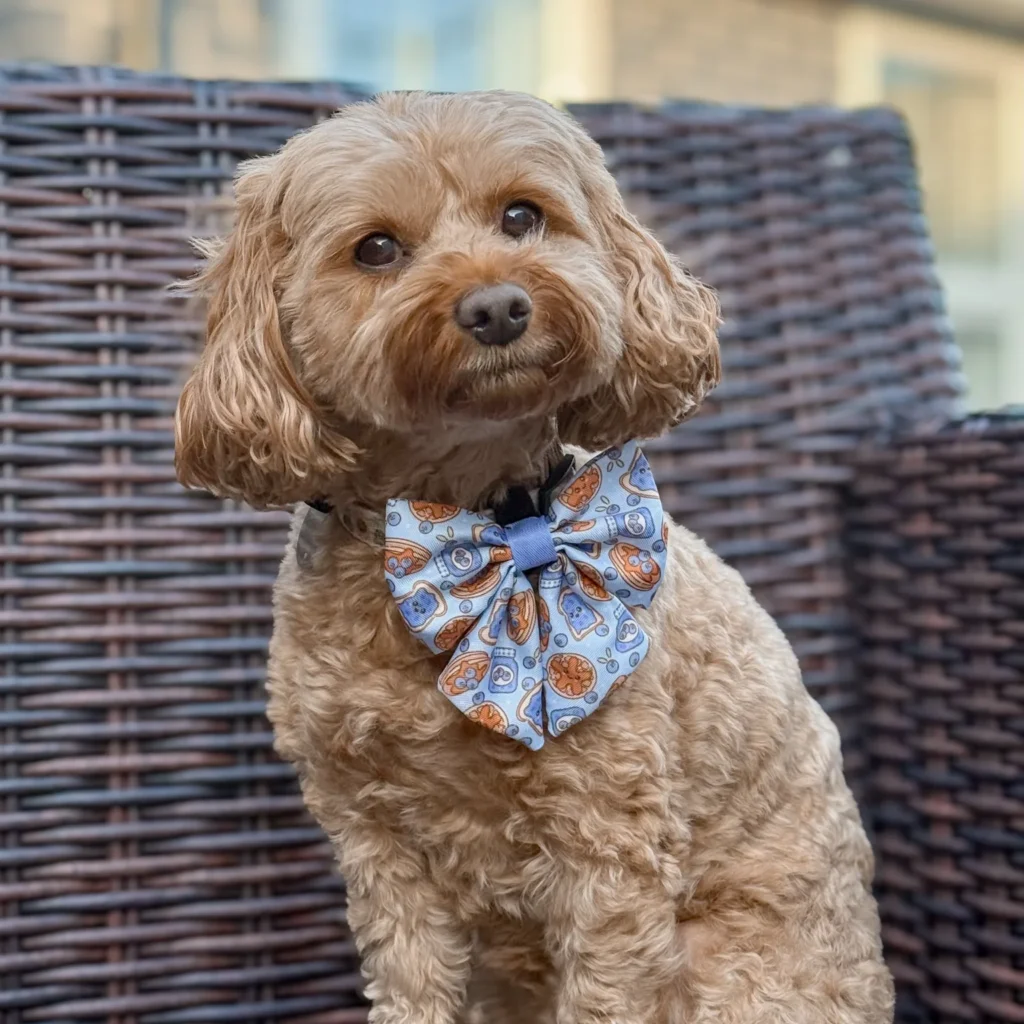
A dog bow tie pattern is simply a template or method for cutting and folding fabric into a bow shape that fits your dog’s neck or collar. Some patterns are extremely simple, using just one piece of fabric folded and gathered. Others involve layering multiple fabrics or adding decorative touches like beads, charms, or rhinestones.
Making your own bow tie has several benefits:
- You control the fabric, color, and pattern to match your dog’s personality
- It costs a fraction of what store-bought accessories cost
- You can make a whole wardrobe of bow ties for every season and holiday
- It’s a fun weekend project, especially if you enjoy crafting
- You can size it perfectly for your dog, whether they’re a tiny teacup breed or a large fluffy dog
If you’re new to dog accessories in general, it also helps to understand what other supplies work well for your pet. Check out this guide on dog accessories tips for more ideas beyond just bow ties.
📸 Photo credit: Instagram @bellathecavapoo20
What You Need Before You Start
Before jumping into the 14 ideas, let’s cover the basic supplies. Most of these bow tie styles use similar materials, so gathering everything upfront will save you time.
Basic Sewing Supplies
Here’s what you’ll typically need for a dog bow tie sewing pattern:
- Fabric scraps (cotton, satin, or felt work best for beginners)
- Sewing machine or needle and thread for hand sewing
- Scissors or a rotary cutter
- Elastic band or hair tie
- Hot glue gun (optional, for no-sew methods)
- A collar slide or safety pin to attach the bow to your dog’s collar
- Ruler and fabric marker for measuring
Fabric Options to Consider
You don’t need fancy fabric to make a great bow tie. Cotton prints, flannel, satin, and even old t-shirts can work depending on the style you’re going for. If you want a soft, comfy option, felt is great because it doesn’t fray at the edges, which means less finishing work for beginners.
For a fancier look, satin or silky fabric adds shine and works beautifully for special occasions like weddings or birthday parties.
Now that you have your supplies ready, let’s look at the 14 dog bow tie pattern free ideas.
14 Dog Bow Tie Pattern Free Ideas to Try
Below are 14 different styles, each inspired by real dog bow ties. We’ve broken down what makes each one unique, how difficult it is to make, and tips for recreating the look at home.
1. Classic Two-Loop Center-Knot Bow
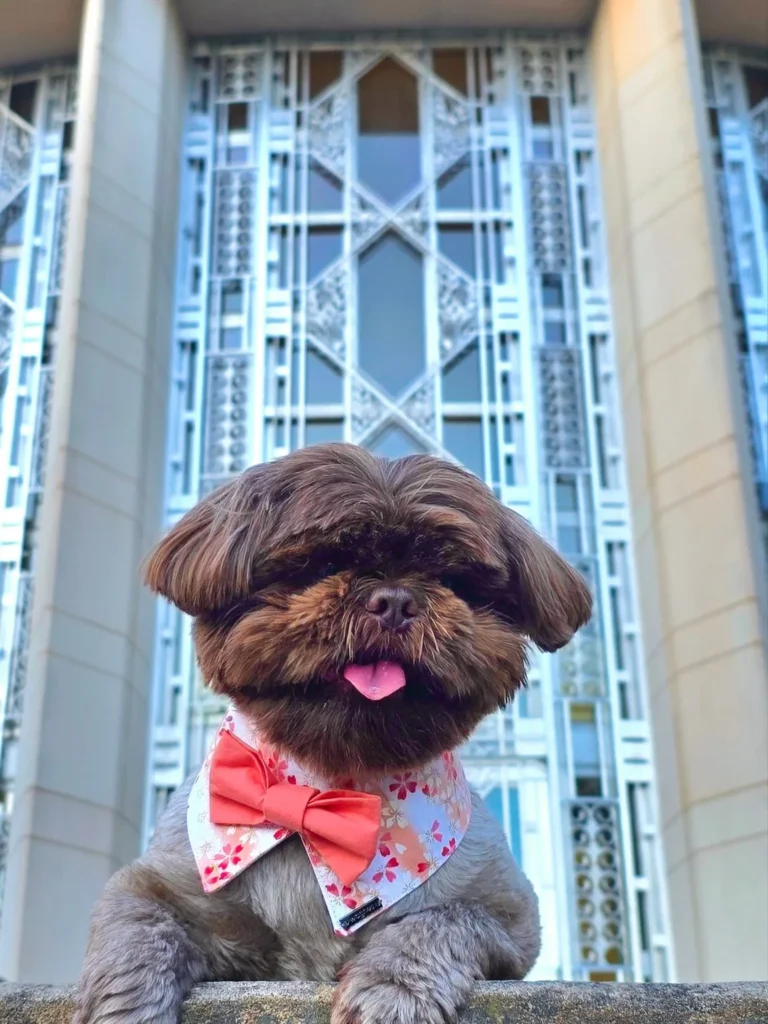
This is the simplest and most beginner-friendly bow tie style out there. It uses one strip of fabric folded into two loops, then gathered and wrapped in the center with a smaller strip of fabric or ribbon.
This style works great with polka dots, stripes, or solid colors. It’s flat, lightweight, and comfortable for dogs of any size. If you’re just starting your dog bow tie diy journey, this is the pattern to practice first.
To make it, fold your fabric strip into a figure-eight shape, pinch the center, and wrap a smaller piece of fabric around the middle to hold the shape. Attach it to an elastic band or directly to your dog’s collar.
📸 Photo credit: Instagram @wagnes_wagfashion
2. Long-Tail Sailor Bow
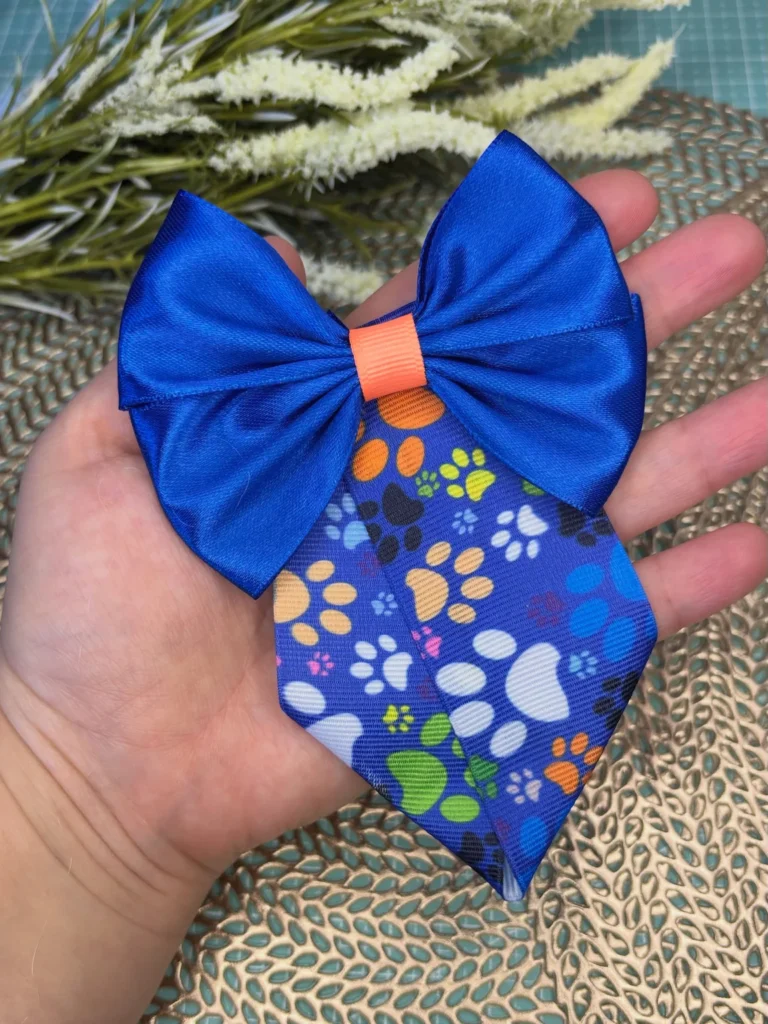
The sailor bow is a step up from the classic loop bow. Instead of tucking the fabric ends in, this style leaves them hanging down like two pointed tails below the knot. It gives a more elegant, flowing look that’s popular for female dogs or fancier occasions.
To make this pattern, you’ll cut a longer piece of fabric, fold the top into a bow shape, and leave the bottom portion loose to create the tail effect. You can layer two different fabrics for extra visual interest, like a solid color paired with a fun print.
This is a great next-level project once you’ve mastered the basic loop bow.
📸 Photo credit: Instagram @kapetlacos
3. Double-Layer Stacked Bow
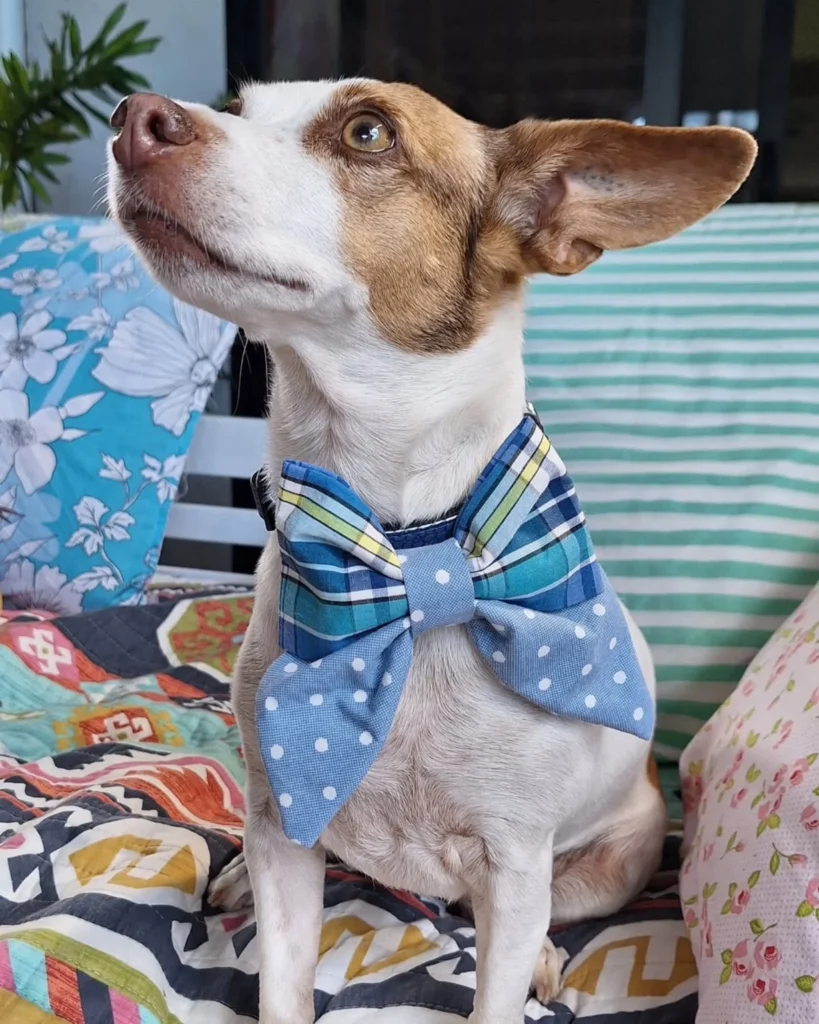
Want your bow tie to have more depth and texture? Try a double-layer stacked bow. This pattern involves making two separate bows, usually in coordinating fabrics or patterns, and stacking one on top of the other.
For example, you might use a plaid fabric for the bottom, larger bow and a polka dot fabric for the smaller bow on top. This creates a layered, dimensional look that stands out in photos.
This pattern is a little more advanced since you’re essentially sewing two bows instead of one, but the payoff is worth it if you want a truly eye-catching accessory.
📸 Photo credit: Instagram @beausandbandits
4. Beaded Center Wrap Bow
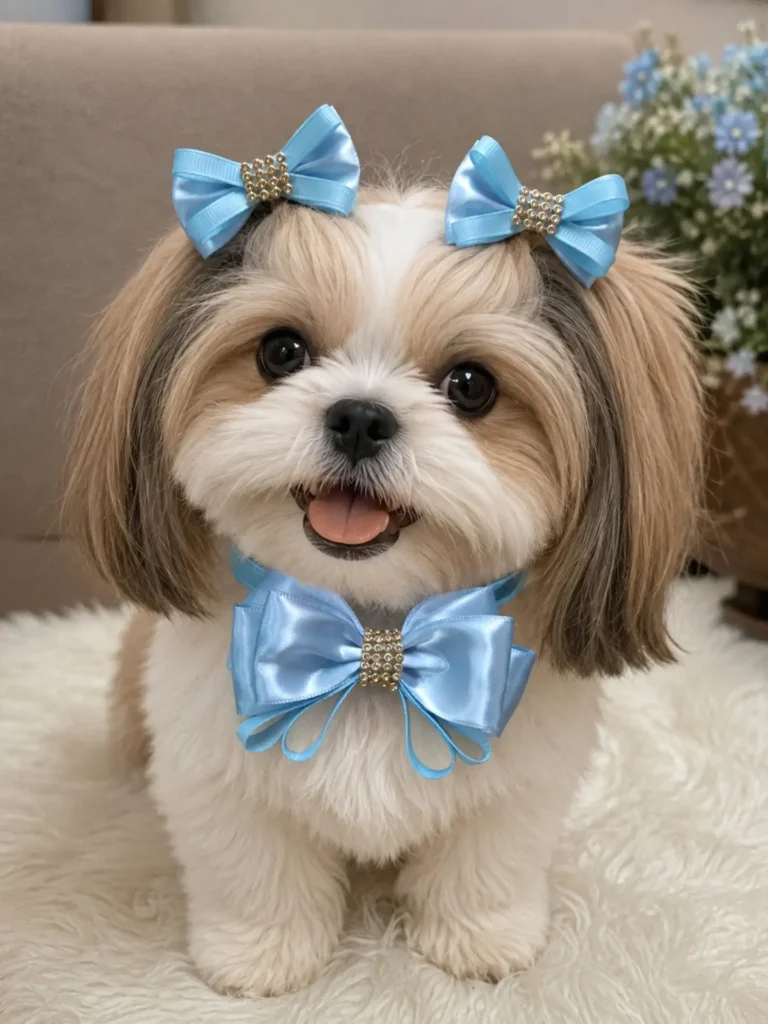
Instead of using plain fabric to wrap the center of your bow, this pattern uses a decorative beaded band. It’s a small detail, but it completely changes the look of the bow tie, giving it a polished, boutique-quality finish.
You can find beaded trim at most craft stores, or you can hand-sew small beads onto a fabric strip yourself. This works especially well for special occasions like birthdays or holiday photos.
This idea also pairs nicely with matching hair bows if you have a longer-haired breed, giving your dog a complete coordinated look.
📸 Photo credit: Instagram @renatacosta_atelie
5. Rhinestone and Glitter Statement Bow
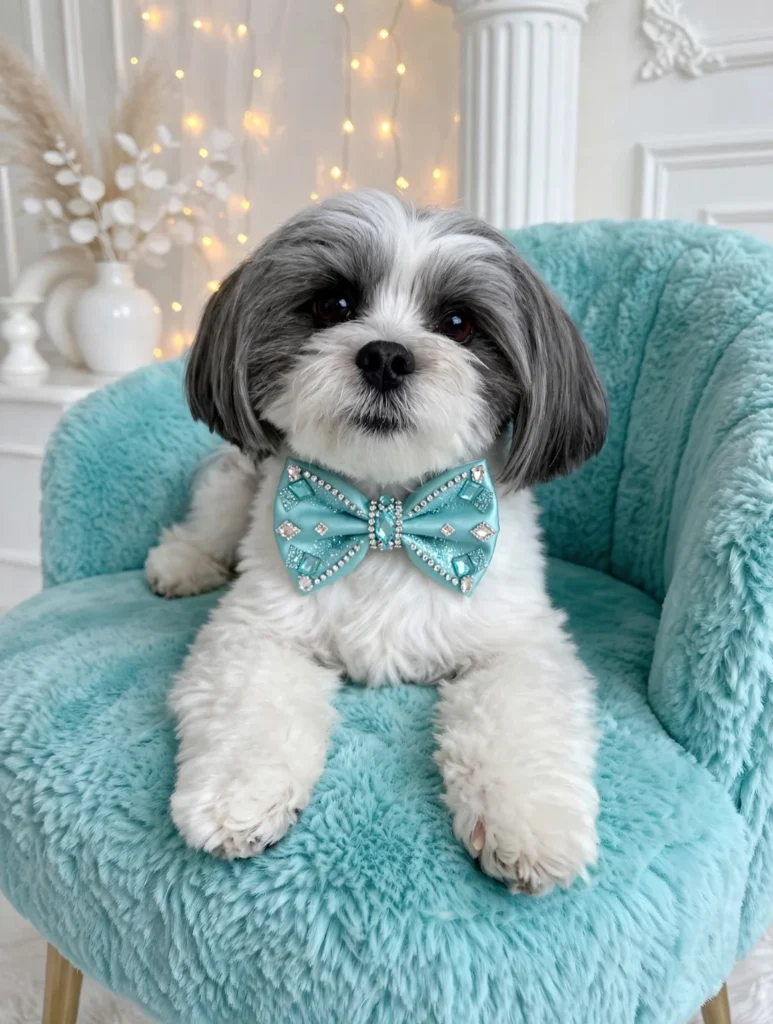
For dogs who love to sparkle, this pattern takes things up a notch. Using satin fabric as your base, you add rhinestones, glitter fabric, or sequin trim to create a glamorous, statement-making bow tie.
This style is perfect for New Year’s Eve, weddings, or any occasion where you want your dog to be the center of attention. While it takes a bit more patience to attach all the embellishments, the technique itself is still based on the same simple bow-folding method.
Use fabric glue or a hot glue gun to attach rhinestones securely so they don’t come loose during wear.
📸 Photo credit: Instagram @_lazy_days_of_daisy_and_crew
6. Metallic Contrast Sailor Bow
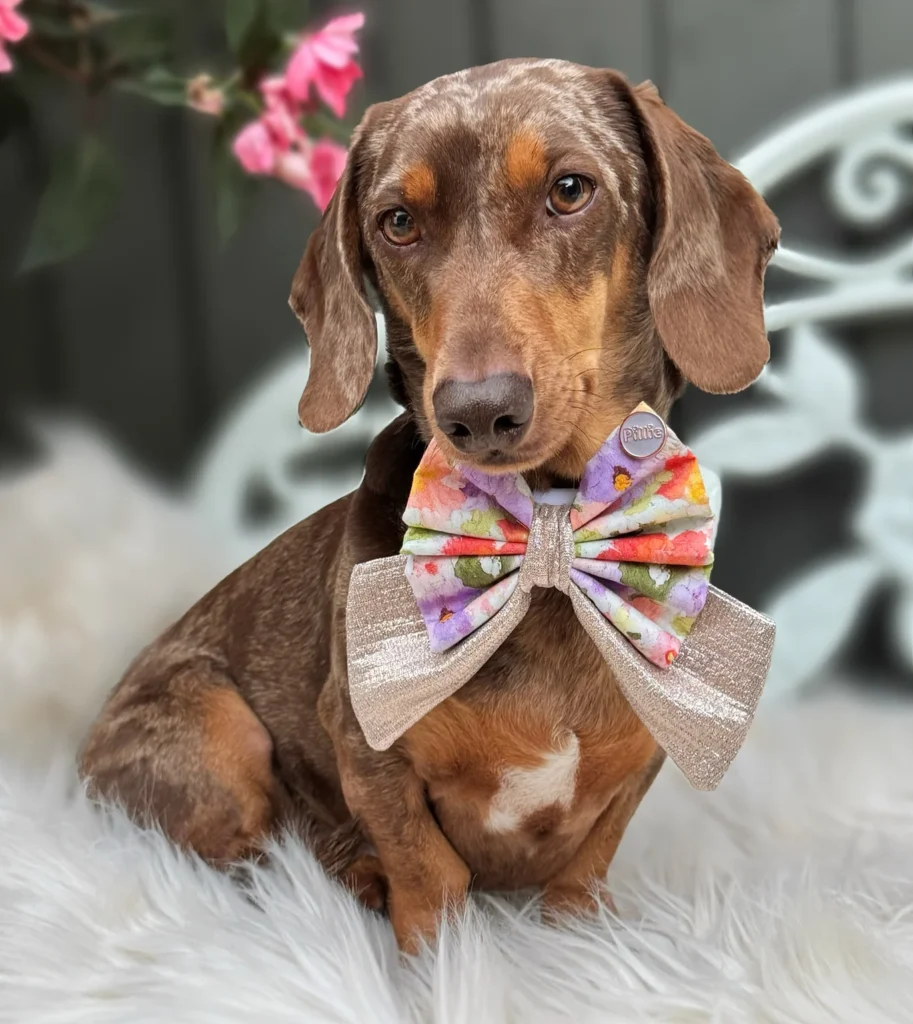
This idea combines two different fabric textures: a soft floral or printed cotton on top, paired with a shiny metallic fabric like rose gold or silver lamé on the bottom layer. The contrast between matte and shiny fabric creates a really eye-catching effect.
This pattern follows the same sailor bow shape mentioned earlier, but the fabric pairing is what makes it unique. It’s a great option if you want something that photographs beautifully for special events.
Metallic fabric can be a little slippery to sew, so pinning your fabric layers together before stitching will help keep everything in place.
📸 Photo credit: Instagram @presley_minidachshund
7. Crochet or Knit Bow Tie (No-Sew Option)
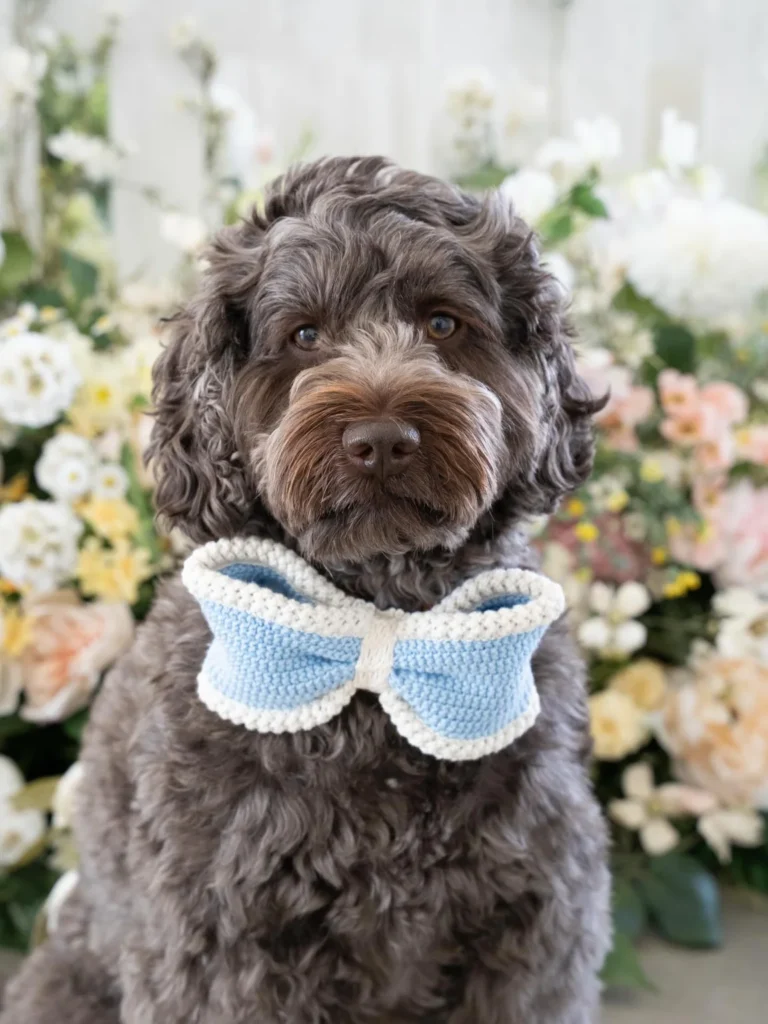
If sewing isn’t really your thing, but you know how to crochet or knit, this pattern is for you. Instead of fabric, this bow tie is made entirely from yarn, giving it a cozy, textured look that’s perfect for fall and winter.
This is a completely different technique from the fabric-based patterns above, but it’s just as easy once you know the basics. Many free crochet bow tie patterns are available online, and most only require basic stitches.
This is also a great option if you want something washable and durable, since knit and crochet fabric tends to hold up well over time.
📸 Photo credit: Instagram @chipper_the_dood
8. Menswear Strap-Style Bow
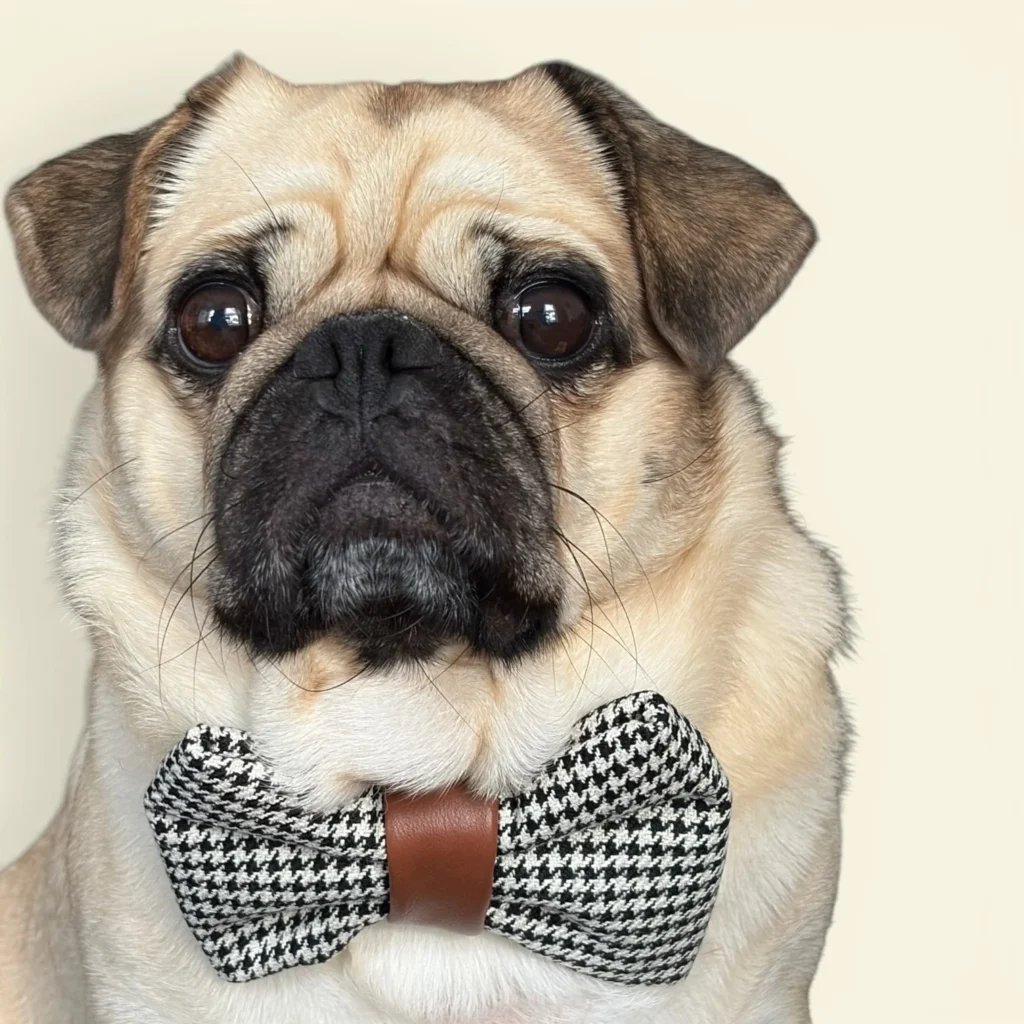
This pattern mimics a traditional human bow tie, using a fabric loop through a center strap instead of a gathered fabric wrap. Often made with tweed, houndstooth, or plaid fabric, this style gives off a classic, dapper vibe.
The center strap is usually made from leather or faux leather, which adds a nice contrast to the fabric bow itself. This pattern is slightly more structured than the others, so it works best with slightly stiffer fabric that holds its shape.
This is a great choice if you want your dog to look sharp for a family photo or formal event.
📸 Photo credit: Instagram @gusgusthepuppu
9. Bow Sewn Directly Onto a Bandana or Collar
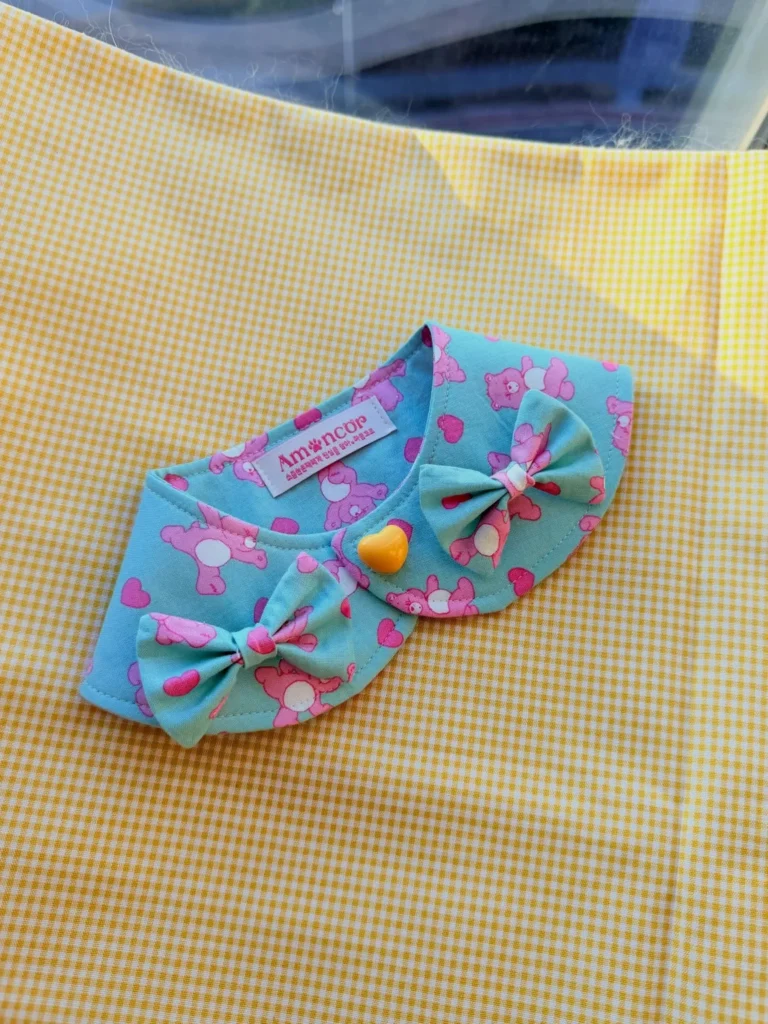
Instead of making a separate bow tie that attaches to a collar, this pattern sews the bow directly onto a bandana or collar piece. This creates an all-in-one accessory, which can be easier for pet parents who don’t want to deal with attaching a separate bow every time.
To make this, you’ll cut your bandana or collar shape first, then sew your bow directly onto the front center. This works especially well with printed cotton fabric that matches both pieces.
This pattern is a great weekend project if you want to make a complete accessory rather than just a standalone bow.
📸 Photo credit: Instagram @amoncor.official
10. Matching Bow-and-Collar Set
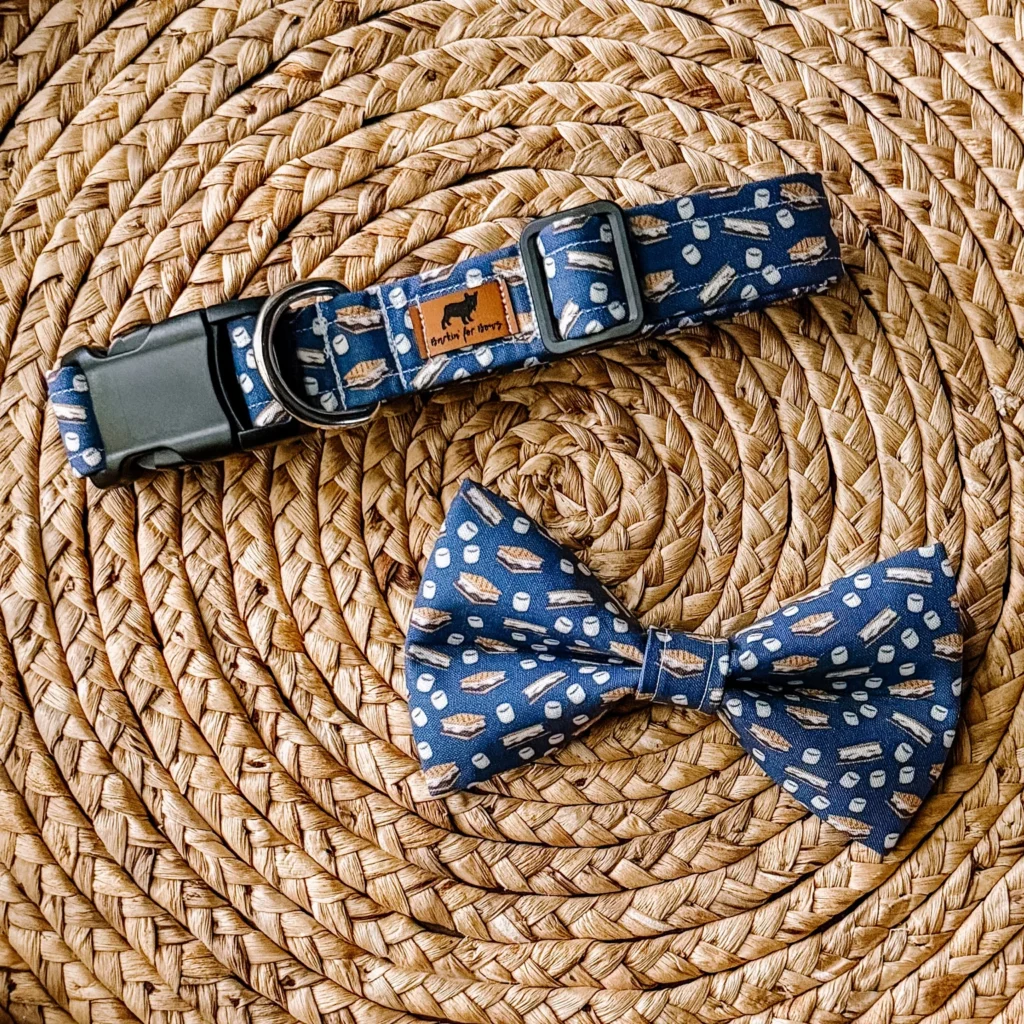
Similar to the idea above, but this pattern focuses on creating two separate pieces, a bow tie and a collar, using the same coordinating fabric. This gives your dog a complete matching look without sewing everything into one piece.
This is a great option if you want flexibility, since you can mix and match the bow with different collars later on. It’s also a nice gift idea if you’re making bow ties for a friend’s dog.
Choose a fun print, like a food pattern or seasonal design, to make the set feel extra special.
📸 Photo credit: Instagram @barkinforbows
11. Playful Novelty Print Bow (Paw Prints & Fun Themes)
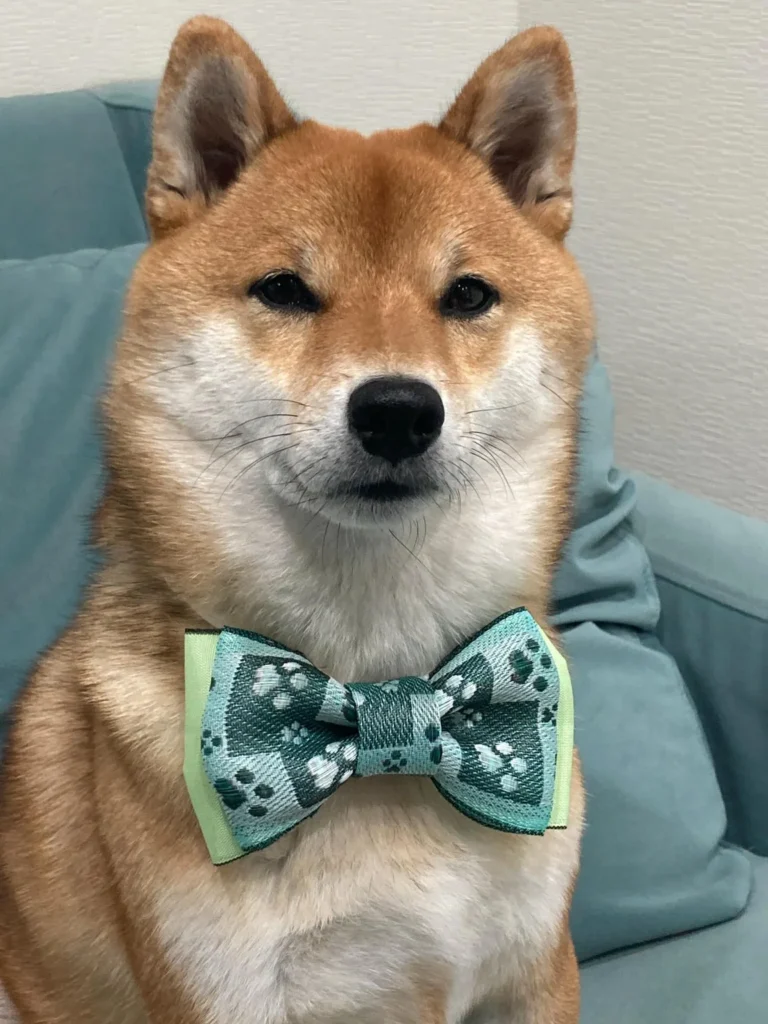
If you want your dog’s bow tie to feel extra playful, this pattern uses a fun novelty print instead of a solid color or floral design. Think scattered paw prints, bones, or other pet-themed patterns printed across a soft cotton or satin fabric.
This style uses the same basic loop-and-wrap technique as the classic bow, so it’s still beginner-friendly. The only difference is choosing a fabric with a fun, whimsical print instead of something plain or formal.
This is a great option if you want a bow tie that feels more casual and everyday, rather than dressy. It also works well for dog-themed parties, adoption events, or just showing off your pup’s playful personality.
📸 Photo credit: Instagram @mio_latte.shiba
12. Simple Solid-Color Petite Bow
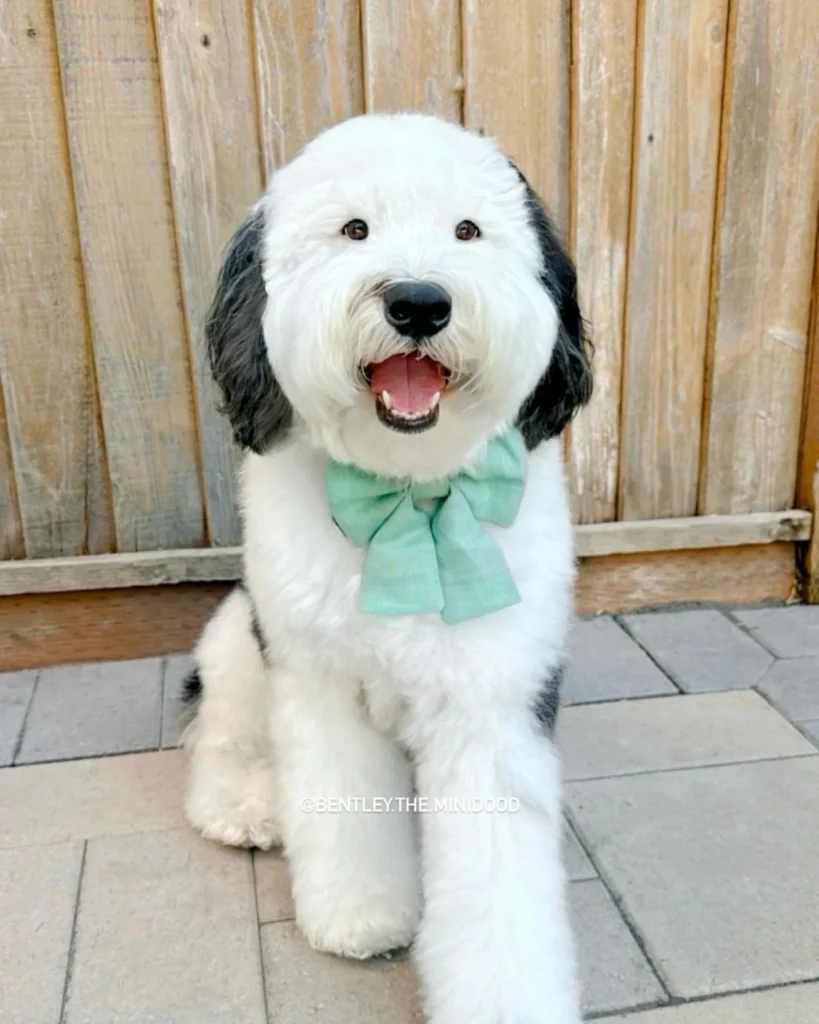
Sometimes less is more. This pattern uses a single solid-color fabric to create a small, simple bow tie without any prints, layers, or embellishments. It’s perfect for everyday wear or for dog parents who prefer a more minimalist look.
This is one of the fastest patterns to make since there’s no need to coordinate multiple fabrics or add decorative details. You can make an entire set in different solid colors in under an hour.
This style also works well if you’re making bow ties to sell, since solid colors tend to appeal to a wide range of buyers.
📸 Photo credit: Instagram @bentley.the.minidood
13. Charm or Nameplate Bow Attachment
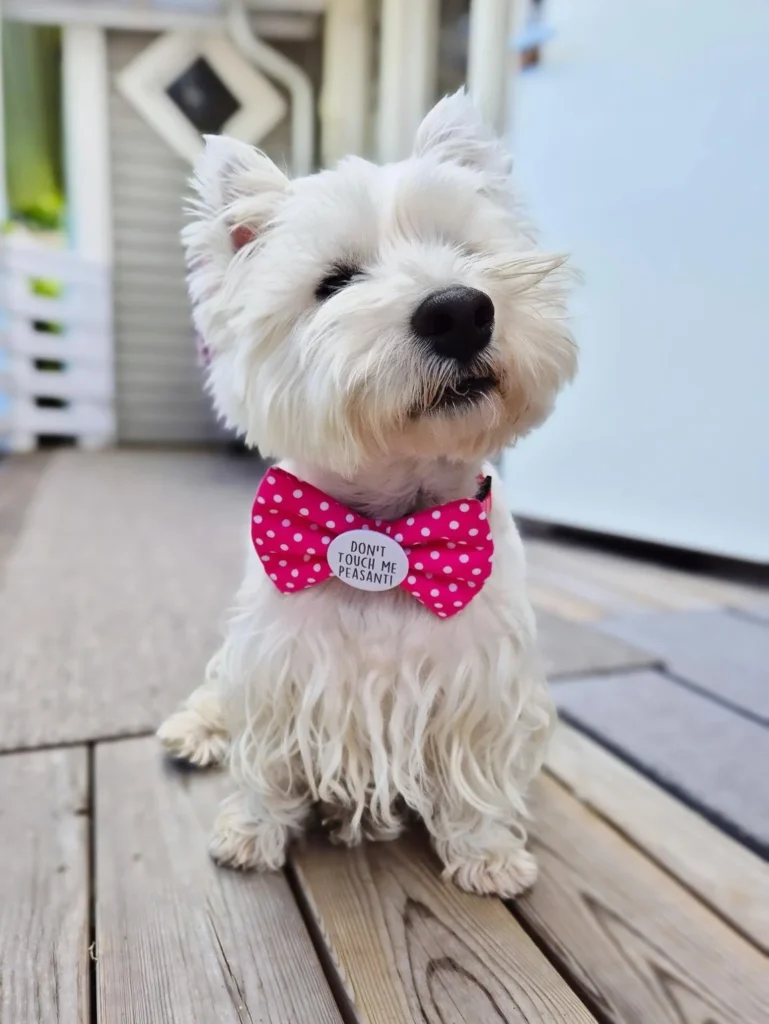
This idea isn’t a completely separate bow shape, but rather an add-on that can be applied to almost any bow tie pattern. By attaching a small charm, nameplate, or engraved tag to the center of your bow, you add a personalized touch.
This works especially well with the classic loop bow or sailor bow styles, since the flat center section gives you a good spot to attach the charm. You can find small pet-friendly charms at most craft or pet supply stores.
This is a great way to make a bow tie feel more special, especially for gifts or memorial pieces.
📸 Photo credit: Instagram @harry.the.flirty.westie
14. Matching Human-and-Dog Bow Set
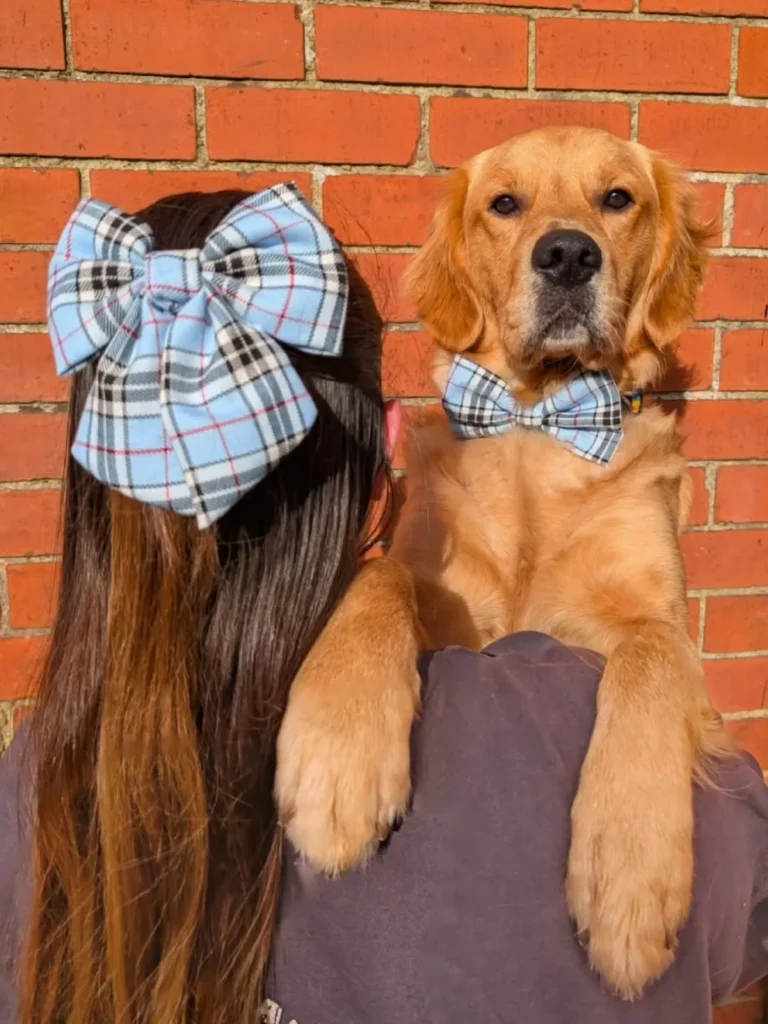
This last idea is all about twinning with your pup. Using the exact same fabric, you make one bow tie for your dog and a matching hair bow for yourself. This has become a huge trend on social media, especially for plaid and seasonal prints.
The technique is simple since you’re just making two versions of the same bow in different sizes. This is a fun idea for family photos, holiday cards, or just everyday matching outfits with your dog.
If you want to try this idea, plaid, gingham, or floral fabric photographs especially well for this style.
📸 Photo credit: Instagram @jim_jams_the_golden
How to Sew Dog Bow Tie With Elastic
Now that you’ve seen all 14 ideas, let’s cover one of the most practical parts of this project: attaching your bow tie using elastic. This method is popular because it makes the bow tie easy to slip on and off without needing a separate collar attachment every time.
Here’s a simple step-by-step process for how to sew dog bow tie with elastic:
Step 1: Measure Your Dog’s Neck
Before cutting your elastic, measure around your dog’s neck where the collar usually sits. Add about half an inch for comfort so it’s not too tight.
Step 2: Cut Your Elastic Band
Cut a piece of elastic slightly shorter than your measurement, since elastic naturally stretches. A half-inch wide elastic band works well for most small to medium dogs, while larger dogs may need a wider band for extra support.
Step 3: Sew the Elastic Into a Loop
Overlap the two ends of your elastic band by about half an inch and sew them together to form a complete loop. This will become the base that slides over your dog’s head or attaches to their existing collar.
Step 4: Attach the Bow Tie to the Elastic
Place your finished bow tie (using any of the 14 patterns above) directly onto the center of the elastic loop. Hand-sew it in place using small, tight stitches so it doesn’t shift around during wear.
Step 5: Test the Fit
Before your dog wears it out and about, test the fit at home first. Make sure it’s snug but not tight, and that your dog can move their head comfortably without the bow tie sliding around.
This elastic method works well with almost any of the 14 patterns mentioned above, giving you flexibility no matter which style you choose to make.
Tips for Choosing the Right Bow Tie Size for Your Dog
Not every bow tie pattern works well for every dog size. A large statement bow might look adorable on a big fluffy dog but could overwhelm a tiny breed. Here are a few quick sizing tips:
- Small breeds (under 15 lbs): Stick to smaller, lightweight bows like the classic loop or petite solid-color style
- Medium breeds (15-40 lbs): Sailor bows and double-layer bows work well without looking too bulky
- Large breeds (40+ lbs): Bigger statement bows, like the rhinestone style or menswear strap bow, actually look more proportional
If you’re still figuring out what breed or size category your dog falls into, this guide on finding out your dog’s breed can help you get a better idea of their build and needs.
It’s also worth considering your dog’s coat type. Long-haired breeds might benefit from the pigtail bow idea, while short-haired dogs usually do well with any neck bow style since there’s no fur getting in the way.
How to Attach a Dog Bow Tie Without a Collar
Not every dog wears a collar all the time, especially indoors. If you want to use your bow tie without a separate collar, here are a few simple attachment options:
- Safety pin method: Simply pin the bow tie directly onto a harness strap or bandana
- Hair clip attachment: Great for smaller bows meant for pigtails or top-knots
- Velcro strip: Sew a small velcro strip to the back of the bow and attach it to a fabric collar or harness
- Elastic loop: As covered above, this is the most secure and popular method
Whichever method you choose, always make sure the attachment is secure enough that it won’t come loose during play, but never so tight that it causes discomfort.
Caring for Your DIY Dog Bow Tie
Once you’ve made your bow tie, a little care will help it last much longer. Most fabric bow ties can be hand washed with mild soap and air-dried. Avoid putting embellished bows (like the rhinestone or beaded styles) in the washing machine, since the decorations can come loose.
For crochet or knit bow ties, gentle hand washing and laying flat to dry will help maintain their shape.
It’s also a good idea to remove the bow tie during rough outdoor play, baths, or swimming to keep it looking fresh for longer. If you’re taking your dog somewhere new, like a hotel or event, packing an extra bow tie or two is always a smart move. This list of travel essentials to pack for your dog covers other useful items to bring along.
Why DIY Dog Bow Ties Make Great Gifts
If you enjoyed making one of these patterns, consider making a few extra as gifts. Handmade dog bow ties are a thoughtful, budget-friendly present for friends, family, or even for a dog-loving coworker. You can customize the fabric to match the recipient’s dog’s personality or favorite colors.
They also make great additions to puppy welcome baskets. If you know someone bringing home a new puppy soon, pairing a homemade bow tie with other essentials makes a lovely gift. This guide on enjoying life with a new puppy has more ideas for what new puppy owners might appreciate.
Final Thoughts on Free Dog Bow Tie Patterns
Making your own dog bow tie doesn’t have to be complicated. With just a few basic supplies and one of the 14 ideas above, you can create a completely custom accessory that fits your dog’s personality and your own creative style.
Whether you start with the simple classic loop bow or work your way up to the rhinestone statement bow, each pattern gives you room to experiment with fabric, color, and embellishments. And once you master the basic technique, you’ll likely find yourself making bow ties for every season and holiday.
The best part about a dog bow tie pattern free project is that it costs very little to get started, and the possibilities are nearly endless. So pick your favorite idea from this list, gather your fabric scraps, and get ready to create something your dog will look adorable wearing.

Izzy is an experienced ranch worker who has a passion for exploring nature and getting up close to wildlife. With her connections to various animal organizations, Izzy is well-versed in animal care and rehabilitation.


