Spinach & Egg Mini Muffins for Dogs That Get Tails Wagging
Want a homemade treat that takes about 25 minutes and uses ingredients you probably already own? Spinach & egg mini muffins for dogs are one of the simplest bakes you can make. They are soft, bite-sized, and easy to freeze. Best of all, you know exactly what goes into them.
Store-bought treats often come with long ingredient lists you can’t pronounce. These muffins have a short list you can read in five seconds. Eggs add protein. Spinach adds a touch of green goodness. A little flour holds it all together.
In this guide, you’ll get a full base recipe first, then a step-by-step walkthrough so nothing goes wrong. After that, you’ll find five more ways to make these treats, including grain-free, air fryer, and frozen versions. Every recipe has its own copy-ready card.
Quick promise: by the end, you’ll have a batch in the oven or the freezer.
1. Spinach & Egg Mini Muffins for Dogs: The Base Recipe
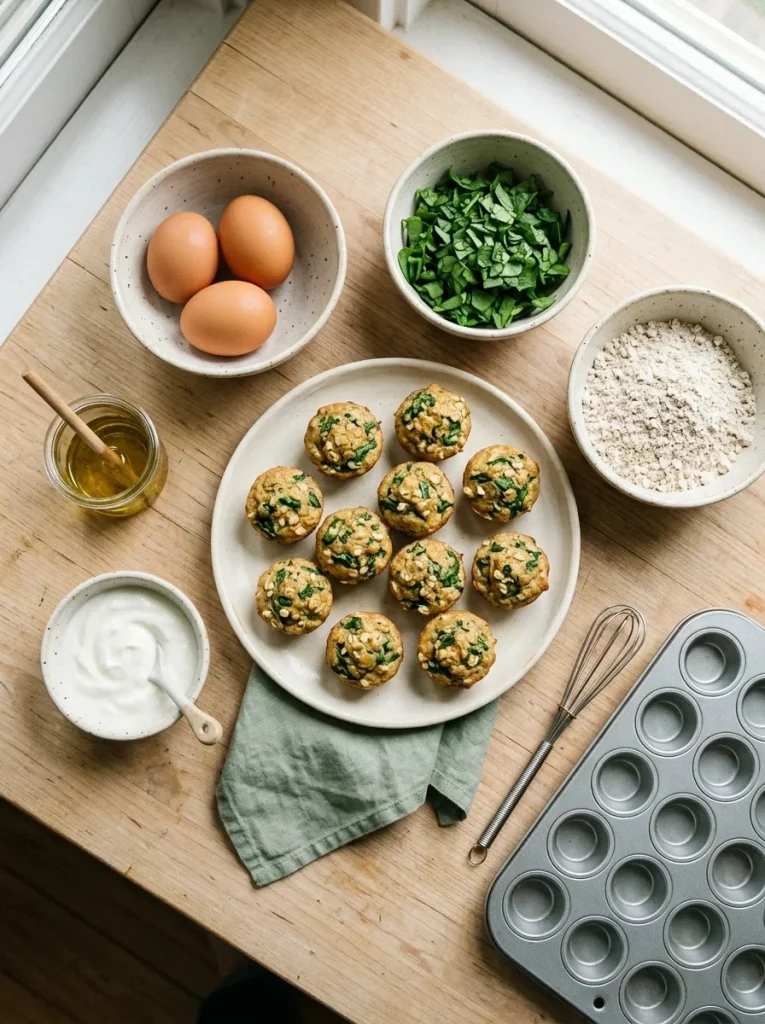
This is your starting point. It uses a standard mini muffin tin and makes about two dozen treats. Each one is roughly the size of a large bite.
If you want more ideas after this, browse these homemade dog treat recipes for other easy bakes.
A. Recipe Card 1: Classic Spinach & Egg Mini Muffins
Spinach & Egg Mini Muffins for Dogs (Classic Oven-Baked)
Prep Time: 10 minutes
Bake Time: 15–18 minutes
Cool Time: 15 minutes
Freeze Time: 2 hours (optional, for long storage)
Yield: About 24 mini muffins
Ingredients:
- 3 large eggs
- 1 cup fresh baby spinach, packed and finely chopped
- 1 cup oat flour (or whole wheat flour)
- ¼ cup plain, unsweetened Greek yogurt (no xylitol)
- 2 tablespoons water
- 1 tablespoon olive oil or melted coconut oil
- Nonstick spray or a little oil for the tin
Instructions:
- Preheat your oven to 350°F (175°C). Lightly grease a 24-cup mini muffin tin.
- Whisk the eggs, yogurt, water, and oil in a large bowl until smooth.
- Stir in the chopped spinach.
- Add the oat flour and fold gently until no dry streaks remain.
- Spoon the batter into the tin, filling each cup about ¾ full.
- Bake for 15–18 minutes, until the tops are set and a toothpick comes out clean.
- Cool in the tin for 5 minutes, then move to a wire rack until completely cool.
Notes:
- Do not add salt, garlic, onion, or seasoning.
- Serve only when fully cooled.
- Keep treats to about 10% of your dog’s daily food.
- Store in the fridge for up to 5 days or the freezer for up to 3 months.
B. Ingredient Swaps at a Glance
Not every kitchen has the same pantry. Here are easy swaps that keep the recipe dog-friendly:
- Oat flour: Whole wheat flour, brown rice flour, or chickpea flour all work. Use the same amount.
- Greek yogurt: Use plain pumpkin puree or unsweetened applesauce instead. This is a good pick for dogs who don’t do well with dairy.
- Fresh spinach: Use ½ cup frozen spinach, thawed and squeezed very dry. Extra water makes muffins gummy.
- Olive oil: Coconut oil works fine. You can skip the oil entirely if you use yogurt.
Pro tip: Make your own oat flour by blending plain rolled oats in a blender for 30 seconds.
2. Step-by-Step Baking Walkthrough
The recipe card tells you what to do. This section tells you how to do it well. Follow these steps and your muffins will come out soft, not rubbery or crumbly.
A. Prep the Spinach
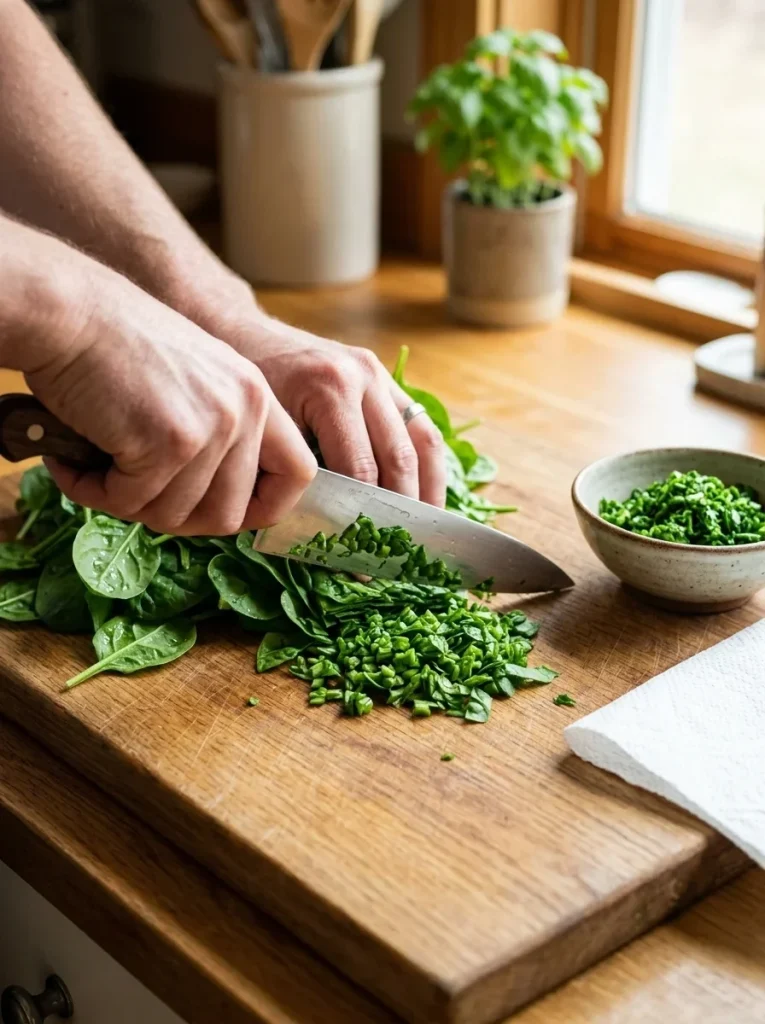
Spinach is the one ingredient that needs a little attention. Big leaves make the batter clumpy and harder for small dogs to chew.
Chop it fine. Aim for pieces smaller than a pea. You can also pulse the leaves in a food processor for a few seconds.
Dry it well. If you rinse the spinach, pat it with a paper towel. Extra water thins out your batter.
Use baby spinach. It’s milder and more tender than mature leaves, so it blends in better.
Frozen spinach works too. Just thaw it and squeeze it in a clean towel until no drops come out.
B. Mix the Batter
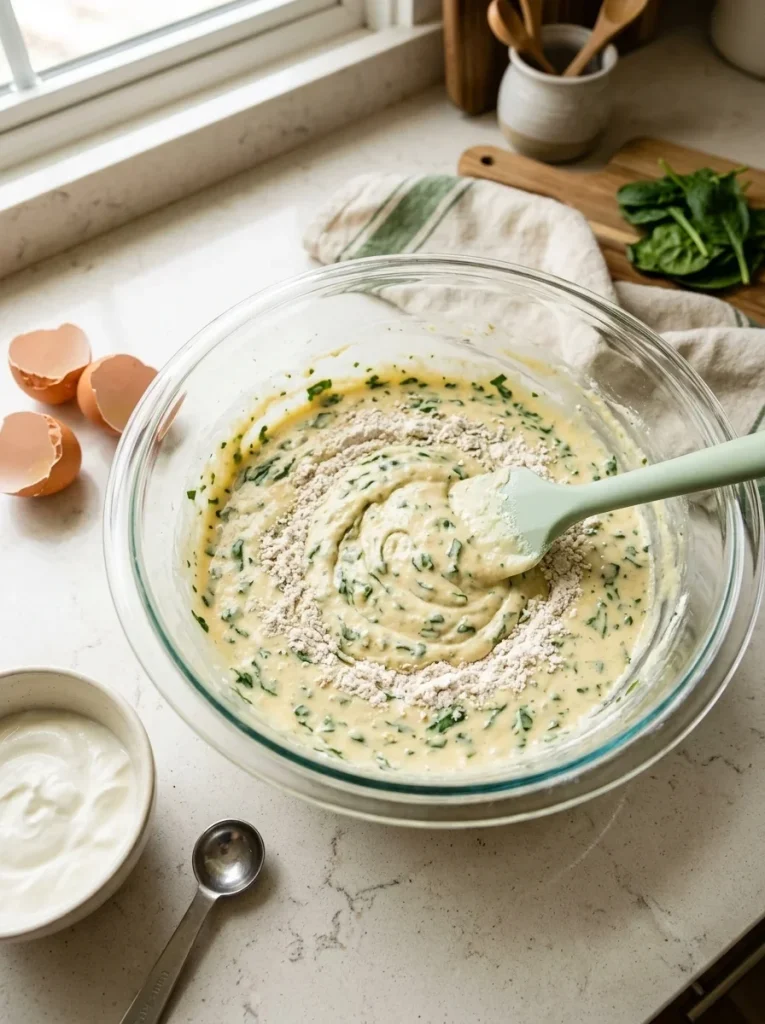
Mix the wet ingredients first. Then add the dry. This keeps the flour from forming lumps.
- Crack the eggs into a large bowl.
- Add the yogurt, water, and oil.
- Whisk until the mixture looks pale and smooth.
- Stir in the spinach.
- Add the flour and fold just until combined.
Don’t overmix. Stirring too hard makes the muffins tough. A few small lumps are fine.
The batter should be thick but spoonable. Think thick pancake batter. If it’s too stiff, add one more tablespoon of water. If it’s too runny, add one tablespoon of flour.
C. Fill the Mini Tin
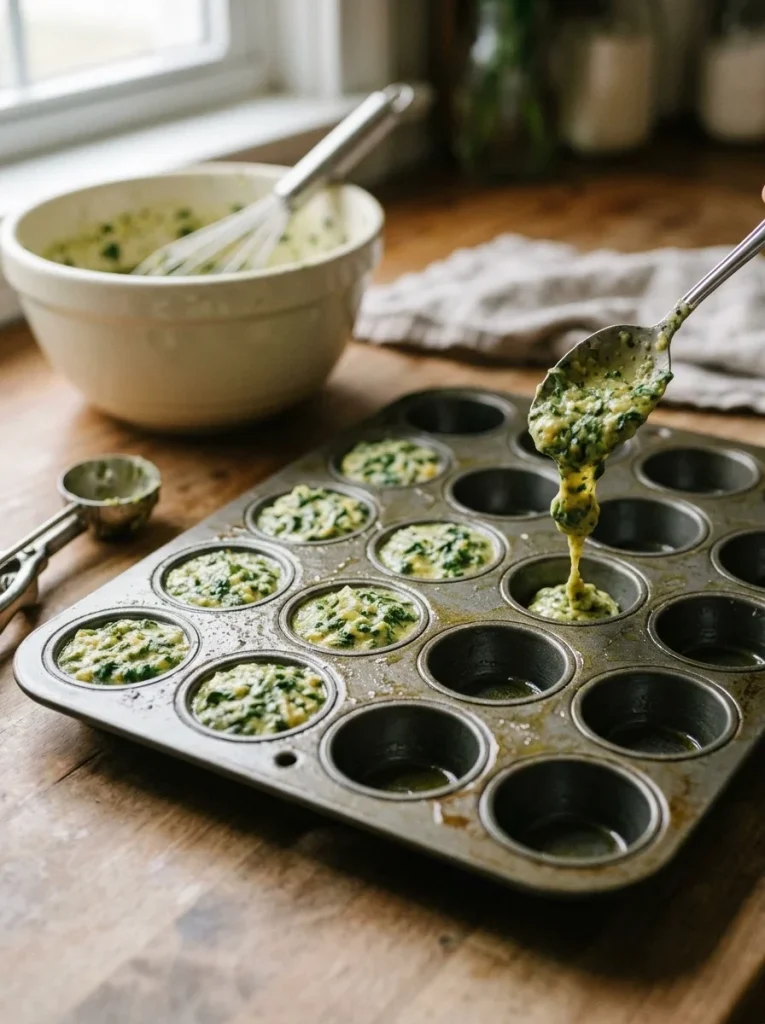
This step is quick, but small mistakes here can cause big headaches later.
Grease well. Mini muffin cups are tiny, and egg batter loves to stick. Use nonstick spray, a thin layer of oil, or silicone liners.
Use a small spoon. A teaspoon or a small cookie scoop works best. Fill each cup about ¾ full. They rise a little, but not much.
Wipe any drips. Batter on the tin’s rim can burn and make cleanup harder.
If you don’t own a mini tin, a regular muffin tin will work. Just bake for 20–25 minutes instead and cut the muffins into pieces after baking.
D. Bake and Test for Doneness

Place the tin on the middle rack. Set a timer for 15 minutes, then check.
Look for these signs:
- The tops are set and lightly golden.
- The edges pull slightly from the tin.
- A toothpick in the center comes out clean.
If the toothpick has wet batter on it, bake for 2–3 more minutes. Eggs must be fully cooked for dogs, so don’t pull them early.
Every oven runs a little different. Your first batch is your test batch. Write down the time that worked so you can repeat it.
E. Cool Completely
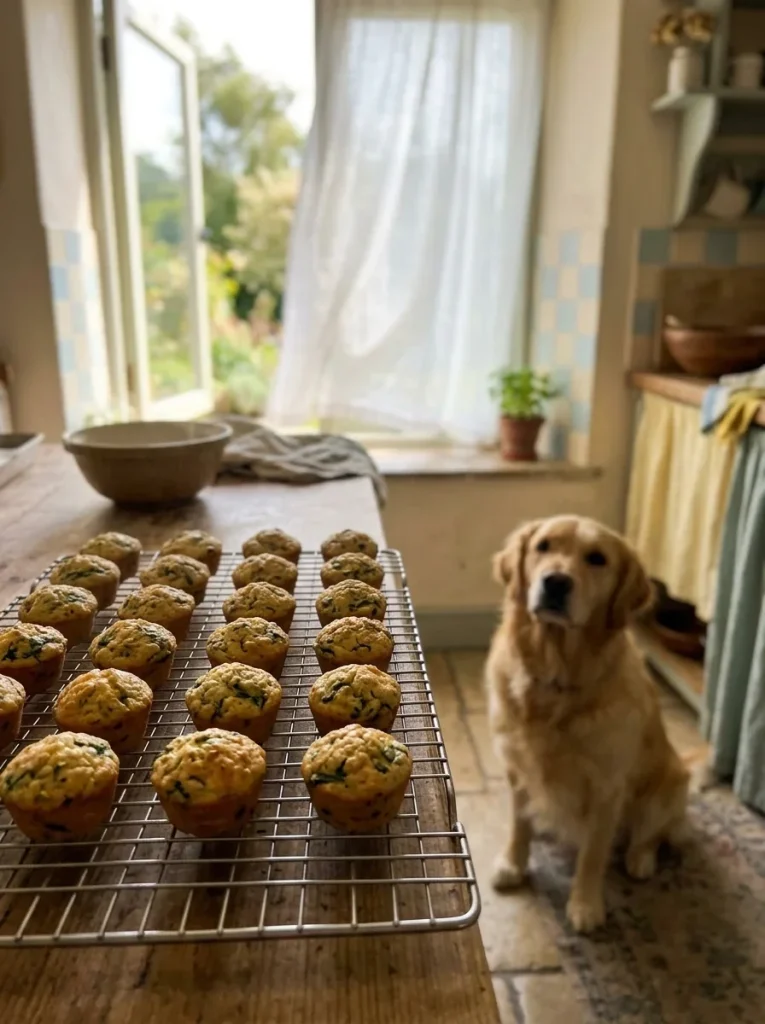
This is the step people skip, and it matters. Hot muffins are soft and can burn your dog’s mouth.
Let them sit in the tin for 5 minutes. Then pop them onto a wire rack. Wait until they feel cool to the touch, about 15 minutes.
Cooling also helps them firm up, so they’re easier to store. Packing warm muffins into a container traps steam and makes them soggy.
3. Different Ways to Make Spinach & Egg Mini Muffins for Dogs
The classic oven method is great, but it isn’t the only way. Some dogs can’t eat grains. Some owners don’t want to turn on the oven. Others want a cool treat for a hot day.
Here are five more methods, and each one is genuinely different. Every method has its own recipe card.
Quick comparison:
| Method | Time | Grain-Free? | Best For |
|---|---|---|---|
| Flourless egg cups | 25 min | Yes | Dogs with grain sensitivities |
| Silicone mold freezer bites | 15 min + freeze | Yes | Hot days, teething pups |
| Air fryer batch | 15 min | Optional | Small kitchens, quick batches |
| Skillet egg bites | 10 min | Yes | No oven needed |
| Frozen pupcakes | 30 min + freeze | No | Birthdays, special days |
A. Flourless Egg Cup Style

These are crustless and grain-free. They’re closer to a mini frittata than a muffin. The texture is soft and moist, which many dogs love.
Recipe Card 2: Flourless Spinach & Egg Cups for Dogs
Prep Time: 10 minutes
Bake Time: 12–15 minutes
Freeze Time: 1–2 hours (optional)
Yield: About 12 mini cups
Ingredients:
- 4 large eggs
- ¾ cup finely chopped fresh spinach
- 2 tablespoons plain pumpkin puree (not pie filling)
- 1 tablespoon water
- Oil or nonstick spray for the tin
Instructions:
- Preheat your oven to 350°F (175°C) and grease a 12-cup mini muffin tin well.
- Whisk the eggs, pumpkin, and water until smooth.
- Stir in the spinach.
- Pour the mixture into the cups, filling each about ¾ full.
- Bake for 12–15 minutes, until set in the center.
- Cool for 10 minutes, then run a thin knife around each cup and lift out.
Notes:
- These will puff up, then sink slightly as they cool. That’s normal.
- They are more delicate than flour-based muffins. Handle gently.
- Keep in the fridge for up to 4 days.
B. Silicone Mold Freezer Bites
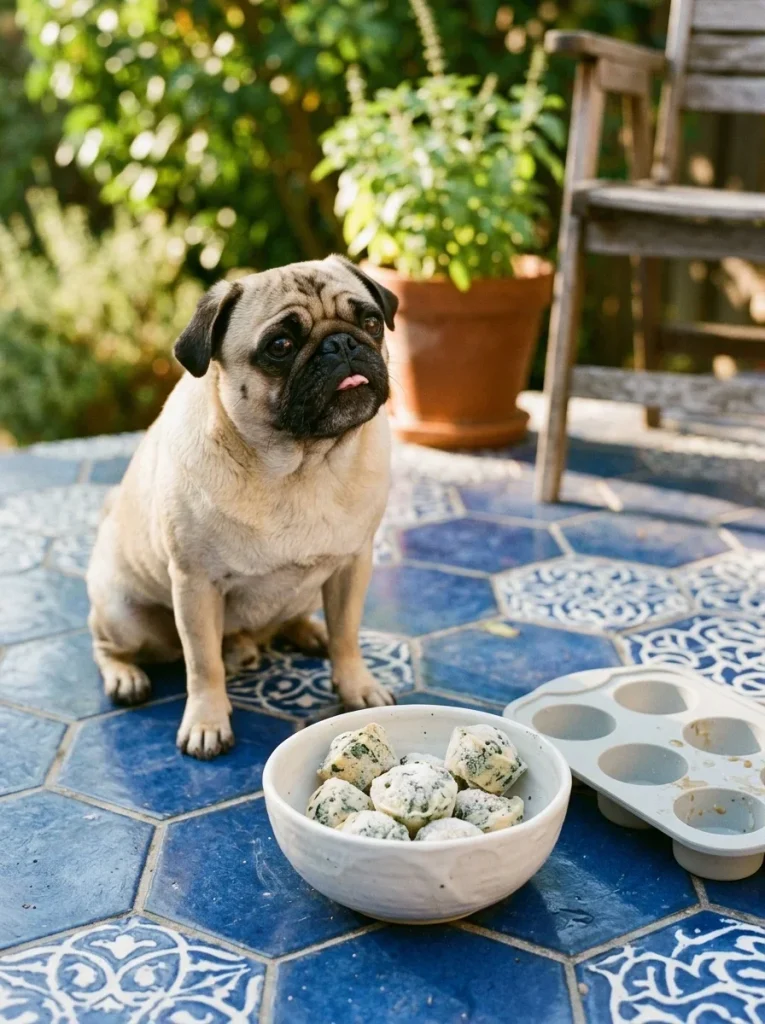
Want a treat with no baking at all? This version uses cooked egg and freezes it in molds. It’s great for hot days and for puppies with sore gums.
Recipe Card 3: Frozen Spinach & Egg Bites
Prep Time: 15 minutes
Bake Time: None (eggs are scrambled on the stove)
Freeze Time: 3–4 hours
Yield: About 20 small bites
Ingredients:
- 3 large eggs, scrambled and fully cooked without salt or butter
- ½ cup cooked spinach, squeezed dry and finely chopped
- ½ cup plain, unsweetened yogurt
- 2 tablespoons water
Instructions:
- Scramble the eggs in a dry nonstick pan until fully set. Let cool.
- Mash the eggs with a fork into small crumbles.
- Mix the eggs, spinach, yogurt, and water in a bowl.
- Spoon the mixture into silicone molds.
- Freeze for 3–4 hours, until solid.
- Pop the bites out and store in a freezer bag.
Notes:
- Serve straight from the freezer for a crunchy cool treat.
- Always supervise puppies while they chew frozen food.
- Keep for up to 2 months in the freezer.
C. Air Fryer Mini Muffins
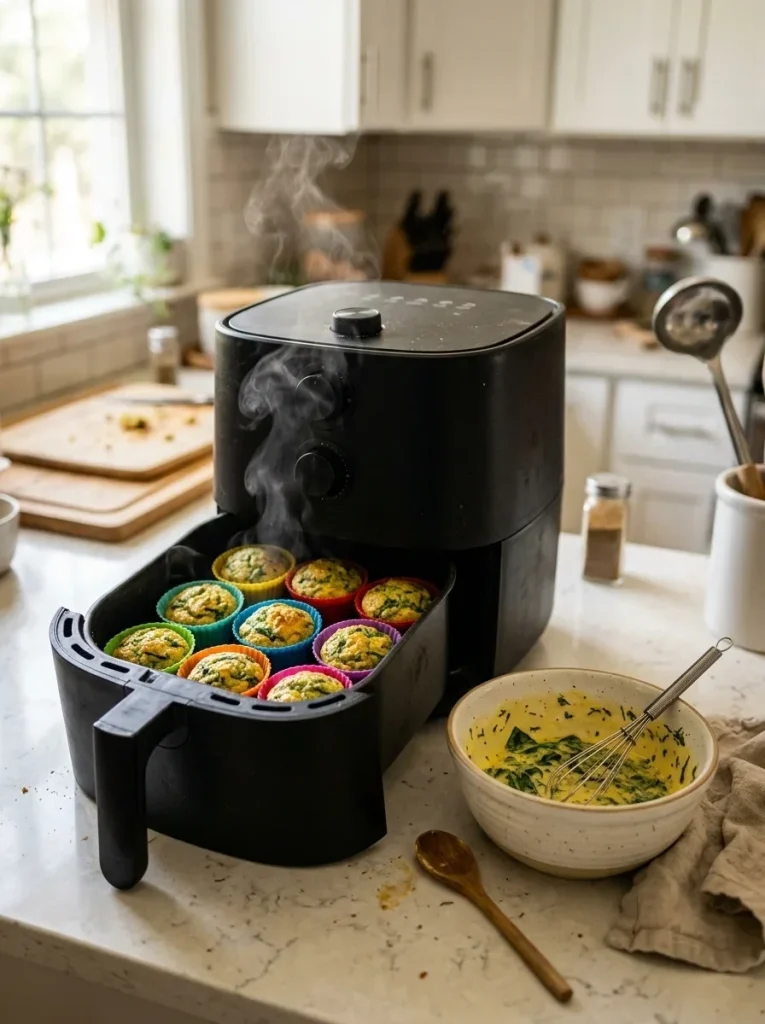
An air fryer heats up fast and uses less energy than a full oven. It’s a good choice if you only want a small batch.
Recipe Card 4: Air Fryer Spinach & Egg Mini Muffins
Prep Time: 10 minutes
Bake Time: 10–12 minutes
Freeze Time: 2 hours (optional)
Yield: About 8 mini muffins per batch
Ingredients:
- 2 large eggs
- ½ cup finely chopped fresh spinach
- ½ cup oat flour
- 3 tablespoons plain Greek yogurt
- 1 tablespoon water
- Silicone or parchment mini liners
Instructions:
- Preheat the air fryer to 330°F (165°C) for 3 minutes.
- Whisk the eggs, yogurt, and water until smooth.
- Stir in the spinach, then fold in the flour.
- Place liners in a silicone mini muffin tray or small cups that fit your air fryer basket.
- Fill each liner ¾ full.
- Air fry for 10–12 minutes, until a toothpick comes out clean.
- Cool completely before serving.
Notes:
- Use silicone or paper liners made for air fryers. Never use loose paper that can fly up into the heating element.
- Check at 10 minutes, since air fryers run hot.
- Work in batches if your basket is small.
D. Skillet Egg Bites
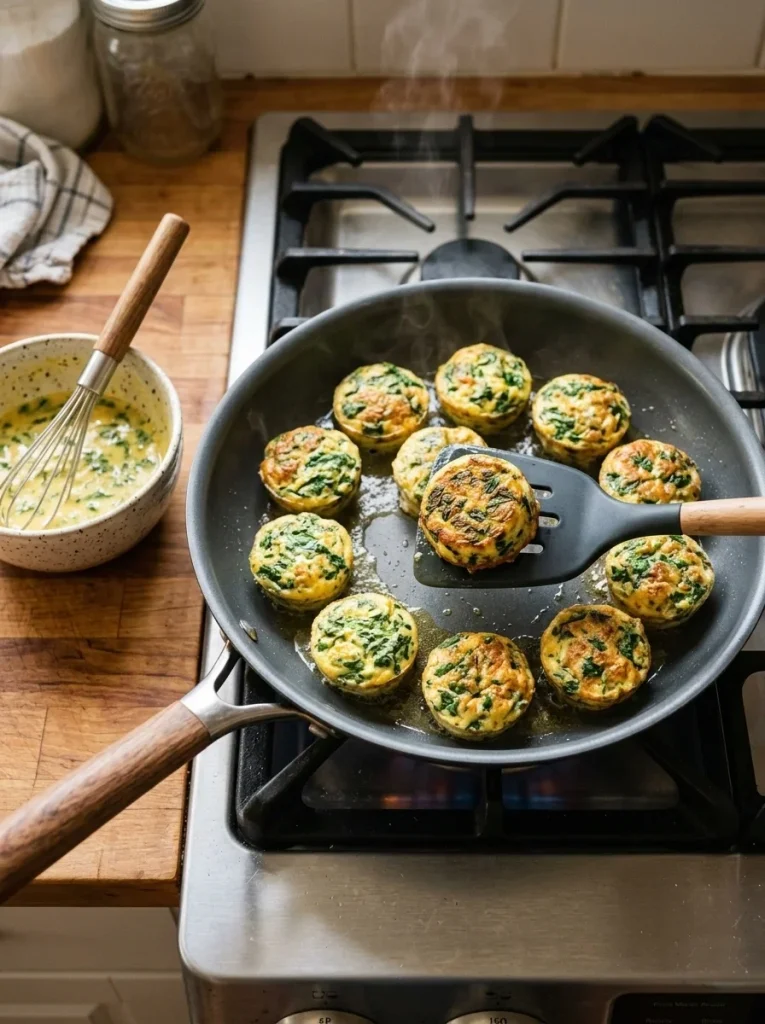
No oven? No air fryer? No problem. This version cooks small rounds of batter right on the stove, like tiny pancakes.
Recipe Card 5: Skillet Spinach & Egg Bites
Prep Time: 8 minutes
Cook Time: 8–10 minutes
Freeze Time: 1 hour (optional)
Yield: About 14 small bites
Ingredients:
- 3 large eggs
- ½ cup finely chopped spinach
- ¼ cup oat flour
- 2 tablespoons water
- 1 teaspoon olive oil for the pan
Instructions:
- Whisk the eggs, water, and flour until smooth.
- Stir in the spinach.
- Heat a nonstick skillet over medium-low heat with the oil.
- Spoon 1 tablespoon of batter per bite into the pan.
- Cook 2–3 minutes per side, until golden and fully set.
- Move to a plate and cool completely.
Notes:
- Keep the heat low so the outside doesn’t brown before the inside cooks.
- These are flatter and softer than muffins, which makes them great for small dogs.
- Keep in the fridge for up to 4 days.
E. Frozen Pupcake Style
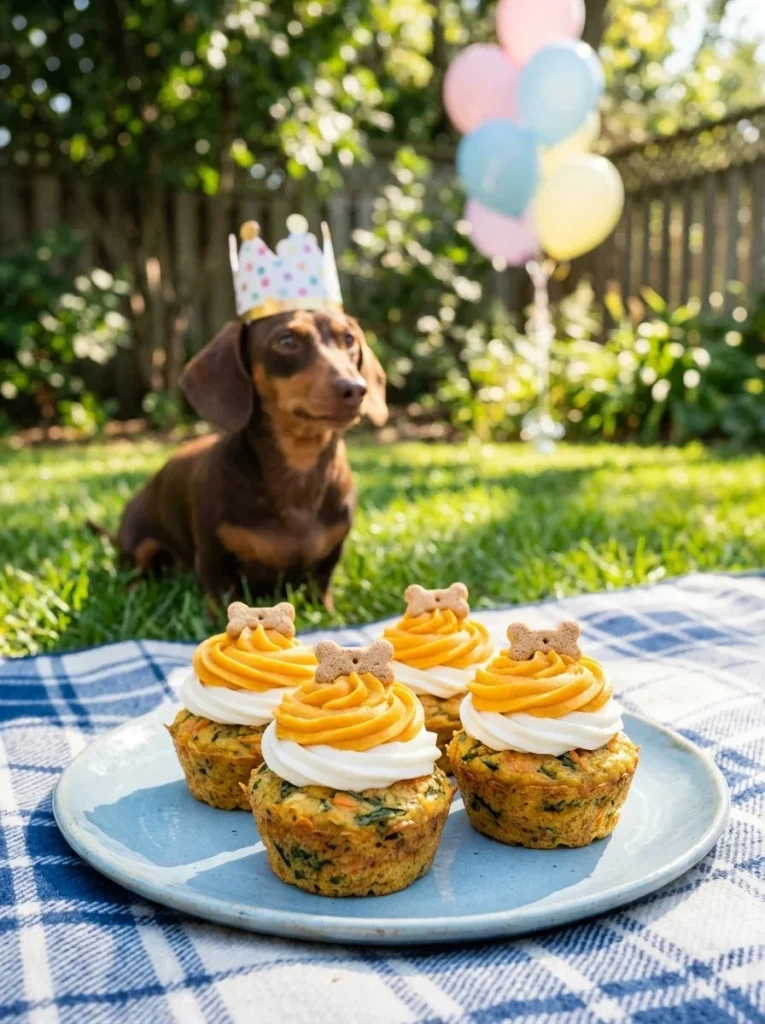
This is the “party” version. The muffin base is baked, then topped with a swirl of yogurt and frozen. It’s a fun treat for birthdays or “gotcha day” celebrations.
If you like this idea, check out these dog birthday cake recipes for more party inspiration.
Recipe Card 6: Frozen Spinach & Egg Pupcakes
Prep Time: 15 minutes
Bake Time: 15–18 minutes
Freeze Time: 2–3 hours
Yield: About 12 pupcakes
Ingredients:
- 1 batch of Classic Spinach & Egg Mini Muffins batter (Recipe Card 1, halved)
- ½ cup plain, unsweetened Greek yogurt
- 1 tablespoon plain pumpkin puree
- A few small dog-safe treats for topping (optional)
Instructions:
- Bake the muffins using Recipe Card 1 in a standard 12-cup muffin tin for 20–22 minutes.
- Cool completely.
- Stir the yogurt and pumpkin together until smooth.
- Spoon or pipe the yogurt mixture onto each muffin.
- Add a small treat on top if you like.
- Freeze for 2–3 hours until the topping is firm.
Notes:
- Check that any toppings are dog-safe and free of xylitol.
- Serve one pupcake at a time. They’re richer than plain muffins.
- Store in a sealed container in the freezer for up to 1 month.
4. Serving Size, Storage & Freezing
You made the muffins. Now, how many should your dog eat, and how do you keep them fresh? This section has the answers.
A. How Many Muffins Per Dog Size
Treats should make up no more than about 10% of your dog’s daily calories. The rest should come from their regular balanced food.
Here’s a simple guide for the classic mini muffins (about one bite each):
| Dog Size | Weight | Muffins Per Day |
|---|---|---|
| Extra small | Under 10 lbs | 1 |
| Small | 10–25 lbs | 1–2 |
| Medium | 25–50 lbs | 2–3 |
| Large | 50–90 lbs | 3–4 |
| Giant | Over 90 lbs | 4–5 |
Start with half a muffin the first time. Watch for any stomach upset over the next day. If all is well, you can serve the full amount.
Handing out treats as rewards? Break muffins into smaller pieces. One muffin can become three or four training rewards.
Keeping treats organized makes life easier. These dog treat station ideas show how to set up a spot for storing homemade goodies.
B. Fridge vs. Freezer Timelines
Homemade treats have no preservatives. That means they spoil faster than store-bought ones.
In the fridge:
- Store in an airtight container.
- Place a paper towel at the bottom to absorb moisture.
- Use within 4–5 days.
In the freezer:
- Freeze in a single layer on a tray first, about 1–2 hours.
- Move to a freezer bag and press out the air.
- Use within 2–3 months.
Quick rule: If they smell sour, look slimy, or show any mold, throw them out.
C. Thawing Tips
You don’t need to thaw frozen muffins for long. Here are a few easy ways:
- Fridge thaw: Move a few muffins to the fridge the night before.
- Counter thaw: Leave them out for 20–30 minutes.
- Quick warm-up: Microwave for 5–8 seconds. Check that they aren’t hot inside.
Never refreeze muffins once they’ve fully thawed. Only take out what your dog will eat that day.
Pro tip: Label your freezer bag with the date. It takes five seconds and saves guessing later.
5. Common Mistakes to Avoid
Even easy recipes can go wrong. Here are the most common problems and how to fix them.
A. Muffins Come Out Dry
Why it happens: Too much flour, or too much time in the oven.
The fix:
- Measure flour by spooning it into the cup and leveling it off. Don’t scoop straight from the bag, which packs in extra.
- Start checking at 13 minutes.
- Add one extra tablespoon of yogurt or water next time.
B. Muffins Stick to the Tin
Why it happens: Egg is very sticky, and mini cups are small.
The fix:
- Grease every cup, including the sides and rim.
- Try silicone liners, which release easily.
- Let muffins rest for 5 minutes before removing them. A thin butter knife can help loosen the edges.
C. Centers Are Undercooked
Why it happens: The oven is too hot, so the outside sets before the inside cooks. Or the cups were overfilled.
The fix:
- Use an oven thermometer to check your temperature.
- Fill cups only ¾ full.
- Always test with a toothpick. Wet batter means it needs more time.
Undercooked egg isn’t safe for dogs. When in doubt, bake a couple of minutes longer.
D. Muffins Turn Out Rubbery
Why it happens: Overmixing, or too many eggs compared to flour.
The fix:
- Fold the batter gently and stop when the flour disappears.
- Measure ingredients carefully.
- Try the flourless egg cup method if you prefer a softer, custard-like texture.
E. Your Dog Turns Up Their Nose
Why it happens: Some dogs are picky about texture or smell.
The fix:
- Warm the muffin for 5 seconds so the egg smell is stronger.
- Crumble a little over their regular food.
- Try the frozen version. Some dogs prefer a cold, crunchy treat.
If your dog suddenly refuses all food, not just treats, contact your vet.
F. Storing Them While Still Warm
Why it happens: Impatience. It happens to everyone.
The fix: Wait until muffins are completely cool. Trapped steam creates moisture, and moisture leads to mold.
6. Are Spinach & Egg Mini Muffins Safe for Dogs? (Short Version)
You’ve got the recipes. Here’s a quick look at why this combination works and what to watch for.
A. Why Spinach and Eggs Work in Small Amounts
Eggs are a good source of protein and contain healthy fats and vitamins. Dogs can eat them as long as they’re fully cooked. Raw egg can carry bacteria and isn’t a good idea.
Spinach contains fiber, vitamins, and minerals. It also has oxalates, which can be a problem in large amounts, especially for dogs with kidney or bladder issues. That’s why these recipes use spinach as a small addition, not the main ingredient.
The key word is moderation. A muffin or two is fine. A whole batch is not.
B. Foods to Keep Out
Some common baking ingredients are unsafe for dogs. Always leave these out:
- Onion and garlic (including powders)
- Salt and seasoning blends
- Xylitol, an artificial sweetener found in some yogurts and peanut butters
- Chocolate, raisins, and grapes
- Macadamia nuts
- Sugar and sweeteners
Always read labels. Even “plain” products can hide unsafe ingredients.
C. When to Check With Your Vet
Every dog is different. Talk to your vet before trying new treats if your dog:
- Has a history of kidney or bladder stones
- Has food allergies or a sensitive stomach
- Is on a prescription or special diet
- Is pregnant, nursing, or a young puppy
Puppies have different nutritional needs from adult dogs. Learn more about puppy veterinary needs before adding new foods.
Warning signs to watch for: vomiting, diarrhea, itching, swelling, or unusual tiredness after eating a new treat. If you see any of these, stop feeding the treat and call your vet.
Love cooking for your pup? Try these homemade dog food recipes for full meal ideas. And if you’re building a cozy snack spot at home, these dog feeding station ideas can help you organize it.
Conclusion
Spinach & egg mini muffins for dogs are a simple way to treat your pup with real ingredients. The classic oven recipe is a great place to start, and the other methods give you options for any kitchen or any dog.
Here’s a quick recap:
- Start with the classic oven-baked recipe.
- Try flourless cups if your dog avoids grains.
- Use freezer bites or pupcakes for hot days and celebrations.
- Keep portions small, and store extras in the freezer.
- Check with your vet if your dog has health concerns.
Pick one recipe this weekend and give it a try. Your dog will be waiting by the oven.

Izzy is an experienced ranch worker who has a passion for exploring nature and getting up close to wildlife. With her connections to various animal organizations, Izzy is well-versed in animal care and rehabilitation.