Snowman Dog Bandana: Free Christmas Crochet Pattern
Nothing says Christmas like a snowman — and this Snowman Dog Bandana turns your pup into one. A crisp white triangular bandana in single crochet, a cozy red ribbed neckband, three classic black snowman buttons down the front, and a little red scarf draped at the side: it is the whole snowman, wearable, in one evening of stitching.
This is a genuinely beginner-friendly holiday project. If you can single crochet, double crochet, and sew on a button, you have every skill this bandana asks for. It comes in three sizes (S, M, L) measured by neck, works up in worsted-weight yarn you probably already own, and the finished bandana photographs like a dream against a Christmas tree. Most crocheters finish the whole thing — bandana, scarf, and buttons — in a single cozy evening, which makes it perfect for last-minute gifting.

Why This Snowman Design Works
The genius of the snowman bandana is how little it needs to read instantly as a snowman: white triangle for the body, black buttons for the coal, red for the scarf. Dogs cannot wear a top hat (well, they can, but not for long), so the bandana distills the snowman to its three most recognizable elements — and it works at a glance, even in a blurry holiday photo.
The construction is honest too. The ribbed neckband does the real work of fit — its stretch accommodates the difference between a relaxed neck and an excited one — while the triangle hangs free, so it never pulls or binds when your dog moves. The scarf is pure theater, sewn on securely at one side so it drapes like the real thing without any wrapping or tying. Every part earns its place.
Before You Get Started
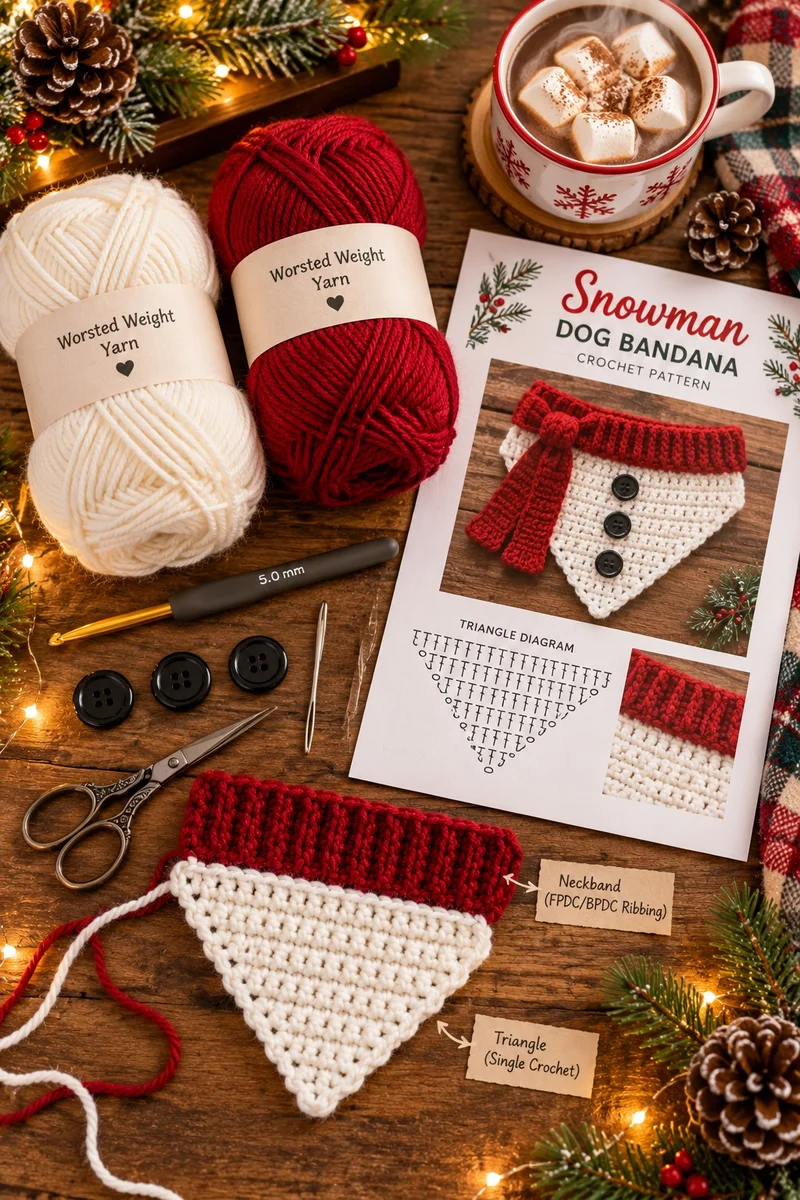
This bandana is built in three simple parts: a red ribbed neckband worked flat and seamed into a ring, a white triangular panel worked bottom-up from the point and sewn to the front of the band, and a red scarf rectangle with a folded cuff attached at the side. Three black buttons sewn down the triangle’s center complete the snowman look.
You should be comfortable with single crochet, double crochet, and front/back post stitches (the ribbing). The triangle uses a simple increase rhythm — one increase row followed by two plain rows — so the shaping stays predictable. Any smooth worsted-weight yarn that meets gauge works; choose a soft acrylic that will not itch your dog’s neck.
Fit & comfort check: You should be able to slide two fingers comfortably between the neckband and your dog’s neck. The ribbing has natural stretch, but measure the neck first and choose the size with a little ease — never tight.
Button warning: the three black buttons are a chewing hazard. Supervise your dog while wearing the bandana, and for determined chewers or puppies, skip the buttons entirely or embroider black circles with yarn instead.
Tools & Materials Needed
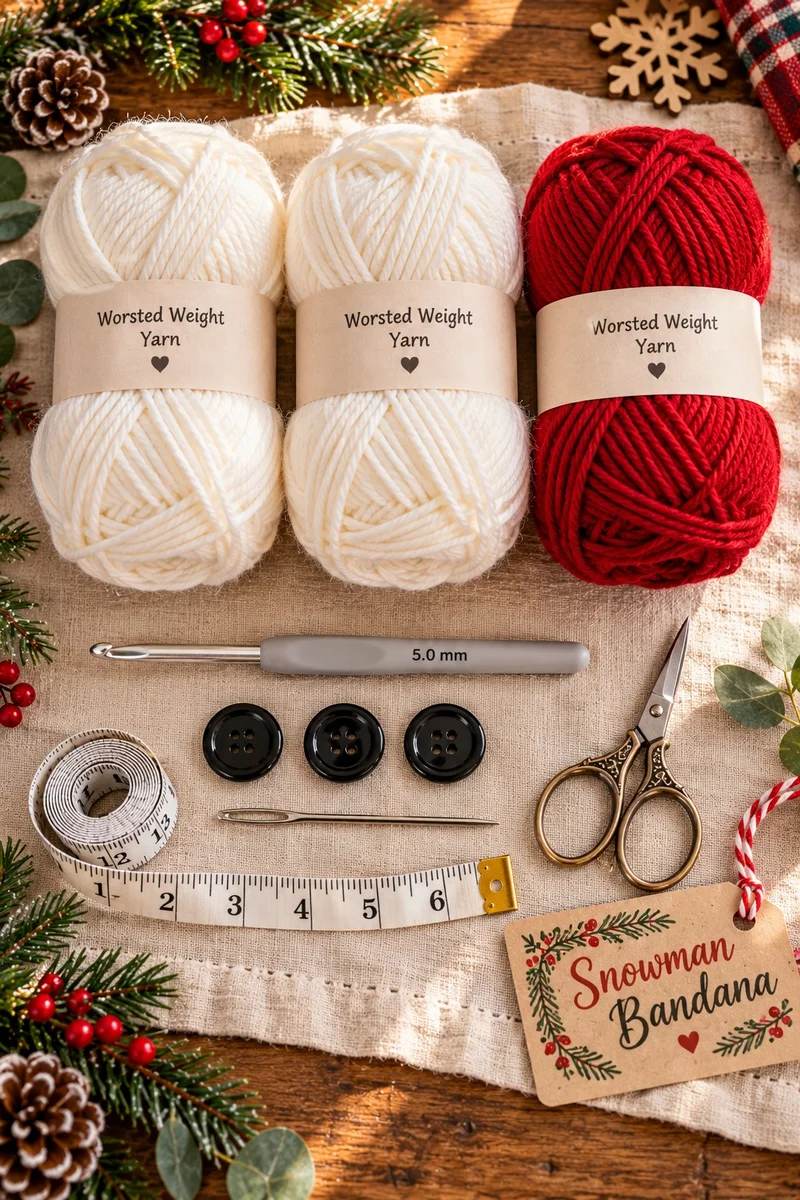
Yarn
- Worsted-weight (#4) acrylic or acrylic-blend yarn, soft and machine-washable.
- White: approx 140 (180, 230) yd for sizes S (M, L)
- Red: approx 85 (110, 140) yd for sizes S (M, L)
Hook & Notions
- US H-8 (5.0 mm) crochet hook, or size needed to obtain gauge
- 3 black buttons, approx 3/4 in (2 cm) diameter
- Yarn needle with a large eye, scissors, flexible tape measure
Size Info and Gauge
S
Neck: 10–12″
Bandana: 6″ wide × 7.5″ long
Terriers, Dachshunds, small spaniels
M
Neck: 14–16″
Bandana: 8″ wide × 10″ long
Beagles, French Bulldogs, Cocker Spaniels
L
Neck: 18–20″
Bandana: 10″ wide × 13″ long
Labradors, Golden Retrievers, large mutts
Gauge: 16 sc × 18 rows = 4″ in single crochet; neckband ribbing 14 dc sts = 4″ (US H-8 / 5.0 mm hook). Measure the neckband against a tape measure as you go — ribbing stretches, so trust the tape, not your eyes.
Abbreviations (US Terms)
ch – chain • sc – single crochet • dc – double crochet • sl st – slip stitch • fpdc – front post double crochet • bpdc – back post double crochet • st(s) – stitch(es) • inc – increase (2 sc in same st)
Pattern Notes
- Sizes are written as S (M, L) throughout. Circle your size before you begin.
- The neckband is worked flat in rows, then seamed into a ring — the seam hides at the back of the neck.
- The triangle is worked bottom-up from the point: one increase row (2 sts gained) followed by two plain rows, repeated. Count your stitches after every increase row.
- Ch 1 at the start of sc rows does not count as a stitch; ch 2 at the start of ribbing rows does not count either.
- For the ribbing, stitch counts must stay even so the fpdc/bpdc alternation lines up — all three sizes are even.
- Weave in ends as you go; the color changes leave several tails.
Pattern Instructions
Part 1: Ribbed Neckband (red)
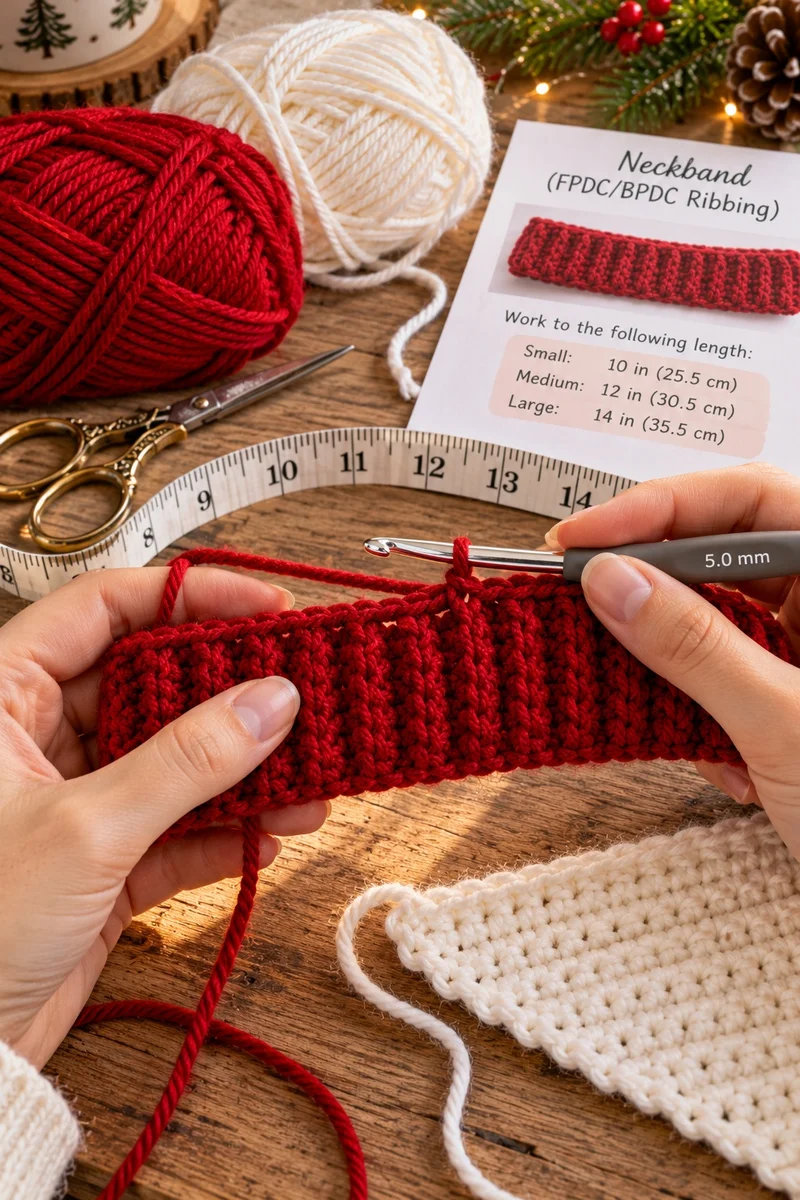
Chain 43 (57, 71).
- Row 1: Dc in 4th ch from hook and in each ch across. (42, 56, 70 dc)
- Rows 2–7: Ch 2 (does not count as st), turn, *fpdc in next st, bpdc in next st* repeat across. (42, 56, 70)
- Fasten off, leaving a long tail. Whipstitch the two short ends together to form a ring. Tuck the seam at the back of the neck.
Part 2: Bandana Triangle (white)
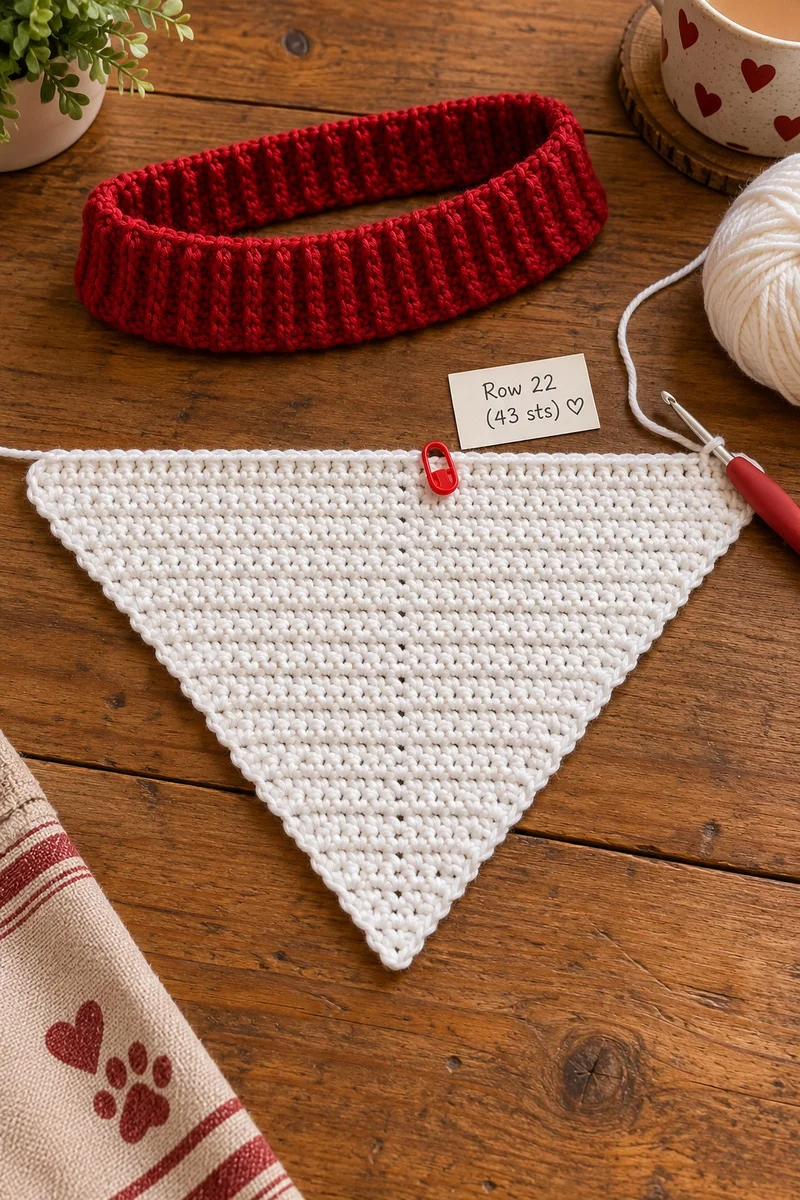
- Row 1: Ch 2, 2 sc in 2nd ch from hook. (2 sts)
- Row 2 (inc row): Ch 1, turn, 2 sc in first st, sc in each st to last st, 2 sc in last st. (4 sts)
- Rows 3–4: Ch 1, turn, sc in each st across. (4 sts)
- Repeat the 3-row sequence [inc row, 2 plain rows]: S: 10 more times (24 sts, 34 rows total) M: 14 more times (32 sts, 46 rows total) L: 18 more times (40 sts, 58 rows total).
- Fasten off, leaving a long tail for sewing the triangle to the neckband.
Part 3: Scarf (red)
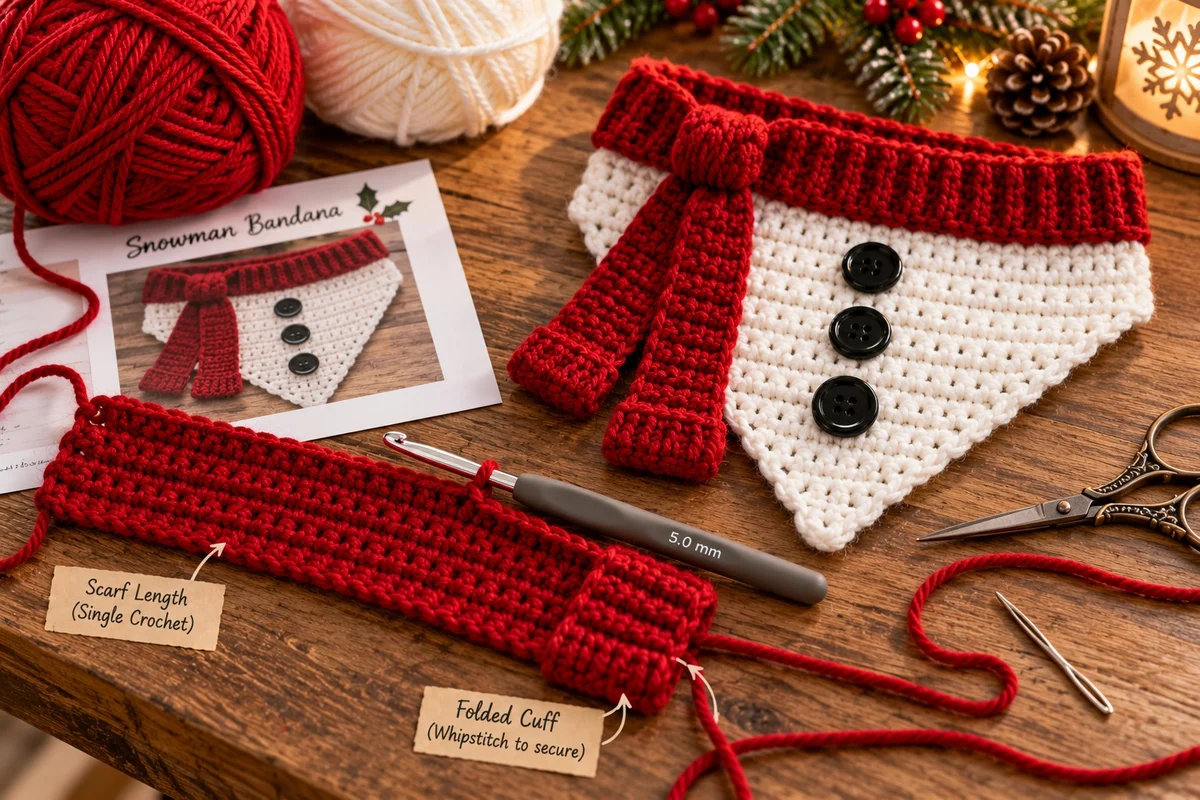
Chain 17 (19, 21).
- Row 1: Sc in 2nd ch from hook and in each ch across. (16, 18, 20 sts)
- Rows 2+: Ch 1, turn, sc in each st across. Work until the scarf measures S: 18″ (81 rows) M: 21″ (95 rows) L: 25″ (113 rows).
- Fasten off. Cuff: fold the last 3″ (7 cm) of one end to the wrong side and whipstitch the side edges, forming the folded cuff.
Part 4: Assembly & Buttons
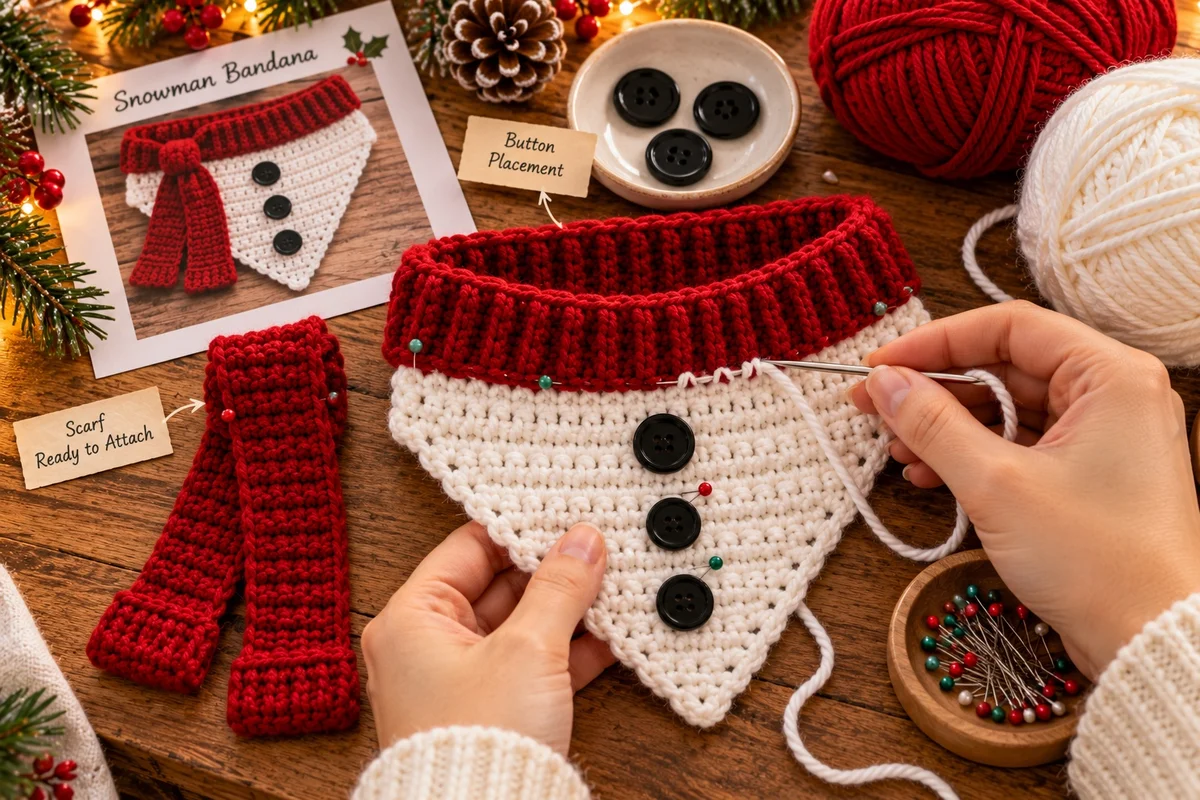
- Center the triangle’s wide top edge on the front of the neckband ring (seam at back). Whipstitch in place with white yarn.
- Sew one short end of the scarf to the side of the neckband, about 2″ from the front center, overlapping 1″. Use red yarn and stitch securely — the scarf gets tugged.
- Sew the 3 black buttons vertically down the center of the white triangle, evenly spaced. Pull snug but do not pucker the fabric.
- Weave in all remaining ends.
Finishing
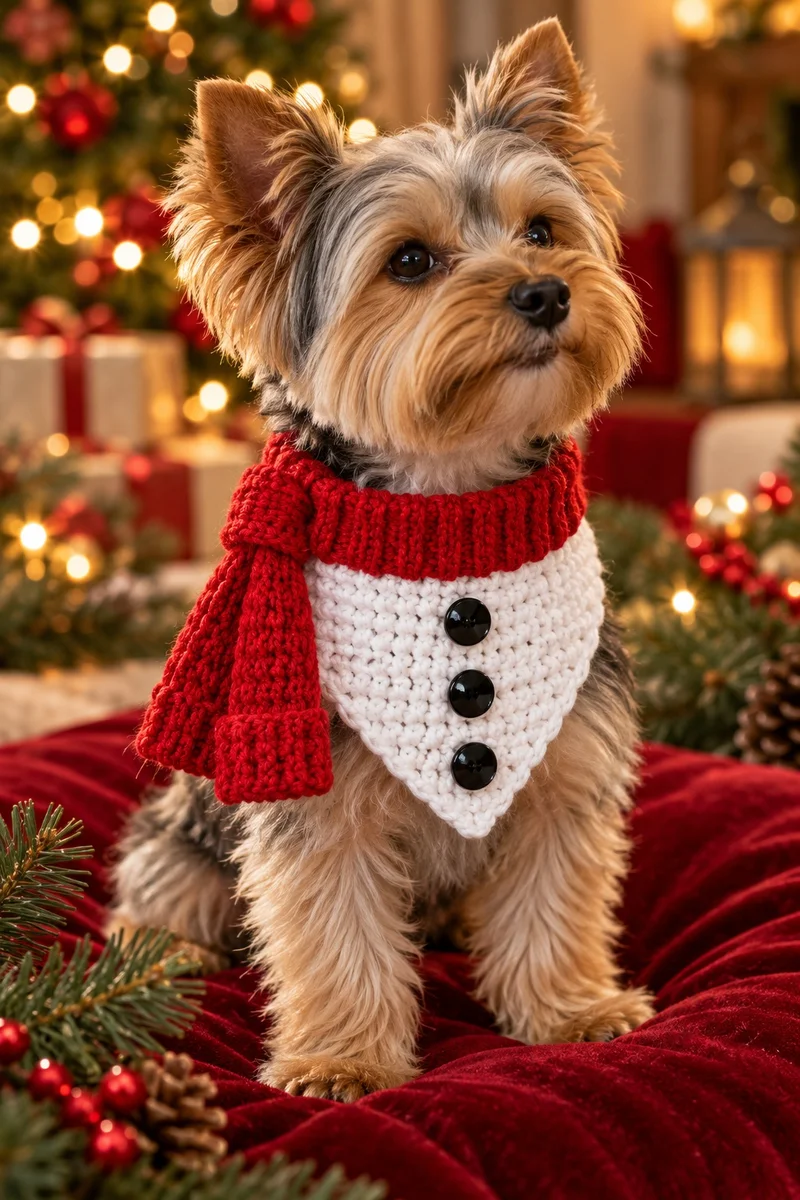
Weave in every end, working tails through the backs of stitches. Give the bandana a light steam-block (hover the iron — never press acrylic) so the triangle lies flat and the ribbing relaxes evenly. Try it on your dog and check the two-finger fit at the neck before the holiday photos. If the scarf twists, a single stitch tacking it to the triangle’s edge keeps it draped perfectly.
Customizing the Fit
Between sizes: work the neckband to the larger size’s chain count but stop the triangle one repeat early — the band stretches, the triangle does not.
Longer scarf: add rows in multiples of 1″ (about 4–5 rows) until the drape looks right on your dog.
No-sew option: skip the buttons and embroider three black circles with yarn and a tapestry needle — safer for puppies and heavy chewers, and it looks just as charming. You can also use felt circles glued with fabric adhesive for a completely stitch-free alternative.
Frequently Asked Questions
Final Thoughts
The Snowman Dog Bandana is proof that the best holiday projects are the simple ones: three parts, two colors, one evening — and a very happy dog who looks ready for a Christmas card. The ribbed neckband is comfortable enough for all-day wear at holiday gatherings, and the whole thing washes easily when the festivities are over.
Make one for your own pup first to dial in the perfect fit, then batch a few as gifts — they stitch up fast once the triangle rhythm clicks, and every dog on the block will want one.
For more festive crochet, try the granny square dog sweater in holiday colors, or keep the winter theme going with the cozy snuggle hoodie for truly cold days.
Izzy is an experienced ranch worker who has a passion for exploring nature and getting up close to wildlife. With her connections to various animal organizations, Izzy is well-versed in animal care and rehabilitation.