Odie Dog Sweater Crochet Pattern: Classic Squares, 4 Sizes
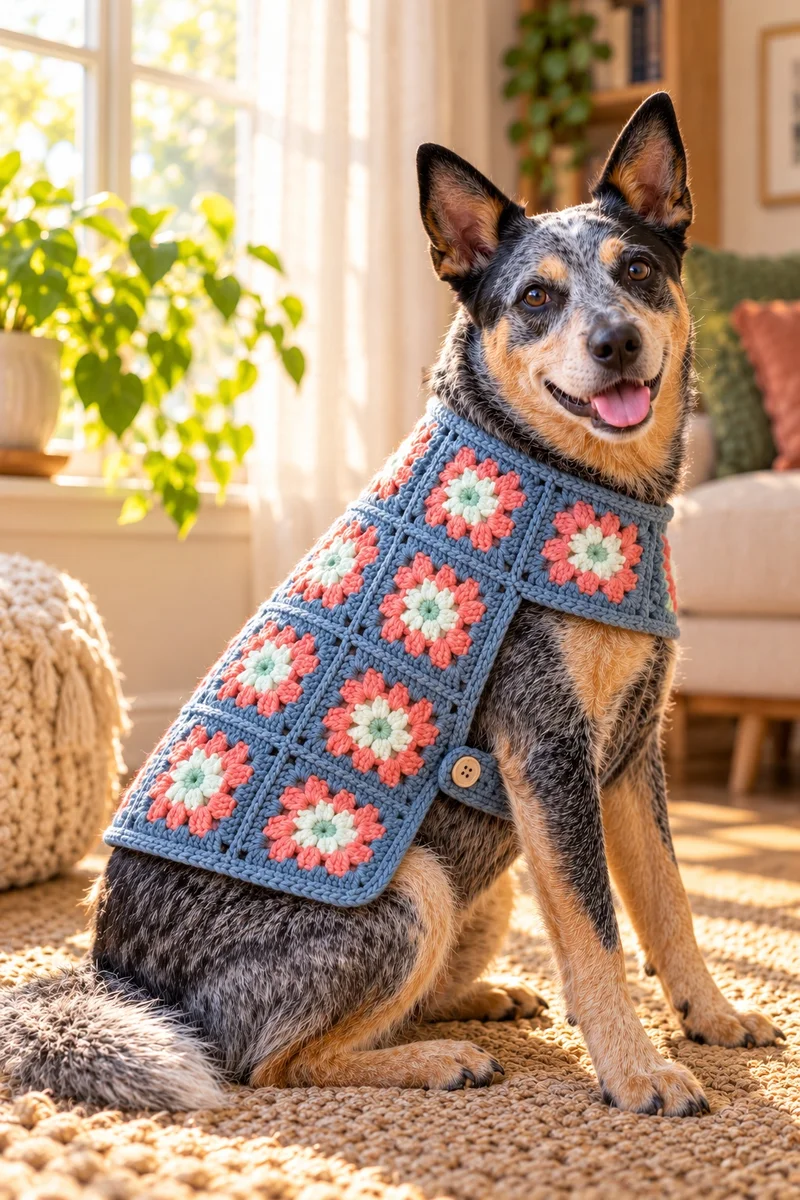
There is a reason the granny square has survived every crochet trend for a century: it is simple, it is beautiful, and it turns scraps into something greater than the sum of its parts. The Odie Dog Sweater Crochet Pattern takes that beloved motif and drapes it over your dog — a classic granny square coat in dusty blue-grey with coral-pink and mint-cream centers, joined into one flowing panel that wraps the chest and buttons under the belly.
No sleeves, no leg openings, no shaping to fear. If you can crochet a granny square, you can make this entire coat. It comes in four sizes, XS through L, and because the panel is just squares, resizing it is as easy as adding a row.
Before You Get Started
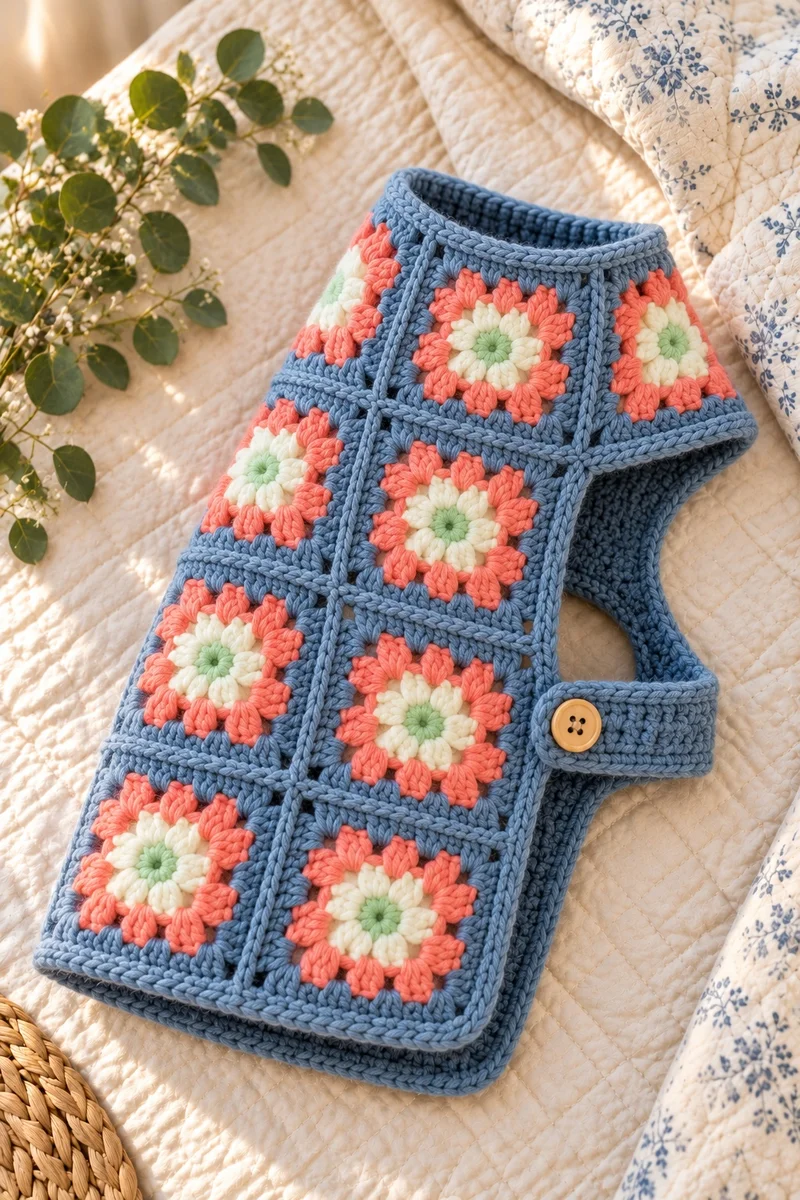
The Odie coat is the simplest garment in this collection. You will crochet classic three-round granny squares — mint-cream centers, coral-pink middles, blue-grey outer rounds — then whipstitch them into a rectangle, work one round of single crochet around the whole panel, and add a small belly strap with a button. That is the entire construction.
You should know how to make a magic ring, double crochet, and change colors. Joining is done with a yarn needle, so there is no seaming technique to learn beyond the whipstitch. Any smooth worsted-weight yarn that meets gauge works; this is also a wonderful scrap project if you keep the outer round consistent for a unified look.
Fit & comfort check: The panel should wrap the chest with the side edges meeting comfortably under the belly — not pulling, not gaping. You should be able to slide two fingers under the strap. Check the button regularly; replace it with a sewn loop or snap if your dog paws at it.
Never leave a dog unsupervised in a handmade garment until you know they will not chew it. A coat can catch on crates and fences; check the strap for rubbing on short-coated breeds, and keep buttons and loose ends away from curious mouths.
Tools & Materials Needed
Yarn
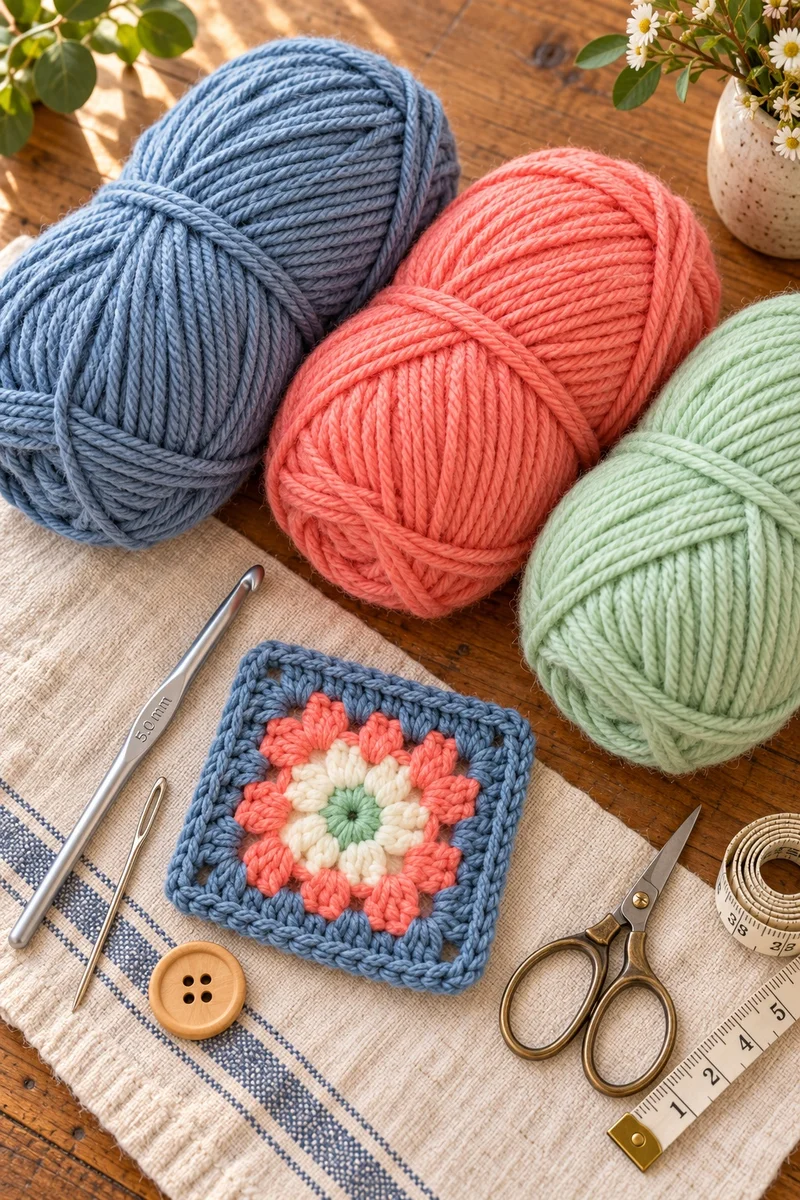
- Worsted-weight (#4) acrylic or acrylic-blend yarn, soft and machine-washable. Color A dusty blue-grey (outer rounds, joining, edging, strap), Color B coral pink (middle round), Color C mint cream (center round).
- Color A: 2 (3, 3, 4) skeins of 100 g / 200 m for sizes XS (S, M, L)
- Color B: 1 (1, 2, 2) skeins for sizes XS (S, M, L)
- Color C: 1 (1, 1, 2) skeins for sizes XS (S, M, L)
Hook & Notions
- US H-8 (5.0 mm) crochet hook, or size needed to obtain gauge
- One 1-inch button (flat, washable)
- Yarn needle with a large eye for joining and sewing
- Scissors and a flexible tape measure
Size Info and Gauge
XS
Panel: 12″ × 8″
Squares: 6 (3 × 2)
Chihuahuas, Yorkies, tiny terriers
S
Panel: 16″ × 12″
Squares: 12 (4 × 3)
Mini poodles, Shih Tzus, small spaniels
M
Panel: 20″ × 12″
Squares: 15 (5 × 3)
Beagles, French bulldogs, spaniels
L
Panel: 24″ × 16″
Squares: 24 (6 × 4)
Labradors, pointers, large mutts
Gauge: each 3-round granny square = 4″ across after light blocking (US H-8 / 5.0 mm hook). Make one square first and measure it — if yours is bigger or smaller, the whole panel scales with it, so this swatch is the entire fit check.
Abbreviations (US Terms)
ch – chain • sc – single crochet • dc – double crochet • sl st – slip stitch • MR – magic ring • sp(s) – space(s) • st(s) – stitch(es) • RS – right side
Pattern Notes
- Sizes are written as XS (S, M, L) throughout. Circle your size before you begin.
- The ch 3 at the start of a granny round counts as the first dc.
- Work all squares with the right side facing; join with right sides up so the texture is consistent.
- Leave a 6-inch tail on the last round of each square for joining — it saves weaving later.
- Lightly block each square to 4 inches before joining; even squares make an even panel.
- Weave in ends as you go — 24 squares means 72 ends if you save them all for the end.
Pattern Instructions
The Classic Granny Square
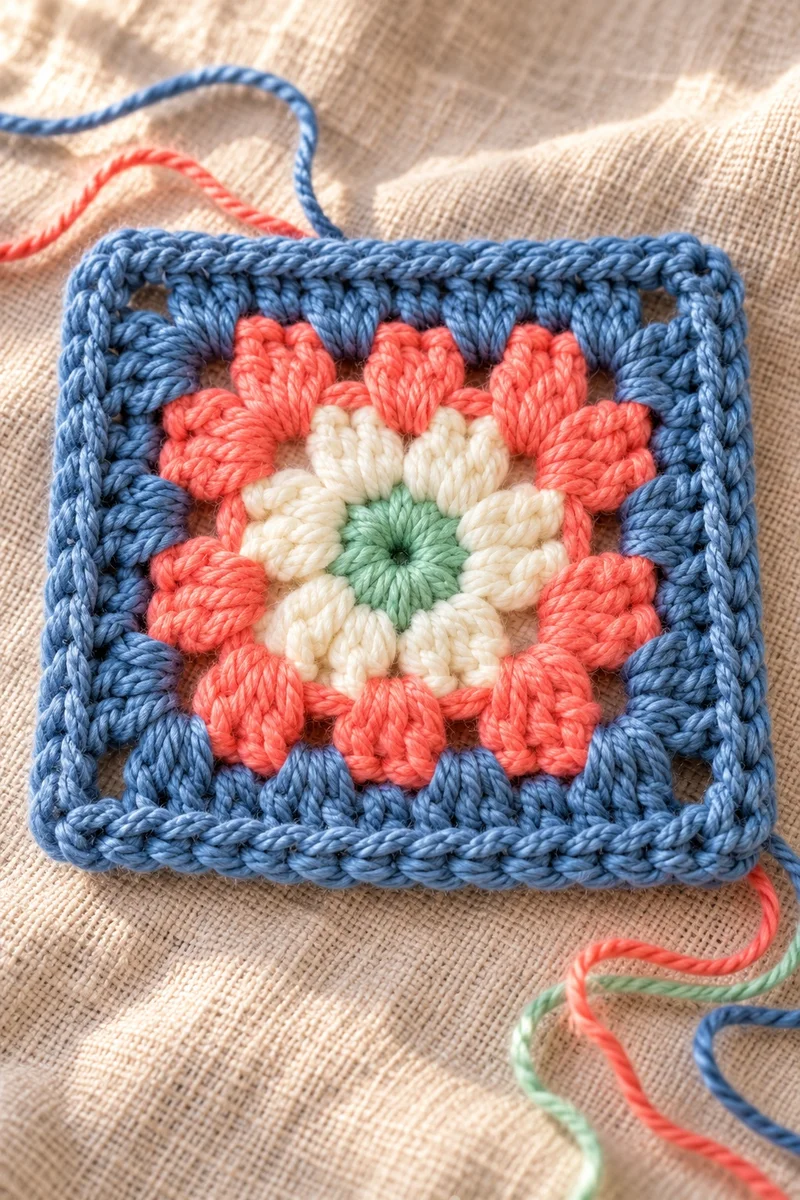
Work each square in three rounds. You will need 6 squares for XS, 12 for S, 15 for M, and 24 for L.
Round 1 (Color C): Magic ring (MR). Ch 3 (counts as first dc here and throughout), 2 dc into ring. Ch 2, *3 dc into ring, ch 2* — repeat * 3 times. Sl st to the top of the beginning ch-3 to join. Fasten off. (12 dc, 4 ch-2 sps.)
Round 2 (Color B): Join with sl st in any ch-2 sp. Ch 3 (counts as first dc), (2 dc, ch 2, 3 dc) into the same ch-2 sp — this is the first corner. *Ch 1, (3 dc, ch 2, 3 dc) in the next ch-2 sp* — repeat * 3 times. Ch 1, sl st to the top of the beginning ch-3 to join. Fasten off. (24 dc, 4 corner ch-2 sps, 4 ch-1 sps.)
Round 3 (Color A): Join with sl st in any corner ch-2 sp. Ch 3 (counts as first dc), (2 dc, ch 2, 3 dc) into the same sp. *Ch 1, 3 dc in the next ch-1 sp, ch 1, (3 dc, ch 2, 3 dc) in the next corner ch-2 sp* — repeat * 3 times. Then ch 1, 3 dc in the last ch-1 sp, ch 1, sl st to the top of the beginning ch-3 to join. Fasten off, leaving a 6-inch tail for joining. (36 dc, 9 dc per side, 4 corner ch-2 sps.)
Joining the Coat Panel
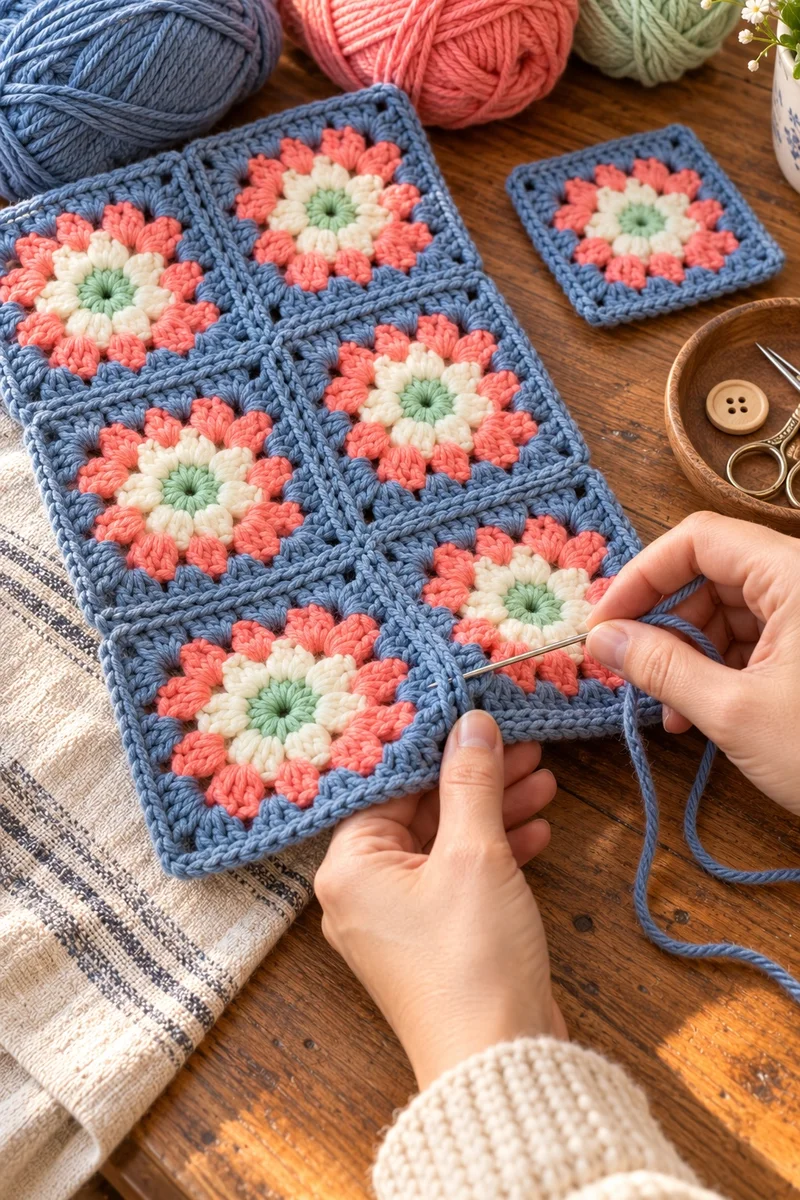
Arrange your squares into a rectangle: XS 3 squares across x 2 long, S 4 x 3, M 5 x 3, L 6 x 4. The ACROSS count wraps around the chest; the LONG count runs neck to tail.
With right sides facing up, join first into horizontal strips using a whipstitch worked through the back loops only (slip-stitch joins work just as well). Then join the strips to one another the same way. Work in Color A and carry the yarn between squares so you do not need to fasten off each time.
Finished panel: XS 12″ x 8″, S 16″ x 12″, M 20″ x 12″, L 24″ x 16″.
Panel Edging
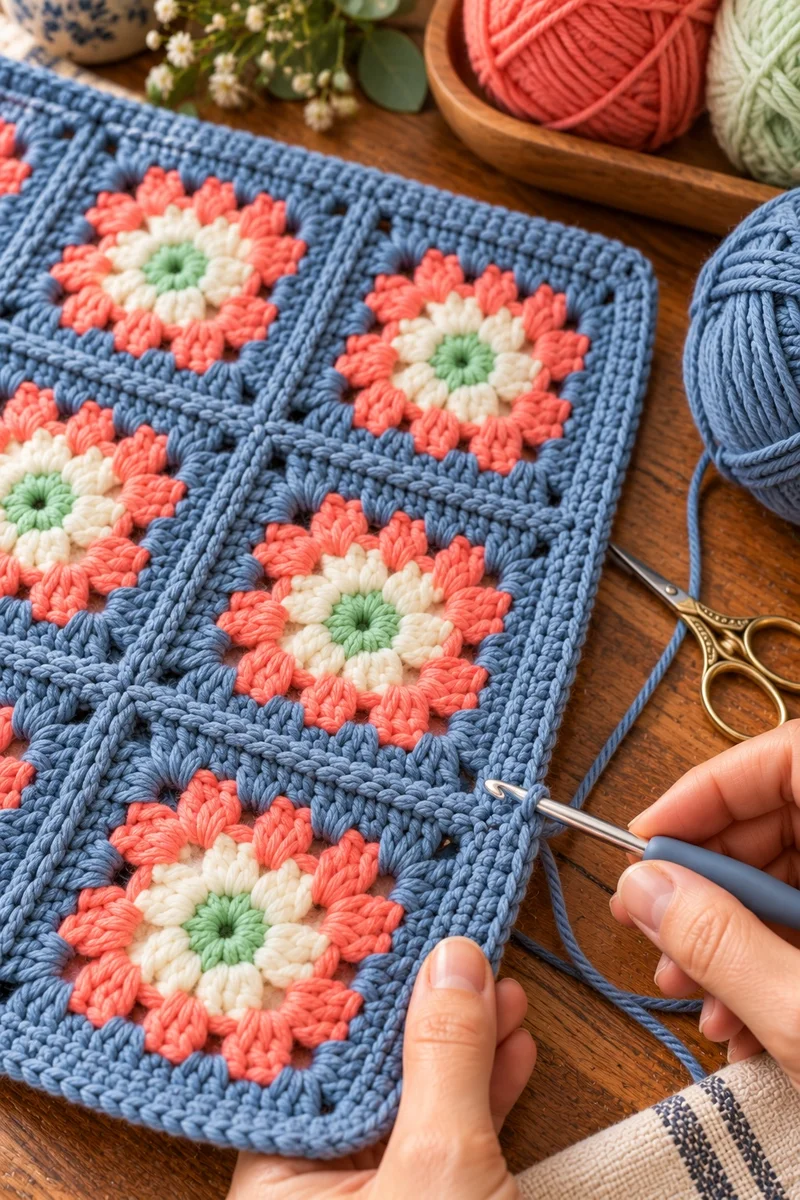
Join Color A at any corner ch-2 sp. Ch 1, *3 sc in the corner ch-2 sp, sc in each dc and 1 sc in each ch-1 sp across* — repeat * around all four sides. Sl st to the first sc. Fasten off.
Each square side takes 11 sc (9 for the dc, 1 for each ch-1 sp); the 3-sc corners turn the corners neatly. Do not count stitches around the perimeter — the total varies with joining tension. Keep the edging flat and even rather than stretched.
Belly Strap
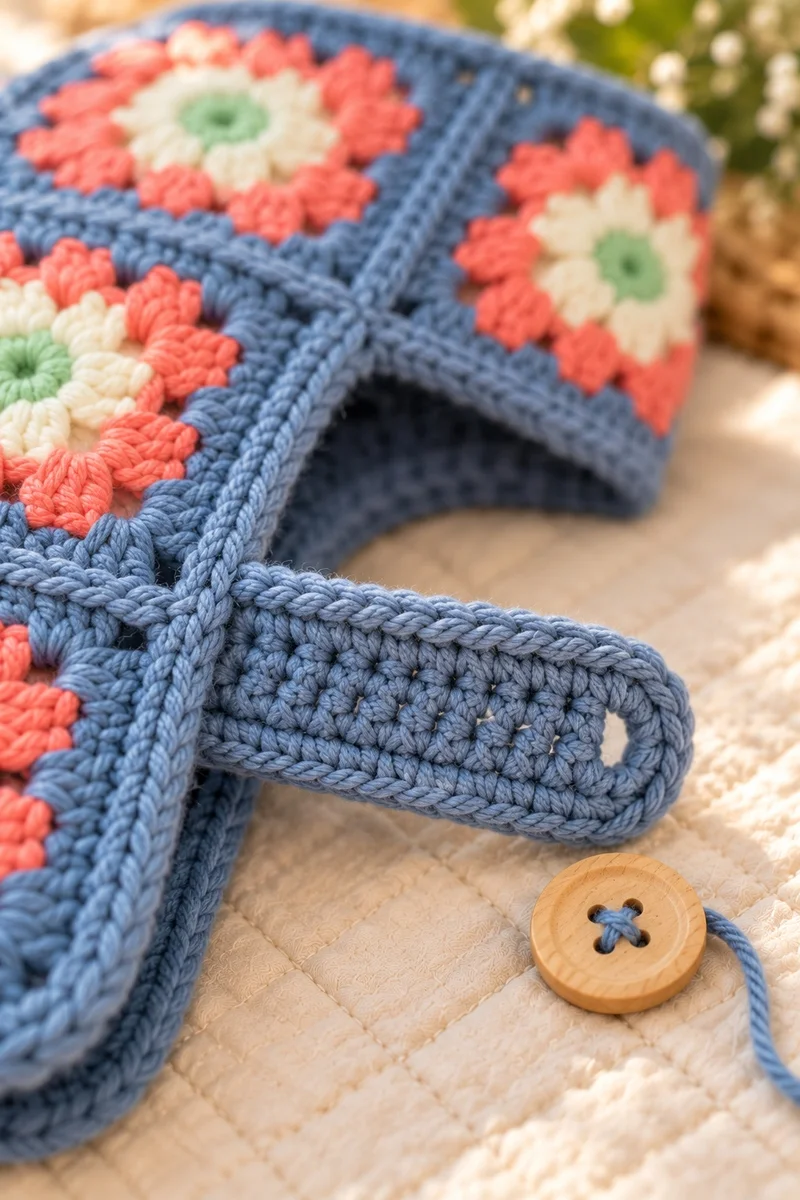
In Color A, ch 21 (25, 29, 33). Sc in the 2nd ch from hook and in each ch across. (20 (24, 28, 32) sc.) Work 2 more rows of sc. Fasten off, leaving a tail for sewing.
Sew one short end of the strap to the middle of one long side edge, about one-third down from the neck edge (the belly position). Sew a 1-inch button to the matching spot on the opposite long side edge. The strap wraps under the belly and the button slips through the crochet fabric to close. Try the coat on your dog and adjust the strap position before sewing it down firmly.
Finishing
Weave in every end, working tails through the backs of stitches. Give the joined panel a light steam-block (hover — never press acrylic) so it drapes evenly.
Sew the button on firmly with several passes of thread-weight yarn or doubled sewing thread — this is the one structural stress point. Try the coat on your dog, check that the panel wraps the chest without pulling, and confirm the strap sits at the belly, not the throat. Adjust the strap position before sewing it down for good.
Customizing the Fit
Between sizes: Add or remove one column of squares across (each column = 4 inches of chest). The pattern’s math is just squares, so custom sizing is trivial.
Longer coat: Add one row of squares to the length for more back coverage — each row adds 4 inches.
Deeper chest: If your dog is barrel-chested, add a column across; the strap will still close as long as the edges meet under the belly.
Color play: Keep the outer round consistent for the unified look, and let the centers run wild — rainbow middles, ombré rows, or one accent square. The construction never changes.
Frequently Asked Questions
Final Thoughts
The granny square coat is proof that the simplest construction can make the most charming garment. No shaping, no sleeves, no fear — just squares, joined with care, in colors that make you happy.
Make the sample’s blue-grey, coral, and mint exactly, or raid your scrap bag and let the centers tell their own story. Either way, the math is checked and the method is forgiving.
Happy crocheting — and save the last square’s tail. You will want to make another one.
Izzy is an experienced ranch worker who has a passion for exploring nature and getting up close to wildlife. With her connections to various animal organizations, Izzy is well-versed in animal care and rehabilitation.