12 No Bake Dog Treats Homemade Using 2 to 5 Ingredients
If your dog gives you those big puppy eyes every time you open the fridge, you’re going to love this list. No bake dog treats homemade are some of the easiest snacks you can whip up for your pup — no oven, no waiting for things to cool, and no fancy baking skills required.
All you really need is a blender, a few dog-safe ingredients, and a mold or tray. In a few hours (or overnight in the freezer), you’ll have a stash of cool, healthy snacks ready whenever your dog deserves a little something extra.
Below are 12 simple, vet-friendly no bake dog treats ideas gathered from real dog parents and their pups. Each one is beginner-friendly, uses ingredients you likely already have, and takes just a few minutes of hands-on prep before the freezer does the rest of the work.
Let’s get into the recipes first, then we’ll cover the basics, storage tips, and a few safety notes to keep your pup happy and healthy.
Contents
- 12 Easy No Bake Dog Treats Homemade Recipes to Try
- 1. Chicken and Sweet Potato Frozen Bites
- 2. No Bake Pumpkin Peanut Butter Oat Balls
- 3. Frozen Banana Yogurt Swirls
- 4. Cooling Broth and Berry Ice Cubes
- 5. Blueberry Pumpkin Celery Bites
- 6. 3-Ingredient Yogurt Applesauce Blueberry Bites
- 7. Strawberry Banana Frozen Yogurt Cups
- 8. Banana Berry Crunch-Top Treats
- 9. Blueberry Banana Paw and Bone Pops
- 10. Coconut Apple Turmeric Treats
- 11. Mixed Fruit and Veggie Pupcicles
- 12. Apple Banana Pawsicles
- Why No Bake Dog Treats Homemade Are So Popular
- How to Make No Bake Dog Treats at Home (Quick Basics)
- Storage and Serving Tips for Frozen Dog Treats
- Ingredient Safety: What to Avoid in Homemade Dog Treats
- Final Thoughts
12 Easy No Bake Dog Treats Homemade Recipes to Try
Each of these recipes was inspired by real dog owners who make treats at home. Pick a few that match what’s already sitting in your kitchen, and feel free to mix and match flavors once you get the hang of it.
1. Chicken and Sweet Potato Frozen Bites
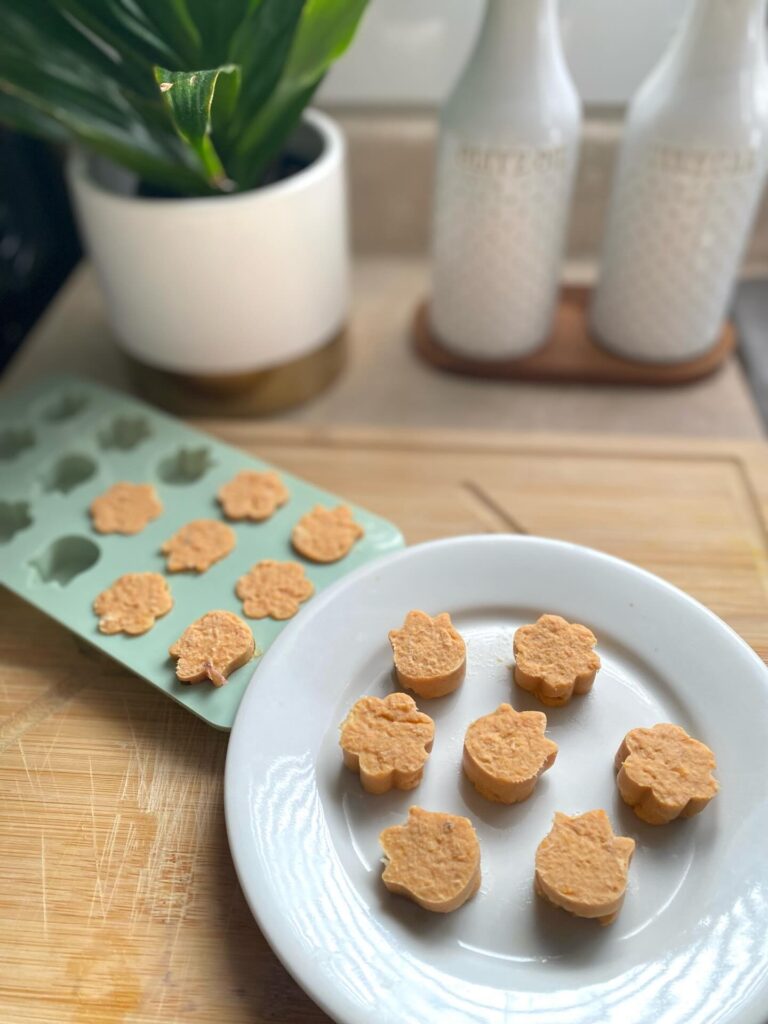
This is about as simple as homemade treats get — just two real-food ingredients and a blender. It’s perfect for dogs with sensitive stomachs since there’s nothing artificial involved.
Prep time: 10 minutes (plus 2+ hours to freeze) Makes: About 20 small bites, depending on mold size
Ingredients:
- 1 cup boiled, shredded chicken (no skin, no seasoning)
- 1 cup baked sweet potato, peeled and cooled
How to make it:
- Add the shredded chicken and sweet potato to a blender or food processor.
- Blend until the mixture is smooth and well combined. Add a splash of water if it’s too thick to blend easily.
- Spoon or pipe the mixture into small silicone molds.
- Freeze for at least 2 hours, or until completely firm.
- Pop the bites out of the molds and store in a sealed container.
Pro tip: Because this treat is high in protein, it’s a great option to use as a training reward. Break the bites into smaller pieces for quick repetition during training sessions.
📸 Photo credit: Instagram @leo_the_malshi_
2. No Bake Pumpkin Peanut Butter Oat Balls
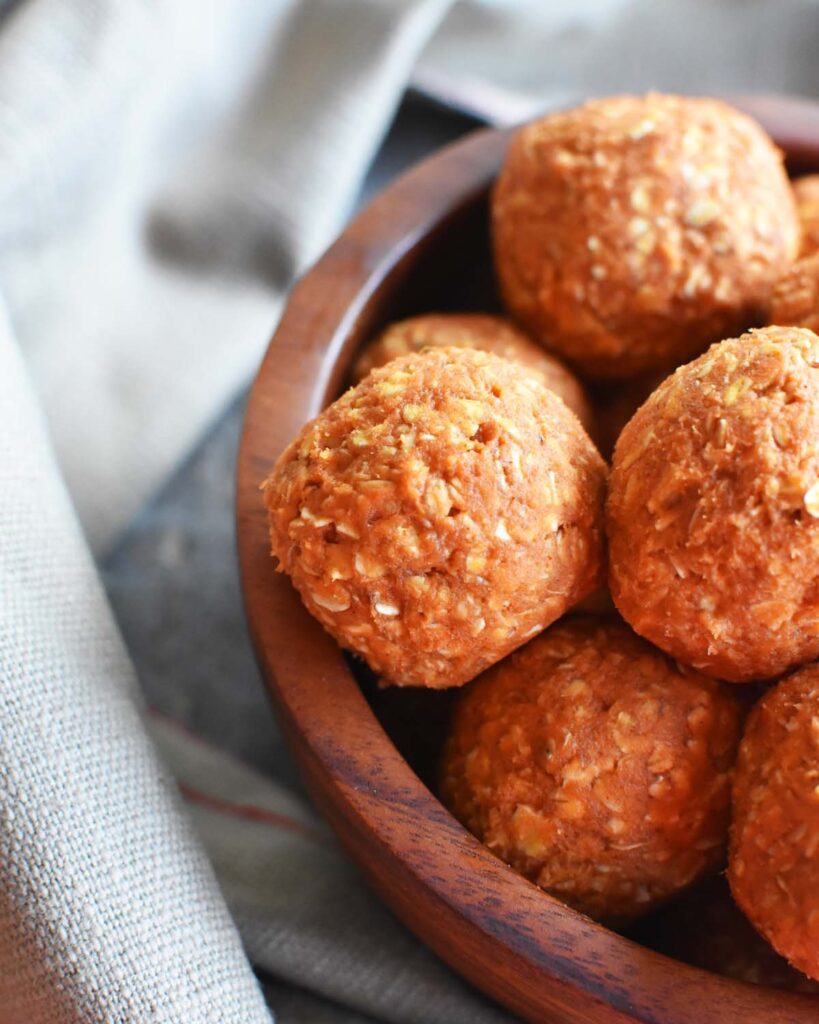
A cozy, fall-inspired treat that comes together with just a bowl and a spoon. The oats give these a satisfying chew, while the pumpkin adds natural fiber that’s gentle on digestion.
Prep time: 15 minutes (plus 1–2 hours to chill) Makes: About 15–18 balls
Ingredients:
- 1 cup plain pumpkin purée (not pumpkin pie filling)
- ¼ cup creamy peanut butter (xylitol-free)
- ¼ cup milk
- 3 cups old-fashioned oats, divided
How to make it:
- In a mixing bowl, combine the pumpkin purée, peanut butter, and milk. Stir until smooth.
- Add 2½ cups of the oats to the mixture and stir until fully combined and slightly sticky.
- Scoop out small portions and roll them into 1-inch balls using your hands.
- Roll each ball in the remaining ½ cup of oats to coat the outside.
- Place the balls on a tray or plate and chill in the refrigerator for 1 to 2 hours until firm.
Pro tip: These treats hold their shape well at room temperature, which makes them a great choice for on-the-go snacks during walks or car rides.
📸 Photo credit: Instagram @gorgedoghoodriver
3. Frozen Banana Yogurt Swirls
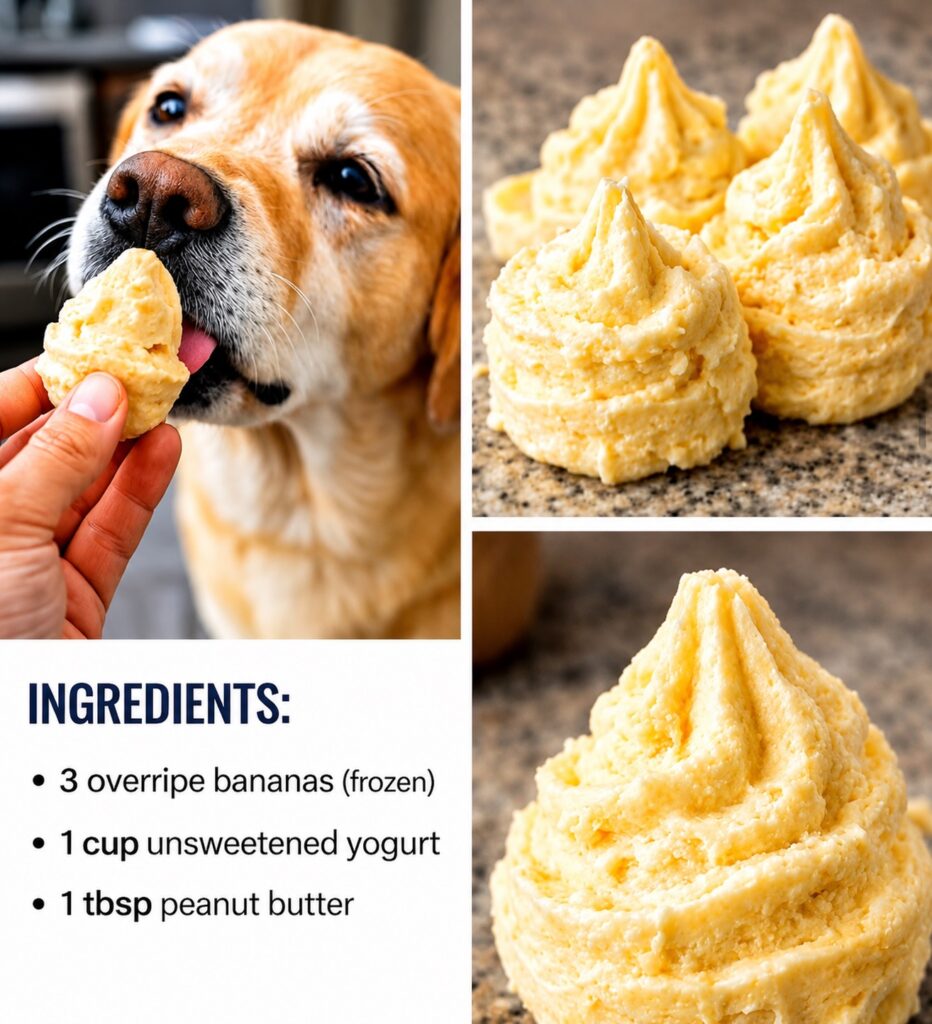
A creamy, naturally sweet treat that tastes like a frozen yogurt swirl cone — just sized for dogs. It’s especially popular in the summer months when pups need a way to cool down.
Prep time: 5 minutes (plus 2–3 hours to freeze) Makes: About 12 swirls
Ingredients:
- 3 frozen ripe bananas
- 1 cup unsweetened plain yogurt
- 1 tablespoon peanut butter (xylitol-free)
How to make it:
- Add the frozen bananas, yogurt, and peanut butter to a blender.
- Blend until the mixture is smooth and creamy, scraping down the sides as needed.
- Spoon the mixture into a piping bag, or use a zip-top bag with the corner snipped off.
- Pipe small swirls onto a parchment-lined tray, or into silicone molds.
- Freeze for 2 to 3 hours, or until fully solid.
Pro tip: If your dog tends to gulp treats quickly, freeze the swirls a bit larger so they last longer and double as a slow lick-and-chew snack.
📸 Photo credit: Instagram @divyas_lifestylediaries
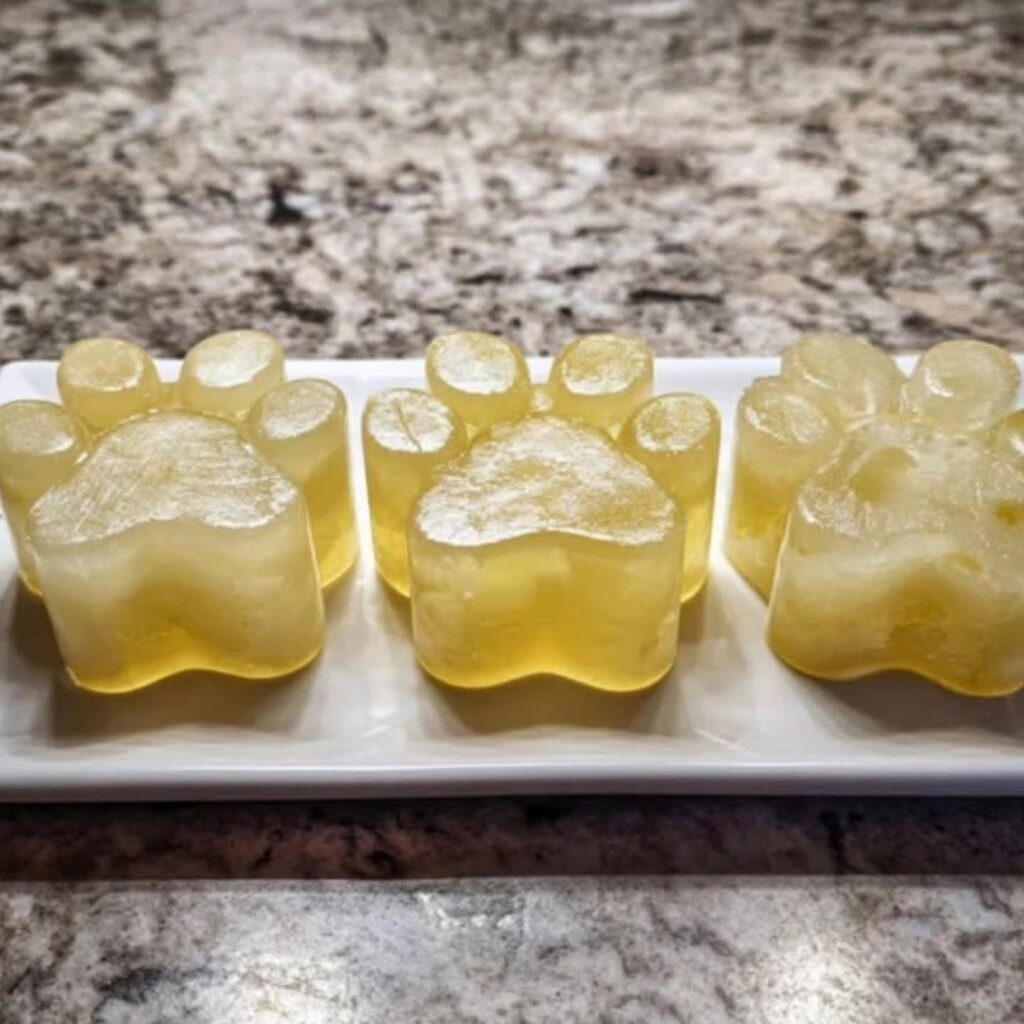
4. Cooling Broth and Berry Ice Cubes
This is really two mini recipes rolled into one, which makes it perfect for dogs who like a bit of variety in their treat lineup. One batch is savory, the other is fruity and refreshing.
Prep time: 10 minutes (plus 3–4 hours to freeze) Makes: About 12 cubes total
Berry Cube Ingredients:
- 1 cup water
- ½ cup blueberries or chopped strawberries
Broth Cube Ingredients:
- 1½ cups low-sodium chicken broth (no onion or garlic)
How to make it:
- For the berry cubes, stir the water and chopped fruit together in a measuring cup or small bowl.
- Pour the berry mixture into an ice cube tray, distributing the fruit evenly.
- In a separate tray, pour the chicken broth directly into the molds.
- Freeze both trays for 3 to 4 hours, or until completely solid.
- Pop the cubes out and store the two batches separately in the freezer.
Pro tip: Bone or paw-shaped silicone molds make these extra fun to serve, and the savory broth cubes are a great option for dogs who aren’t big fans of sweeter treats.
📸 Photo credit: Instagram @scr.nc
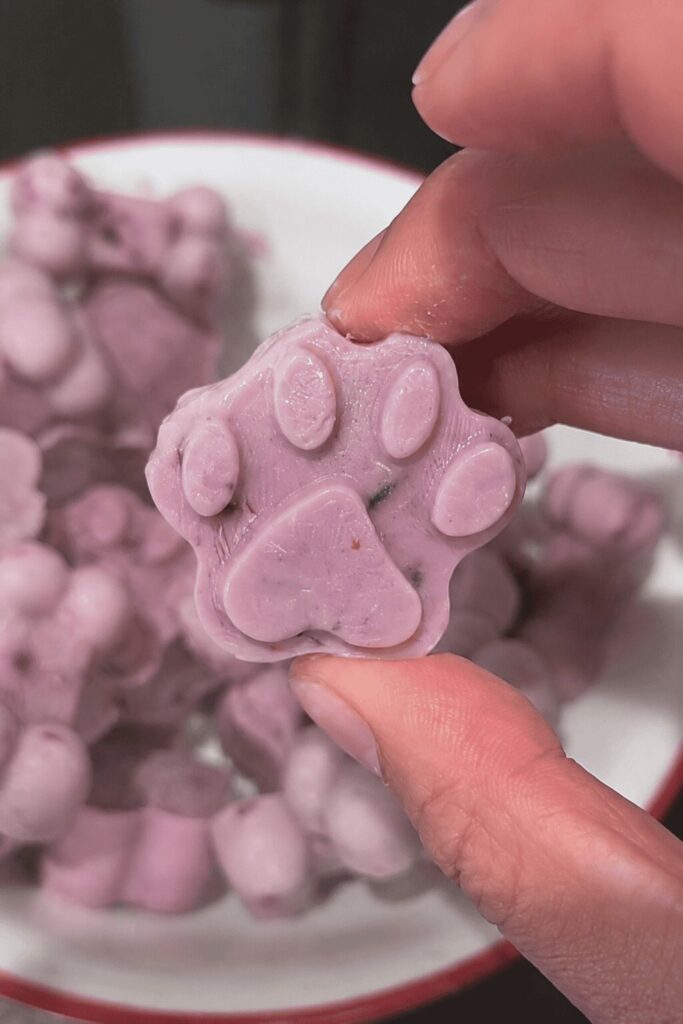
5. Blueberry Pumpkin Celery Bites
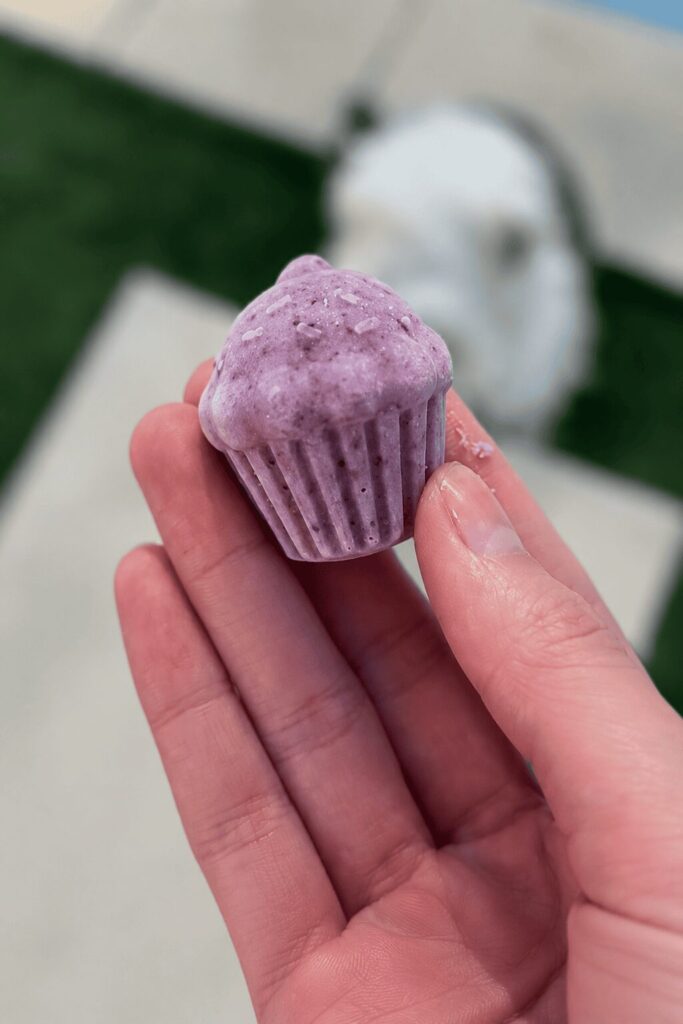
A four-ingredient treat that’s as easy as toss, blend, and freeze. The combination of pumpkin and yogurt makes this one especially gentle on a dog’s digestive system.
Prep time: 10 minutes (plus 3 hours to freeze) Makes: About 15 small bites
Ingredients:
- ½ cup celery, chopped
- ½ cup blueberries
- ½ cup plain Greek yogurt
- ¼ cup pumpkin purée
- A small splash of water
How to make it:
- Add the celery, blueberries, yogurt, and pumpkin purée to a blender.
- Add a small splash of water to help the mixture blend smoothly.
- Blend until fully smooth, with no large chunks remaining.
- Pour the mixture into silicone molds, filling each cavity to the top.
- Freeze for about 3 hours, or until solid all the way through.
Pro tip: This recipe is a good one to introduce slowly if your dog hasn’t had celery before — start with a smaller portion to make sure it agrees with their stomach.
6. 3-Ingredient Yogurt Applesauce Blueberry Bites
When you want something fast with almost nothing in the pantry, this is the recipe to reach for. No blender is even needed — just a bowl and a spoon.
Prep time: 5 minutes (plus 2–3 hours to freeze) Makes: About 10–12 bites
Ingredients:
- ½ cup plain yogurt
- ¼ cup unsweetened applesauce
- A small handful of blueberries
How to make it:
- In a small bowl, stir together the yogurt and applesauce until smooth.
- Gently fold in the blueberries, keeping them mostly whole for texture.
- Spoon the mixture into small silicone molds or an ice cube tray.
- Freeze for 2 to 3 hours, or until firm.
Pro tip: This is one of the easiest recipes on the list to scale up — double or triple the batch if you have multiple dogs at home.
7. Strawberry Banana Frozen Yogurt Cups
This treat feels like real “ice cream” for dogs, minus anything that could upset their stomach. The crumbled biscuit layer adds a nice bit of crunch against the smooth frozen base.
Prep time: 10 minutes (plus several hours to freeze) Makes: About 8–10 cups, depending on mold size
Ingredients:
- ½ cup plain Greek yogurt
- ½ banana
- A large handful of strawberries (fresh or frozen)
- A few plain dog biscuits, crumbled
How to make it:
- Add the yogurt, banana, and strawberries to a blender.
- Blend just until combined — you want a few small strawberry chunks left for texture, not a completely smooth purée.
- Coarsely crumble a few dog biscuits and sprinkle a thin layer into the bottom of your mold or small cup.
- Pour the strawberry yogurt mixture over the crumbled biscuit layer.
- Freeze until completely solid, about 3 to 4 hours.
Pro tip: For a classic “ice cream cup” presentation, freeze the mixture directly in small paper cups instead of silicone molds.
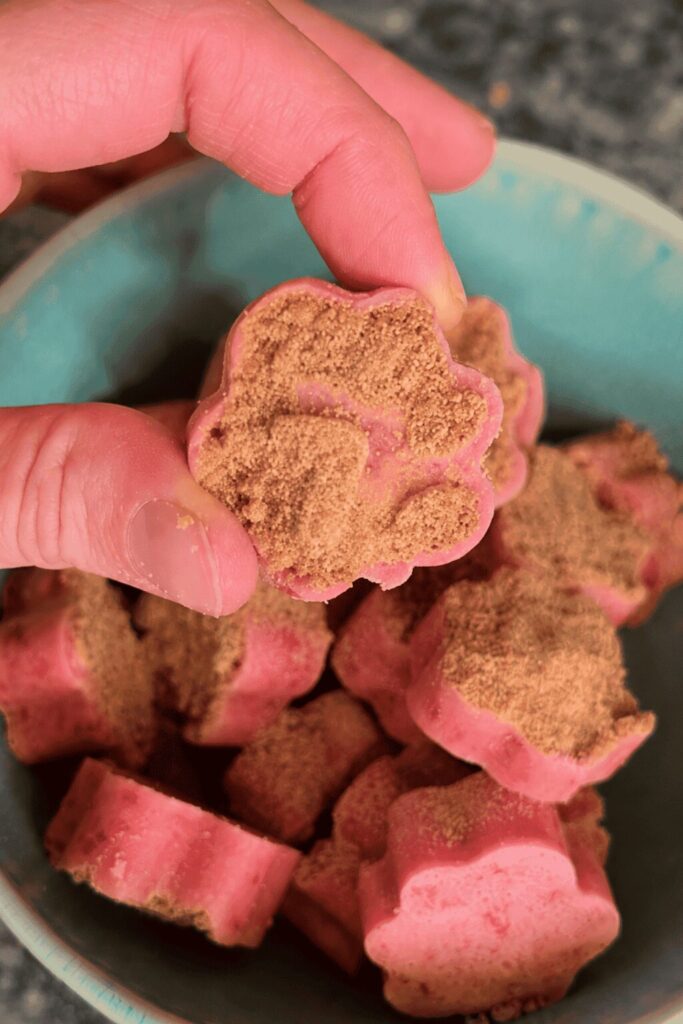
8. Banana Berry Crunch-Top Treats
A pretty, layered treat that looks like it came straight from a pet bakery, but is simple enough to make on a weeknight.
Prep time: 10 minutes (plus 3–4 hours to freeze) Makes: About 10–12 treats
Ingredients:
- 1 banana
- 4 strawberries
- 1½ cups plain Greek yogurt
- A few crunchy dog biscuits, for topping
How to make it:
- Add the banana, strawberries, and yogurt to a blender.
- Blend until completely smooth and creamy.
- Pour the mixture evenly into silicone molds.
- Press a small dog biscuit into the top of each mold so it sits just below the surface.
- Freeze for 3 to 4 hours, or until fully set.
Pro tip: Use a paw-shaped mold for these — the biscuit “topper” peeks through nicely once the treat is frozen and popped out.
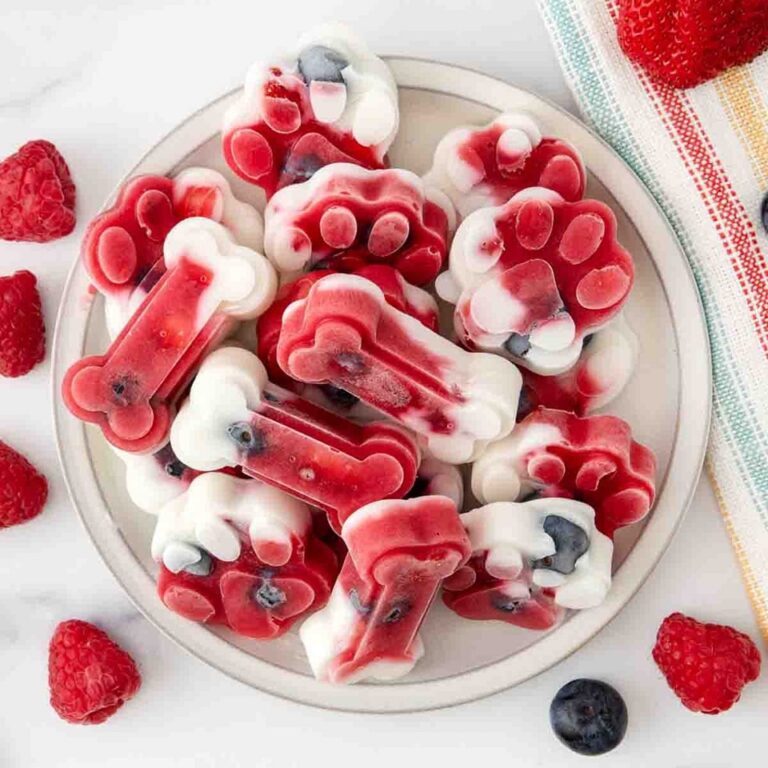
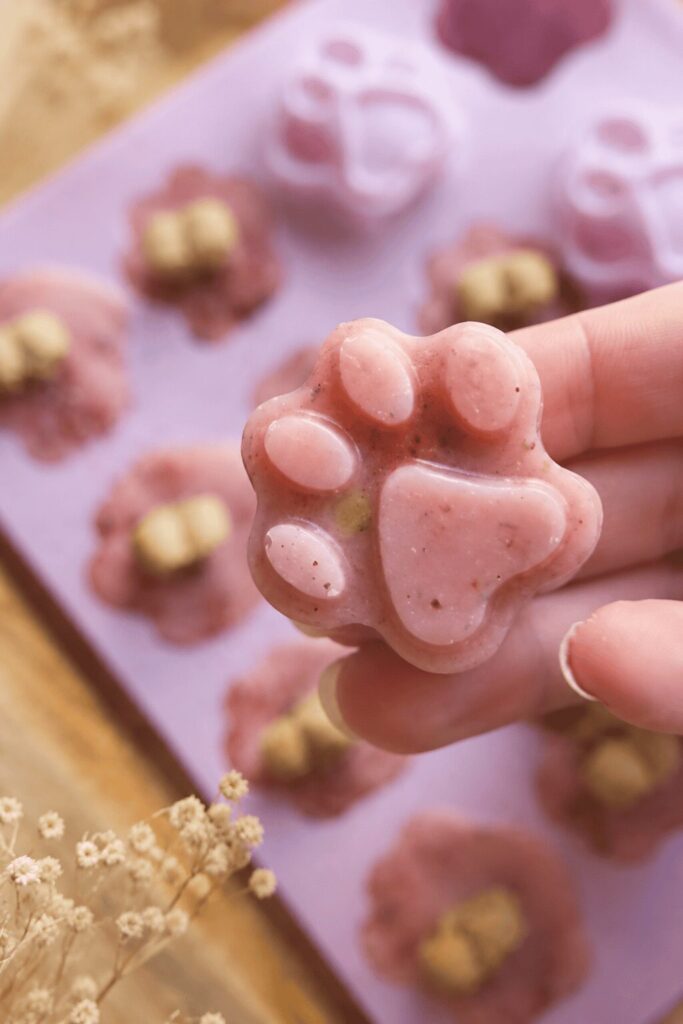
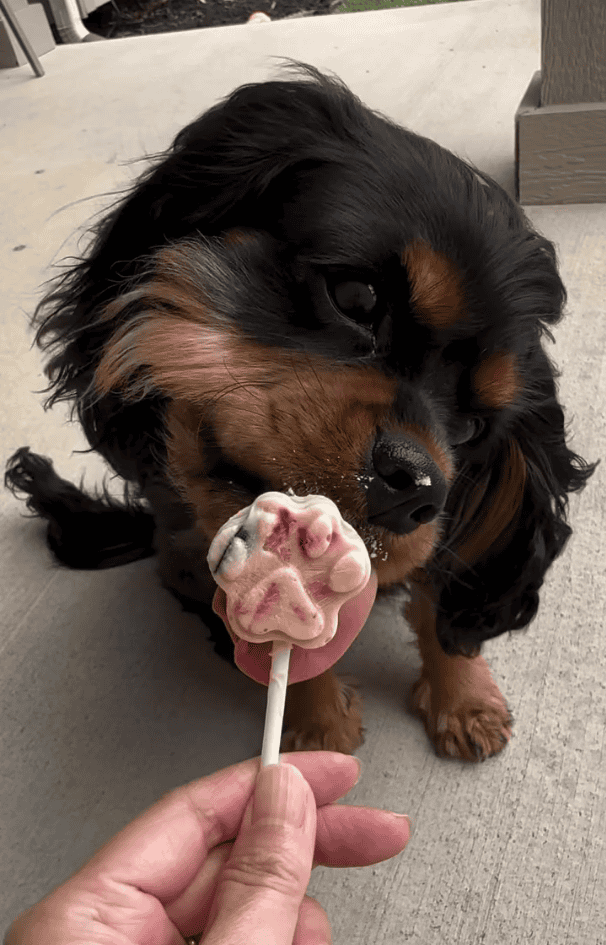
9. Blueberry Banana Paw and Bone Pops
A fan-favorite three-ingredient recipe that’s easy to scale up for multiple dogs or a big batch to last the week.
Prep time: 5 minutes (plus overnight to freeze) Makes: About 15 pops, depending on mold size
Ingredients:
- ½ cup blueberries
- 1 cup plain Greek yogurt
- 1 ripe banana
- 1 tablespoon honey (optional)
How to make it:
- Add the blueberries, yogurt, banana, and honey (if using) to a blender.
- Blend until completely smooth.
- Pour the mixture into paw or bone-shaped silicone molds.
- Freeze overnight for the best firm texture all the way through.
- Pop the treats out and store in a sealed bag or container.
Pro tip: Skip the honey entirely if your dog doesn’t need the extra sweetness — the banana and blueberries already add plenty of natural flavor.
10. Coconut Apple Turmeric Treats
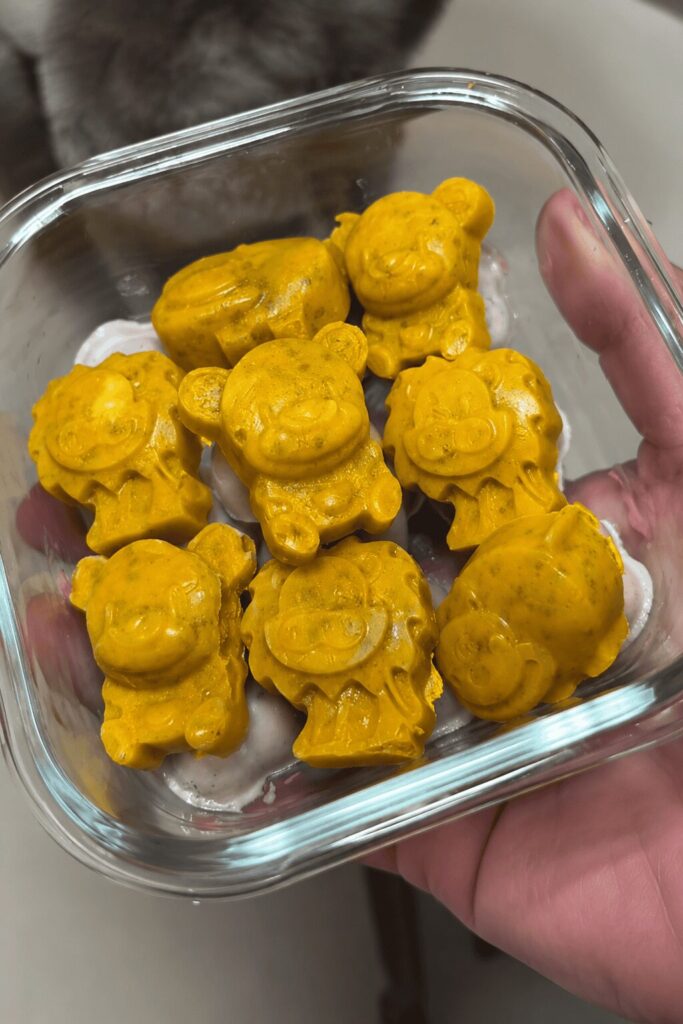
A slightly more “spa day” recipe, made with ingredients that are often associated with skin and coat health. It’s a nice one to rotate in if your dog has dry skin or seasonal itchiness.
Prep time: 10 minutes (plus 2–3 hours to freeze) Makes: About 12–15 small treats
Ingredients:
- ½ cup unsweetened applesauce
- 1 tablespoon melted coconut oil
- 1 tablespoon plain Greek yogurt
- 1 teaspoon turmeric
- 2 tablespoons chia seeds
How to make it:
- Add the applesauce, melted coconut oil, yogurt, and turmeric to a blender or mixing bowl.
- Blend or stir until everything is fully combined and smooth.
- Fold in the chia seeds by hand so they stay evenly distributed.
- Pour the mixture into silicone molds.
- Freeze for 2 to 3 hours, or until firm.
Pro tip: Turmeric and chia seeds are both new ingredients for a lot of dogs, so introduce this treat slowly and watch for any sensitivity, especially the first time.
11. Mixed Fruit and Veggie Pupcicles
A flexible, “use what you have” recipe that’s great for using up extra produce sitting in the fridge. This one is easy to customize based on what your dog already loves.
Prep time: 10 minutes (plus 3–4 hours to freeze) Makes: About 10 pupcicles
Ingredients:
- 1 cup mixed dog-safe fruits and veggies, diced (try apple, carrot, or cucumber)
- ½ cup plain Greek yogurt
- 1 tablespoon peanut butter (xylitol-free)
How to make it:
- Dice your chosen dog-safe fruits and vegetables into small, bite-sized pieces.
- In a bowl, mix the diced produce into the yogurt and peanut butter until evenly combined.
- Spoon the mixture into a piping bag, or use a zip-top bag with the tip cut off.
- Pipe the mixture into popsicle molds, inserting the popsicle sticks once filled.
- Freeze until completely solid, about 3 to 4 hours.
Pro tip: This is a great recipe to rotate seasonally — use pumpkin in the fall, watermelon in the summer, or apple year-round.
📸 Photo credit: Instagram @paisleythecavapooooo
12. Apple Banana Pawsicles
A simple two-fruit treat that comes together in under five minutes, making it a great first recipe if you’re new to homemade dog treats.
Prep time: 5 minutes (plus 3–4 hours to freeze) Makes: About 8 pawsicles
Ingredients:
- ½ cup unsweetened applesauce
- ½ banana, mashed
- ¼ cup water
How to make it:
- In a bowl, mix the applesauce, mashed banana, and water until smooth and well combined.
- Pour the mixture into paw-shaped silicone molds.
- Freeze for 3 to 4 hours, or until completely solid.
- Pop the pawsicles out and serve straight from the freezer.
Pro tip: Serve these right after a walk on a hot day — the cool texture and mild fruit flavor make them an easy way to help your dog rehydrate.
📸 Photo credit: Instagram @annieanddavespetsitting
Why No Bake Dog Treats Homemade Are So Popular
There’s a reason these treats are all over social media right now, and it’s not just because they look cute in photos.
- No oven needed — just a blender, bowl, and freezer
- Few ingredients — most recipes use 2 to 5 items you probably already have
- Great for hot weather — frozen treats cool dogs down fast after walks or playtime
- Perfect for training — small, bite-sized pieces work as quick rewards
- Customizable — swap fruits, swap molds, swap flavors based on what your dog likes
These treats also double as a fun bonding activity. Kids can help scoop the mixture into molds, and dogs get the bonus of watching (and sniffing) the whole process happen in the kitchen.
If you’re working on rewarding good behavior, these treats pair nicely with basic training routines. Check out these puppy training tips for ideas on when and how to use treats most effectively.
How to Make No Bake Dog Treats at Home (Quick Basics)
Once you’ve tried a few of the recipes above, making your own variations gets even easier. Here are the basics that apply to almost every recipe on this list.
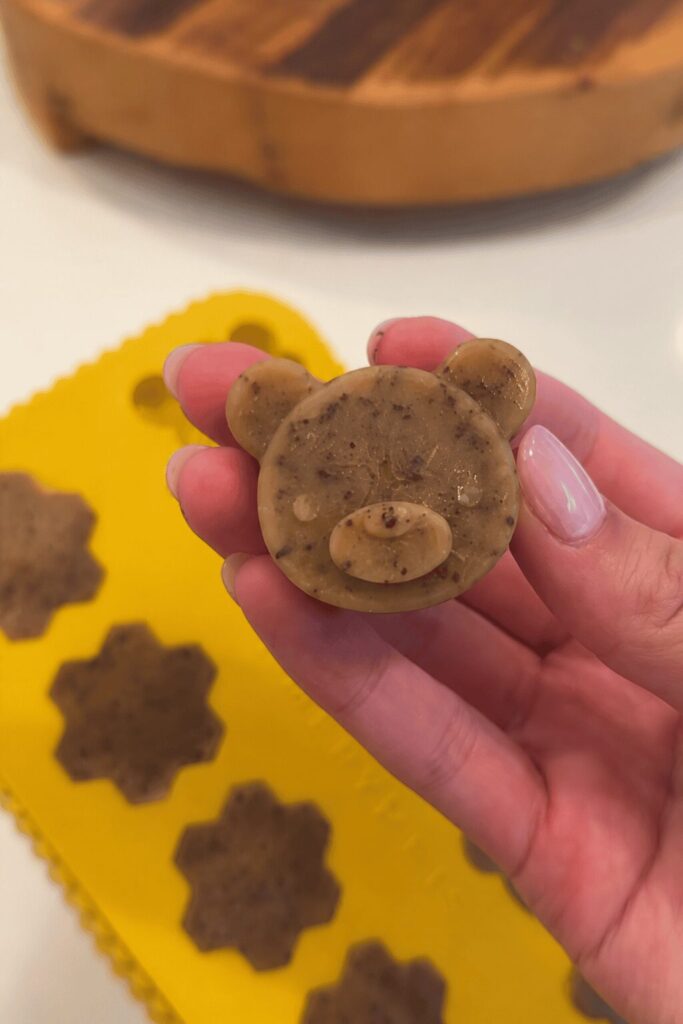
Pick your mold. Silicone molds shaped like paws, bones, or flowers work best because frozen treats pop out easily without sticking. No molds on hand? A regular ice cube tray works just as well for smaller, bite-sized treats.
Blend until smooth — or don’t. Most recipes call for a quick blend so the mixture is easy to pour or pipe into molds. If your dog enjoys a bit of texture, try pulsing the blender just a few times instead of blending completely smooth.
Watch your freeze time. Small, bite-sized treats usually need about 2 to 3 hours in the freezer. Larger pops, bars, or layered treats may need closer to 4 hours, or overnight, for the firmest texture all the way through.
Use plain, unsweetened ingredients. Plain yogurt, unsweetened applesauce, and xylitol-free peanut butter keep treats safe and naturally low in added sugar. Always double-check labels, since some “natural” peanut butters sneak in xylitol.
Don’t skip the splash of water. Thicker mixtures, like the celery and pumpkin bites, sometimes need a small splash of water to blend smoothly. Add it a tablespoon at a time so the mixture doesn’t get too thin.
If you want a dedicated spot to store molds, scoops, and treat-making supplies, setting up a dog treat station can keep everything organized and easy to find next time you’re ready to make a fresh batch.
Storage and Serving Tips for Frozen Dog Treats
Once your treats are frozen solid, here’s how to keep them fresh and ready to serve all week long.
- Store in the freezer in a sealed bag or airtight container for up to 2 to 3 months.
- Portion by size — smaller dogs should get smaller treats, or larger treats broken into pieces.
- Let larger pops thaw slightly for a minute or two before giving them to very young or older dogs, since extreme cold can sometimes be hard on sensitive teeth.
- Label your bags with the date and main ingredients, especially if you’re making a few different batches at once.
- Rotate your stash so older batches get used before newer ones, just like you would with any frozen food.
A simple, organized space — like a dedicated dog treats and bones storage area — makes it easy to grab a treat without digging through the entire freezer every time your dog gives you those puppy-dog eyes.
Ingredient Safety: What to Avoid in Homemade Dog Treats
Before you start mixing, it’s worth knowing which ingredients are genuinely safe and which ones should never make it into your dog’s bowl.
Avoid these completely:
- Xylitol (found in some peanut butters and “sugar-free” products)
- Grapes and raisins
- Chocolate
- Onion and garlic
- Excess added sugar or honey
Generally safe in moderation:
- Plain Greek yogurt (unsweetened)
- Bananas, blueberries, strawberries, and apples (no seeds or core)
- Pumpkin purée (plain, not pie filling)
- Peanut butter (xylitol-free only)
- Boiled chicken, sweet potato, and oats
Every dog is a little different, and some pups have sensitivities that aren’t obvious right away. If you’re trying a new ingredient — like turmeric, chia seeds, or celery — introduce it slowly in a small amount first, then watch for any reaction over the next day or two.
For anything beyond basic treats, especially if your dog has allergies or existing health conditions, it’s worth checking in on your dog’s veterinary needs to make sure new ingredients fit their overall health profile.
Final Thoughts
Making no bake dog treats homemade is one of the easiest ways to spoil your pup without turning on the oven or spending hours in the kitchen. With just a handful of simple ingredients, a mold, and a few hours in the freezer, you can build a treat stash that’s ready whenever your dog deserves a little something extra.
If you enjoyed these no-bake ideas, you might also like browsing more homemade dog treat recipes, or, for a special occasion, trying out a few dog birthday cake recipes to really make your pup’s next celebration memorable.

Izzy is an experienced ranch worker who has a passion for exploring nature and getting up close to wildlife. With her connections to various animal organizations, Izzy is well-versed in animal care and rehabilitation.


