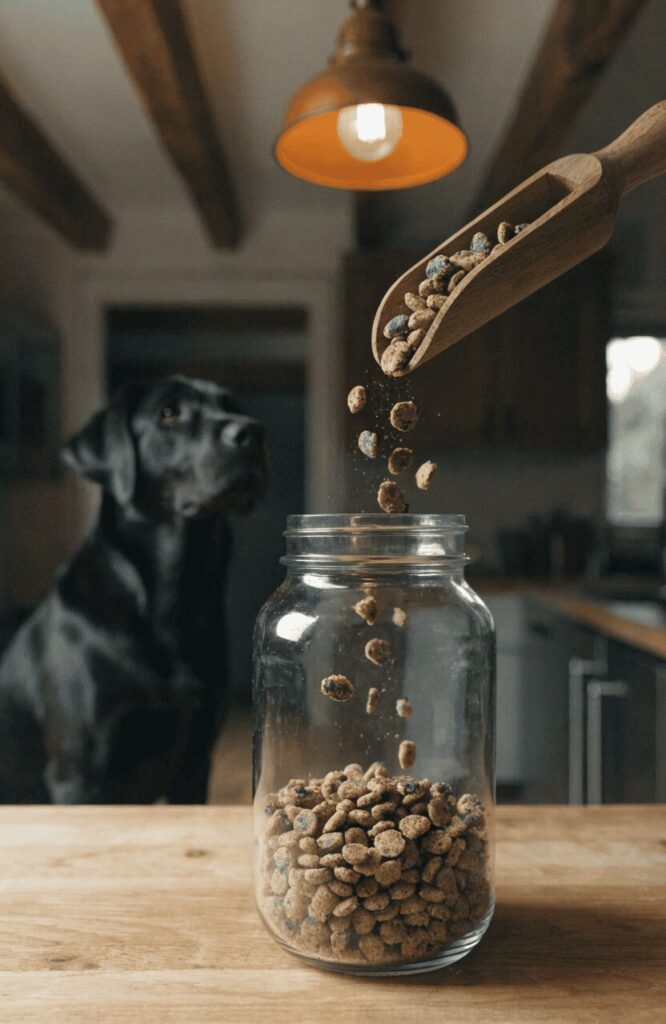
6 Homemade Dry Dog Food Recipes (Baked, Dehydrated & More)
Does your dog inhale every meal like it’s their last — yet you still have no clue what’s actually inside that bag of store-bought kibble? You’re not alone. Millions of dog owners are moving toward homemade dry dog food because they want to see real, whole ingredients going into their dog’s bowl every single day.
The great news is this: making dry dog food at home doesn’t require a factory or a food science degree. It requires an oven, a handful of whole ingredients, and a little patience.
In this article, you’ll find 6 complete homemade dry dog food recipes organized by cooking method — oven-baked, dehydrated, and air-dried. Every recipe comes with a copy-paste-ready recipe card, exact measurements, and step-by-step instructions. Scroll past the recipes for ingredient swap ideas, storage tips, portion guidance, and answers to the most common questions.
Before you start: Always check with your vet before making major changes to your dog’s diet. These recipes are designed to be nutritious and wholesome, but every dog has unique needs based on size, age, breed, and health history.
Let’s get into it.
Contents
- Quick Method Guide: Which Cooking Style Is Right for You?
- Oven-Baked Homemade Dry Dog Food Recipes
- Dehydrated Homemade Dry Dog Food Recipes
- Air-Dried / Low-Temp Homemade Dry Dog Food Recipes
- Ingredient Variations Worth Trying
- How to Store Homemade Dry Dog Food Properly
- How Much to Feed Your Dog
- Why Dog Owners Are Switching to Homemade Dry Dog Food
- Final Thoughts
Quick Method Guide: Which Cooking Style Is Right for You?
Before diving into recipes, here’s a fast breakdown of the three methods covered in this article:
| Method | Texture | Equipment | Shelf Life |
|---|---|---|---|
| Oven-Baked | Crunchy, firm kibble | Standard oven | 1–2 weeks |
| Dehydrated | Chewy-to-crunchy | Dehydrator or oven | 2–4 weeks |
| Air-Dried | Slightly softer, dry | Oven on lowest heat | 1–2 weeks |
Pick the method that matches your kitchen setup and your dog’s texture preferences. Picky eaters? Try a small batch of each to find their favorite before committing to a large batch.
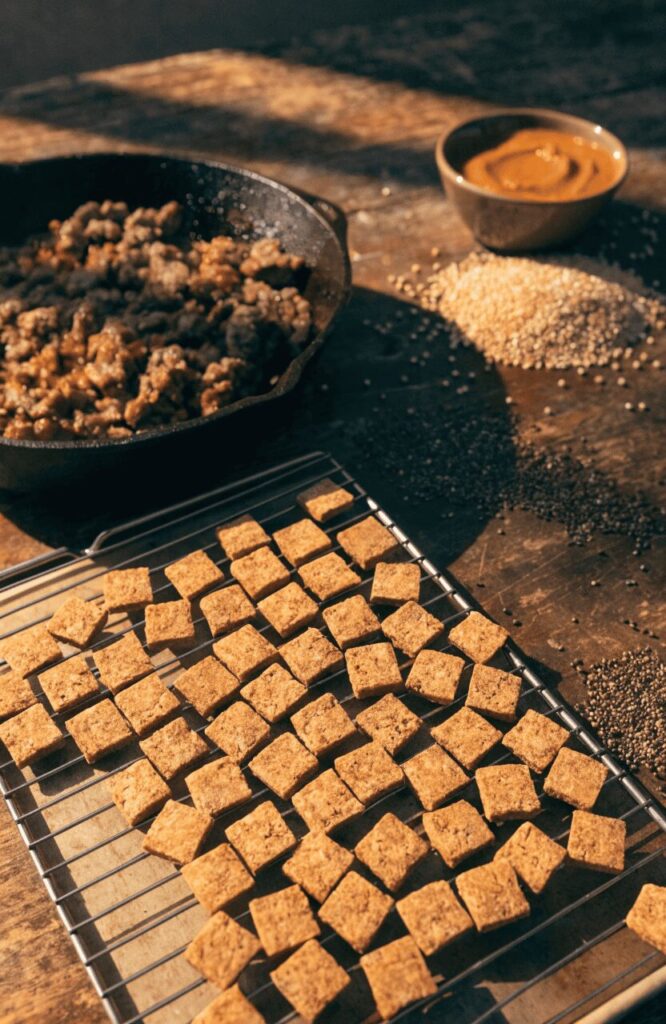
Oven-Baked Homemade Dry Dog Food Recipes
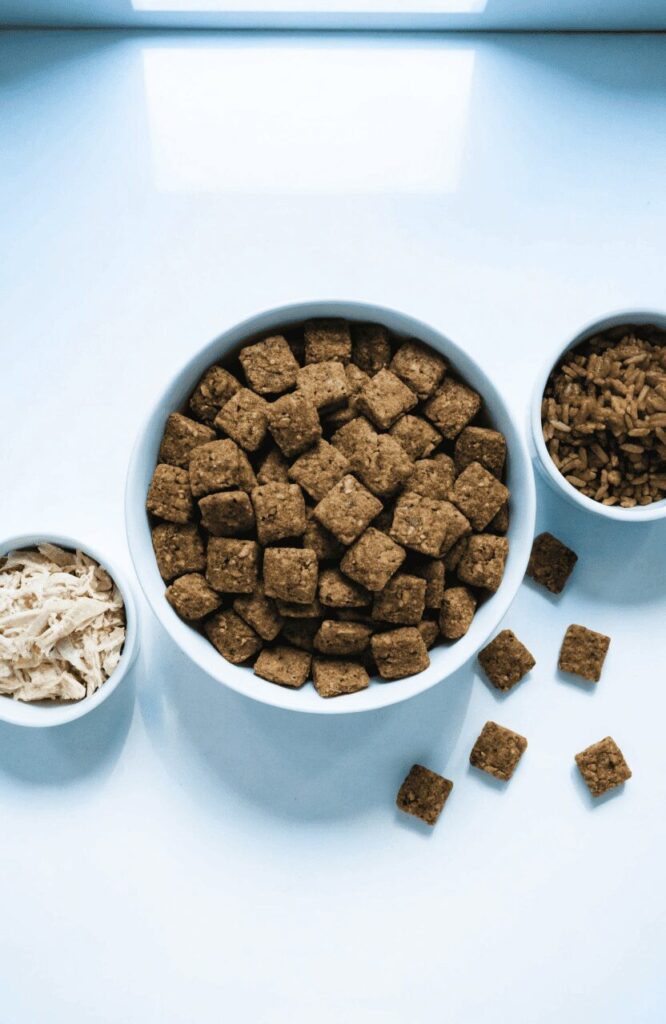
Oven baking is the most beginner-friendly method. You mix everything into a dough, cut it into small kibble-sized pieces, and bake low and slow until hard and dry.
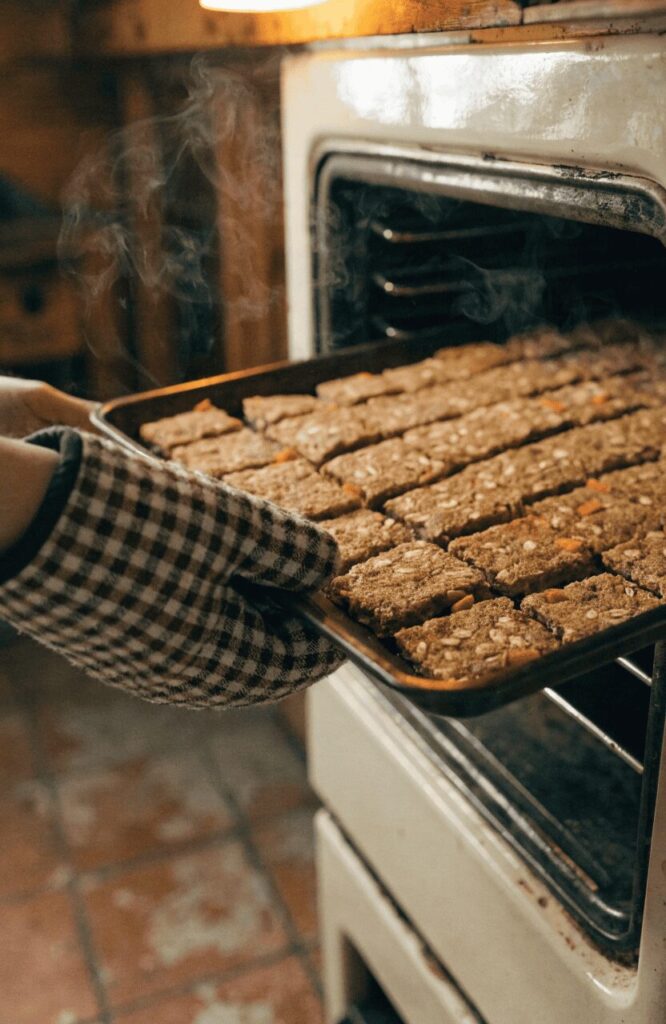
The golden rule for baked kibble: low heat, long time. You’re not baking bread — you’re drying food through while cooking it. A temperature between 250°F and 325°F (120°C–165°C) gives the best results. Rushing it at high heat burns the outside while leaving the inside moist, which causes mold.
Recipe 1: Chicken & Brown Rice Baked Kibble
The most beginner-friendly recipe in this guide. Chicken and rice are gentle on the stomach, easy to digest, and accepted by almost every dog — including those with sensitive digestion. If you’ve never made homemade dog food before, start here.
📋 RECIPE CARD ━━━━━━━━━━━━━━━━━━━━━━━━━━━━━━━━━━
Recipe: Chicken & Brown Rice Baked Kibble Prep Time: 20 minutes Cook Time: 2 hours 30 minutes Yield: Approx. 6–7 cups | Feeds a medium dog (30–50 lbs) for ~3 days
━━━━━━━━━━━━━━━━━━━━━━━━━━━━━━━━━━
INGREDIENTS
- 2 cups cooked, shredded chicken breast (unseasoned)
- 2 cups cooked brown rice
- 1 cup whole wheat flour (or oat flour)
- 1 cup finely grated carrots
- ½ cup low-sodium chicken broth (no onion, no garlic)
- 2 large eggs
- 1 tablespoon olive oil
- ½ teaspoon dried parsley (optional)
INSTRUCTIONS
- Preheat oven to 275°F (135°C). Line two large baking sheets with parchment paper.
- Combine all ingredients in a large mixing bowl and stir until a thick, dough-like consistency forms.
- On a lightly floured surface, roll the dough to about ½ inch thickness.
- Cut into small ½-inch square pieces using a knife or pizza cutter to mimic kibble size.
- Spread pieces evenly across baking sheets — make sure none are touching.
- Bake for 2 hours, then flip each piece and bake for another 30 minutes until golden and firm.
- Turn the oven off and leave kibble inside for 1 additional hour to continue drying.
- Once fully cooled, store in an airtight container.
NOTES 💡 Cut one piece in half before removing from the oven — the inside should be completely dry with no soft or moist center. Moist centers cause mold. ⚠️ Never use broth containing onion or garlic powder. Both are toxic to dogs even in small amounts. 🔄 Swap carrots for finely grated zucchini or peas for a slightly different nutrient profile.
━━━━━━━━━━━━━━━━━━━━━━━━━━━━━━━━━━
Why this works: Brown rice provides slow-burning energy. Chicken delivers lean protein for muscle maintenance. Eggs and olive oil act as binders while adding healthy fats. It’s clean, simple, and balanced.
Recipe 2: Beef, Carrot & Oat Baked Kibble
Need more protein punch? Beef is your answer. This recipe uses blended oats instead of wheat flour, making it a solid option for dogs with mild wheat sensitivities. The carrot adds natural sweetness and beta-carotene.
📋 RECIPE CARD ━━━━━━━━━━━━━━━━━━━━━━━━━━━━━━━━━━
Recipe: Beef, Carrot & Oat Baked Kibble Prep Time: 25 minutes Cook Time: 2 hours 45 minutes Yield: Approx. 7–8 cups | Feeds a large dog (50–80 lbs) for ~2 days
━━━━━━━━━━━━━━━━━━━━━━━━━━━━━━━━━━
INGREDIENTS
- 2 cups lean ground beef (cooked, fat drained)
- 2 cups rolled oats (blended into coarse flour)
- 1 cup cooked and mashed carrots
- ½ cup plain, unsweetened applesauce
- 2 large eggs
- 1 tablespoon coconut oil
- ¼ cup water (add more only if dough is too dry)
INSTRUCTIONS
- Preheat oven to 300°F (150°C) and line baking sheets with parchment paper.
- Pulse rolled oats in a blender or food processor until they resemble coarse flour.
- Cook ground beef fully in a pan, drain all fat, and allow to cool completely.
- In a large bowl, combine all ingredients. Mix into a firm, workable dough. Add water one tablespoon at a time only if needed.
- Roll dough to ½ inch thickness and cut into small, even squares.
- Bake for 2 hours, flip every piece, then continue baking for another 45 minutes.
- Let kibble cool inside the oven with the door slightly open.
- Once fully cooled, transfer to an airtight container.
NOTES 💡 Use 90/10 lean ground beef or leaner — excess fat in kibble goes rancid faster and reduces shelf life. ⚠️ Check your applesauce label carefully. It must be plain with absolutely no xylitol or added sweeteners — xylitol is fatal to dogs. 🔄 Green beans or finely diced celery can replace carrots for dogs that prefer a more savory flavor.
━━━━━━━━━━━━━━━━━━━━━━━━━━━━━━━━━━
Why this works: Oats are rich in soluble fiber that supports healthy digestion and steady energy. Beef delivers iron and zinc alongside dense protein. Applesauce works as a natural binding agent while adding a touch of natural sweetness dogs enjoy.
Dehydrated Homemade Dry Dog Food Recipes
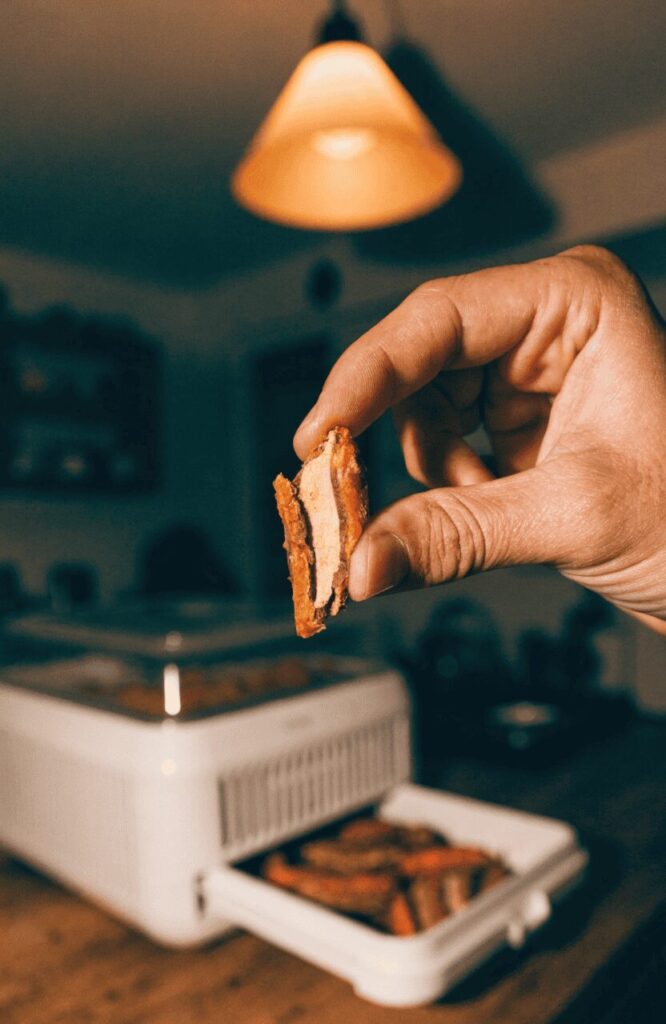
Dehydrating removes moisture at a low temperature over a longer period — and the result is food that preserves more nutrients than high-heat baking.
You can use a food dehydrator (most reliable and consistent) or your oven set to its lowest temperature, usually around 150°F–170°F (65°C–77°C). The texture varies depending on how long you run it — less time gives a chewier result, more time produces something close to crunchy kibble.
This method is especially great for fish and leafy greens, since lower heat protects delicate omega-3 fatty acids and vitamins that high heat destroys.
Recipe 3: Salmon & Sweet Potato Dehydrated Kibble
Salmon is one of the best things you can put in your dog’s bowl. It’s loaded with omega-3 fatty acids that support coat shine, reduce inflammation, and boost brain function. Paired with sweet potato — a fiber-rich, vitamin-packed ingredient — this recipe is a nutritional standout.
📋 RECIPE CARD ━━━━━━━━━━━━━━━━━━━━━━━━━━━━━━━━━━
Recipe: Salmon & Sweet Potato Dehydrated Kibble Prep Time: 30 minutes Dehydrate Time: 8–10 hours Yield: Approx. 5–6 cups | Feeds a medium dog for ~2–3 days
━━━━━━━━━━━━━━━━━━━━━━━━━━━━━━━━━━
INGREDIENTS
- 2 cups canned salmon in water (drained, no salt added)
- 2 cups cooked and mashed sweet potato
- 1½ cups brown rice flour (or oat flour)
- 2 large eggs
- ¼ cup water (as needed)
- 1 tablespoon ground flaxseed
- ½ teaspoon dried kelp powder (optional, for iodine)
INSTRUCTIONS
- Set your dehydrator to 155°F (68°C). If using an oven, preheat to its lowest possible setting.
- Combine all ingredients in a large mixing bowl and stir into a firm, workable dough.
- Roll dough out to about ¼ inch thick between two sheets of parchment paper.
- Cut into small, uniform pieces using a small cookie cutter or pizza cutter.
- Place pieces on dehydrator trays (or parchment-lined oven racks) with space between each piece.
- Dehydrate for 8–10 hours, rotating trays halfway through.
- Test dryness: a fully dehydrated piece should snap when bent, not flex or feel soft.
- Cool completely before transferring to an airtight container.
NOTES 💡 Canned salmon often contains small, soft bones — these are completely safe for dogs and add a helpful calcium boost. ⚠️ Never use smoked salmon. It contains excessive sodium and often has preservatives that are harmful to dogs. 🔄 Sardines packed in water (no salt added) are a cheaper alternative that still deliver strong omega-3 benefits.
━━━━━━━━━━━━━━━━━━━━━━━━━━━━━━━━━━
Why this works: Omega-3s from salmon reduce joint inflammation and make coats visibly shinier within weeks. Sweet potato provides beta-carotene, vitamin C, and natural energy. Flaxseed doubles down on the omega-3 content and improves stool consistency.
Want to add more variety to your dog’s snack routine beyond dry food? Browse these homemade dog treat recipes for quick, wholesome ideas that pair perfectly with a homemade kibble diet.
Recipe 4: Turkey & Spinach Dehydrated Dog Food
Turkey is a lean, easily digestible protein that’s ideal for dogs managing their weight or dealing with digestive sensitivity. Spinach adds iron, antioxidants, and vitamins A and C without adding many calories. Together, they create a light but genuinely nutrient-dense dehydrated kibble.
📋 RECIPE CARD ━━━━━━━━━━━━━━━━━━━━━━━━━━━━━━━━━━
Recipe: Turkey & Spinach Dehydrated Dog Food Prep Time: 25 minutes Dehydrate Time: 9–11 hours Yield: Approx. 6 cups | Feeds a medium dog for ~3 days
━━━━━━━━━━━━━━━━━━━━━━━━━━━━━━━━━━
INGREDIENTS
- 2 cups cooked ground turkey (unseasoned)
- 1½ cups cooked quinoa (or brown rice)
- 1 cup fresh spinach, wilted and finely chopped
- ½ cup plain canned pumpkin (not pumpkin pie filling)
- 1½ cups chickpea flour (or whole wheat flour)
- 2 large eggs
- 2 tablespoons olive oil
INSTRUCTIONS
- Set dehydrator to 160°F (71°C), or preheat oven to its lowest setting.
- Wilt spinach briefly in a dry pan over medium heat — no oil, no seasoning. Allow to cool, then chop finely.
- Combine ground turkey, quinoa, spinach, pumpkin puree, eggs, and olive oil in a large mixing bowl.
- Add flour gradually, mixing until a stiff, non-sticky dough forms.
- Roll out on parchment paper to ¼–½ inch thickness.
- Cut into small, even pieces using a knife or small cookie cutter.
- Place on dehydrator trays with space between each piece.
- Dehydrate for 9–11 hours until every piece is completely firm and dry.
- Rest for at least 30 minutes before storing in an airtight container.
NOTES 💡 Pumpkin is a natural digestive aid that also acts as an excellent binder — don’t skip it. ⚠️ Only use plain canned pumpkin. Pumpkin pie filling contains cinnamon, nutmeg, and sugar — all problematic for dogs. 🔄 Substitute spinach with finely chopped kale or broccoli florets for different antioxidant content.
━━━━━━━━━━━━━━━━━━━━━━━━━━━━━━━━━━
Why this works: Turkey is lower in fat than most proteins, making this ideal for less active or overweight dogs. Quinoa is one of the few plant-based ingredients that provides a complete amino acid profile. Pumpkin soothes digestion and prevents the crumbles from falling apart.
Air-Dried / Low-Temp Homemade Dry Dog Food Recipes
Air-drying is the gentlest of all three methods. You run your oven at the absolute lowest temperature — ideally 150°F or below — and let time do the work. The process takes longer, but it preserves the most delicate heat-sensitive nutrients, including certain B vitamins and natural enzymes.
The resulting texture is typically slightly softer than baked kibble but still dry enough to store safely for 1–2 weeks. Many dog owners prep these batches overnight so the oven runs while they sleep.
The trade-off is clear: more time, more nutrients. If you have the patience, it’s worth it.
Recipe 5: Lamb & Pumpkin Air-Dried Kibble
Lamb is considered a “novel protein” — meaning most dogs haven’t been exposed to it. This makes it the top choice for dogs with allergies or sensitivities to common proteins like chicken or beef. If your dog constantly scratches, has a dull coat, or deals with recurring digestive issues, switching to lamb may help significantly.
📋 RECIPE CARD ━━━━━━━━━━━━━━━━━━━━━━━━━━━━━━━━━━
Recipe: Lamb & Pumpkin Air-Dried Kibble Prep Time: 30 minutes Dry Time: 12–14 hours Yield: Approx. 5–6 cups | Feeds a medium dog for ~2–3 days
━━━━━━━━━━━━━━━━━━━━━━━━━━━━━━━━━━
INGREDIENTS
- 2 cups ground lamb (fully cooked, fat drained)
- 1 cup plain canned pumpkin
- 1 cup cooked millet (or brown rice)
- 1 cup oat flour
- 2 large eggs
- 1 tablespoon chia seeds
- ¼ cup water (only if dough is too stiff)
INSTRUCTIONS
- Preheat oven to 150°F (65°C) — the absolute lowest setting it will go.
- Cook ground lamb thoroughly, drain all excess fat, and let cool completely before mixing.
- In a large mixing bowl, combine all ingredients and stir into a firm, even dough.
- Roll dough out to ¼ inch thickness between two sheets of parchment paper.
- Cut into small, even ½-inch square pieces.
- Place pieces on wire cooling racks set inside rimmed baking sheets — this allows air to circulate underneath for more even drying.
- Place in oven for 12–14 hours. Prop the oven door open slightly using a wooden spoon handle to allow moisture to escape.
- Pieces should be completely hard when done. Cool fully before storing.
NOTES 💡 Wire racks instead of solid baking sheets allow heat to circulate beneath the pieces, cutting drying time and improving texture consistency. ⚠️ If your oven’s lowest setting is above 170°F, check pieces every 2 hours to prevent burning. Smaller pieces dry faster and are at higher risk. 🔄 Swap millet for cooked red lentils to boost protein and iron content with minimal change in flavor.
━━━━━━━━━━━━━━━━━━━━━━━━━━━━━━━━━━
Why this works: Lamb is rich in zinc and vitamin B12, both critical for energy and coat health. Chia seeds contribute omega-3 fatty acids without any fish smell — great for dogs that turn their nose up at fish-based recipes. Millet is naturally gluten-free and easy on sensitive stomachs.
For more natural ways to treat your dog alongside homemade meals, check out what dog bone treats work best for different breeds and sizes.
Recipe 6: Peanut Butter & Banana Dry Crumbles

This one sits between a treat and a meal topper. The crumbles are dry, light, and intensely aromatic — dogs lose their minds over peanut butter. Sprinkle them over any of the kibble recipes above to encourage eating, use them as high-value training rewards, or serve them as a standalone snack.
📋 RECIPE CARD ━━━━━━━━━━━━━━━━━━━━━━━━━━━━━━━━━━
Recipe: Peanut Butter & Banana Dry Crumbles Prep Time: 15 minutes Dry Time: 10–12 hours Yield: Approx. 3–4 cups | Use as a meal topper or training treat
━━━━━━━━━━━━━━━━━━━━━━━━━━━━━━━━━━
INGREDIENTS
- 1 ripe banana, mashed
- ½ cup natural peanut butter (xylitol-free — non-negotiable)
- 1½ cups whole wheat flour or oat flour
- 1 large egg
- ¼ cup plain Greek yogurt (no artificial sweeteners)
- 2 tablespoons raw honey (optional — omit for diabetic dogs)
INSTRUCTIONS
- Preheat oven to 160°F (71°C) or its lowest available setting.
- Mash banana in a bowl and stir in peanut butter until smooth and fully combined.
- Add the egg and Greek yogurt, and mix well until uniform.
- Gradually add the flour and stir until a thick, non-sticky dough forms.
- Instead of rolling and cutting, break or crumble the dough by hand into rough pea-sized pieces directly onto a parchment-lined baking sheet.
- Spread evenly with space between pieces.
- Bake at low heat for 10–12 hours until every piece is completely hard and dry.
- Crumbles should snap under pressure. If they still feel soft, return them to the oven for another 60–90 minutes.
- Store in an airtight jar in the refrigerator for up to 2 weeks.
NOTES 💡 These crumbles are excellent high-value training rewards — small, aromatic, and instantly motivating for even stubborn dogs. ⚠️ This is critical: always check peanut butter labels for xylitol. It appears frequently in “natural” or “reduced-sugar” varieties and is potentially fatal to dogs even in tiny amounts. 🔄 Add 1 tablespoon of ground flaxseed or a small handful of blueberries for extra antioxidant content without changing the texture significantly.
━━━━━━━━━━━━━━━━━━━━━━━━━━━━━━━━━━
Why this works: Bananas deliver potassium and natural sugars for quick energy. Peanut butter adds protein and satisfying healthy fats. Greek yogurt contributes live probiotics that support gut health and digestion — and makes the texture perfectly crumbly without being too dry to work with.
For a broader look at full homemade meal options, our homemade dog food recipes guide covers wet and dry meals with complete nutritional guidance.
Ingredient Variations Worth Trying
One of the biggest advantages of making a homemade dry dog food recipe yourself is total flexibility. These three swap strategies work across nearly all six recipes above:
Variation 1: Grain-Free Swap
If your vet has confirmed a grain sensitivity, replace any flour or grain in the recipes with:
- Coconut flour — absorbs a lot of liquid, so use about 25% less than the flour amount called for
- Chickpea flour — excellent binder, higher protein, mild flavor most dogs like
- Tapioca starch — completely neutral flavor and creates a firm binder for doughs
Note: true grain allergies in dogs are less common than widely believed. Always confirm with a vet before eliminating grains entirely, as they provide important fiber and energy.
Variation 2: High-Protein Boost
For working dogs, highly active breeds, or dogs recovering from illness or surgery:
- Add one extra egg to any recipe
- Replace part of the flour with ground split peas or red lentils
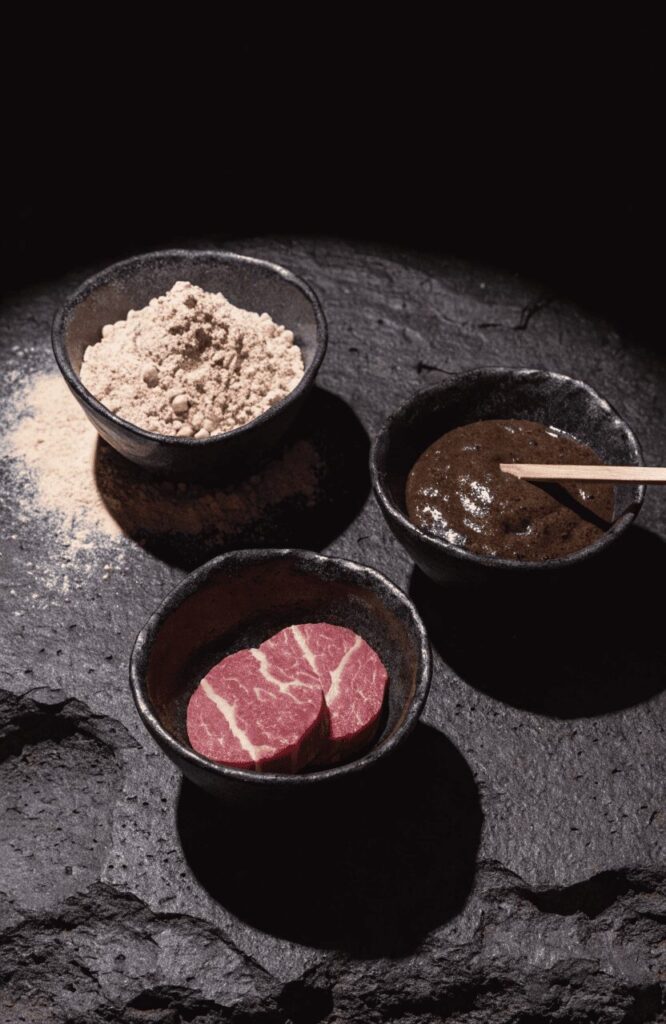
- Substitute regular muscle meat with chicken liver or beef heart (finely ground) — organ meats are far more nutrient-dense by weight
Variation 3: Allergy-Friendly Version
For dogs with confirmed food allergies or intolerances:
- Use a novel protein your dog has never eaten — rabbit, venison, duck, and bison are all excellent options
- Replace eggs with a flax egg: 1 tablespoon ground flaxseed mixed with 3 tablespoons water per egg, rested for 5 minutes before using
- Use pumpkin puree as your primary binder instead of yogurt or applesauce
Always introduce new proteins gradually. Start with 20% new kibble mixed into 80% of their current food, then increase the ratio over 10–14 days to prevent digestive upset.
How to Store Homemade Dry Dog Food Properly
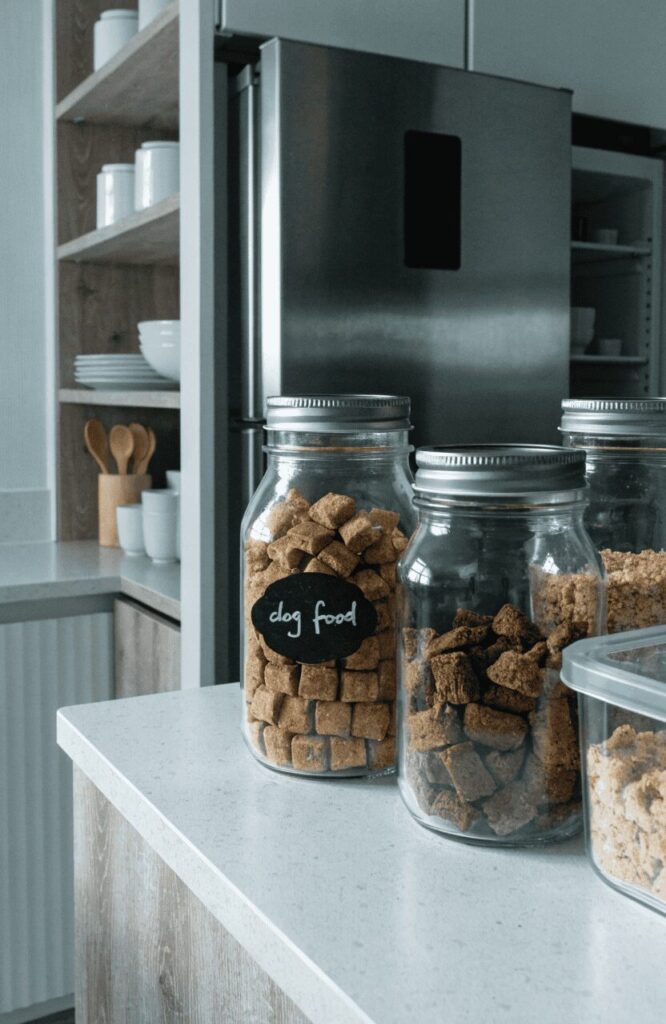
Storage is where many first-time homemade food makers make mistakes. Here’s exactly what you need to know:
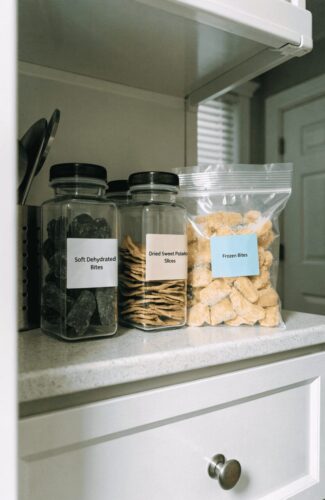
At room temperature: Use a sealed airtight container — glass jars or BPA-free containers both work. Baked and air-dried kibble stays fresh for 1–2 weeks in a cool, dry spot away from direct sunlight.
In the refrigerator: Extends shelf life to 2–4 weeks for all recipes. This is the safest everyday option and is highly recommended for dehydrated recipes.
In the freezer: Freeze in zip-lock bags or silicone pouches for up to 3 months. Thaw overnight in the refrigerator before serving — never microwave kibble to thaw it as uneven heat creates moisture pockets that cause spoilage.
Signs your kibble has gone bad:
- Visible mold (fuzzy patches or colored spots)
- Unusual or sour smell
- Any softness or dampness when pressed
If kibble feels soft after cooling, it wasn’t dried long enough. Return it to the oven at low heat for another 30–60 minutes before storing. It’s much better to over-dry than under-dry.
Setting up a clean, dedicated area for your dog’s meals makes the whole routine easier. These dog feeding station ideas are a great starting point for organizing your homemade feeding setup.
How Much to Feed Your Dog
This is where homemade food requires more attention than store-bought kibble. Commercial bags come with calorie-per-cup guidelines. Homemade recipes vary based on ingredients, moisture content, and density.
Use this as a general daily starting point for adult dogs:
| Dog Weight | Approximate Daily Amount |
|---|---|
| Under 10 lbs | ½ – ¾ cup per day |
| 10–25 lbs | ¾ – 1½ cups per day |
| 25–50 lbs | 1½ – 2½ cups per day |
| 50–80 lbs | 2½ – 3½ cups per day |
| Over 80 lbs | 3½ – 5+ cups per day |
These are estimates for moderately active adult dogs. Active working dogs need more; senior or sedentary dogs need less. Puppies are a different story entirely — they have significantly higher protein, calcium, and calorie needs per pound of body weight. Review your puppy’s vet schedule to get guidance on appropriate portion sizing at each growth stage.
Pro tip: Weigh your dog every two weeks when transitioning to homemade food. If they’re losing weight unexpectedly, increase portions. If they’re gaining too fast, reduce by about 10% and monitor.
Why Dog Owners Are Switching to Homemade Dry Dog Food
The recipes are the main event — but here’s a quick look at why this approach is gaining real momentum among dog owners:
Total ingredient transparency. No mystery fillers, no artificial preservatives, no rendered by-products. Every item in the bowl is something you personally chose and can read without a chemistry degree.
Fewer hidden allergens. Many commercial kibbles contain corn, soy, wheat gluten, and synthetic additives that commonly trigger skin reactions, ear infections, and digestive issues. Going homemade lets you eliminate specific triggers one by one.
More bioavailable nutrition. Nutrients from fresh whole foods are absorbed more efficiently by a dog’s body than synthetic vitamins sprayed onto extruded pellets during manufacturing.
Digestive improvements. Many owners report firmer, less odorous stools within the first 2–3 weeks of switching to whole-ingredient homemade food.
One important caveat: homemade food cooked at home — no matter how good the recipe — may not hit every specific micronutrient target a dog needs for long-term health. If your dog eats homemade food as their primary diet, working with a veterinary nutritionist is the most responsible approach to ensuring nothing critical is missing.
Final Thoughts
Making a homemade dry dog food recipe from scratch is more approachable than most people expect. Once you try your first batch — whether that’s a simple chicken and rice baked kibble or a slow-dried salmon and sweet potato dehydrate — you’ll understand why so many dog owners don’t go back to bags.
Start with one method, make a small test batch, and pay attention to how your dog responds over the following two weeks. Look at their energy, their coat, their digestion. Most dogs show visible, positive changes quickly.
Your dog can’t pick what goes into their bowl. But you can — and these six recipes make it easy to get it right.

Izzy is an experienced ranch worker who has a passion for exploring nature and getting up close to wildlife. With her connections to various animal organizations, Izzy is well-versed in animal care and rehabilitation.