Greek Yogurt Dog Frosting Recipe for Cakes, Cupcakes, and Biscuits
Want a Greek yogurt dog frosting recipe that looks good and is safe for your dog? You’re in the right place.
Store-bought frosting is full of sugar, dyes, and ingredients that can make dogs sick. Greek yogurt is a simple swap. It’s thick, creamy, and easy to spread, and most dogs love the tangy taste.
Yogurt frosting can be runny, though, and it may not hold its shape on a cake or cookie. So this guide gives you two full recipes: a soft, spreadable one and a firm, hard-drying one. You’ll also learn four ways to use frosting, how to color it with real foods, and how to store it.
In this guide, you’ll learn:
- A 3-ingredient base frosting you can make in 5 minutes
- A hard-drying version that sets firm enough to stack
- Four frosting styles: spread, pipe, drizzle, and dip
- Natural colors that are dog-safe
- Storage, serving sizes, and safety rules
Let’s start with the basics.
1. Greek Yogurt Dog Frosting Recipe (The Base Recipe)
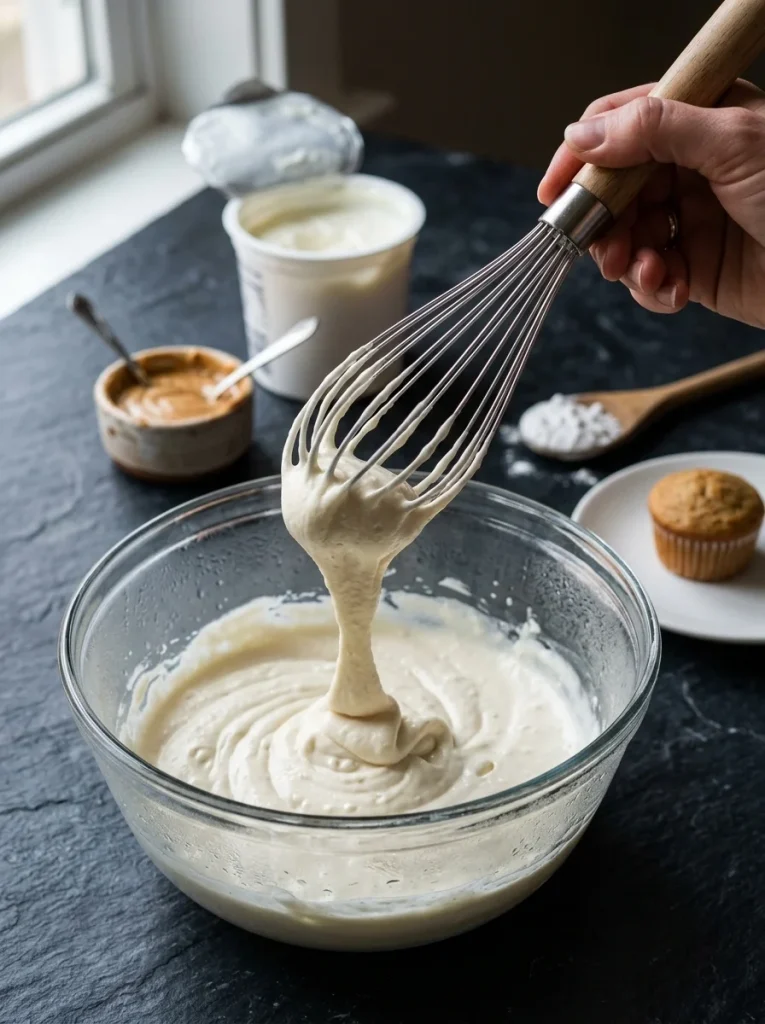
Quick take: This is your go-to soft frosting. It needs three ingredients and no cooking.
It works for cupcakes, cakes, and biscuits you plan to eat within a few days. If you need a frosting that sets firm, skip ahead to section 2.
A. What You Need Before You Start
Gather everything first. The recipe moves fast, and cold ingredients work best.
Equipment:
- A medium mixing bowl
- A spatula or whisk
- Measuring cups and spoons
- A spoon or small offset spatula for spreading
- A piping bag (optional, for section 3)
The key ingredient: plain Greek yogurt. Check the label before you buy. You want:
- Plain and unsweetened. No vanilla, no fruit flavors.
- No xylitol. This sweetener is toxic to dogs, even in small amounts.
- No artificial sweeteners of any kind.
- Full-fat or 2%. Full-fat gives the creamiest texture. Nonfat works but can be runnier.
Why Greek yogurt and not regular? Greek yogurt has most of its liquid (whey) strained out. That makes it thicker, so it holds its shape better. Regular yogurt turns to soup on a warm cupcake.
Tip: Put your yogurt in a coffee filter over a bowl in the fridge for 2 to 4 hours. Extra liquid will drip out, and your frosting will be even thicker.
B. Recipe Card #1: Basic Spreadable Frosting
Greek Yogurt Dog Frosting (Soft and Spreadable)
Prep Time: 5 minutes
Freeze Time: 15 to 20 minutes (optional, to firm up)
Yield: About 1 cup (frosts 12 mini cupcakes or 1 small cake)
Difficulty: EasyIngredients
- 1 cup plain Greek yogurt (unsweetened, xylitol-free), well chilled
- 2 tablespoons unsweetened, xylitol-free natural peanut butter OR 2 tablespoons mashed banana
- 1 to 2 tablespoons cornstarch or arrowroot powder (for thickness)
Instructions
- Chill your mixing bowl in the freezer for 10 minutes.
- Add the Greek yogurt and your peanut butter or banana to the cold bowl.
- Whisk for 1 minute until smooth and creamy.
- Sprinkle in 1 tablespoon of cornstarch or arrowroot. Whisk again.
- Check the thickness. If it’s still runny, add the second tablespoon.
- Spread on your cooled treats right away.
- For a firmer finish, place frosted treats in the freezer for 15 to 20 minutes.
Notes
- Always frost treats only after they have cooled fully. Warm treats melt the frosting.
- Check your peanut butter label. Xylitol (sometimes listed as “birch sugar”) must not be on it.
- Store frosted treats in the fridge and use within 3 days.
- This frosting stays soft. For a firm finish, use Recipe Card #2.
C. Step-by-Step Tips for Smooth Frosting
Good frosting comes down to a few small habits.
Keep everything cold. Warm yogurt gets thin fast. Chill the bowl, the yogurt, and even the treats.
Don’t over-whisk. Mix until smooth, then stop. Too much mixing can break the yogurt and make it watery.
Add thickener slowly. One tablespoon at a time is best. Too much cornstarch makes the frosting pasty.
Work in small batches. If you’re frosting a lot of treats, keep the bowl in the fridge between rounds.
Use a warm spatula for spreading. Dip your spatula in warm water, then dry it. It glides over the frosting for a smooth finish.
Pro Tip: Frost a test treat first. If the frosting slides off, chill it longer or add a little more thickener.
2. Hard-Drying Greek Yogurt Frosting Recipe for Dog Treats
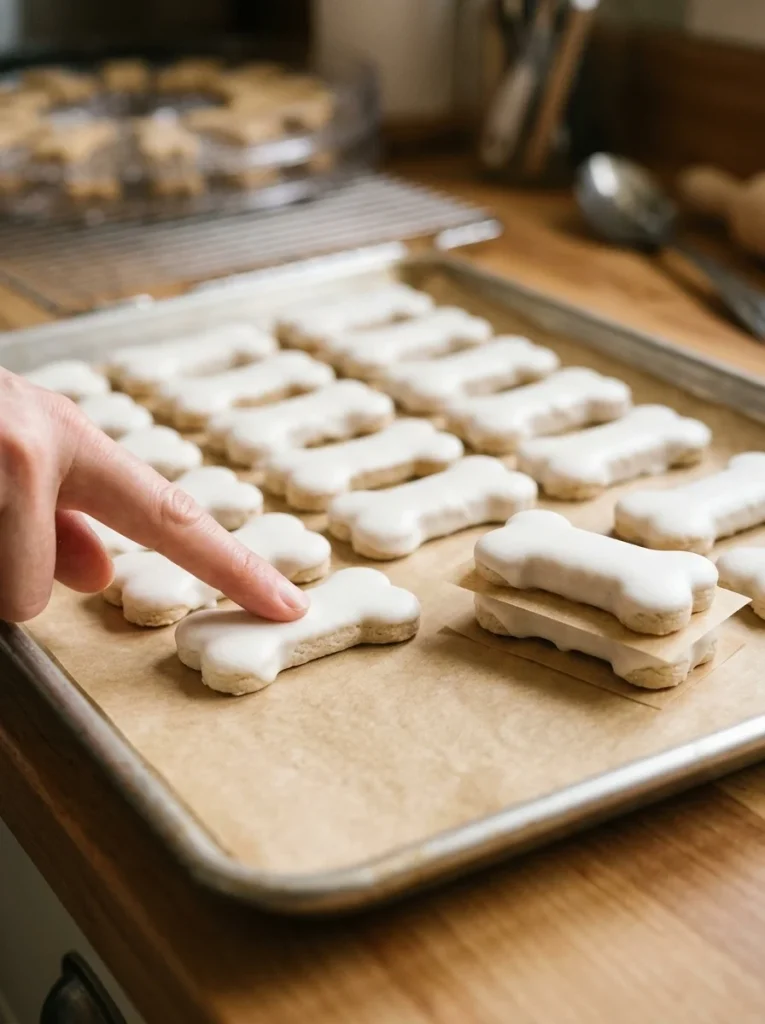
Quick take: This version sets firm to the touch, so you can stack, pack, and carry your treats.
If you’ve ever tried to bring frosted dog treats to a party, you know the problem. Soft frosting smears, sticks to the lid, and melts in the car. A hard-drying Greek yogurt frosting recipe for dog treats fixes that.
A. Why Regular Yogurt Frosting Stays Soft
Yogurt is mostly water and protein. Even Greek yogurt stays creamy because it still holds moisture. Sitting on the counter won’t dry it out. It will only make it warm and runny.
To get a hard finish, you need to do two things:
- Add a starch that soaks up moisture and helps the frosting set.
- Dry it gently with low heat or cold, dry air.
Here’s the part many recipes skip. Yogurt is a dairy food, so dried yogurt frosting is still perishable. “Hard” means firm enough to handle. It does not mean shelf-stable. Always store frosted treats in the fridge or freezer.
B. Recipe Card #2: Hard-Drying Frosting
Hard-Drying Greek Yogurt Dog Frosting
Prep Time: 10 minutes
Dry Time: 1 to 2 hours (oven or dehydrator), or 4 to 6 hours (fridge)
Freeze Time: 30 minutes (optional, for extra-firm finish)
Yield: About 3/4 cup (frosts 12 to 15 cookies or biscuits)
Difficulty: Easy to MediumIngredients
- 1/2 cup plain Greek yogurt (unsweetened, xylitol-free), strained if possible
- 3 tablespoons arrowroot powder or tapioca starch
- 1 tablespoon unsweetened coconut oil, melted and slightly cooled
- 1 teaspoon water (only if needed)
Instructions
- Place the Greek yogurt in a small bowl.
- Add the arrowroot or tapioca starch. Stir until no dry spots remain.
- Pour in the melted coconut oil. Stir until thick and glossy.
- The frosting should look like a thick paste. If it’s too stiff to spread, add water, a few drops at a time.
- Spread or dip your cooled treats. Use a thin, even layer. Thick layers dry slowly.
- Place treats on a baking sheet lined with parchment paper.
- To dry in the oven: Set the oven to its lowest temperature (usually 170°F to 200°F). Prop the door open slightly. Dry for 1 to 2 hours, until the frosting feels firm and dry to the touch.
- To dry in a dehydrator: Set to 135°F. Dry for 1 to 2 hours.
- To dry in the fridge: Place uncovered on a rack for 4 to 6 hours.
- For extra firmness, freeze for 30 minutes.
Notes
- Thin layers set best. If your frosting is thick, press it down gently with the back of a spoon.
- The surface will feel dry before the center does. Test by pressing lightly. No dent means it’s ready.
- Store in the fridge in an airtight container, with parchment between layers. Use within 5 to 7 days.
- Freeze for up to 2 months. Thaw in the fridge before serving.
C. Drying Times: Counter, Oven, Dehydrator, Fridge
Not sure which method to pick? Use this quick comparison.
| Method | Time | Result | Best For |
|---|---|---|---|
| Counter | Not recommended | Stays soft, spoils fast | Nothing (skip this) |
| Low oven (170–200°F) | 1–2 hours | Firm, slightly matte | Biscuits and cookies |
| Dehydrator (135°F) | 1–2 hours | Very firm, even finish | Batches of small treats |
| Fridge (uncovered) | 4–6 hours | Firm but slightly tacky | Overnight prep |
| Freezer | 30+ minutes | Hard, cold set | Quick finishing |
Why skip the counter? Yogurt shouldn’t sit at room temperature for long. Leaving it out for more than about 2 hours can let bacteria grow. Stick to the oven, dehydrator, or fridge.
Watch for these signs your frosting is ready:
- The surface looks matte, not shiny
- It doesn’t smear when you touch it lightly
- It doesn’t stick to parchment paper
- A gentle press leaves no fingerprint
Pro Tip: Want to stack treats for gift boxes? Dry them fully, freeze for 30 minutes, then layer with parchment paper. They’ll come apart cleanly.
3. Four Frosting Styles to Try
Quick take: One frosting can become four different looks just by changing how thick it is and how you apply it.
Once you know your base recipe, you can use it in many ways. Here are the four most useful styles.
A. Spreadable Frosting (for Cakes and Cupcakes)
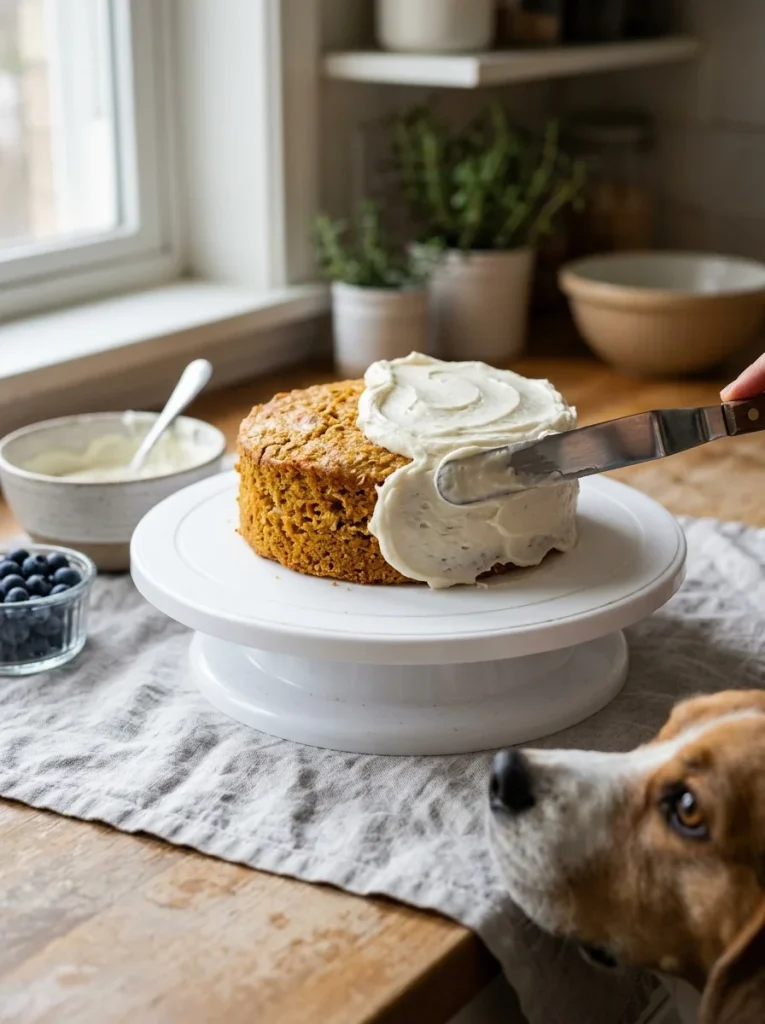
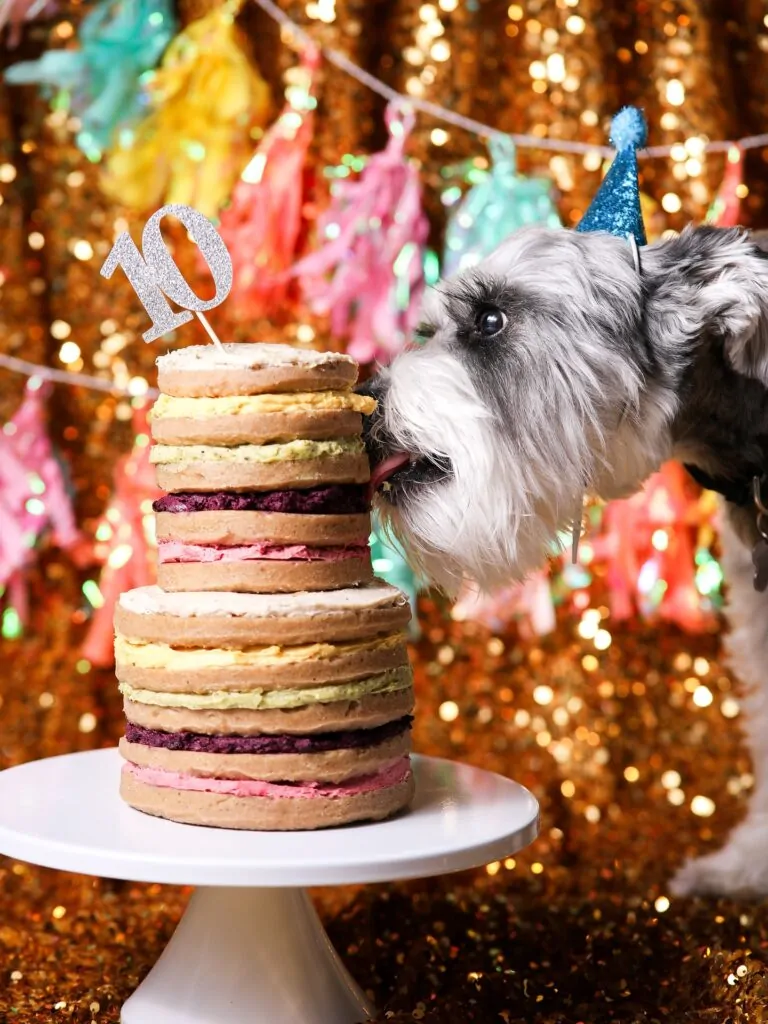
This is the classic look. It’s what you’d use for a dog birthday cake or a tray of pupcakes.
How to make it:
- Use Recipe Card #1 with the full 2 tablespoons of thickener.
- Chill the frosting for 10 minutes before using.
- Use a small offset spatula or the back of a spoon.
How to apply it:
- Start with a small scoop in the center of the treat.
- Spread outward in gentle circles.
- For swirls, drag the tip of your spatula through the frosting.
Best for: Cakes, cupcakes, and soft treats served the same day.
If you’re baking the cake itself, check out these dog birthday cake recipes for ideas that pair well with yogurt frosting.
B. Pipeable Frosting (for Detail Work and Swirls)
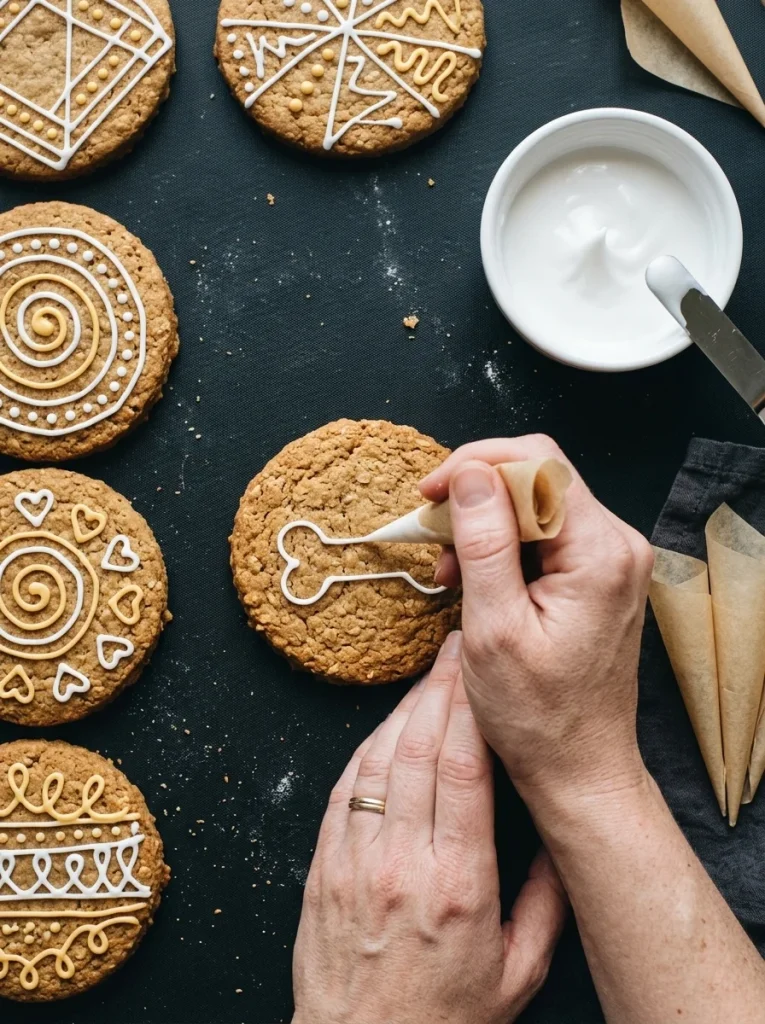
Piping makes treats look professional. The trick is getting the right thickness.
How to make it:
- Start with Recipe Card #2 (the hard-drying version).
- Add cornstarch or arrowroot, 1 teaspoon at a time, until the frosting holds a peak.
- It should be stiff enough that a spoon stands up in it.
How to pipe:
- Spoon the frosting into a piping bag or a sturdy zip-top bag.
- Snip a tiny corner off the bag if not using a tip.
- Squeeze gently and steadily.
- Try borders, dots, paw prints, or little bones.
Best for: Borders, names, and decorations on cookies and biscuits.
Common mistake: Overfilling the bag. Fill it halfway and twist the top. You’ll have much more control.
C. Thin Drizzle or Glaze (for Cookies and Biscuits)
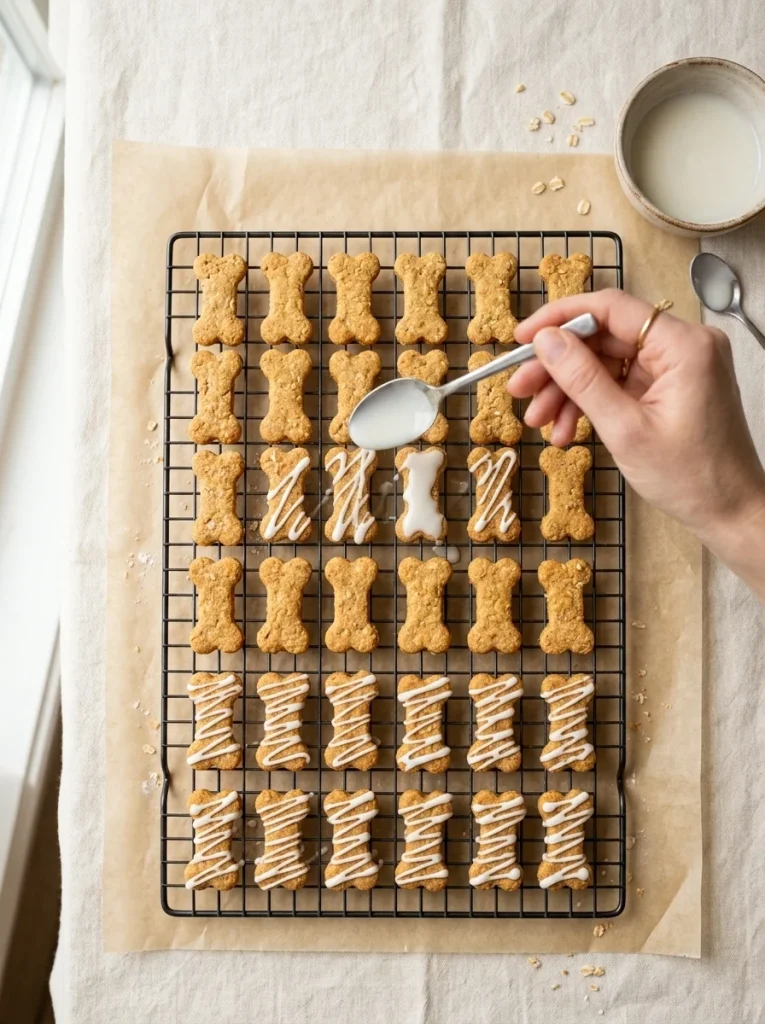
Drizzle is the easiest style for beginners. There’s no piping skill needed.
How to make it:
- Mix 1/2 cup Greek yogurt with 1 tablespoon of arrowroot.
- Add water, 1/2 teaspoon at a time, until it runs off a spoon in a slow ribbon.
How to apply it:
- Line up your cooled treats on a wire rack over parchment paper.
- Dip a spoon in the glaze.
- Wave the spoon back and forth over the treats in a zigzag.
- Let the glaze set in the fridge for 30 to 60 minutes.
Best for: Crunchy biscuits, bone-shaped cookies, and treats that need a light finish.
Looking for a base treat to drizzle? Try a simple biscuit from our homemade dog treats recipes collection.
D. Frozen Dip or Coating (for No-Bake Treats)
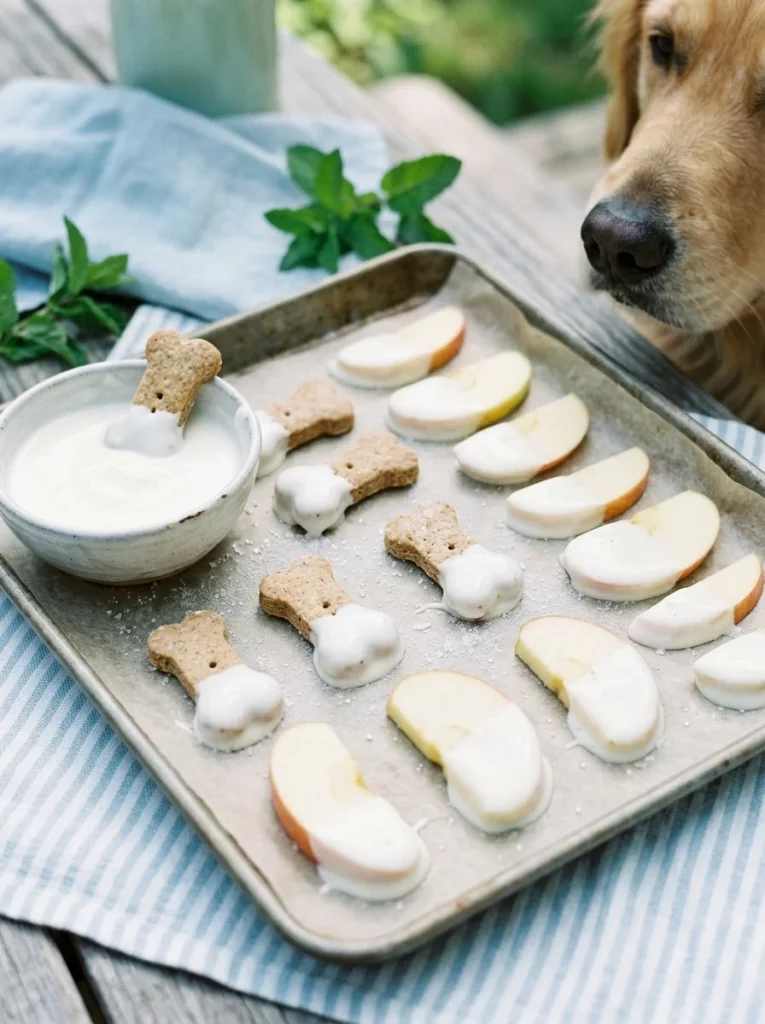
This style skips the oven entirely. It’s great for summer, and dogs go wild for it.
You dip a treat in yogurt, then freeze it. The yogurt hardens into a cold, crunchy shell. Here’s the full recipe.
Frozen Greek Yogurt Dip for Dog Treats
Prep Time: 10 minutes
Freeze Time: 1 to 2 hours
Yield: 12 to 15 dipped treats
Difficulty: EasyIngredients
- 1 cup plain Greek yogurt (unsweetened, xylitol-free)
- 1 tablespoon unsweetened coconut oil, melted
- 12 to 15 small dog biscuits, pretzel-shaped treats, or fresh dog-safe fruit pieces (such as apple slices without seeds)
Instructions
- Line a baking sheet with parchment paper.
- Stir the Greek yogurt and melted coconut oil together until smooth.
- Dip each treat halfway into the yogurt. Let the extra drip off.
- Place the dipped treats on the lined baking sheet.
- Freeze for 1 to 2 hours, until the coating is hard.
- Move to a freezer-safe container, with parchment between layers.
Notes
- The coconut oil helps the coating harden and stay glossy. Use only a small amount, as too much fat can upset some dogs’ stomachs.
- Serve straight from the freezer.
- Keeps in the freezer for up to 2 months.
- For a thicker coating, dip twice. Freeze for 15 minutes between dips.
Best for: Hot days, training rewards, and dogs who love crunchy, cold snacks. If you keep a stash of goodies on hand, a setup like these dog treat station ideas makes it easy to store and serve them.
4. Natural Colors for Dog-Safe Frosting
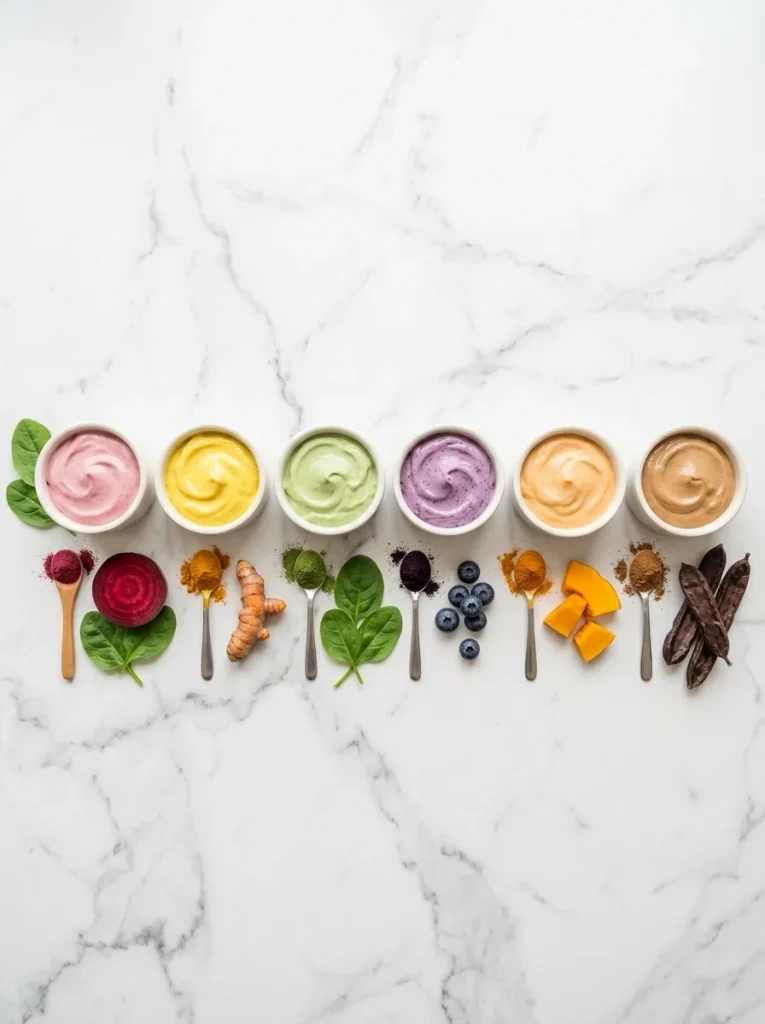
Quick take: You can make pink, yellow, purple, and green frosting with pantry foods. No artificial dyes needed.
Artificial food dyes serve no purpose for dogs, and some dogs react badly to them. Real foods give you soft, pretty colors without the worry.
A. Beet, Spinach, Turmeric, and Blueberry
Here are the most reliable options.
| Color | Ingredient | Amount per 1/2 cup frosting |
|---|---|---|
| Pink | Beet powder | 1/4 to 1/2 teaspoon |
| Yellow | Turmeric | 1/8 teaspoon |
| Green | Spinach powder or matcha-free spirulina | 1/4 teaspoon |
| Purple | Blueberry powder or mashed blueberry | 1/2 teaspoon |
| Orange | Pumpkin puree (plain) or carrot powder | 1 teaspoon |
| Brown | Carob powder (never chocolate or cocoa) | 1 teaspoon |
How to use them:
- Start with a tiny pinch. Natural colors are strong.
- Stir it into the frosting.
- Wait 2 minutes. The color deepens as it sits.
- Add more only if needed.
Important: Use carob, not cocoa. Chocolate and cocoa are toxic to dogs. Carob is the dog-safe stand-in.
Skip these: Don’t use any color that comes with added sugar or sweeteners, and avoid store-bought “natural” color drops unless you’ve read every ingredient.
B. How to Get Bright Colors Without Dyes
Natural colors are softer than artificial ones. A few tricks help them pop.
- Use powders, not liquids. Fruit and veggie juices add extra water. That makes frosting runny.
- Start with very white yogurt. A bright white base shows color better.
- Mix a small test batch first. Colors can shift as they dry. Beet pink may fade slightly. Turmeric yellow deepens.
- Skip heat when you can. Oven drying can dull some colors. The fridge-dry or freezer method keeps them brighter.
Tip for kids’ parties: Let children pick the color and stir in the powder. It’s a fun, safe activity and a great way to get them involved.
Pro Tip: Keep a few small jars of food powders in your pantry. A little goes a long way, and they last for months.
5. Decorating and Storing Your Frosting
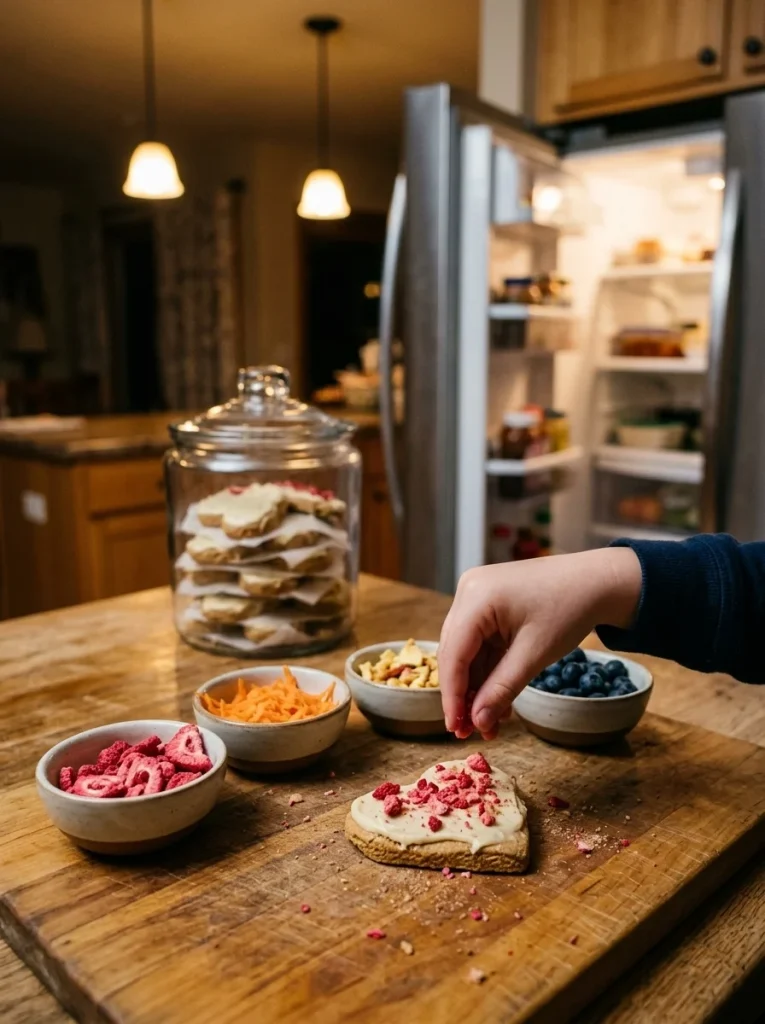
Quick take: Good decorating takes a steady hand. Good storage takes a cold fridge. Together, they keep your treats looking great and staying safe.
A. Piping Tips for Beginners
Even if you’ve never piped before, you can get clean results.
Start simple. Choose one shape and repeat it. Dots and straight lines look neat and take almost no skill.
Practice on parchment. Pipe a few test lines before touching your treat. This helps you learn the pressure.
Hold the bag at a 45-degree angle. Squeeze from the top with your dominant hand, and guide with the other.
Finish with a flick. Stop squeezing, then lift the bag. This cuts off the frosting cleanly.
Easy decoration ideas:
- Paw prints: Make one large dot and four small dots above it
- Bones: Draw a short line with a dot at each end
- Hearts: Two dots that meet at a point
- Names: Write with a thin line of frosting (use the stiff version)
- Sprinkle toppings: Crushed freeze-dried strawberries, shredded carrots, or tiny bits of dried apple
If you enjoy making bone-shaped treats to decorate, our dog bones treat guide has more ideas.
B. Fridge, Freezer, and Shelf Life
Because yogurt is dairy, storage matters. Follow these rules to keep your treats safe.
| Frosting Type | Fridge | Freezer |
|---|---|---|
| Soft frosting (Card #1) | 3 days | Not recommended |
| Hard-drying frosting (Card #2) | 5–7 days | Up to 2 months |
| Frozen dip (Card #3) | Not applicable | Up to 2 months |
| Unused frosting in a bowl | 3–4 days, covered | Up to 1 month |
Storage tips:
- Use an airtight container.
- Place parchment paper between layers.
- Label the container with the date.
- Thaw frozen treats in the fridge, not on the counter.
- Throw away any treat that smells sour, looks slimy, or has gone off-color.
Traveling with treats? Pack them in a cooler with ice packs. Don’t leave them in a hot car for more than an hour. If you’re heading out on the road with your pup, these travel essentials for your dog can help you pack smart.
C. Fixing Runny or Grainy Frosting
Something went wrong? Most problems have a simple fix.
Problem: Frosting is too runny.
- Add cornstarch or arrowroot, 1 teaspoon at a time.
- Chill the bowl and frosting for 15 minutes.
- Strain your yogurt next time.
Problem: Frosting is too thick.
- Add water or plain yogurt, 1/2 teaspoon at a time.
- Let it sit at room temperature for 5 minutes.
Problem: Frosting is grainy or lumpy.
- The starch may not have dissolved. Whisk harder or sift the starch first.
- Make sure your melted coconut oil isn’t too hot. Hot oil can make the yogurt separate.
Problem: Frosting won’t dry.
- Your layer may be too thick. Spread it thinner.
- Your oven may not be low enough. Try a dehydrator or fridge.
- Add another tablespoon of starch next time.
Problem: Frosting cracks after drying.
- The layer was too thick, or the oven was too hot. Use a thinner layer and lower heat.
Problem: Colors look dull.
- Use powder instead of liquid. Add a little more, then let it rest for a few minutes.
Pro Tip: Keep a small bowl of extra starch nearby while you work. It’s the fastest fix for most frosting problems.
6. Which Treats to Frost
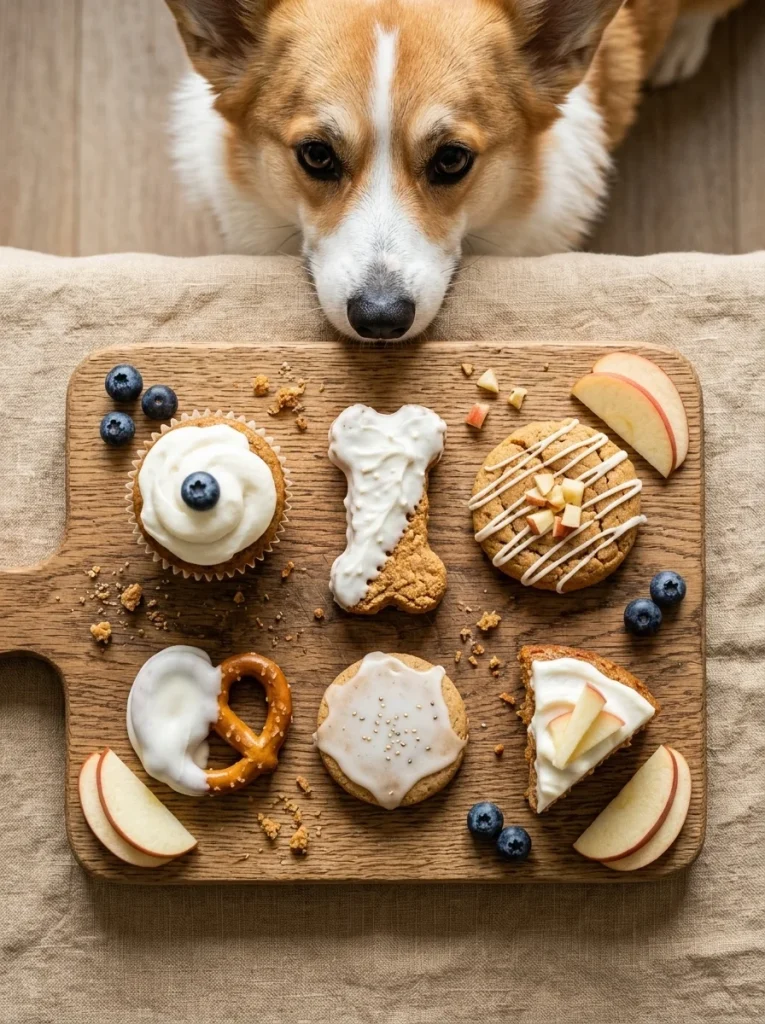
Quick take: Pick treats that are plain, dog-safe, and sturdy enough to hold frosting.
Frosting is the finishing touch. You still need a good treat underneath.
A. Dog Birthday Cakes, Pupcakes, and Biscuits
Here’s which frosting works best with each treat.
| Treat | Best Frosting | Why |
|---|---|---|
| Birthday cake | Soft (Card #1) | Easy to spread and swirl |
| Pupcakes (cupcakes) | Soft or piped | Looks pretty, eaten quickly |
| Crunchy biscuits | Hard-drying (Card #2) | Sets firm, stays tidy |
| Soft-baked cookies | Drizzle | Light and not too heavy |
| Plain dog bones | Frozen dip (Card #3) | Cool, crunchy coating |
| Training treats | Thin glaze | Barely-there, just for flavor |
Choosing a base treat: Stick with simple recipes made from oat flour, pumpkin, peanut butter, banana, or carrot. Avoid anything with raisins, grapes, chocolate, onion, macadamia nuts, or xylitol.
For something more wholesome to pair with frosting, browse these human-grade dog food recipes for ingredient ideas.
Timing tips:
- Always cool treats fully before frosting. This can take 1 to 2 hours.
- Frost soft treats right before serving for the best texture.
- Frost crunchy biscuits a day ahead if you’re using hard-drying frosting.
B. Serving Sizes by Dog Weight
Frosting is a treat. It is not a meal. A small dollop is plenty.
Treats should make up no more than about 10% of your dog’s daily calories. Since your dog’s frosted treat already counts toward that, keep the frosting portion tiny.
A simple guide for frosting amounts:
| Dog Size | Weight | Frosting Per Treat |
|---|---|---|
| Extra small | Under 10 lbs | 1 teaspoon |
| Small | 10–25 lbs | 1 to 2 teaspoons |
| Medium | 25–50 lbs | 1 tablespoon |
| Large | 50–90 lbs | 1 to 2 tablespoons |
| Giant | 90+ lbs | 2 tablespoons |
Keep in mind:
- This guide is a starting point, not a rule. Your vet knows your dog best.
- Introduce yogurt slowly. Give a small taste first and wait 24 hours.
- Serve just one frosted treat per day at most.
Got a new puppy? Puppies have sensitive stomachs. Ask your vet before giving dairy. Our puppy veterinary needs guide covers what to ask at your first visits.
7. Safety and Ingredient Rules (Short Version)
Quick take: A few simple rules keep every batch safe.
A. Ingredients to Never Use
Check labels every time, even on products you’ve bought before. Recipes change.
Never put these in dog frosting:
- Xylitol: Found in some peanut butters, yogurts, and “sugar-free” products. It’s highly toxic to dogs.
- Chocolate and cocoa: Toxic to dogs.
- Powdered sugar: Adds empty calories and can upset the stomach.
- Raisins and grapes: Can cause kidney failure.
- Macadamia nuts: Toxic to dogs.
- Artificial sweeteners and flavors: Many are not safe.
- Vanilla extract: Contains alcohol. Skip it.
- Nutmeg: Can be harmful in larger amounts.
Safe add-ins, in small amounts:
- Plain pumpkin puree
- Mashed banana
- Blueberries
- Unsweetened, xylitol-free peanut butter
- A tiny bit of coconut oil
B. Dairy Sensitivities and When to Call Your Vet
Many dogs are a bit lactose intolerant. Greek yogurt has less lactose than milk, so most dogs handle it fine. Still, every dog is different.
Watch for these signs after your dog eats yogurt:
- Gas or bloating
- Loose stool or diarrhea
- Vomiting
- Itching or excessive scratching
- Low energy
If your dog licks or scratches a lot after eating dairy, it could be a food reaction. Our guide on excessive licking in dogs explains what to watch for.
Call your vet if:
- Symptoms last more than a day
- Your dog vomits more than once
- Your dog has a known dairy allergy
- Your dog has pancreatitis, diabetes, or weight problems
- Your dog ate something on the “never” list
If you think your dog ate xylitol or chocolate, call your vet or an animal poison helpline right away. Don’t wait for symptoms.
For dogs who can’t have dairy: Try mashed banana, plain pumpkin, or unsweetened applesauce (no added sugar) mixed with a little coconut oil. These make a soft, dairy-free topping.
Conclusion
Making a Greek yogurt dog frosting recipe at home is easier than most people expect. With just yogurt, a bit of starch, and a few pantry ingredients, you can make frosting that looks great and keeps your dog safe.
Here’s a quick recap:
- Use Recipe Card #1 for soft frosting on cakes and cupcakes.
- Use Recipe Card #2 when you need a hard-drying frosting that stacks and travels.
- Use Recipe Card #3 for a frozen, crunchy dip on hot days.
- Pick your style: spread, pipe, drizzle, or dip.
- Color with real foods like beet, turmeric, and spinach.
- Store it cold, and use it within a few days.
- Keep portions small, and always check labels for xylitol.
Start with the base recipe and get comfortable with the texture. Then try the hard-drying version once you want more polish. Before long, you’ll be decorating treats like a pro.
Want more ideas? Explore our full collection of homemade dog treats recipes and pick your next project. Your dog will thank you with a wagging tail.
Always check with your vet before adding new foods to your dog’s diet, especially if your dog has health conditions.

Izzy is an experienced ranch worker who has a passion for exploring nature and getting up close to wildlife. With her connections to various animal organizations, Izzy is well-versed in animal care and rehabilitation.