6 Easy Oatmeal Protein Balls for Dogs With Dog-Safe Ingredients
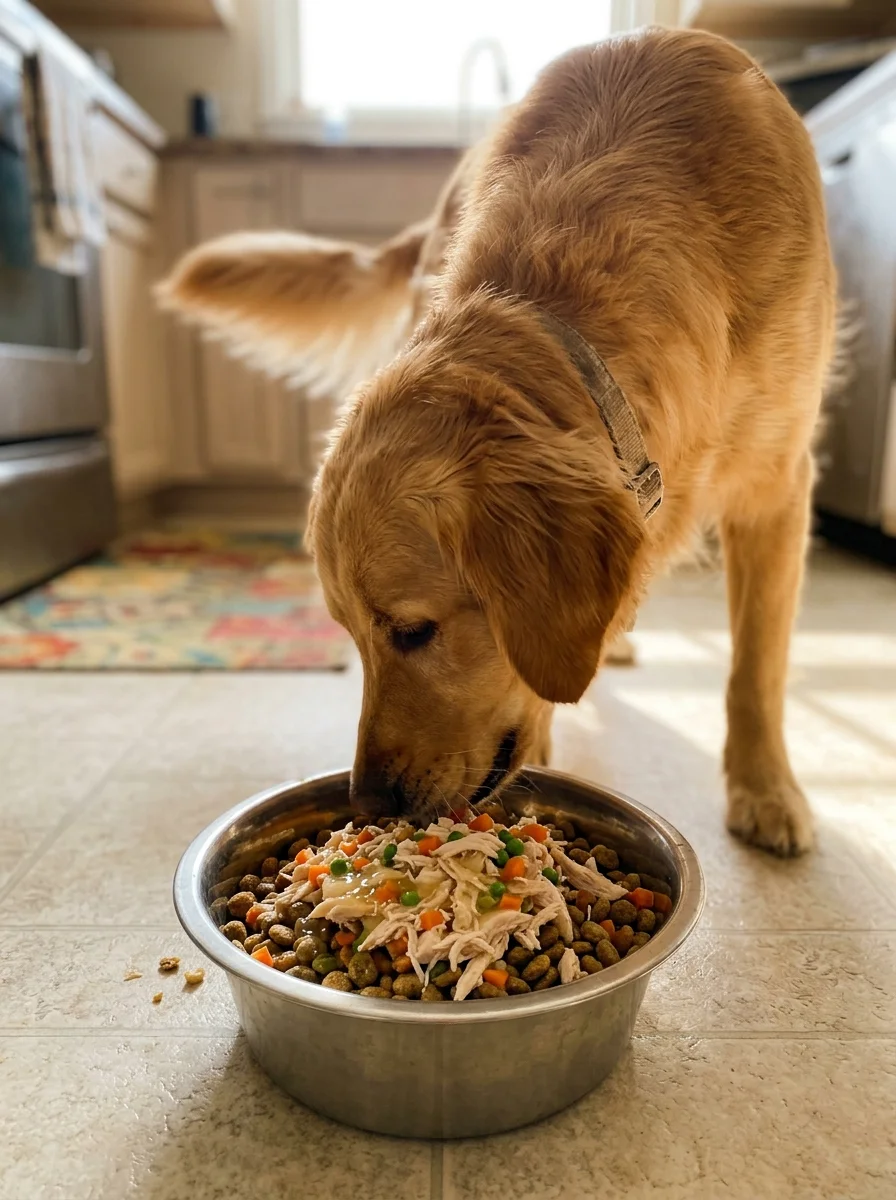
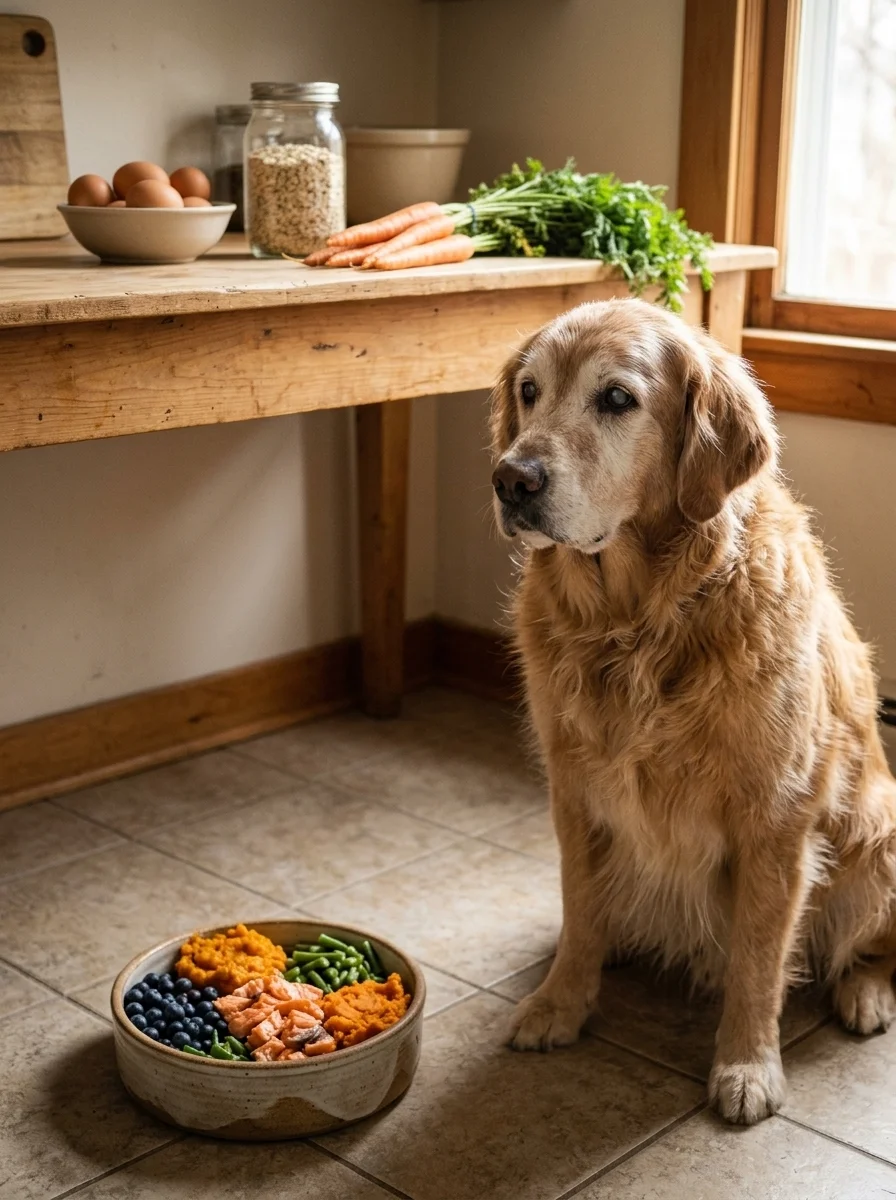
Your dog gives you the look every time you open the fridge. You want a treat that is tasty, simple, and made with ingredients you can pronounce. That is where Oatmeal Protein Balls for dogs come in.
These little bites are soft, easy to portion, and packed with dog-safe protein. You can make most of them in under 20 minutes with things already in your kitchen. No fancy gear. No weird powders.
Below you will find six standalone recipes, ordered from easiest to fanciest. Each one has its own recipe card, so you can jump straight to the one you want. Want a quick roll-and-chill treat? Start with Recipe 1. Want something crunchy or savory? Scroll down.
Here is the lineup:
- Recipe 1: Classic No-Bake Balls (about 10 minutes of work)
- Recipe 2: Baked Oat Bites (crispy outside, chewy inside)
- Recipe 3: Frozen Balls for Hot Days (cool and refreshing)
- Recipe 4: Silicone Mold Bites (tiny, neat, and mess-free)
- Recipe 5: Yogurt-Dipped Balls (a creamy coat dogs love)
- Recipe 6: Savory Chicken-Stuffed Balls (for picky eaters)
One quick rule before we start: every recipe here uses dog-safe protein only. That means eggs, plain yogurt, cooked chicken, and xylitol-free peanut butter. Human protein powders are not on the list, and I will explain why later.
1. Classic No-Bake Oatmeal Protein Balls for Dogs
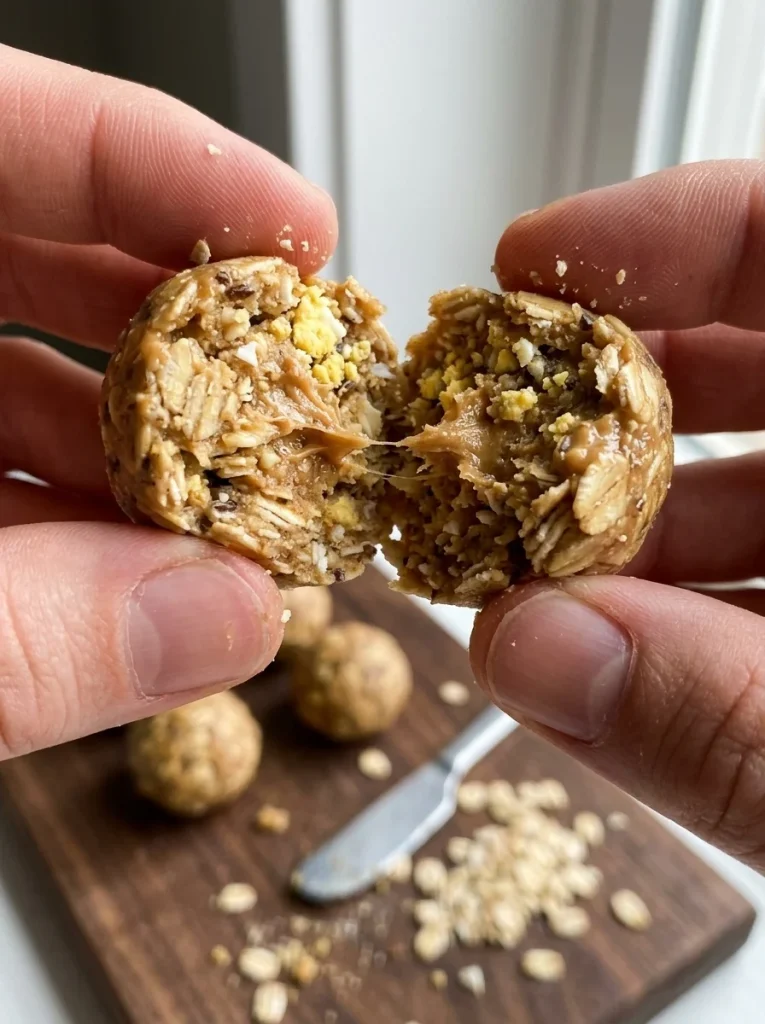
This is the recipe to learn first. You mix, roll, chill, and you are done. There is no oven, no hot kitchen, and almost no cleanup.
It is also the best base for new bakers. Once you get the feel for the dough, every other recipe in this article feels easy.
Why This Version Works
Rolled oats give the balls a hearty, chewy bite. Peanut butter adds flavor dogs go nuts for. A mashed hard-boiled egg and a spoonful of Greek yogurt bring in protein, and they also help the dough hold together without any sugar.
The chill time is what turns a sticky mix into a firm, snackable ball. Do not skip it.
Tips for Best Results
- Always check the peanut butter label for xylitol (sometimes listed as “birch sugar”). It is toxic to dogs.
- If the dough sticks to your hands, wet your palms with cool water.
- Roll smaller balls for small dogs and training sessions.
RECIPE CARD
Prep Time: 10 minutes
Cook Time: None
Freeze/Chill Time: 30 minutes in the freezer (or 1 hour in the fridge)
Yield: About 18 small balls
Ingredients:
- 1 cup old-fashioned rolled oats
- 1/2 cup natural peanut butter (xylitol-free, no added sugar)
- 1/4 cup plain unsweetened Greek yogurt
- 1 hard-boiled egg, peeled and mashed well
- 1 tablespoon ground flaxseed (optional)
- 2 to 3 tablespoons cool water, as needed
Instructions:
- Add the oats, peanut butter, yogurt, mashed egg, and flaxseed to a large bowl.
- Stir with a sturdy spoon until the mix looks thick and sticky.
- Add water one tablespoon at a time if the dough feels dry or crumbly.
- Wet your hands and roll the dough into small balls, about 1 inch wide.
- Place the balls on a parchment-lined tray.
- Chill in the freezer for 30 minutes, or in the fridge for 1 hour, until firm.
- Serve one or two, depending on your dog’s size.
Notes:
- Store in an airtight container in the fridge for up to 5 days.
- Freeze for up to 2 months. Thaw for 5 minutes before serving.
- Use quick oats if you only have those. The balls will be a bit softer.
- Always check with your vet before adding new foods to your dog’s diet.
2. Baked Oat Bites for Dogs
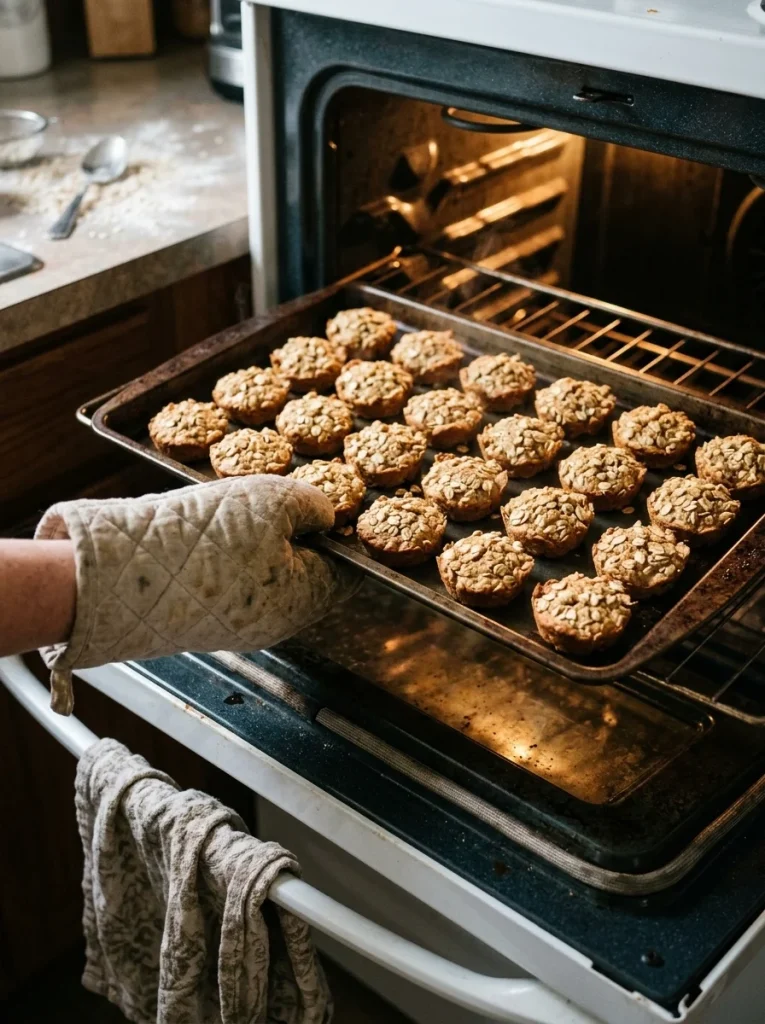
Some dogs love a bit of crunch. Baked oat bites have a lightly crisp outside and a soft, chewy middle. They also last longer on the counter than no-bake balls, which makes them great for road trips and gift bags.
If you like making treats in batches, this one is for you.
Why This Version Works
Baking sets the eggs and dries the surface of each bite. That gives you a sturdier treat that does not squish in your pocket. The applesauce replaces sugar and adds natural sweetness and moisture.
Oat flour helps the bites hold their shape. You can make it yourself by blitzing rolled oats in a blender for 30 seconds.
Tips for Best Results
- Pick unsweetened applesauce. Sugary types are not good for dogs.
- Keep the balls the same size so they bake evenly.
- Leave them in the cooling oven for extra crunch.
RECIPE CARD
Prep Time: 15 minutes
Cook Time: 18 minutes
Freeze/Chill Time: None (cool for 20 minutes)
Yield: About 24 bites
Ingredients:
- 1 1/2 cups old-fashioned rolled oats
- 1 cup oat flour (blend rolled oats into a fine powder)
- 2 large eggs
- 1/2 cup unsweetened applesauce
- 1/3 cup natural peanut butter (xylitol-free)
- 2 tablespoons water, if needed
Instructions:
- Heat your oven to 350°F (175°C). Line a baking sheet with parchment paper.
- In a large bowl, whisk the eggs, applesauce, and peanut butter until smooth.
- Stir in the oats and oat flour until a thick dough forms.
- Add a splash of water if the dough feels too stiff to roll.
- Roll the dough into 1-inch balls and place them 1 inch apart on the tray.
- Gently press each ball down a little with your palm.
- Bake for 16 to 18 minutes, until the edges look golden.
- Turn off the oven, crack the door, and let the bites cool inside for 20 minutes.
Notes:
- Store in an airtight container in the fridge for up to 7 days.
- Freeze for up to 3 months.
- For a firmer, crunchier bite, bake 3 to 4 minutes longer.
- Cool completely before giving one to your dog.
3. Frozen Oatmeal Protein Balls for Hot Days
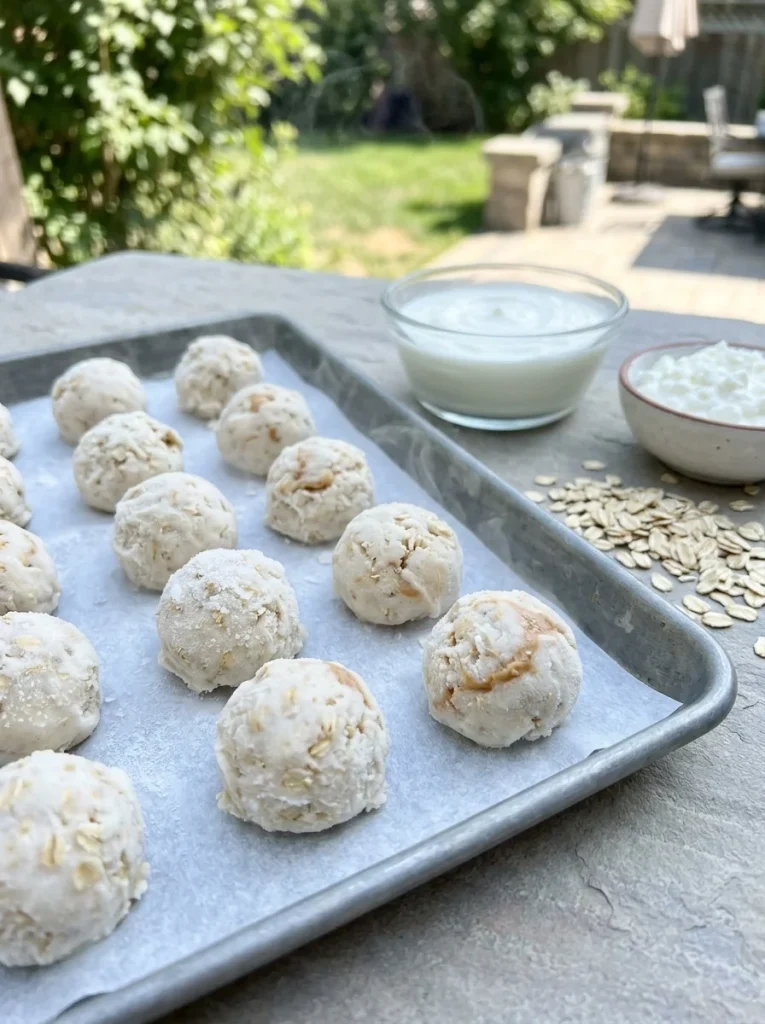
When the weather heats up, a cold treat feels like a gift. These frozen balls turn plain oatmeal and yogurt into a cooling snack your dog can crunch on. They are great after a walk or a game of fetch.
They are also one of the gentlest options here, which makes them handy for dogs who like softer foods.
Why This Version Works
This recipe starts with cooked oatmeal, cooked in plain water with no salt or sugar. That makes the base soft and easy to scoop. Greek yogurt and cottage cheese add protein and a creamy feel.
Freezing does the rest. The balls turn firm and refreshing, and they last a long time in your freezer.
Tips for Best Results
- Let the oatmeal cool all the way before mixing. Hot oatmeal will melt the yogurt.
- Pick low-fat, low-sodium cottage cheese.
- Serve right from the freezer on warm days. Let them sit a minute for senior dogs.
RECIPE CARD
Prep Time: 10 minutes
Cook Time: 5 minutes (to cook the oats)
Freeze/Chill Time: 2 hours
Yield: About 16 balls
Ingredients:
- 1/2 cup old-fashioned rolled oats, cooked in 1 cup water, then cooled
- 1/2 cup plain unsweetened Greek yogurt
- 1/4 cup low-fat, low-sodium cottage cheese
- 2 tablespoons natural peanut butter (xylitol-free)
- 1/4 cup oat flour
Instructions:
- Cook the oats in water until soft. Do not add salt, sugar, or milk.
- Spread the oatmeal on a plate and let it cool completely.
- In a bowl, mix the cooled oatmeal, yogurt, cottage cheese, and peanut butter.
- Stir in the oat flour until the mix is thick enough to scoop.
- Use a small cookie scoop or spoon to drop 1-inch mounds onto a parchment-lined tray.
- Freeze for at least 2 hours, until solid.
- Move the frozen balls into a freezer bag or container.
Notes:
- Keep frozen for up to 2 months.
- Skip this recipe if your dog is sensitive to dairy.
- Serve one at a time. Too many cold treats can upset small stomachs.
- Never use flavored or sweetened yogurt.
4. Silicone Mold Oatmeal Protein Bites
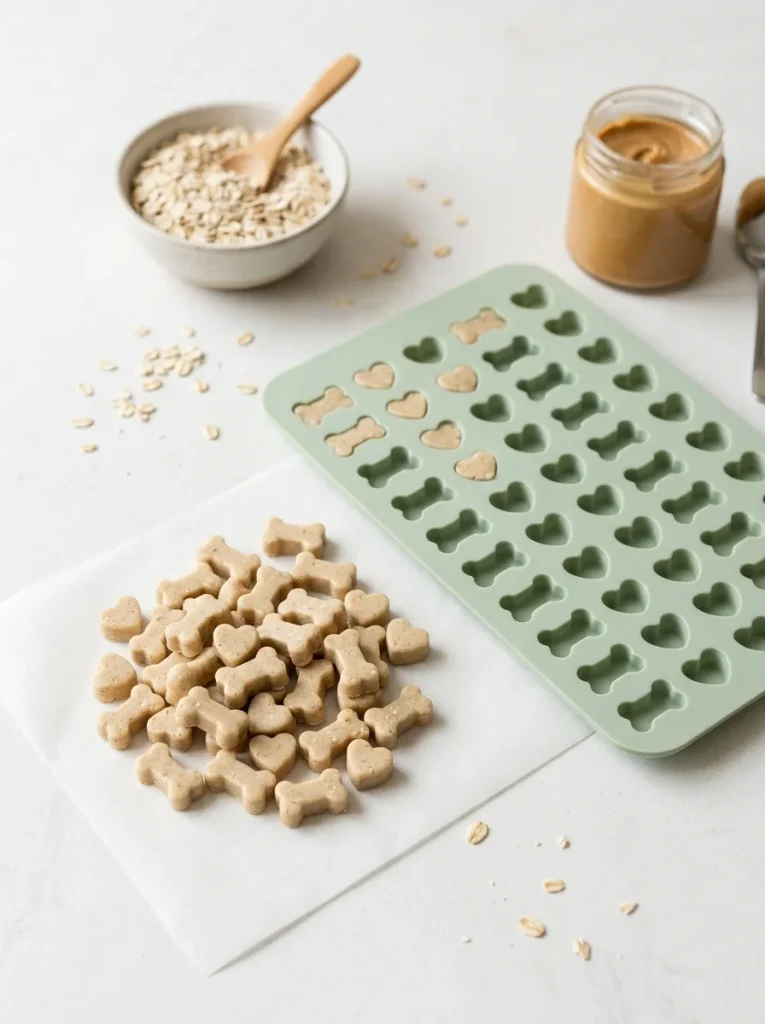
Not a fan of rolling? A silicone mold does the shaping for you. You press the mix into little cavities, chill it, and pop out perfect, identical bites.
This is the neatest method in the article. It is also great for making tiny training treats without sticky hands.
Why This Version Works
Molds give every bite the same size, which helps with portion control. That matters when you hand out treats during training. A mold also keeps the shape clean, so the bites stack well in a jar or bag.
The mix here is a bit wetter than the rolled recipes. That helps it press into every corner of the mold and set smoothly.
Tips for Best Results
- Use a mold with small cavities, such as mini bone or heart shapes.
- Press the mix down firmly so there are no air gaps.
- Freeze the mold for 10 minutes before popping bites out. They release much more cleanly.
RECIPE CARD
Prep Time: 15 minutes
Cook Time: None
Freeze/Chill Time: 1 hour in the fridge, or 30 minutes in the freezer
Yield: About 30 mini bites
Ingredients:
- 1 cup quick oats, pulsed in a blender until coarse
- 1/2 cup low-fat, low-sodium cottage cheese
- 1 hard-boiled egg, mashed
- 1/4 cup natural peanut butter (xylitol-free)
- 2 tablespoons unsweetened applesauce
- 1/4 cup water
Instructions:
- Pulse the quick oats a few times so they break into smaller pieces.
- In a bowl, mix the cottage cheese, mashed egg, peanut butter, and applesauce.
- Stir in the oats and water until you get a thick, spoonable paste.
- Spoon the mix into a small silicone mold.
- Press down firmly with the back of a spoon and smooth the tops.
- Chill in the fridge for 1 hour, or freeze for 30 minutes.
- Flex the mold gently and pop out the bites.
Notes:
- Store in a sealed container in the fridge for up to 5 days.
- Freeze for up to 2 months.
- Add 1 tablespoon more oats if the mix is too wet to hold its shape.
- Wash the mold in warm, soapy water right away, since peanut butter can cling.
5. Yogurt-Dipped Oatmeal Protein Balls
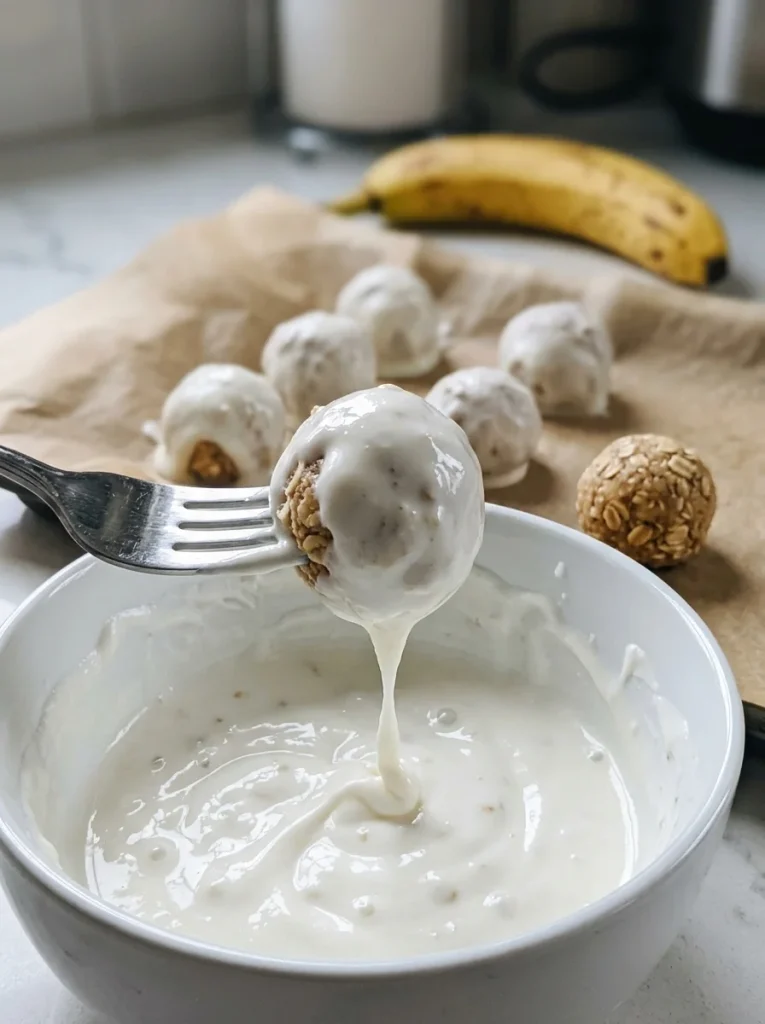
Want to feel like a gourmet dog chef? Dip your oat balls in plain yogurt. The coating freezes into a thin, creamy shell that gives each ball a fun texture and a little extra protein.
It looks fancy, but it takes only one extra step. These also make a cute gift for a dog-owning friend.
Why This Version Works
The base is a simple banana-peanut butter ball. The banana adds natural sweetness, so you do not need honey or sugar. Then the yogurt coat adds a cool, tangy layer that many dogs adore.
Thick Greek yogurt works best. Thin yogurt will slide right off.
Tips for Best Results
- Freeze the plain balls first so the yogurt grabs on and sets fast.
- Use a toothpick or fork to dip, then let the extra yogurt drip off.
- Keep these treats frozen until just before serving, or the coat will soften.
RECIPE CARD
Prep Time: 20 minutes
Cook Time: None
Freeze/Chill Time: 1 hour total (30 minutes before dipping, 30 minutes after)
Yield: About 14 balls
Ingredients:
For the balls:
- 1 cup old-fashioned rolled oats
- 1/3 cup natural peanut butter (xylitol-free)
- 1/4 cup mashed ripe banana
- 1 tablespoon water
For the coating:
- 3/4 cup thick plain unsweetened Greek yogurt
Instructions:
- In a bowl, mix the oats, peanut butter, mashed banana, and water.
- Roll the dough into small 1-inch balls.
- Freeze the balls on a parchment-lined tray for 30 minutes.
- Pour the yogurt into a small, deep bowl.
- Dip each frozen ball into the yogurt and turn it to coat all sides.
- Lift it out with a fork and let the extra yogurt drip off.
- Set the dipped balls back on the tray.
- Freeze for another 30 minutes, until the coating is firm.
Notes:
- Store in the freezer in an airtight container for up to 1 month.
- Do not leave these out in the heat, since the coating melts fast.
- Check the yogurt label to make sure it has no xylitol or added sweetener.
- Skip dairy coatings for lactose-sensitive dogs.
6. Savory Chicken-Stuffed Oatmeal Protein Balls
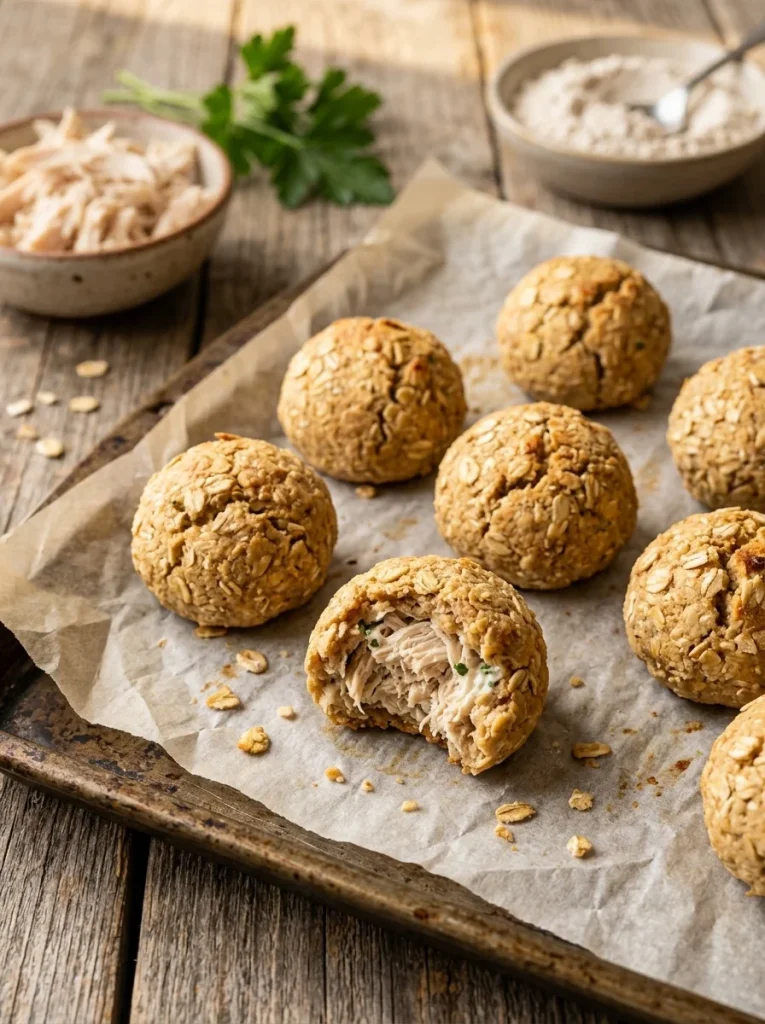
Some dogs turn up their noses at sweet-style treats. For them, go savory. These baked oat balls hide a tender, juicy chicken center that smells amazing and is hard to resist.
This is the most “meaty” recipe here, and it works well for picky eaters or as a high-value training reward.
Why This Version Works
The outer dough is a simple oat-and-egg mix that bakes into a soft shell. Inside, finely shredded chicken breast and a little yogurt keep the filling moist. Because the filling is tucked inside, the whole bite smells like real chicken.
It is a clever way to give your dog lean protein without making a full meal.
Tips for Best Results
- Use plain cooked chicken with no salt, onion, or garlic. Those seasonings are unsafe for dogs.
- Shred the chicken very fine so it blends into the filling.
- Seal each ball well so the filling does not leak out while baking.
RECIPE CARD
Prep Time: 25 minutes
Cook Time: 20 minutes
Freeze/Chill Time: None (cool for 15 minutes)
Yield: About 16 balls
Ingredients:
For the dough:
- 1 1/2 cups oat flour (blend rolled oats into a fine powder)
- 1 large egg
- 1/4 cup plain, unsalted chicken broth (no onion or garlic)
- 1 tablespoon olive oil
For the filling:
- 1 cup finely shredded cooked chicken breast
- 2 tablespoons plain unsweetened Greek yogurt
- 1 tablespoon chopped fresh parsley (optional)
Instructions:
- Heat your oven to 350°F (175°C). Line a baking sheet with parchment paper.
- In a bowl, mix the oat flour, egg, broth, and olive oil into a soft dough.
- In a second bowl, stir together the chicken, yogurt, and parsley.
- Take a tablespoon of dough and flatten it into a small circle in your palm.
- Place a small spoonful of filling in the center.
- Fold the dough around the filling and roll it into a smooth ball.
- Place the balls on the tray, seam side down.
- Bake for 18 to 20 minutes, until lightly golden.
- Let them cool for 15 minutes before serving.
Notes:
- Because of the chicken, store these in the fridge for up to 4 days only.
- Freeze for up to 2 months. Thaw in the fridge overnight.
- Boil or bake the chicken plain, with nothing added.
- Cut each ball in half for small dogs.
Storage, Portions, and Quick Fixes
You made a batch. Now what? A few simple habits keep these treats fresh, safe, and the right size for your dog.
A. How Long They Last
Most no-bake and baked balls keep well in the fridge for 5 to 7 days. Recipes with chicken or yogurt are best used within 4 to 5 days. For longer storage, freeze them in a labeled bag.
Always use clean, airtight containers. If a treat smells sour or looks slimy, throw it out.
B. How Many to Serve
Treats should make up no more than 10% of your dog’s daily calories. Here is an easy starting guide for 1-inch balls:
- Under 10 lbs: half a ball to 1 ball
- 10 to 30 lbs: 1 to 2 balls
- 30 to 60 lbs: 2 to 3 balls
- Over 60 lbs: 3 to 4 balls
Start small the first time. If your dog has tummy trouble, wait and talk to your vet.
C. Fixing Common Problems
- Dough is too sticky? Add 1 to 2 tablespoons of oats or oat flour.
- Dough is too crumbly? Add a spoonful of water, yogurt, or applesauce.
- Balls fall apart? Chill them longer, or press them tighter when rolling.
- Treats too hard? Bake a little shorter next time.
Want more ideas for keeping treats organized? Our guide to dog treat station ideas shows cute ways to store and serve snacks at home.
Ingredients to Never Use in Dog Treats
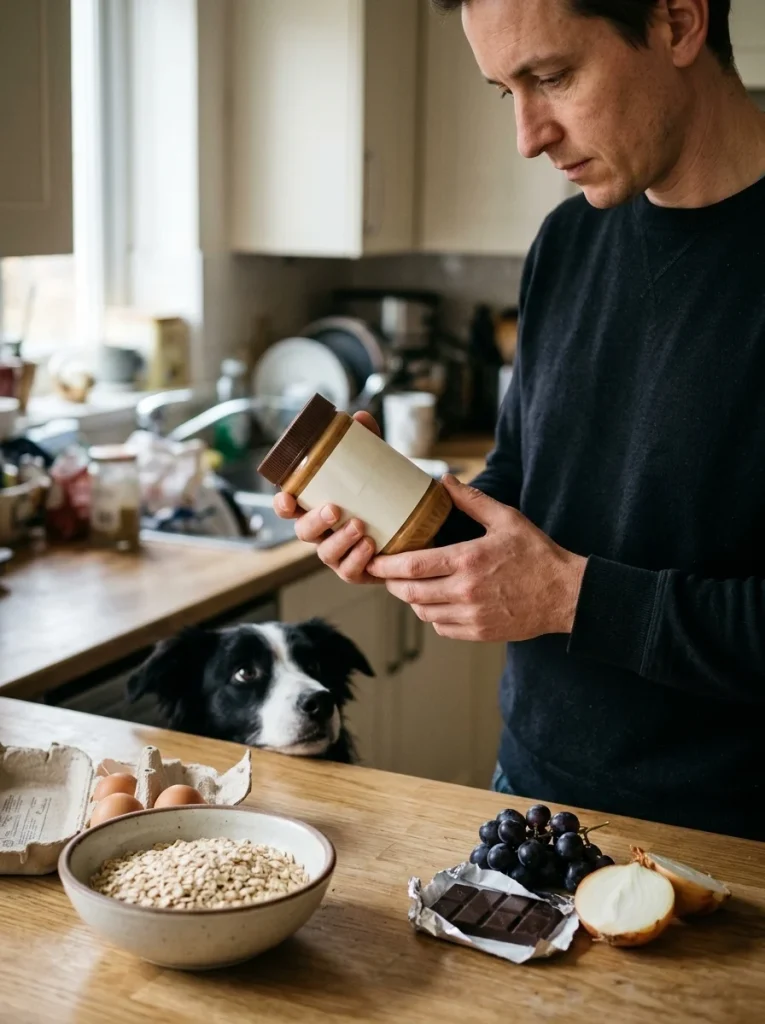
Making treats at home gives you control. But a few common kitchen items can hurt your dog, so keep these out of your mixing bowl.
A. The Danger List
- Xylitol: This sweetener is in some peanut butters, yogurts, and sugar-free products. It is very toxic to dogs. Always read labels.
- Chocolate and cocoa: Both can cause serious problems.
- Raisins and grapes: They can harm a dog’s kidneys.
- Macadamia nuts: They can cause weakness and vomiting.
- Onion and garlic: Even small amounts can damage red blood cells.
- Human protein powder: Many contain xylitol, artificial sweeteners, or other additives that are not safe for dogs.
B. What to Do If Your Dog Eats Something Bad
Call your vet or a pet poison hotline right away. Do not wait for symptoms to show up. Our puppy veterinary needs guide explains when to call the vet and what to keep on hand.
Curious about what else is safe? You might also like our post on whether dogs can eat Cheerios.
Quick Background: Are Oats Good for Dogs?
Yes, plain oats are generally safe for dogs in small amounts. They are a whole grain that offers fiber, and that can help support healthy digestion. They also provide some B vitamins and gentle energy.
Oats are a good fit for many dogs, including those with sensitivity to wheat. Still, every dog is different.
A. A Few Things to Remember
- Use plain oats only, with no sugar, salt, or flavorings.
- Cook or soak oats when possible so they are easier to digest.
- Introduce any new food slowly, in tiny amounts.
- Dogs with allergies, diabetes, or weight problems should have vet approval first.
Oatmeal treats are a snack, not a full meal. If you want to go beyond treats, our collection of homemade dog food recipes covers balanced meals. For more snack ideas, browse these homemade dog treat recipes and our guide to dog bone treats.
Final Thoughts: Your Dog’s New Favorite Snack
Making Oatmeal Protein Balls for dogs is one of the easiest ways to spoil your best friend. You control every ingredient, you skip the mystery fillers, and you get a treat that is fun to make and even more fun to give.
Here is a quick recap to help you choose:
- Short on time? Make the classic no-bake balls.
- Want something crunchy? Try the baked oat bites.
- Dealing with summer heat? Go for the frozen balls.
- Training your pup? Use the silicone mold bites.
- Feeling fancy? Dip the yogurt-coated balls.
- Got a picky eater? Bake the chicken-stuffed balls.
Start with one recipe, watch how your dog reacts, and build from there. Keep portions small, check every label, and always talk to your vet if your dog has special health needs.
Pick a recipe, grab your oats, and get rolling. Your dog’s tail will thank you.

Izzy is an experienced ranch worker who has a passion for exploring nature and getting up close to wildlife. With her connections to various animal organizations, Izzy is well-versed in animal care and rehabilitation.