Dehydrated Dog Treats Recipes for a Long Shelf Life at Home
If you’ve ever flipped over a bag of store-bought dog snacks and squinted at a list of ingredients you can barely pronounce, you’re not alone. That’s exactly why so many dog owners are turning to dehydrated dog treats recipes they can make right in their own kitchen. These treats use simple, whole-food ingredients, skip the preservatives, and are surprisingly easy to prepare.
Whether you own a dehydrator, an air fryer with a dehydrate setting, or just a regular oven, you can turn everyday ingredients like meat, fruit, and vegetables into crunchy, healthy snacks your dog will go crazy for. Best of all, these treats have a long shelf life, so you won’t need to make a new batch every week.
In this guide, you’ll find seven different dehydrated dog treats homemade recipes, tested methods for drying at home, and tips on storage so your treats stay fresh and crunchy for as long as possible. By the end, you’ll have everything you need to start making your own best dehydrated dog treats — no fancy equipment required.
Let’s get into the recipes.
1. Dehydrated Fruit Dog Treats (Apples, Pears & Bananas)
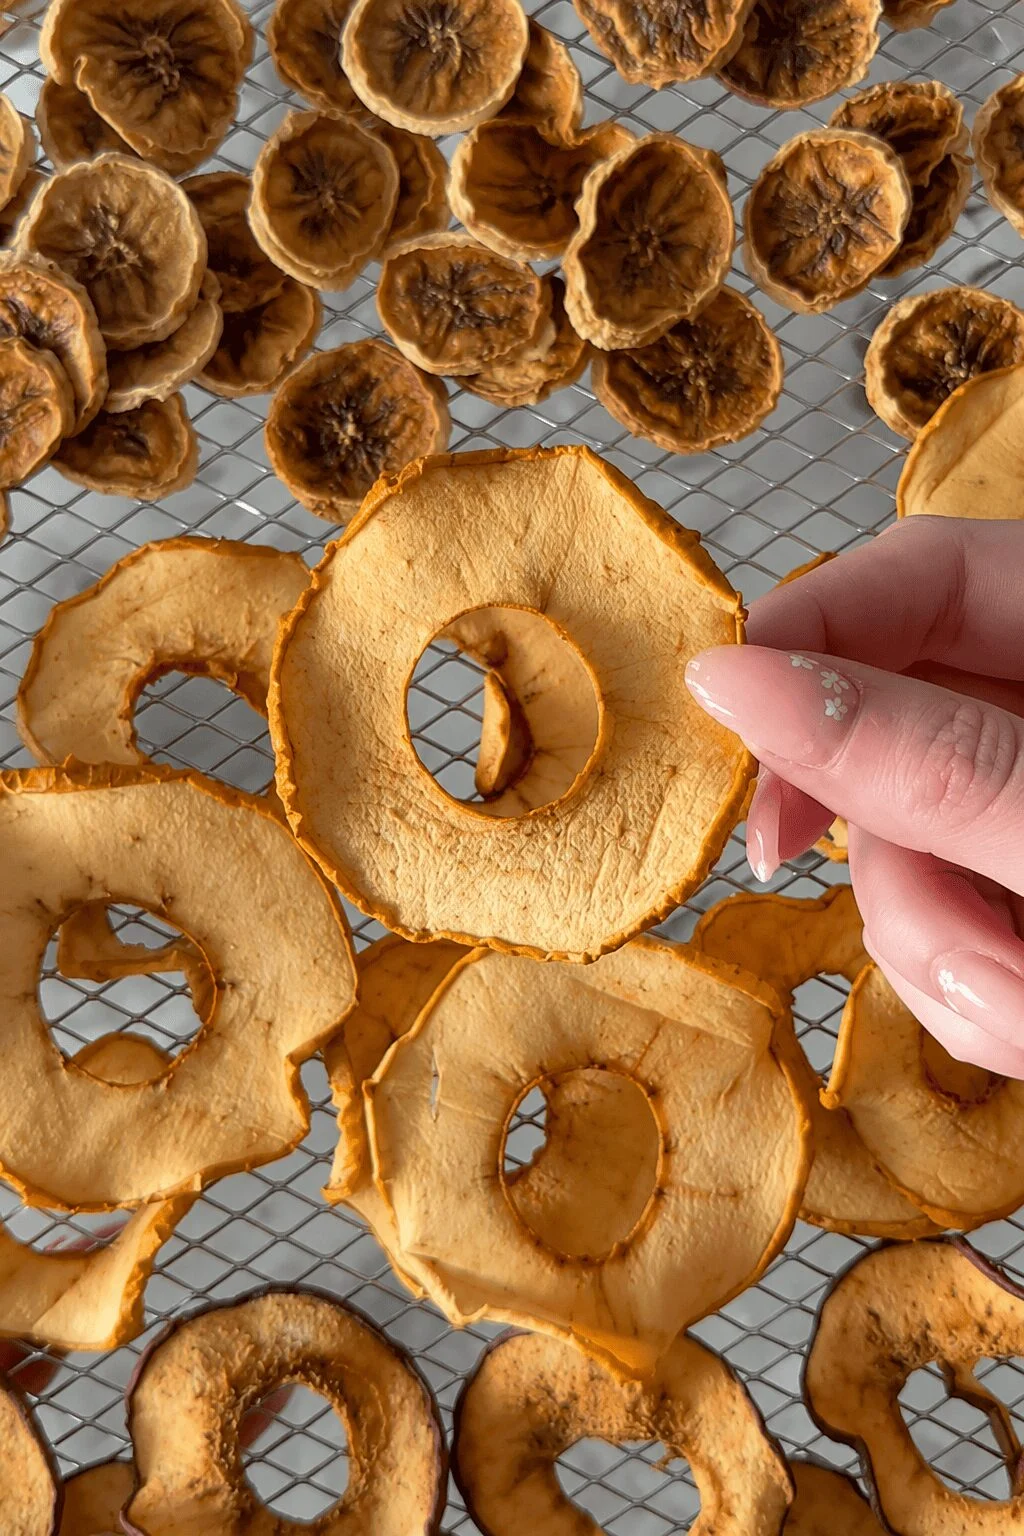
Fruit is one of the simplest starting points for anyone new to making dehydrated dog treats homemade, because it usually requires just one ingredient — no mixing, no dough, no mess. Apples, pears, and bananas are all dog-safe in moderation and naturally sweet, which makes them a hit with picky pups.
Choosing your fruit
When picking apples or pears, look for varieties with lower sugar content — a quick search at your local grocery store for “lowest sugar apples” or “lowest sugar pears” will point you toward good options. Golden Delicious apples and Bosc pears are commonly used because they hold their shape well when sliced thin.
Ingredients
- Apples (cored, seeds removed — apple seeds contain trace cyanide and should never be dehydrated with the fruit)
- Pears (cored)
- Bananas (peeled)
Directions
- Slice all fruit into uniform, thin pieces — about ⅛ to ¼ inch thick — so they dry at the same rate.
- Arrange the slices in a single layer on your dehydrator trays, air fryer basket, or a parchment-lined baking sheet.
- Dehydrator or air fryer method: Dry at around 200°F. Fruit generally takes 4 to 5 hours at this temperature. This higher setting speeds up the process without letting the slices crisp up and burn.
- Low and slow method: If you have more time, drying at 130–150°F for several hours produces a softer, chewier texture that some dogs prefer.
- Oven method: Set your oven to its lowest possible temperature, usually between 150–170°F, and check the fruit every hour or so until dry.
Storage
- If fully dried and crunchy, store in an airtight container at room temperature — they’ll stay fresh for about a week this way.
- If you prefer a softer, chewier texture, or want the treats to last longer, store them in the refrigerator or freezer instead. Properly stored, they can last 2 to 3 months.
Pro tip: Make a big batch on a Sunday and portion them into small bags. This way you always have a healthy, single-ingredient snack ready to grab, similar to how you might prep a batch of treats for a dog treat station at home.
2. Leftover Meat Dog Treats
Got extra chicken, turkey, beef, or bacon from last night’s dinner? Don’t toss it — turn it into treats. This recipe is one of the easiest ways to use up cooked meat instead of letting it go to waste, and it results in a chewy, protein-packed snack dogs love.
Ingredients
- 1 cup cooked meat (chicken, turkey, beef, or bacon — lightly seasoned, no onion or garlic)
- 1 cup water (used gradually)
- ½ cup plain oatmeal
- ½ cup oat bran or wheat flour
Directions
- Shred or chop the cooked meat, then blend it with about ⅓ cup of water until it forms a thick, spreadable paste.
- Mix in the oatmeal and flour a little at a time until a firm dough comes together. If it feels too sticky, add a bit more flour; if it’s too dry, add a splash more water.
- Roll the dough out to about ¼ to ⅛ inch thick on a lightly floured surface. Use a knife or cookie cutter to cut it into small shapes — bones, circles, or strips all work well.
- Arrange the pieces on your dehydrator trays, leaving a little space between each one so air can circulate.
- Dry at 155°F for 4 to 6 hours, checking after the 4-hour mark. The treats are done when they feel firm and crunchy all the way through, not soft in the middle.
Storage tip: Keep these in an airtight container in the fridge for freshness, since they contain meat. They’ll typically last 1 to 2 weeks refrigerated.
A quick note on meat choice: Leaner meats like chicken breast or turkey tend to dry more evenly than fattier cuts like bacon. If you do use bacon, pat off excess grease before blending so the dough isn’t too oily.
📸 Photo credit: Instagram @excaliburdehydrator
3. Mixed Protein Treat Medley (Liver, Duck Heart, Turkey, Cheese & Beef Bites)
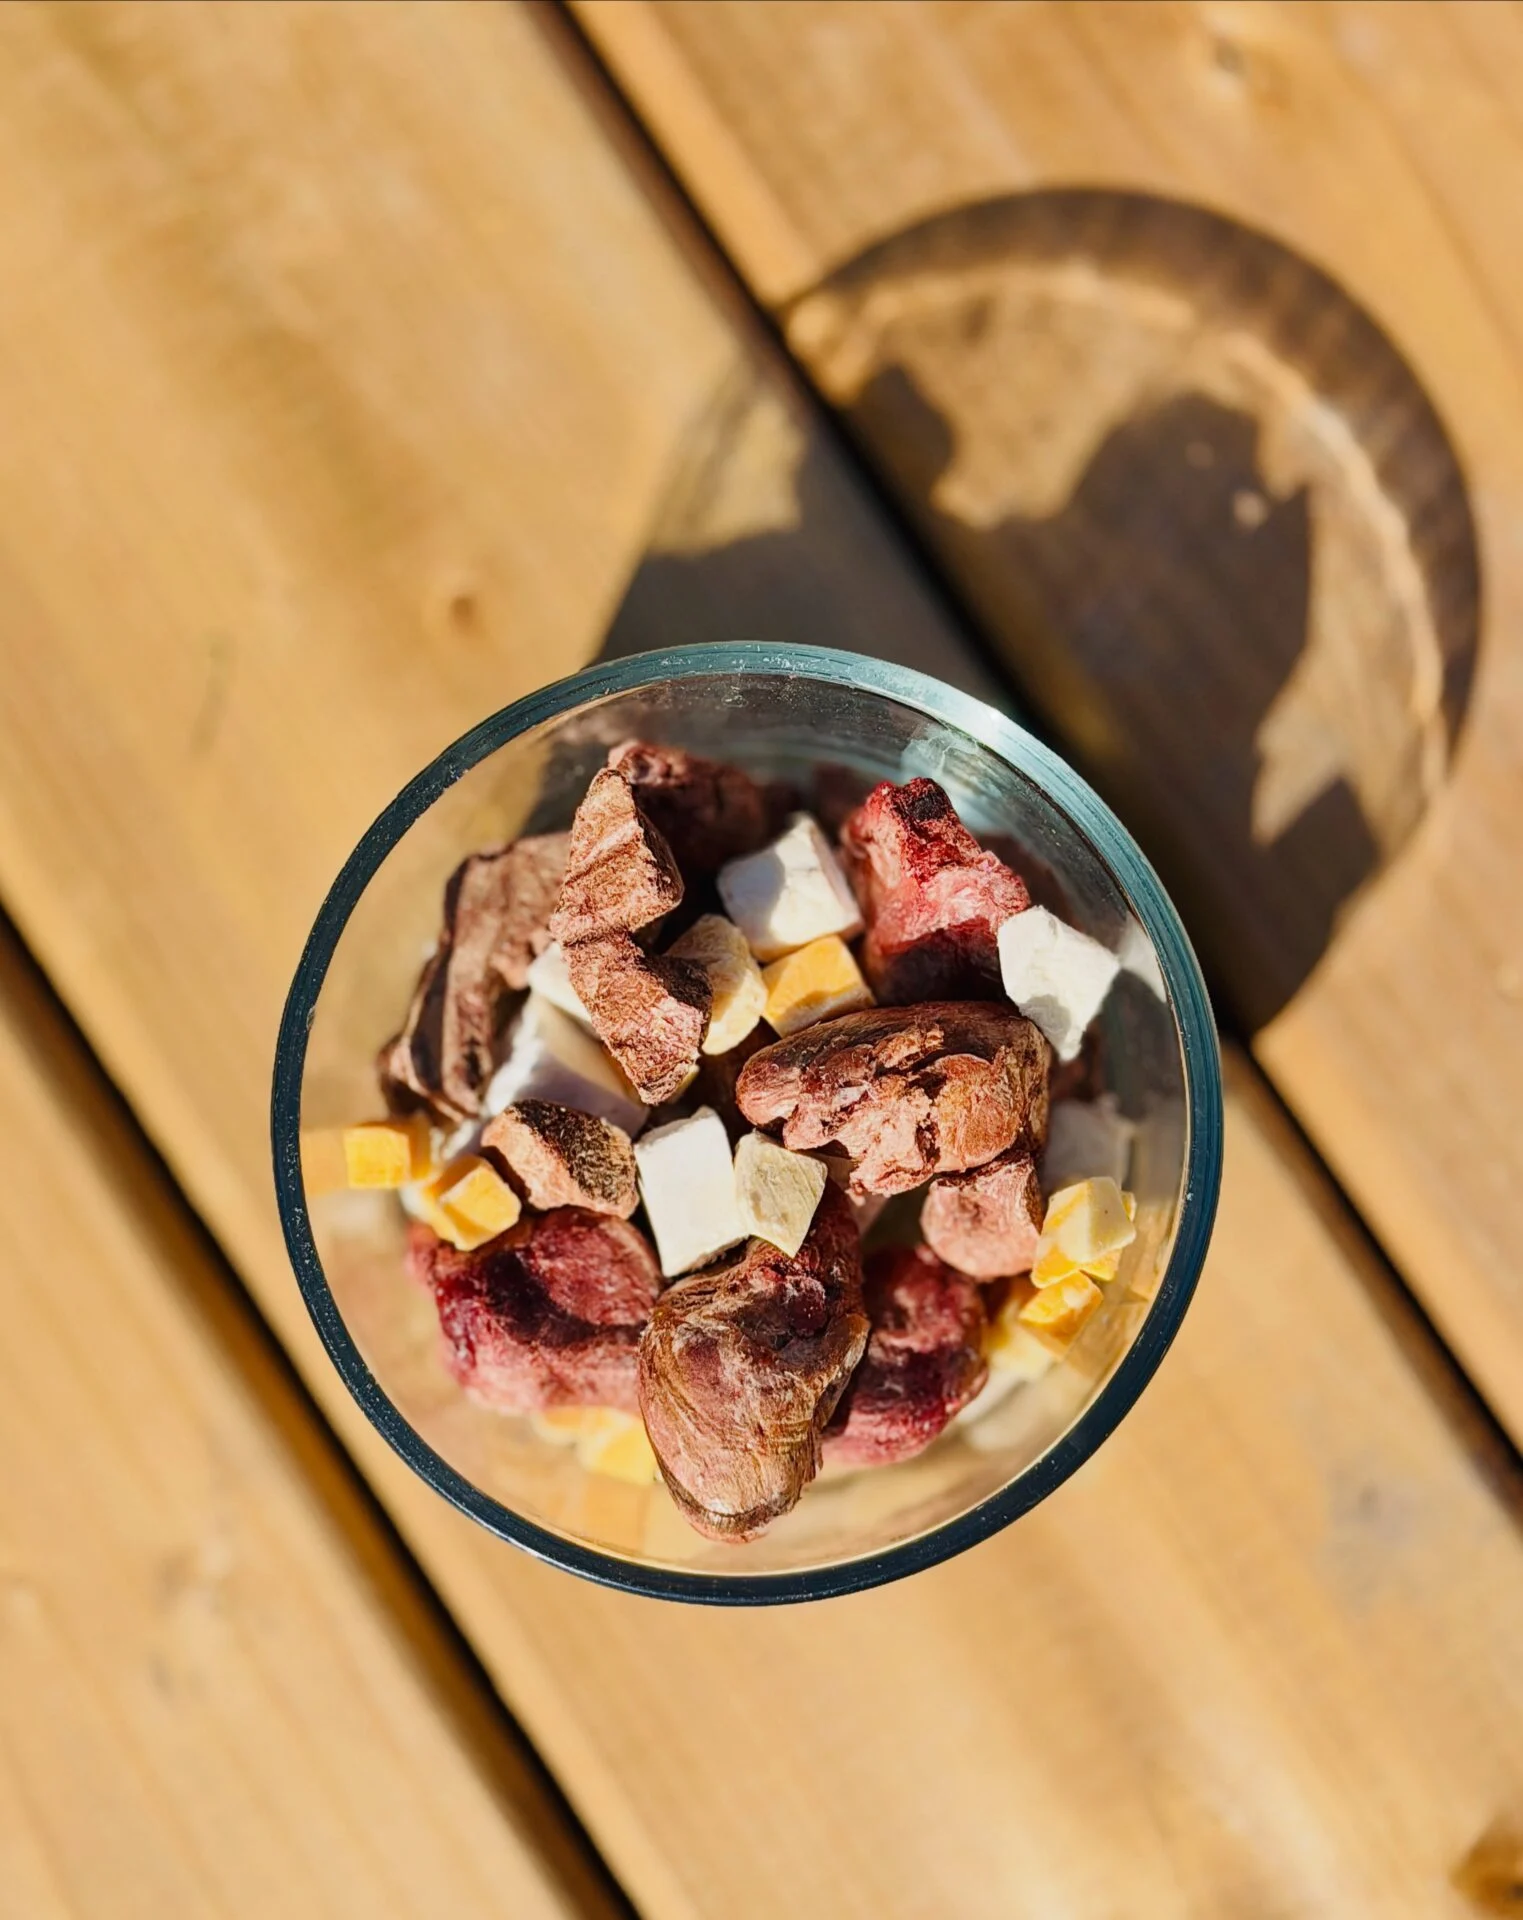
This one is perfect for dog owners who want variety in every handful. Instead of drying one ingredient at a time, you dry several proteins separately, then combine them into a colorful, single-ingredient “treat salad” — great for training sessions, snuffle mats, or stuffing into a reward jar.
Because each ingredient dries at a slightly different rate and thickness, they’re dehydrated in separate batches and mixed together once fully dried. This keeps every piece truly single-ingredient, so it’s easy to tell exactly what your dog is eating and to spot any food sensitivities.
Ingredients
- Pork liver, sliced into thin, bite-sized pieces
- Duck hearts, halved
- Turkey breast, cut into small cubes
- Low-fat cheese, cut into small cubes
- Lean beef, cut into small cubes
Directions
- Trim any excess fat from the meats and pat all ingredients dry with a paper towel before slicing.
- Cut each ingredient into small, similarly sized bite pieces — this helps them dry at roughly the same pace and makes for easy, mess-free training treats later.
- Arrange each ingredient on its own dehydrator tray, since liver, organ meat, cheese, and muscle meat all release different amounts of moisture.
- Dry the meats and organ pieces at 155–160°F for 6 to 8 hours, checking periodically. Liver and duck heart tend to take slightly longer than lean turkey or beef because of their higher moisture content.
- Dry the cheese cubes at a lower temperature, around 125–135°F, for 4 to 6 hours, checking often since cheese can soften and stick to trays if it gets too warm.
- Once every tray is fully dry and cooled, combine all the pieces together in a large bowl to create your treat medley.
Serving ideas
This mix is ideal for:
- Training rewards — small bite sizes make it easy to reward good behavior quickly.
- Enrichment — scatter pieces into a snuffle mat or puzzle feeder to slow down mealtime and keep your dog mentally engaged.
- Reward jars — keep a jar on the counter for spontaneous good-boy moments.
Storage
Store the finished mix in an airtight container in the refrigerator for up to 2 weeks, or in the freezer for longer storage of up to a few months. Because this mix contains organ meat and cheese, refrigeration is recommended over room-temperature storage.
📸 Photo credit: Instagram @stormymeetsworld
4. No-Dehydrator Sweet Potato Dog Treats
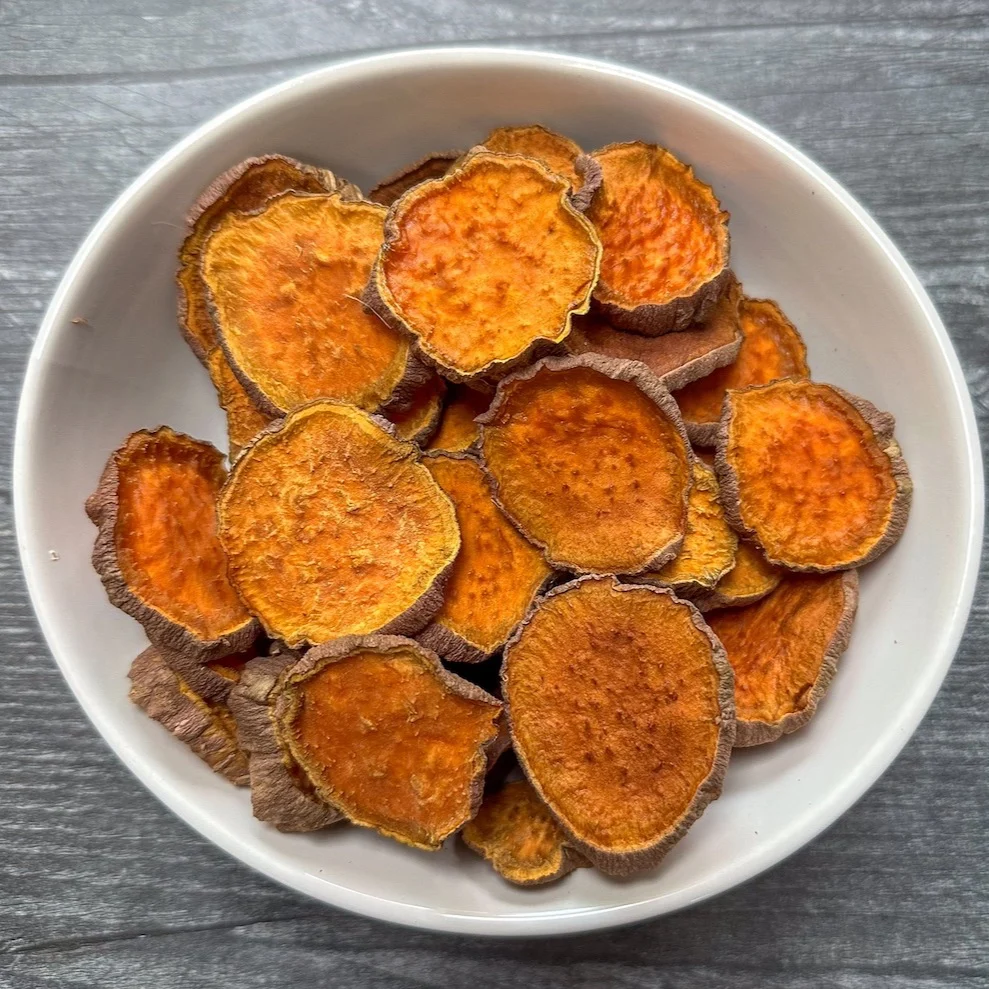
Don’t own a dehydrator? No problem. This one-ingredient recipe proves you don’t need special equipment to make crunchy, low-calorie sweet potato chews — a regular oven works just fine.
Ingredients
- Sweet potatoes (as many as you’d like — 2 medium potatoes make a good starter batch)
Directions
- Wash the sweet potatoes thoroughly to remove dirt and debris.
- Using a sharp knife or a mandoline slicer, cut the sweet potatoes into thin, even slices about ¼ inch thick. Uniform thickness is key for even drying.
- Line a baking sheet with parchment paper, or lightly oil the pan.
- Arrange the slices in a single layer, making sure they don’t overlap.
Oven method:
- Preheat your oven to 250°F (121°C).
- Bake for 2½ to 3 hours total.
- At around the 1 to 1½ hour mark, flip the slices and rotate the baking sheets on the rack so everything dries evenly.
Dehydrator method:
- Arrange slices on your dehydrator racks.
- Set to the manufacturer’s vegetable setting, typically around 135°F (57°C).
- Dry for 6 to 8 hours, checking every couple of hours and rotating racks as needed.
Cooling and storage
Once done, remove the slices and let them cool completely before storing. They should be crispy on the outside with a slight chew in the middle — not mushy. Store in an airtight container at room temperature, where they’ll keep for several weeks.
Sweet potato chews are a great alternative if your dog has food sensitivities, and they pair well with other single-ingredient snacks featured in this list of homemade dog treats recipes.
📸 Photo credit: Instagram @hungrydanekitchen
5. Dehydrated Pineapple Dog Treats
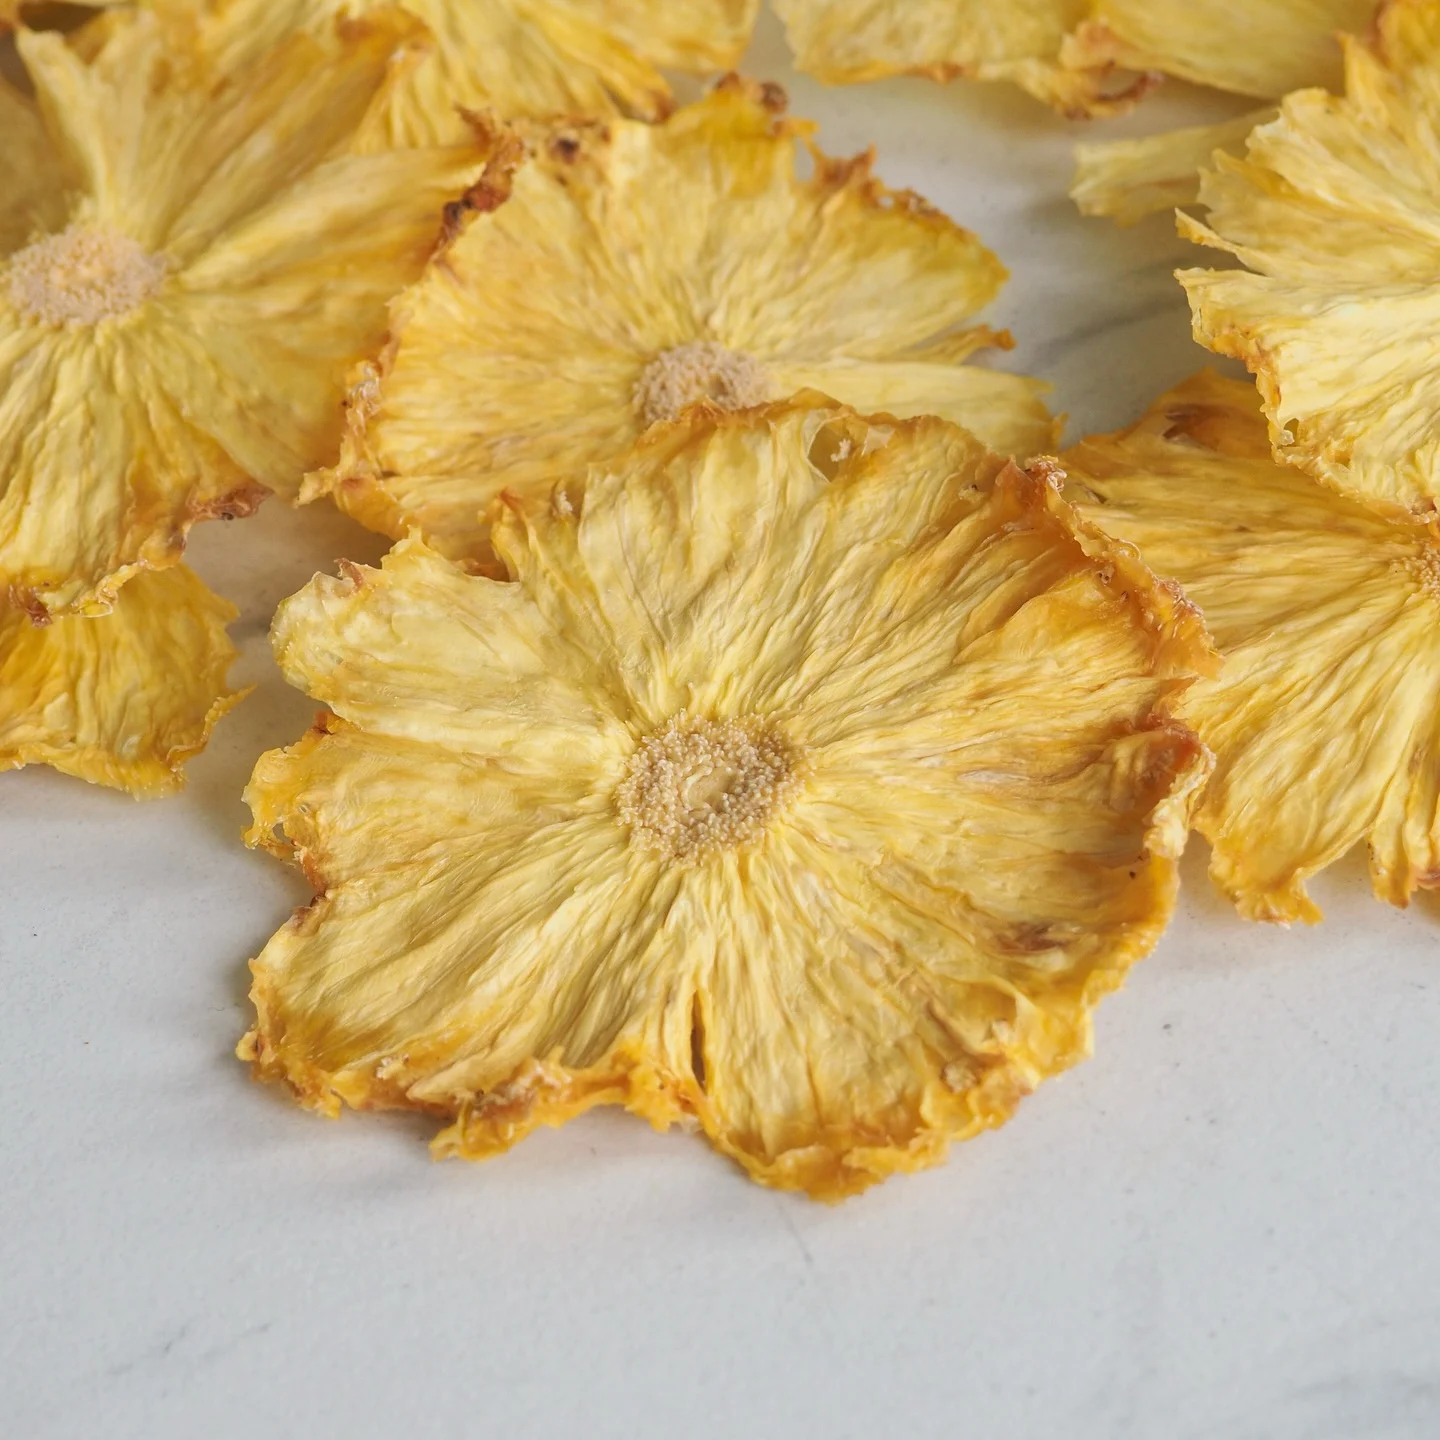
Pineapple makes a bright, tangy addition to your dog’s treat rotation, and it comes with some nice nutritional perks — vitamin C, digestive enzymes, and antioxidants. Since the original post didn’t include full drying instructions, here’s a complete, tested method based on standard dehydrating practices for pineapple.
Ingredients
- 1 fresh pineapple, peeled and cored
Directions
- Slice the pineapple into rounds about ¼ inch thick, removing the tough core from each slice.
- Pat the slices dry with a paper towel to remove excess juice — this helps them dry faster and more evenly.
- Arrange the slices in a single layer on your dehydrator trays.
- Dry at 135–140°F for 6 to 10 hours, flipping halfway through. Drying time will vary depending on slice thickness and your dehydrator model.
- The treats are ready when they feel leathery to firm, with no sticky or wet spots remaining.
A note on moderation
Pineapple is naturally high in sugar compared to sweet potato or plain meat treats, so it’s best given as an occasional snack rather than a daily staple — a slice or two at a time is plenty for most dogs.
Storage
Store dried pineapple in an airtight container at room temperature for up to 1–2 weeks, or refrigerate for a longer shelf life of several weeks.
📸 Photo credit: Instagram @shop.communitytreats
6. Whole Meat Jerky Strips
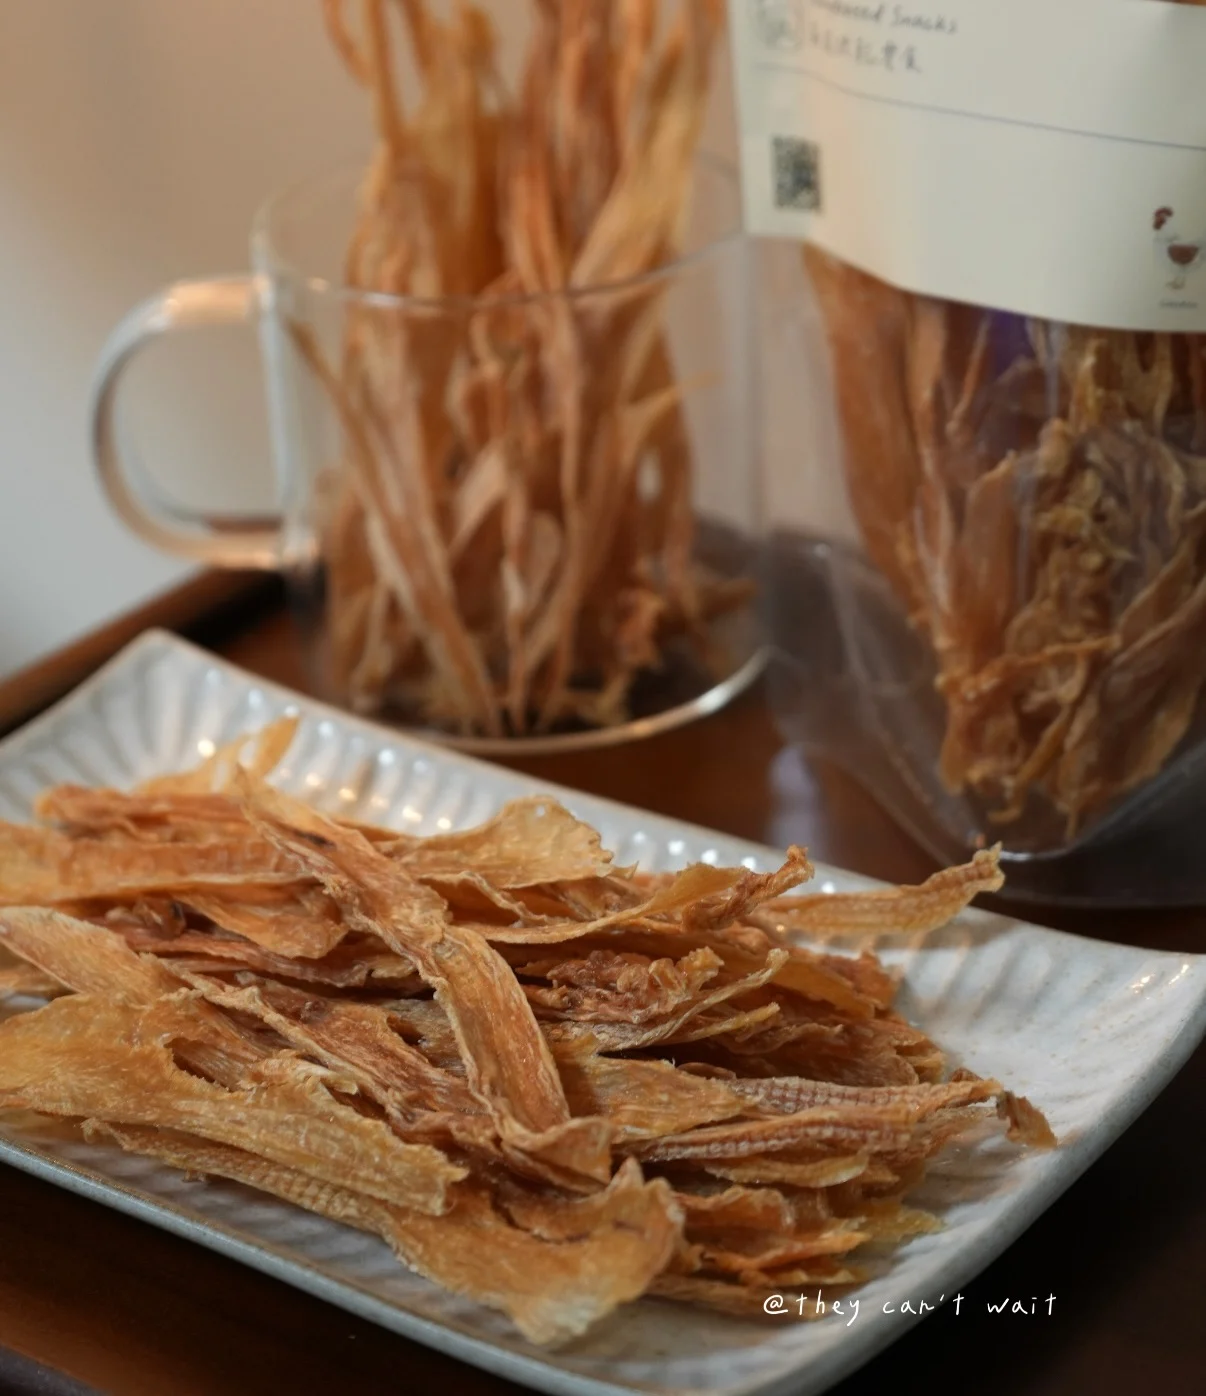
Unlike the ground meat treats in recipe one, this method keeps the meat in whole strips, similar to a simple homemade jerky. It’s a great option if you want a chewier, longer-lasting treat with a single ingredient and no added flour or oats. Based on the strip-style, air-dried texture shown in the reference photo, chicken breast is an easy, widely available option to start with, though lean turkey or beef work just as well.
Ingredients
- Chicken breast, turkey breast, or lean beef (boneless, skinless, visible fat trimmed)
Directions
- Trim the meat of all visible fat and connective tissue, since fat doesn’t dehydrate well and can turn rancid faster than lean meat.
- Slice the meat into thin, even strips, cutting against the grain for a slightly more tender finished texture, or with the grain for a chewier, longer-lasting jerky.
- Pat the strips dry with a paper towel to remove surface moisture before drying.
- Arrange the strips on dehydrator trays in a single layer, without touching, so air circulates fully around each piece.
- Dry at 155–160°F for 6 to 10 hours, depending on strip thickness. Thicker strips take longer.
- Check doneness by bending a strip — it should be firm and slightly leathery, with no visible moisture at the center. If it feels squishy or moist when bent, continue drying and check every 30 minutes.
Why whole strips instead of ground meat
Keeping the meat whole rather than blending it gives your dog a more satisfying chew, which can help slow down treat time and provide a bit of natural teeth-cleaning action as they gnaw.
Storage
Because this is a purely meat-based treat with no preservatives, refrigerate in an airtight container for up to 2 weeks, or freeze for longer-term storage of a few months.
📸 Photo credit: Instagram @they.cant.wait
7. Hypoallergenic Oven-Baked Bites
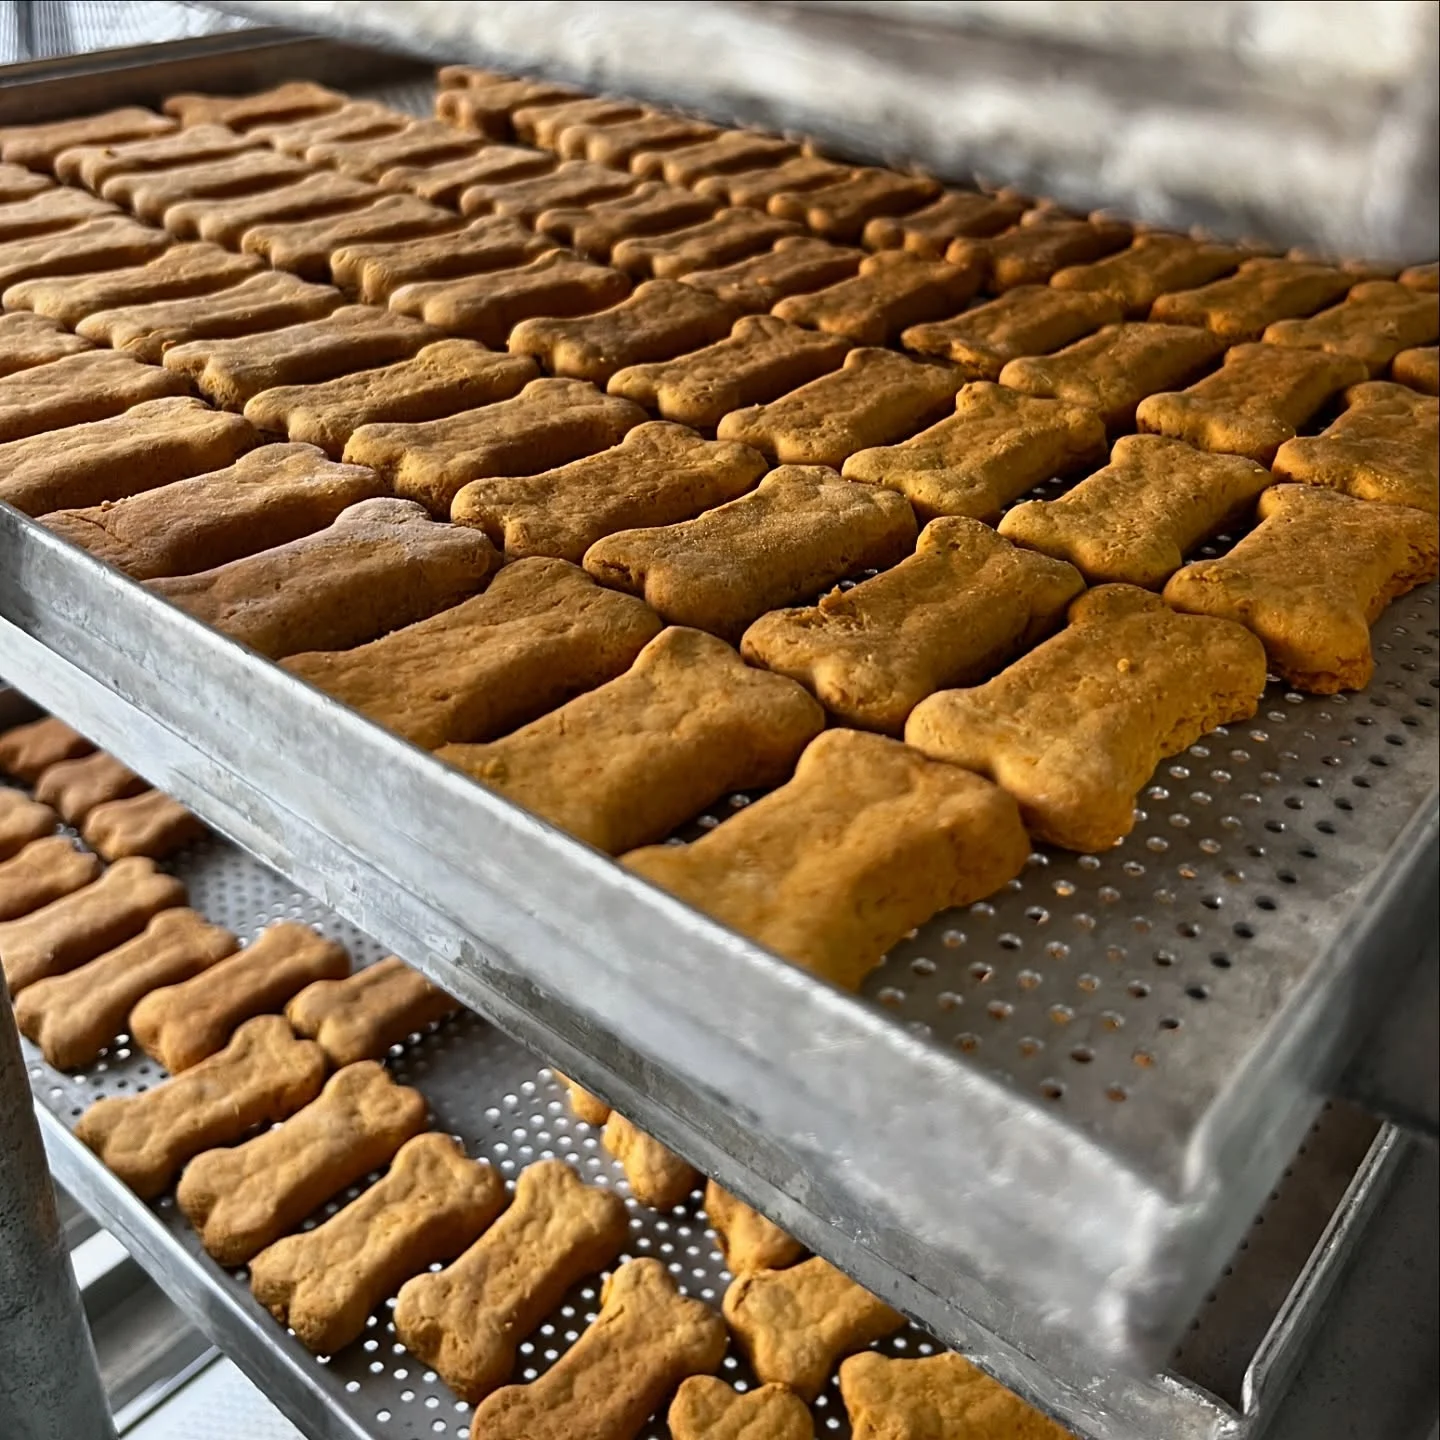
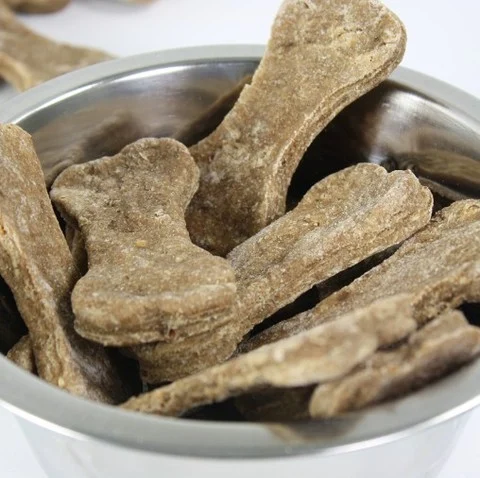
Not every dog does well with common proteins or grains. This simple, limited-ingredient recipe is built for sensitive stomachs, using a single novel protein and a minimal ingredient list to reduce the chance of an allergic reaction. Based on the crunchy, bone-shaped treats shown in the reference photo, this version uses a simple flour-and-protein dough baked until crisp.
Ingredients
- 1 cup pureed single-source protein (such as plain pumpkin, sweet potato, or a lean novel protein like turkey or rabbit, fully cooked and pureed)
- 1½ cups single-source flour, such as oat flour or chickpea flour (choose one your dog hasn’t had issues with before)
- ¼ cup water, as needed
Directions
- In a mixing bowl, combine the pureed protein with the flour, stirring until a crumbly dough starts to form.
- Add water a tablespoon at a time until the dough comes together into a firm, workable ball — it should not be sticky.
- Roll the dough out on a lightly floured surface to about ¼ inch thick.
- Cut into small bone or circle shapes using a cookie cutter, or simply cut into strips with a knife.
- Place the shapes on a parchment-lined baking sheet, leaving a little space between each piece.
- Bake at 300°F for 35–45 minutes, flipping halfway through, until the treats are firm and golden and no longer soft in the center.
- Turn the oven off and let the treats sit inside with the door slightly cracked for an extra 20–30 minutes. This extra drying time helps achieve that fully crunchy, dehydrated texture rather than a soft-baked one.
Why limited ingredients matter
Keeping the ingredient list short makes it much easier to identify what’s causing an issue if your dog does have a reaction, and it avoids common allergy triggers like wheat, dairy, corn, or soy that are found in a lot of commercial treats.
Storage
Once fully cooled, store in an airtight container at room temperature for up to 2 weeks, thanks to the long shelf life that comes from the extra drying time in the oven.
📸 Photo credit: Instagram @alles.pet
Why Make Dehydrated Dog Treats Homemade
Now that you’ve seen seven different recipes, you might be wondering why so many dog owners are moving away from store-bought bags altogether. Here’s why homemade dehydrating has become such a popular choice.
You control exactly what goes in
When you make your own dehydrated dog treats recipes, there are no hidden preservatives, artificial flavors, or filler ingredients. You know exactly what your dog is eating, which matters a lot if your pup has allergies or a sensitive stomach — as shown in the hypoallergenic recipe above, you can tailor the ingredient list to your dog’s exact needs.
It’s genuinely budget-friendly
Buying a bag of pineapple chips or a tub of freeze-dried liver bites at the pet store adds up fast. Making your own from produce or leftover meat you already have on hand costs a fraction of the price, especially if you’re already cooking those ingredients for your household.
Long shelf life without added chemicals
One of the biggest draws of dehydrating is the long shelf life it creates naturally, just by removing moisture. Unlike raw or lightly cooked treats that spoil in a day or two, properly dehydrated snacks can last anywhere from a week at room temperature to several months in the freezer — all without needing artificial preservatives.
It’s flexible, no matter your kitchen setup
You don’t need to invest in a dedicated dehydrator to get started. As shown in the sweet potato and hypoallergenic recipes above, a standard oven set to a low temperature works well. Air fryers with a dehydrate setting are another great option, especially for smaller batches like the fruit chips in recipe two.
It’s a great way to reduce food waste
The leftover meat recipe is a perfect example — instead of throwing away extra chicken or turkey from dinner, you can turn it into a batch of treats your dog will love. This is a simple way to stretch your grocery budget further while keeping your dog well-fed with quality ingredients.
You can customize texture and variety
From crunchy fruit chips to chewy whole-meat jerky to a mixed protein medley, dehydrating at home lets you offer your dog a huge range of textures and flavors — something that’s hard to replicate with a single bag of store-bought treats.
Best Dehydrated Dog Treats — Tips for Success
Making treats at home is simple, but a few small details make the difference between a great batch and a wasted one. Here are the tips that matter most.
Choosing the Right Temperature
Temperature is the single biggest factor in how your treats turn out.
- Meat-based treats, including jerky strips and the protein medley, should be dried at a slightly higher temperature, generally around 155–160°F, to help reduce moisture and bacteria risk.
- Fruits and vegetables can be dried at a wider range, from a low-and-slow 130–150°F to a faster 200°F, depending on how much time you have.
- Cheese and dairy-based pieces need a gentler, lower temperature, around 125–135°F, to avoid melting or sticking to trays.
- Always check your dehydrator or oven’s actual temperature with an oven thermometer if possible, since many home ovens run hotter or cooler than their dial suggests.
How to Store Dehydrated Treats for Long Shelf Life
Storage is where a lot of the long shelf life benefit either gets protected or lost.
- Fully dried, crunchy treats (like sweet potato chips, fruit slices, or oven-baked bites) can generally sit in an airtight container at room temperature for one to several weeks.
- Meat-based treats, including jerky strips and the protein medley, should always go in the fridge, since they carry more moisture and higher spoilage risk than plant-based snacks.
- For the longest shelf life, freezing is your best bet — most dehydrated treats can last 2 to 3 months in the freezer without losing quality.
- Always let treats cool completely before sealing them in a container. Trapping warm, humid air inside can lead to mold, even in fully dried treats.
Common Mistakes to Avoid
- Cutting pieces unevenly. Thick and thin slices in the same batch will dry at different speeds, leaving some pieces underdone.
- Skipping the flip. Many recipes call for flipping halfway through — skip this step and you’ll often end up with one side dry and one side still soft.
- Overcrowding the trays. Treats need space around them for air to circulate. Pieces touching each other will take longer to dry and may trap moisture.
- Using seasoned or salted meat. A little seasoning is fine, but avoid onion, garlic, excess salt, or spicy seasonings, all of which can upset a dog’s stomach.
- Mixing ingredients with different drying times onto one tray. As shown in the protein medley recipe, dry each ingredient separately when moisture content differs significantly, then combine once everything is fully dried.
- Storing before fully cooled. Sealing warm treats traps steam inside the container, which can lead to spoilage even after all that drying time.
Bringing It All Together
Making your own dehydrated dog treats recipes doesn’t require fancy equipment or complicated steps. Whether you’re repurposing leftover meat, slicing up fruit for a naturally sweet snack, building a mixed protein medley for training, or turning a single sweet potato into a bag of crunchy chews, each of these recipes proves that healthy, homemade treats are well within reach.
Start with whichever recipe matches what you already have in your kitchen and your dog’s needs. If you’ve got leftover chicken from dinner, try the meat treats. If your dog has a sensitive stomach, the hypoallergenic bites are a safe place to start. If you want variety for training sessions, the protein medley gives you five flavors in one jar. Once you’ve got the basics down, you can start experimenting with your own flavor combinations, and even use your at-home treat stash as training rewards or enrichment snacks for your dog.
If you’re looking to expand beyond treats, many of the same dehydrating and cooking principles apply to full meals too — check out these homemade dog food recipes or, for something a little more advanced, these human-grade dog food recipes for inspiration. And if your dog loves a classic chew, don’t miss this guide to dog bones and treats for more ideas.
Whichever recipe you try first, your dog is sure to notice the difference between a homemade treat made with real ingredients and something out of a bag. Happy dehydrating!

Izzy is an experienced ranch worker who has a passion for exploring nature and getting up close to wildlife. With her connections to various animal organizations, Izzy is well-versed in animal care and rehabilitation.