Homemade Anti-Inflammatory Dog Treats for Joints, Skin, and Mobility
Watching your dog struggle to get up from a nap is hard. One day they’re sprinting after a ball, and the next they’re taking the stairs one careful step at a time.
That stiffness is often inflammation — and the good news is you can help from your own kitchen. Anti-inflammatory dog treats made with real, simple ingredients can support your dog’s joints, skin, and overall comfort, one snack at a time.
Inflammation isn’t always obvious. Sometimes it shows up as a limp after a long walk. Sometimes it’s a dog who used to jump onto the couch without thinking twice, and now hesitates at the edge. Sometimes it’s itchy skin, red paws, or a coat that’s lost its shine. All of these can be tied back to the same root cause: inflammation building up in the body over time.
The good news is that food can genuinely help. Just like an anti-inflammatory diet can make a difference for people with joint pain or skin conditions, the right ingredients can support a dog’s body from the inside out. You don’t need a prescription to start. You need a mixing bowl, a few pantry staples, and about thirty minutes.
This guide skips the long lectures and gets straight to what you actually came for: real, tested recipes. You’ll find five different styles below — baked, joint-focused, no-bake, frozen, and dehydrated — plus ingredient swaps for dogs with allergies or special diets. Each one is written so you can follow along even if you’ve never baked a dog treat in your life. Grab your mixing bowl, and let’s get baking.
1. The Everyday Anti-Inflammatory Dog Treat

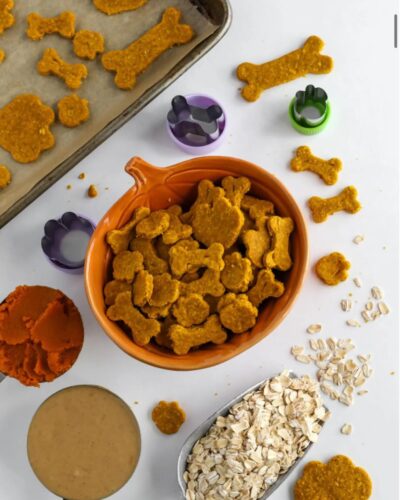
This is your go-to base recipe. It’s simple, budget-friendly, and uses two of the most well-known anti-inflammatory ingredients for dogs: turmeric and flaxseed. Keep a batch of these in your fridge, and you’ll always have a healthy snack ready for dog treat station ideas or daily training rewards.
What makes this recipe a good starting point is how forgiving it is. The dough is thick and easy to work with, the ingredients are things most people already have in the pantry, and the bake time is short enough that you’re not tied to the kitchen all afternoon. If you’ve never made dog treats before, start here before trying the more specialized recipes further down.
🐾 Recipe Card: Turmeric & Flaxseed Dog Treats
Prep Time: 10 minutes Cook Time: 25 minutes Total Time: 35 minutes Yield: About 30 small treats
Ingredients:
- 2 cups oat flour (or rolled oats blended into flour)
- 1 tablespoon ground flaxseed
- 1 teaspoon turmeric powder
- A small pinch of black pepper (helps the body absorb turmeric)
- 1 egg
- ½ cup plain pumpkin puree (not pie filling)
- ¼ cup water (add more if the dough feels dry)
Instructions:
- Preheat your oven to 350°F (175°C). Line a baking sheet with parchment paper.
- In a large bowl, mix the oat flour, flaxseed, turmeric, and black pepper.
- In a separate bowl, whisk the egg and pumpkin puree together.
- Pour the wet mixture into the dry ingredients. Stir until a thick dough forms, adding water a little at a time if needed.
- Roll the dough out to about ¼-inch thickness on a floured surface.
- Cut into small shapes using a cookie cutter or a knife.
- Place treats on the baking sheet and bake for 25 minutes, or until firm and lightly golden.
- Let them cool completely before serving — they’ll firm up more as they cool.
Notes:
- Store in an airtight container in the fridge for up to 2 weeks, or freeze for up to 3 months.
- Always pair turmeric with a small amount of fat and black pepper. Without it, your dog’s body absorbs very little of the curcumin (turmeric’s active ingredient).
- Don’t add extra turmeric hoping for a stronger effect — too much can upset your dog’s stomach.
- If your dough feels too sticky to roll, add a tablespoon of oat flour at a time until it firms up. If it’s too dry and crumbly, add water the same way.
- These treats have a mild, slightly earthy smell from the turmeric. Most dogs don’t mind it, but if yours is picky, the pumpkin usually wins them over.
Once you’ve mastered this base version, you’ll notice it’s really just a template. Swap an ingredient here or there, and you get a completely different flavor and benefit profile. That’s exactly what the two variations below do.
A. Vegan Cinnamon Variation (No Animal Products)

If you want a fully plant-based version — great for dogs with egg or dairy sensitivities — this is it. It also happens to smell like a bakery, which makes it a fun one to bake on a weekend when you want your kitchen to smell like cinnamon rolls instead of dog treats.
Swap these ingredients:
- Replace the egg with 1 tablespoon of ground flaxseed mixed with 3 tablespoons of water (let it sit for 5 minutes to thicken)
- Replace the pumpkin puree with mashed banana or unsweetened applesauce
- Add ½ teaspoon of ground cinnamon along with the turmeric
Cinnamon isn’t just for flavor here. In small amounts, it has mild anti-inflammatory properties of its own and can help balance blood sugar. Some studies in humans suggest cinnamon may help reduce inflammatory markers in the blood, and while the research in dogs is much more limited, a small pinch is considered safe for most healthy adult dogs.
Bake using the same times and temperature as the base recipe. The texture will be slightly softer than the egg version, since the flax-and-water mixture doesn’t bind quite as firmly as an egg does. If you want a firmer treat, add an extra tablespoon of oat flour to the dough before rolling it out.
This version is a great one to keep on hand if you regularly have guests bring their dogs over, since you won’t need to ask about egg allergies before handing out a treat.
B. Fish & Omega-3 Boost Variation
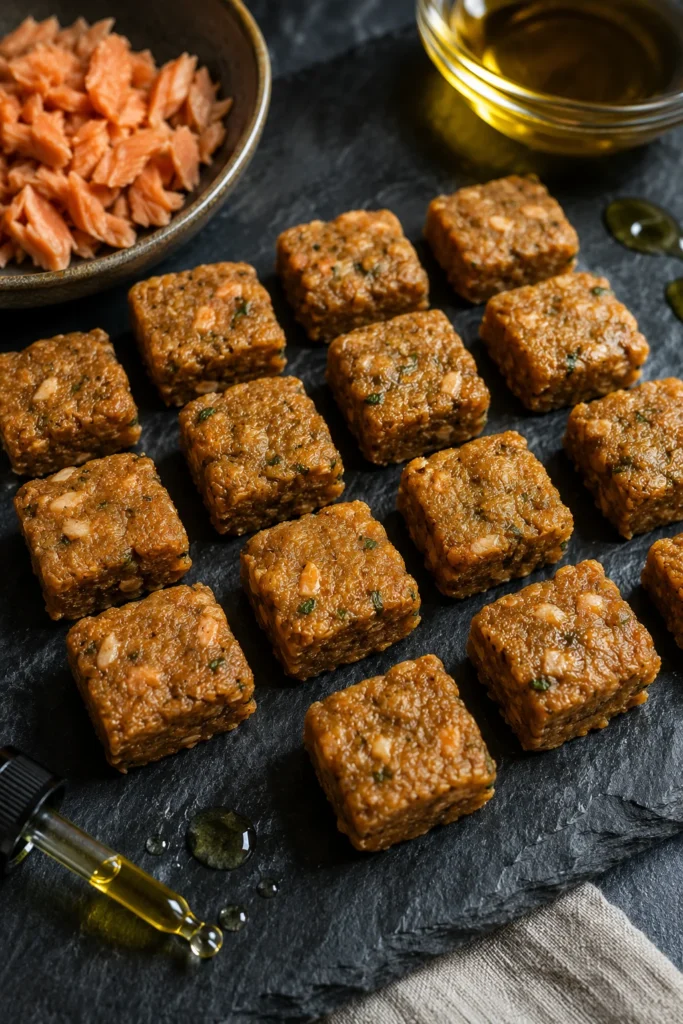
For dogs with itchy skin or dry coats alongside joint stiffness, omega-3 fatty acids make a real difference. Many dogs deal with both problems at once — joint pain and skin irritation — since both are connected to inflammation somewhere in the body.
Swap these ingredients:
- Replace the pumpkin puree with ½ cup of canned sardines or salmon (packed in water, drained and mashed)
- Add 1 teaspoon of fish oil to the wet mixture
The fish adds a strong smell dogs love, and the omega-3s work alongside turmeric to calm inflammation from the inside out. Sardines are a particularly good choice here because they’re small, oily fish that are low in mercury compared to larger fish, making them a safer everyday option than something like tuna.
If your dog has never had fish before, introduce this variation slowly. Start with half a treat and watch for any stomach upset over the next day before feeding a full serving. Some dogs take to fish immediately, while others need a little time to adjust.
One more tip: if you can’t find canned sardines packed in water, avoid the ones packed in oil or with added salt. Extra sodium isn’t good for dogs, especially older dogs or those with heart or kidney concerns.
2. Best Anti-Inflammatory Dog Treats for Joints
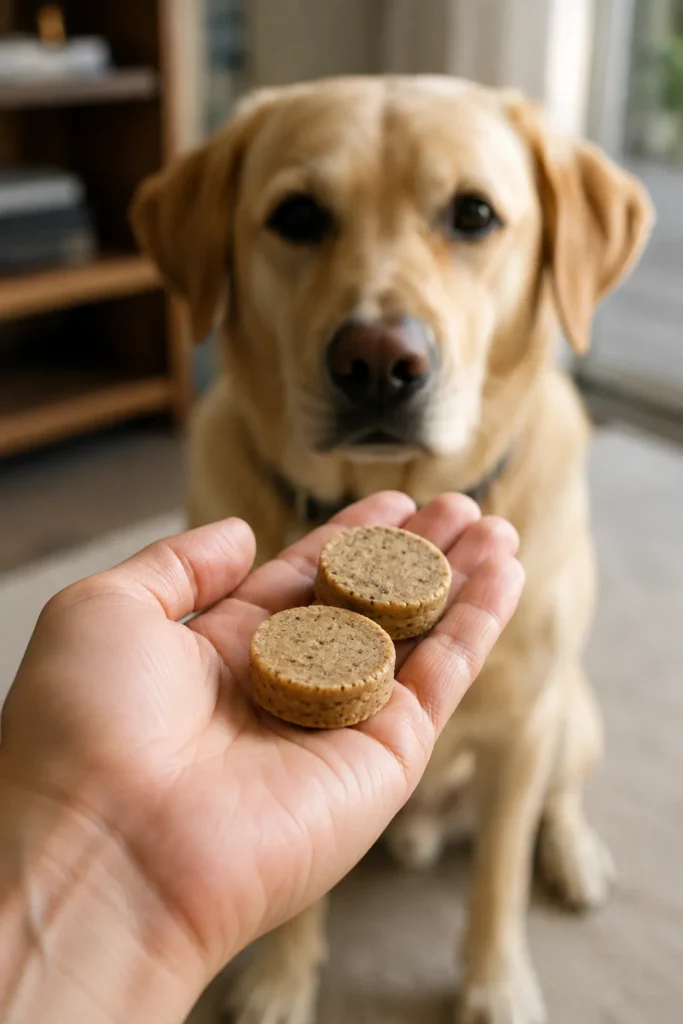
If your dog’s main issue is stiff, achy joints rather than skin or digestive problems, this recipe is built specifically for that. It uses green-lipped mussel powder, a natural source of glucosamine and chondroitin — the same compounds found in many vet-recommended joint supplements.
Green-lipped mussels come from New Zealand and have been studied for their effect on joint health in both humans and dogs. Unlike turmeric or ginger, which mostly calm inflammation after it happens, the compounds in green-lipped mussels also support the actual structure of cartilage. That makes this recipe a good option for dogs who are already showing signs of arthritis, hip dysplasia, or general age-related stiffness, rather than just occasional soreness after a long hike.
🐾 Recipe Card: Green-Lipped Mussel Joint Treats
Prep Time: 15 minutes Cook Time: 28 minutes Total Time: 43 minutes Yield: About 24 treats
Ingredients:
- 1 cup whole wheat flour (or oat flour for a gluten-free option)
- 2 tablespoons green-lipped mussel powder
- ½ cup mashed sweet potato (cooked and cooled)
- 1 egg
- 1 tablespoon coconut oil, melted
Instructions:
- Preheat your oven to 325°F (165°C). Line a baking sheet with parchment paper.
- In a bowl, whisk the egg, mashed sweet potato, and melted coconut oil together.
- Add the flour and mussel powder. Mix until a firm dough forms.
- If the dough is too dry, add water one tablespoon at a time.
- Roll the dough to ¼-inch thickness and cut into small pieces.
- Bake for 28 minutes, until dried and firm to the touch.
- Cool completely on a wire rack before serving.
Notes:
- Store in the fridge for up to 2 weeks, or freeze for longer storage.
- These treats work well as a daily joint supplement replacement for dogs who don’t like swallowing pills or powders straight.
- If your dog is already taking a vet-prescribed joint supplement, ask your vet before adding mussel powder too, so you don’t double up on the same nutrients.
- This recipe pairs especially well as a reward during positive reinforcement training, since older dogs with joint pain often benefit from calmer, reward-based sessions instead of high-impact drills.
- Green-lipped mussel powder can usually be found at pet supply stores or online, sold specifically for pets. Don’t substitute regular seafood seasoning or human supplements, since dosing and additives are different.
- If your dog has a known shellfish allergy, skip this recipe entirely and stick with the turmeric or fish oil-based treats instead.
Because this recipe leans on a single powerful ingredient rather than a mix of many small ones, consistency matters more than quantity. A small treat given daily will do far more for joint support than a large batch fed only once in a while. Think of this less like an occasional snack and more like a daily habit, similar to giving a vitamin.
Some owners like to break these treats into smaller pieces and hide them inside a puzzle toy, which slows down eating and adds a bit of mental stimulation for the day. It’s also a nice option for dogs who need to eat more slowly because of digestive sensitivities.
3. No-Bake Option for Busy Owners

Some days there’s no time to preheat an oven and wait 30 minutes. This no-bake version takes about 10 minutes, start to finish, and still delivers real anti-inflammatory ingredients.
This recipe is especially handy for people who don’t bake often and don’t want to deal with rolling out dough or cleaning cookie cutters. Everything happens in one bowl, and the hardest part is just waiting for the fridge to do its job.
🐾 Recipe Card: No-Bake Turmeric Energy Bites
Prep Time: 10 minutes Chill Time: 30 minutes Total Time: 40 minutes Yield: About 20 small bites
Ingredients:
- 1 cup old-fashioned oats
- 2 tablespoons natural peanut butter (xylitol-free — always double-check the label)
- 1 tablespoon honey
- ½ teaspoon turmeric powder
- 1 tablespoon ground flaxseed
Instructions:
- In a bowl, mix the peanut butter and honey until smooth.
- Add the oats, turmeric, and flaxseed. Stir until fully combined and slightly sticky.
- Roll the mixture into small, bite-sized balls using your hands.
- Place the bites on a plate or tray lined with parchment paper.
- Refrigerate for at least 30 minutes to firm up.
Notes:
- Store in the fridge for up to 10 days. These don’t freeze as well as baked treats because of the texture.
- Great for hot summer days when you don’t want to run the oven.
- Perfect for quick training sessions — no waiting for anything to bake or cool.
- Double-check that your peanut butter brand doesn’t contain xylitol, which is toxic to dogs. This is one of the most common mistakes people make with no-bake treats, since so many “natural” peanut butters have started adding it as a sweetener.
- If the mixture feels too dry to roll into balls, add a small splash of water or an extra half-teaspoon of honey. If it feels too wet and sticky, add a bit more oats.
One nice thing about this recipe is how easy it is to make in bulk. Since there’s no baking involved, you can double or triple the batch without worrying about oven space or uneven cooking. It’s also a great recipe to make with kids, since there’s no hot oven involved and the whole process is basically just mixing and rolling.
If your dog is on the smaller side, roll these into extra-small bites so a full training session doesn’t add up to too many calories. For bigger dogs, a slightly larger size works fine, since they’ll usually take one bite regardless of size.
4. Frozen Treats for Hot Days & Sore Joints
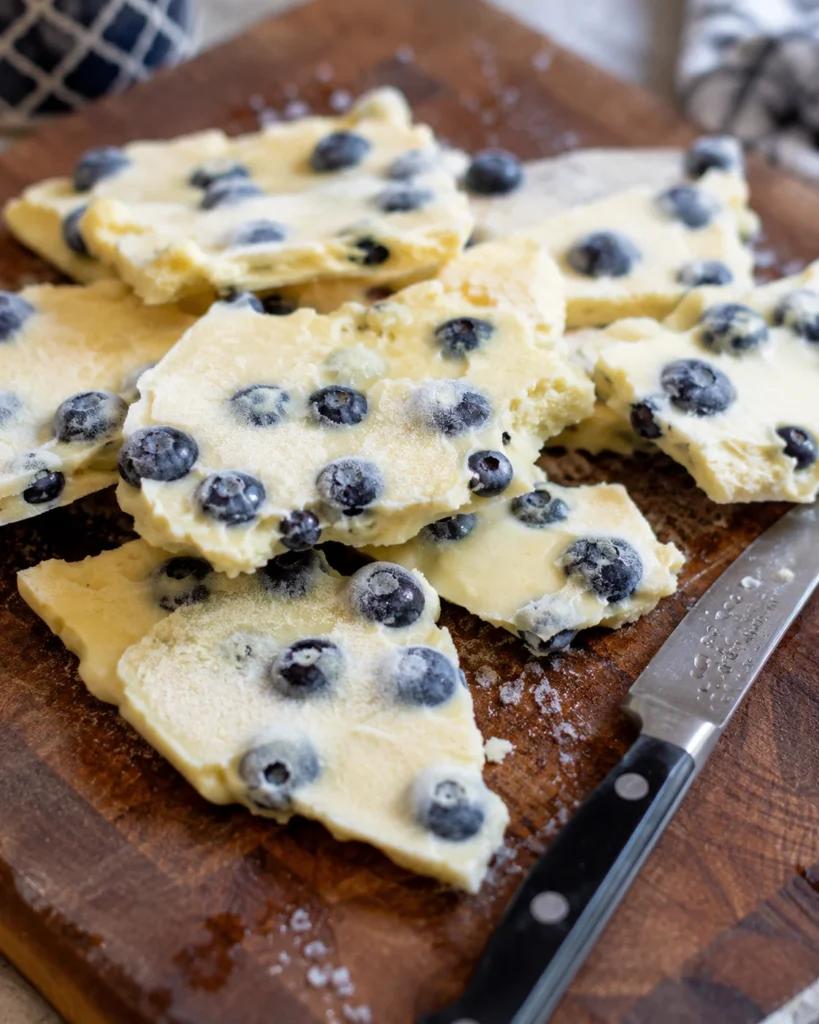
Frozen treats do double duty. The cold helps soothe swollen or achy joints on hot days, while the ingredients still work their anti-inflammatory magic. These are especially handy in summer or for dogs who love chewing on ice cubes anyway.
There’s also a practical side benefit here: frozen treats last a long time in the freezer, so you can make a big batch once and have snacks ready for weeks. They’re especially popular for dogs recovering from minor injuries, since the cold has a natural numbing effect that can make sore joints feel better temporarily, similar to how an ice pack works for people.
🐾 Recipe Card: Frozen Turmeric & Yogurt Bark
Prep Time: 10 minutes Freeze Time: 4 hours (or overnight) Total Time: 4 hours 10 minutes Yield: About 12-16 pieces
Ingredients:
- 1 ½ cups plain, unsweetened yogurt (no xylitol or artificial sweeteners)
- ¼ teaspoon turmeric powder
- 1 tablespoon ground flaxseed
- ¼ cup blueberries, mashed slightly
Instructions:
- In a bowl, mix the yogurt, turmeric, and flaxseed until smooth and evenly colored.
- Line a baking sheet or shallow tray with parchment paper.
- Pour the yogurt mixture onto the tray and spread it into a thin, even layer.
- Scatter the mashed blueberries across the top.
- Freeze for at least 4 hours, or until completely solid.
- Once frozen, break or cut into small pieces sized for your dog.
Notes:
- Store broken pieces in a freezer bag for up to 2 months.
- Serve straight from the freezer — no thawing needed.
- Great for dogs recovering from excessive licking or itchy skin issues, since cold treats can help calm irritated skin along with the anti-inflammatory ingredients.
- Avoid giving a large piece to small dogs at once — cold treats can cause brain freeze-like discomfort just like in people. Break into smaller bits for toy breeds.
- Make sure your yogurt is genuinely plain and unsweetened. Flavored yogurts often contain added sugar or artificial sweeteners that aren’t good for dogs, even in small amounts.
- If blueberries aren’t available, mashed strawberries or a small amount of pumpkin puree work as a substitute, though the color won’t be quite as vibrant.
This recipe is easy to scale up or down depending on your tray size. A smaller tray gives you thicker bark, while a larger tray spread thin gives you more pieces that are quicker to freeze solid. Either way works fine — it just changes how long you’ll need to wait before the bark is ready to break apart.
If you want to get creative, you can pour the mixture into silicone ice cube trays instead of a flat tray. This gives you neat, individual portions without any breaking or cutting required, and it makes portion control a lot easier if you’re tracking your dog’s daily treat calories.
5. Dehydrated Chews for Dogs Who Prefer Meaty Textures
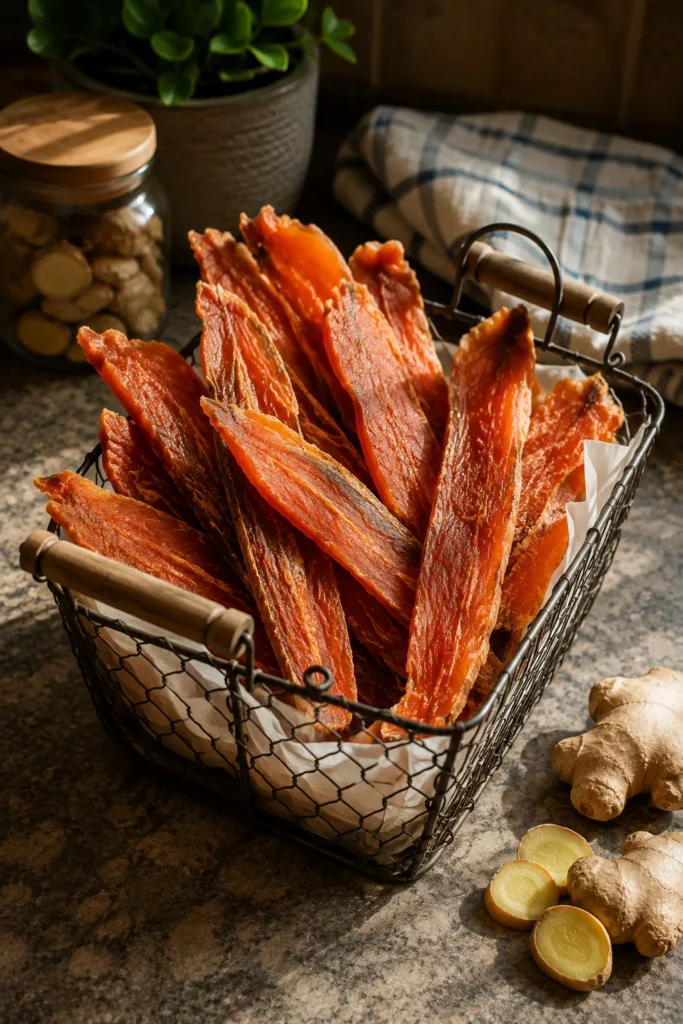
Not every dog is a fan of soft, cookie-style treats. Some dogs — especially bigger chewers — do better with a jerky-like texture. Dehydrating also concentrates the natural anti-inflammatory compounds in the ingredients, since no water is added to the mix.
This method takes longer than any of the others, but most of that time is hands-off. You’re not standing over the dehydrator the whole time — you’re just letting it run while you go about your day. The payoff is a treat with a satisfying chew that many dogs find more exciting than a soft cookie.
🐾 Recipe Card: Dehydrated Salmon & Ginger Chews
Prep Time: 10 minutes Dehydrate Time: 6-8 hours Total Time: About 7 hours Yield: About 20 chews (depends on fillet size)
Ingredients:
- 1 pound fresh salmon fillet, skin removed
- ½ teaspoon fresh grated ginger (or ¼ teaspoon ground ginger)
Instructions:
- Slice the salmon into thin, even strips, about ¼-inch thick.
- Rub the ginger evenly over each strip.
- Arrange the strips on dehydrator trays without overlapping.
- Dehydrate at 145°F (63°C) for 6-8 hours, or until the strips are firm and fully dry with no moisture in the center.
- Let cool completely before storing.
Notes:
- No dehydrator? You can use an oven set to its lowest temperature (usually around 170°F) with the door slightly propped open, checking every hour.
- Store in an airtight container in the fridge for up to 3 weeks, or freeze for longer shelf life.
- Ginger contains gingerol, a compound that helps calm inflammation and can also settle an upset stomach — a nice bonus for dogs prone to motion sickness on car rides.
- These chews are rich in protein and omega-3s, making them a solid choice alongside daily meals rather than an every-hour snack.
- Slice the salmon while it’s still slightly cold or partially frozen. It’s much easier to get even, thin strips that way compared to cutting room-temperature fish.
- Always check the center of the thickest strip before storing. If it still feels cool or slightly damp, give it another hour in the dehydrator or oven.
Since this recipe only has two ingredients, the quality of your salmon matters more than usual. Fresh, boneless, skinless fillets work best. Frozen salmon that’s been properly thawed also works fine, as long as it’s fully dry before slicing so the ginger sticks evenly.
Because these chews are higher in protein and lower in filler compared to the baked recipes above, they make a good option for dogs on a grain-free diet, or for owners who want a treat that doubles as a small protein boost rather than just a snack.
How Much to Feed: Serving Chart by Weight
Even the healthiest treat can cause problems if you overdo it. Treats should never make up more than about 10% of your dog’s daily calories. Use this simple chart as a starting point for any of the recipes above.
| Dog’s Weight | Treat Size | Treats Per Day |
|---|---|---|
| 5–15 lbs | Small | 1–2 treats |
| 16–30 lbs | Small to Medium | 2–3 treats |
| 31–50 lbs | Medium | 3–4 treats |
| 51–70 lbs | Medium to Large | 4–5 treats |
| 71+ lbs | Large | 5–6 treats |
This chart is meant as a general starting point, not a strict rule. A very active working dog can usually handle a treat or two more than the chart suggests, while a smaller, less active dog might do better sticking to the lower end. Pay attention to your dog’s body condition over time — if you notice weight creeping up, it might be worth cutting back on treats or adjusting their regular meals slightly to balance things out.
A few quick notes on serving:
- Puppies can have anti-inflammatory treats in smaller amounts, but check with your vet first since their nutritional needs are different from adult dogs. This matters even more if you’re still working out your puppy’s overall veterinary care plan, since growing puppies have different calorie and nutrient requirements than adult dogs.
- Senior dogs with joint pain often benefit the most from daily, consistent treats rather than occasional large amounts. A small treat every day tends to work better than a handful given once a week.
- If your dog is on medication, especially blood thinners or anti-inflammatory drugs from the vet, talk to your vet before adding turmeric or ginger regularly, since they can interact with certain medications.
- New treats should always be introduced slowly. Give a small piece first and wait 24 hours before offering a full serving, so you can watch for any signs of an upset stomach or allergic reaction.
- If you’re feeding more than one recipe from this list in the same week, keep total daily treats within the chart above rather than adding extra portions on top for each different recipe.
The Science Behind It (Quick Version)
You don’t need a science degree to understand why these ingredients work — here’s the short version.
Turmeric contains curcumin, a compound shown to reduce inflammation markers in the body. It needs a bit of fat and black pepper to actually get absorbed, which is why almost every turmeric recipe above pairs it with oil, peanut butter, or coconut oil. On its own, turmeric passes through the body largely unused. With the right pairing, though, the body can actually put it to work.
Flaxseed and fish provide omega-3 fatty acids, which help calm inflammation linked to joints, skin, and even allergies. This is the same reason vets often recommend fish oil supplements for arthritic dogs. Omega-3s work by balancing out the omega-6 fatty acids that are already abundant in most commercial dog foods, and too much omega-6 relative to omega-3 has been linked to increased inflammation over time.
Ginger has a compound called gingerol that works similarly to turmeric, with the added benefit of settling upset stomachs. It’s often recommended for dogs who get carsick, in addition to its anti-inflammatory benefits, which makes it a nice two-for-one ingredient.
Green-lipped mussels are naturally rich in glucosamine and chondroitin, the building blocks of healthy cartilage — making them one of the most targeted ingredients for joint-specific treats. Unlike the other ingredients on this list, which mostly work by calming inflammation after it starts, these compounds actually support the physical structure of the joint itself.
Cinnamon and blueberries, used in a couple of the recipes above, add smaller but still useful benefits. Cinnamon has some evidence behind it for lowering inflammatory markers, while blueberries are packed with antioxidants that help fight the cellular damage inflammation can cause over time.
None of these ingredients replace medication or veterinary care. Think of them as a supportive daily habit, not a cure. If your dog has a diagnosed condition like arthritis or hip dysplasia, these treats work best as an addition to whatever plan your vet has already put in place, not a replacement for it.
Final Thoughts
You don’t need a fancy kitchen or rare ingredients to help your dog feel more comfortable. A bag of oat flour, a jar of turmeric, and 30 minutes are often all it takes.
Start with the everyday recipe if you’re new to this, then branch out based on what your dog actually needs — joint support, a no-bake option for busy days, or a frozen treat for summer. If your dog already loves chew-style snacks, check out more homemade dog treats recipes to keep things interesting, or browse a few dog bones and chew treat ideas if your dog prefers something to gnaw on for longer stretches.
It’s also worth remembering that food is just one piece of the puzzle. A dog dealing with joint stiffness often benefits from gentler exercise, a comfortable place to rest, and patience as they adjust to a slower pace. Keeping training sessions calm and reward-based can help too, especially for older dogs who don’t move quite like they used to.
Small, consistent changes in what you feed can add up to a real difference in how your dog moves, plays, and feels — one treat at a time. Whether you land on the simple turmeric base, the joint-focused mussel recipe, or the frozen yogurt bark for summer afternoons, the most important thing is sticking with it. Inflammation doesn’t build up overnight, and it won’t disappear overnight either. But with a little consistency, most owners notice their dog moving a bit easier within a few weeks, and that alone makes the extra time in the kitchen worth it.

Izzy is an experienced ranch worker who has a passion for exploring nature and getting up close to wildlife. With her connections to various animal organizations, Izzy is well-versed in animal care and rehabilitation.