Dog Dental Chews Homemade: 9 Easy DIY Recipes for Clean Teeth
Bad breath. Yellow teeth. A pup who won’t let you near his mouth. If any of this sounds familiar, you’re not alone. Dental problems are one of the most common health issues dogs face, and most pet parents don’t realize how much it matters until the vet bill shows up.
Here’s the part that surprises a lot of people: dental disease isn’t just about bad breath. Left unchecked, plaque buildup can lead to gum inflammation, tooth loss, and even infections that affect other organs. Your dog can’t tell you their teeth hurt, so it often goes unnoticed until a vet points it out during a checkup.
The good news is that you don’t need fancy store-bought products to help. Making dog dental chews homemade is simpler than most people think, and it gives you full control over what goes into your dog’s mouth. No mystery ingredients. No preservatives. No fillers hiding behind vague labels. Just real food that happens to double as a toothbrush.
There’s also something satisfying about knowing exactly what’s in your dog’s treats. A lot of store-bought dental chews are packed with additives, artificial coloring, or “meat meal” that isn’t quite the same as real meat. When you make chews at home, you skip all of that. You also save money over time, since a batch of homemade sticks costs a fraction of what a bag of branded dental chews runs.
In this guide, you’ll find nine easy recipe ideas for dog dental chews homemade, each one inspired by real dog parents who’ve tested these treats on their own pups. Every recipe uses simple ingredients you can find at any grocery store, and none of them require special equipment beyond an oven or a basic dehydrator. Whether your dog prefers something meaty and chewy, crunchy and light, or a little more unusual like a fish-based twist, there’s an idea here worth trying.
Let’s get into it.
9 Dog Dental Chews Homemade Recipe Ideas
Chewing is a natural behavior for dogs, and it does more than keep them busy. The physical act of gnawing on a firm, chewy treat helps scrape plaque off the tooth surface before it hardens into tartar. That’s exactly why dental chews work, and why making your own at home can be just as effective as anything you’d buy in a store.
The texture of a chew matters just as much as the ingredients inside it. A chew that’s too soft won’t do much scraping. One that’s too hard could crack a tooth. The recipes below aim for that middle ground: firm enough to work the teeth, but still safe and easy on the jaw.
Each idea below includes the ingredients, the steps, and a quick storage tip so you can start baking or dehydrating right away. Feel free to mix and match, double a batch, or swap in a protein your dog already loves.
1. Canadian-Style Beef & Spinach Jerky Sticks
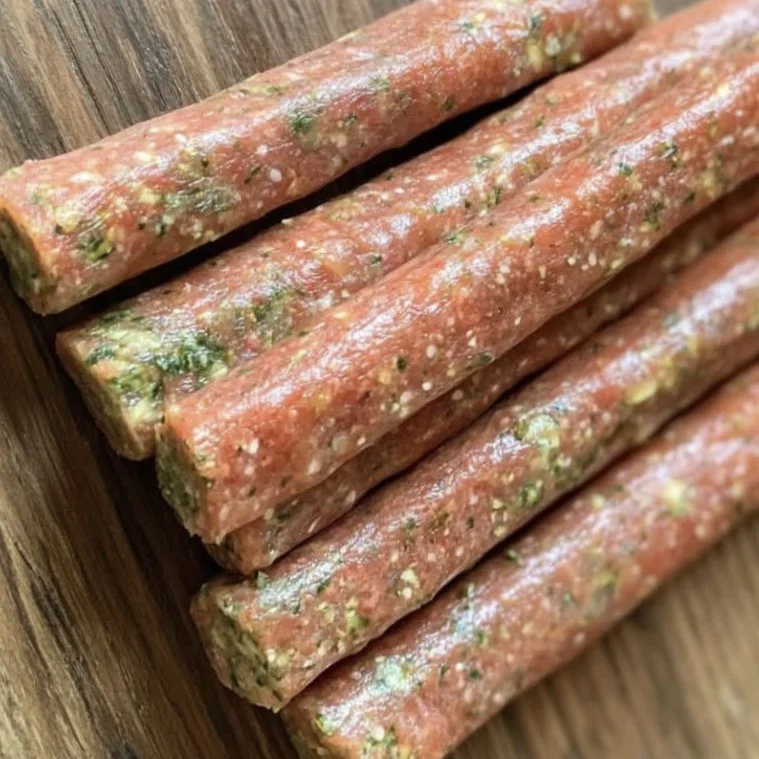
This recipe leans on lean ground meat and a couple of veggies for extra nutrients. The oats give it a chewy bite that dogs love to work on, which is exactly the texture you want for scraping away plaque. It’s also a great way to sneak in some greens without your dog even noticing.
Ingredients:
- 1 lb ground red meat (beef, lamb, or venison)
- ½ cup finely chopped spinach or kale
- ¼ cup grated carrots
- ¼ cup rolled oats, blended into flour
- 1 tbsp ground flaxseed
- 1 egg
Steps:
- Preheat your oven to its lowest setting, around 170°F.
- Mix all the ingredients together in a large bowl until fully combined.
- Shape the mixture into sticks about 4-5 inches long.
- Lay the sticks on a parchment-lined baking sheet, leaving space between each one.
- Bake for 4-5 hours, flipping halfway through, until firm and dry.
- Let the sticks cool completely before serving.
The flaxseed in this recipe isn’t just filler. It brings a dose of omega-3s that support skin and coat health, so this stick is doing double duty beyond just the teeth. If your oven runs hot even on its lowest setting, prop the door open slightly with a wooden spoon to keep the temperature low and steady.
Storage: Keep in the fridge for up to a week, or freeze for up to a month.
📸 Photo credit: Instagram @happytails.resort.muskoka
2. Human-Grade Beef & Carrot Dehydrated Strips
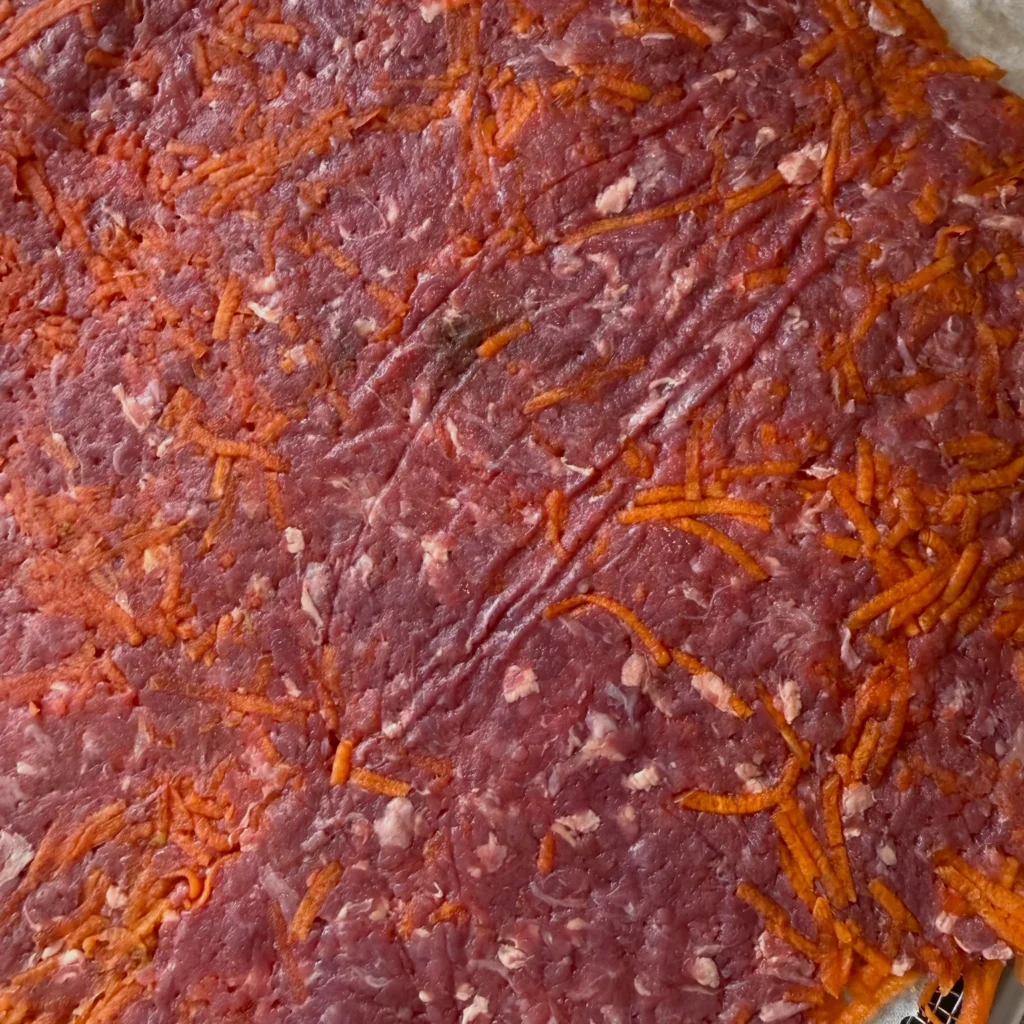
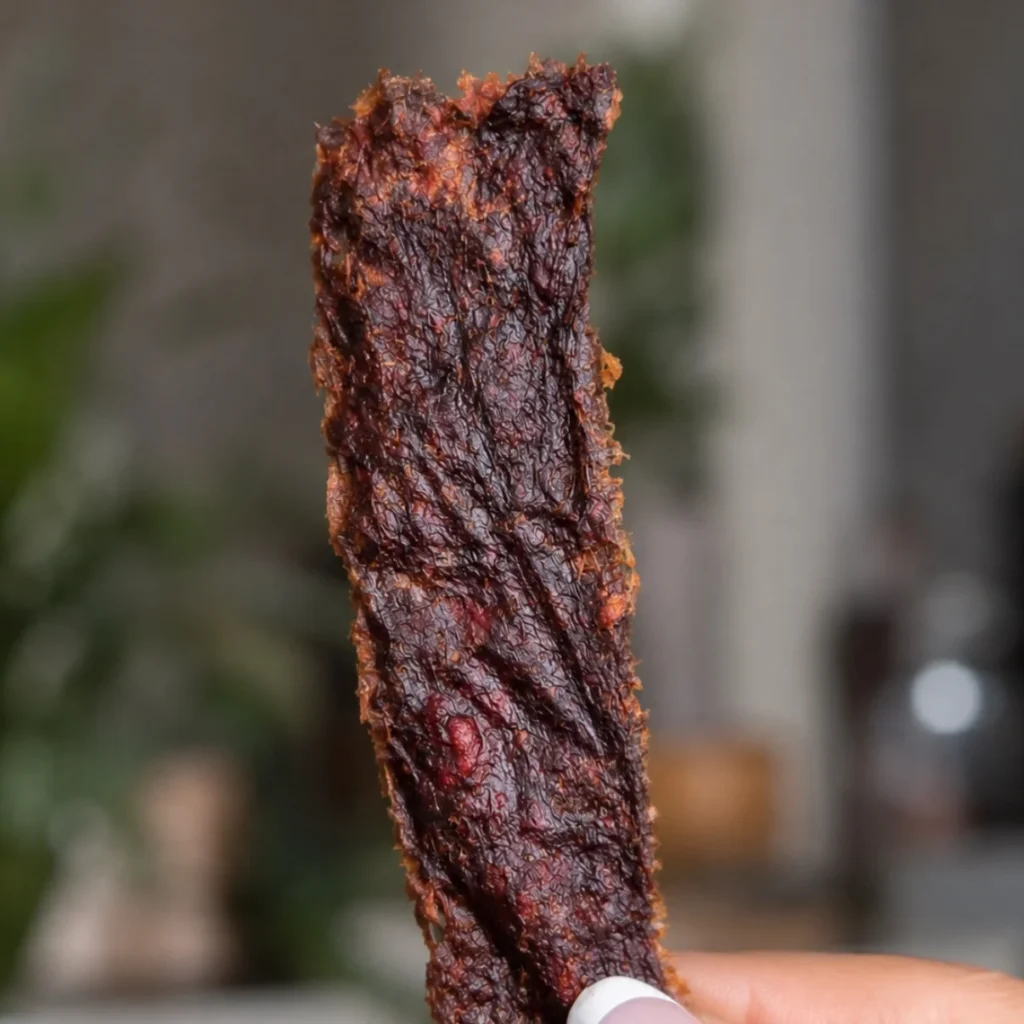
This one is all about simplicity. Just two main ingredients, dehydrated low and slow, so nothing gets lost in translation. It’s a great starting point if you’re new to making treats and want something foolproof. Because there’s no filler holding the mixture together, the texture stays close to real jerky, which most dogs find far more appealing than a processed store treat.
Ingredients:
- 1 lb lean ground beef
- ½ cup finely grated carrot
- Pinch of salt-free seasoning (optional)
Steps:
- Mix the ground beef and grated carrot together in a bowl until evenly combined.
- Press the mixture flat onto a parchment-lined tray, about ¼ inch thick.
- Score the surface into strips using a knife, without cutting all the way through.
- Dehydrate at 155-160°F for 6-8 hours, or use your oven on its lowest setting.
- Once fully dry and firm, snap along the scored lines into individual strips.
- Cool completely before storing.
Using lean beef keeps the fat content low, which is important for dehydrated treats since fattier cuts can spoil faster even after drying. If you want a firmer, longer-lasting chew, leave it in the dehydrator an extra hour or two past the point it looks done. It should feel dry and slightly leathery, not soft or tacky, before you call it finished.
Storage: Refrigerate for up to a week or freeze for longer shelf life.
📸 Photo credit: Instagram @poochespantrymelb
3. Crunchy Chicken Muscle Meat Sticks
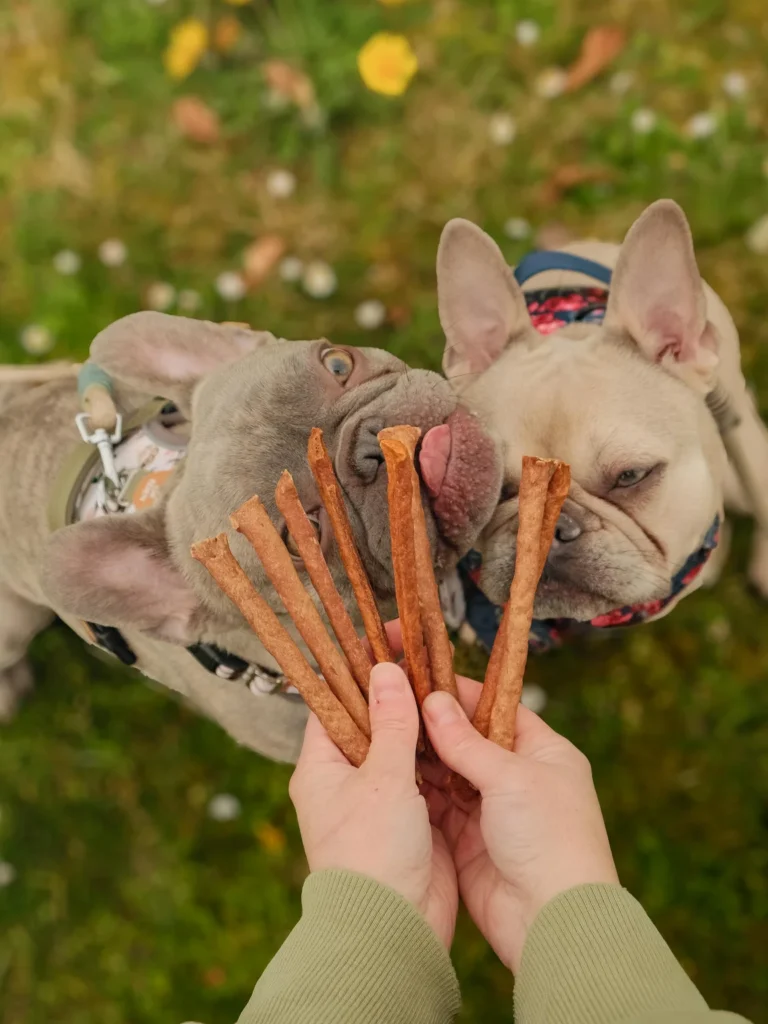
These thin, crunchy sticks are perfect for dogs who prefer a snappier texture over a chewy one. The crunch itself helps knock loose plaque, especially on smaller teeth, which makes this a great option for smaller breeds or dogs who tend to gulp softer treats without much chewing at all.
Ingredients:
- 1 lb ground chicken breast
- 2 tbsp chicken broth (unsalted)
- 1 tbsp coconut flour
Steps:
- Combine the ground chicken, broth, and coconut flour in a bowl.
- Mix until the texture is smooth and slightly sticky.
- Roll the mixture into thin, pencil-width sticks on parchment paper.
- Bake at 175°F for 3-4 hours, or dehydrate until fully dry and crisp.
- Test one stick by snapping it. It should break cleanly, not bend.
- Let cool fully before handing one over.
Chicken breast is naturally lean, which is part of why these sticks dry out into such a crisp, snappable texture. Coconut flour helps bind everything together without adding grains, making this a good pick if your dog does better on a grain-free diet. Rolling the sticks thin is key here, since anything too thick will stay chewy instead of crunchy.
Storage: Store in an airtight container in the fridge for up to 10 days.
📸 Photo credit: Instagram @ivy.threelegs
4. Cod Skin Dental Twists
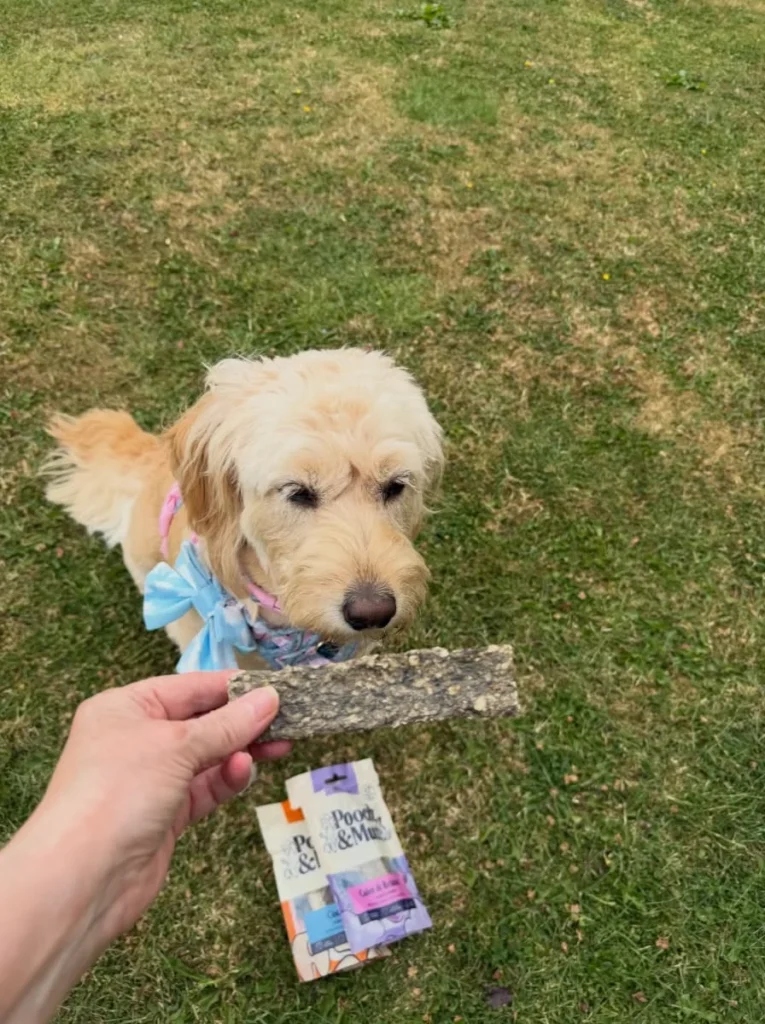
Fish-based chews are great for dogs with sensitivities to red meat or poultry, and cod skin has a naturally tough texture that holds up well to enthusiastic chewers. It’s also a good source of collagen, which some pet parents look for when it comes to joint and coat support.
Ingredients:
- 1 lb cod skin, cleaned and trimmed
- 1 tbsp fish oil
- 1 tsp ground flaxseed
Steps:
- Cut the cod skin into long strips, about 1 inch wide.
- Lightly brush each strip with fish oil.
- Sprinkle the ground flaxseed evenly over the strips.
- Twist each strip gently before laying it on a dehydrator tray.
- Dehydrate at 145°F for 8-10 hours until fully dry and firm.
- Cool completely before storing or serving.
Fish skin can have a strong smell while it dries, so this one’s best made in a well-ventilated space or outside if you have the option. The twisting step isn’t just for looks either. It creates ridges and folds that give your dog’s teeth more surface area to work against as they chew, similar to the texture you’d find in higher-end dental treats.
Storage: Keep refrigerated for up to a week; freeze for longer storage.
📸 Photo credit: Instagram @lunaminigoldendoodle01
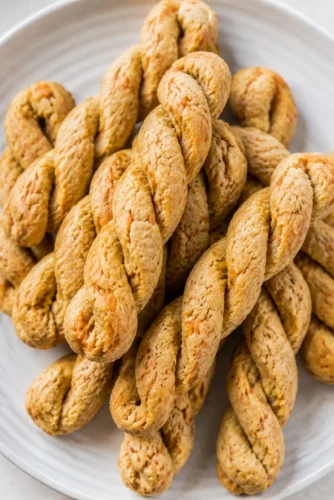
5. Turmeric & Sweet Potato Dental Ridges
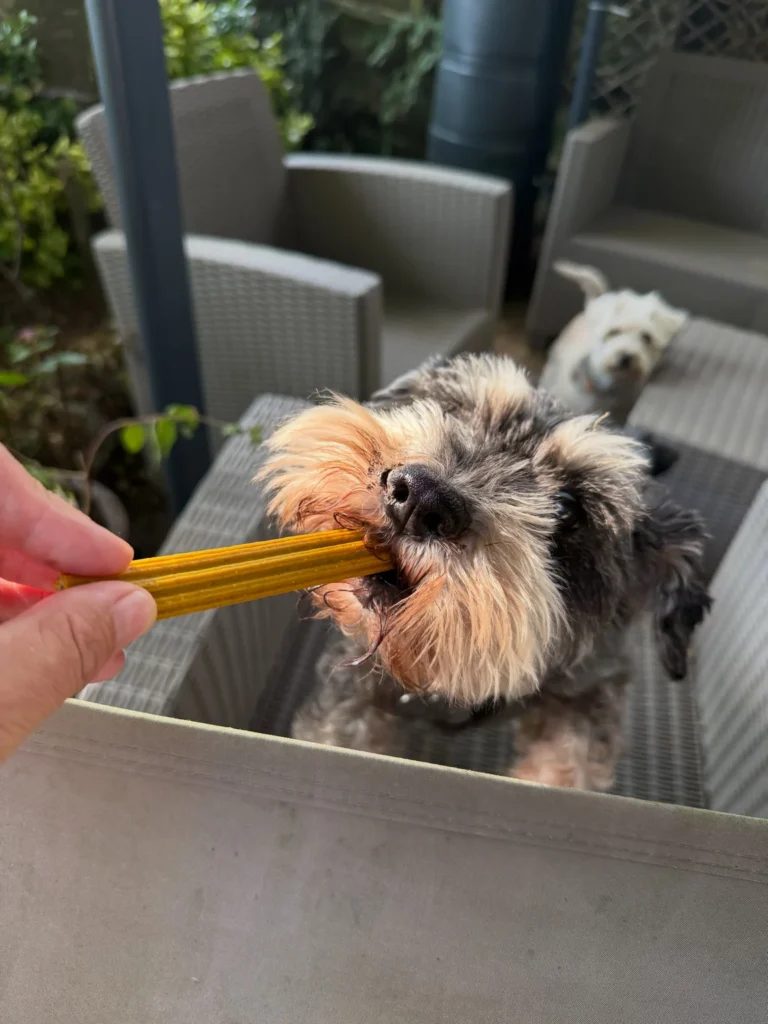
The ridged texture on these chews isn’t just for looks. Those grooves add extra surface area, which means more contact with the teeth as your dog chews. Turmeric is often added to homemade dog treats for its mild anti-inflammatory reputation, though it’s used here mostly for color and a subtle earthy flavor dogs tend to enjoy.
Ingredients:
- 1 cup mashed sweet potato
- ½ cup oat flour
- 1 tsp turmeric powder
- 1 egg
Steps:
- Combine the mashed sweet potato, oat flour, turmeric, and egg in a bowl.
- Mix until you have a firm, workable dough.
- Roll the dough flat and cut it into ridged strips using a fork to press lines into the surface.
- Place strips on a parchment-lined baking sheet.
- Bake at 250°F for about 2 hours, flipping halfway, until dry and slightly golden.
- Cool fully before serving.
Sweet potato adds natural sweetness and fiber, which makes these a hit even with picky eaters. If your dough feels too sticky to roll, add a spoonful more oat flour at a time until it firms up. A small amount of turmeric is fine, but there’s no need to use more than a teaspoon since too much can upset a sensitive stomach.
Storage: Store in the fridge for up to a week.
📸 Photo credit: Instagram @a_view_from_number_1
6. Oat & Herb Speckled Dental Bites
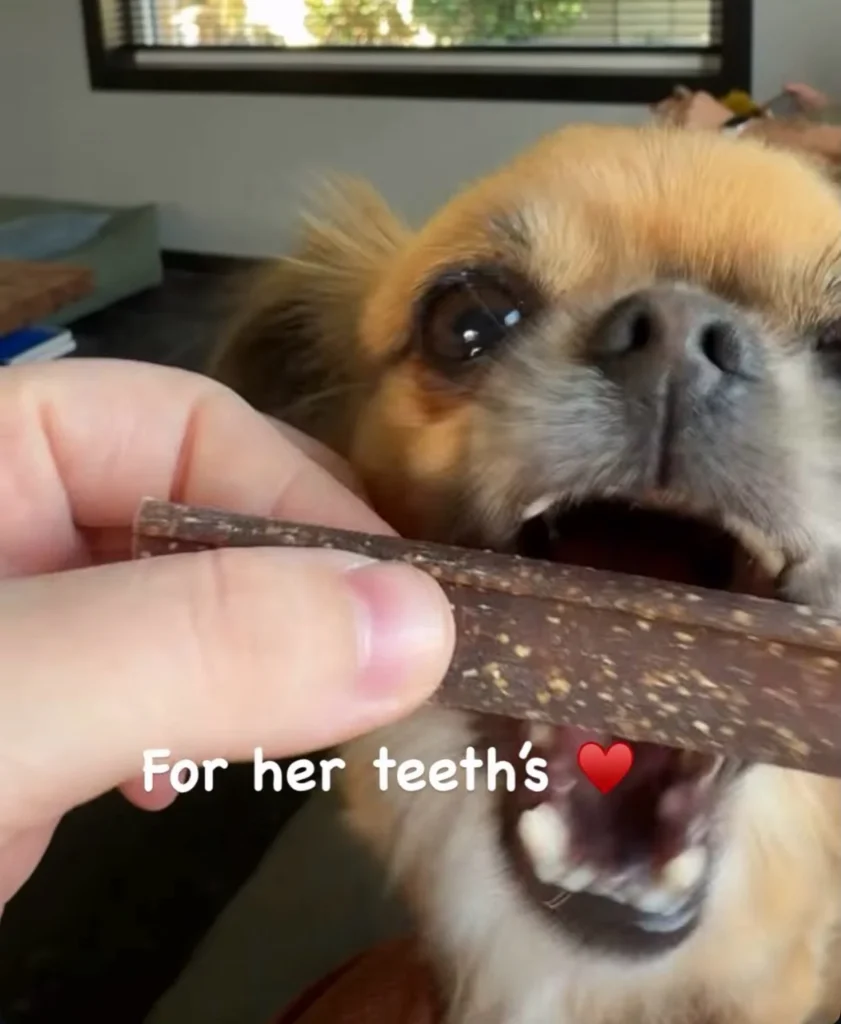
These speckled bites get their look from finely chopped herbs mixed right into the dough. Parsley in particular is a nice bonus since it can help freshen breath, making it a smart addition for dogs whose owners are dealing with less-than-pleasant doggy kisses.
Ingredients:
- 1 cup oat flour
- ¼ cup finely chopped parsley
- ¼ cup peanut butter (unsalted, no xylitol)
- 1 egg
- 2 tbsp water
Steps:
- Mix the oat flour and chopped parsley together in a bowl.
- Add the peanut butter and egg, then stir until combined.
- Add water a little at a time until the dough holds together.
- Roll the dough into a flat sheet and cut into small rectangular bites.
- Bake at 300°F for 20-25 minutes until firm and lightly browned.
- Cool completely before offering to your dog.
Always double check your peanut butter label before using it in any dog treat. Some brands sweeten with xylitol, which is toxic to dogs even in small amounts, so a plain, natural peanut butter is the safest choice. These bites bake faster than the dehydrated recipes on this list, which makes them a good option if you’re short on time but still want something homemade.
Storage: Keep in an airtight container for up to a week.
📸 Photo credit: Instagram @rescuefamilylife
7. Venison & Bone Broth Dental Strips
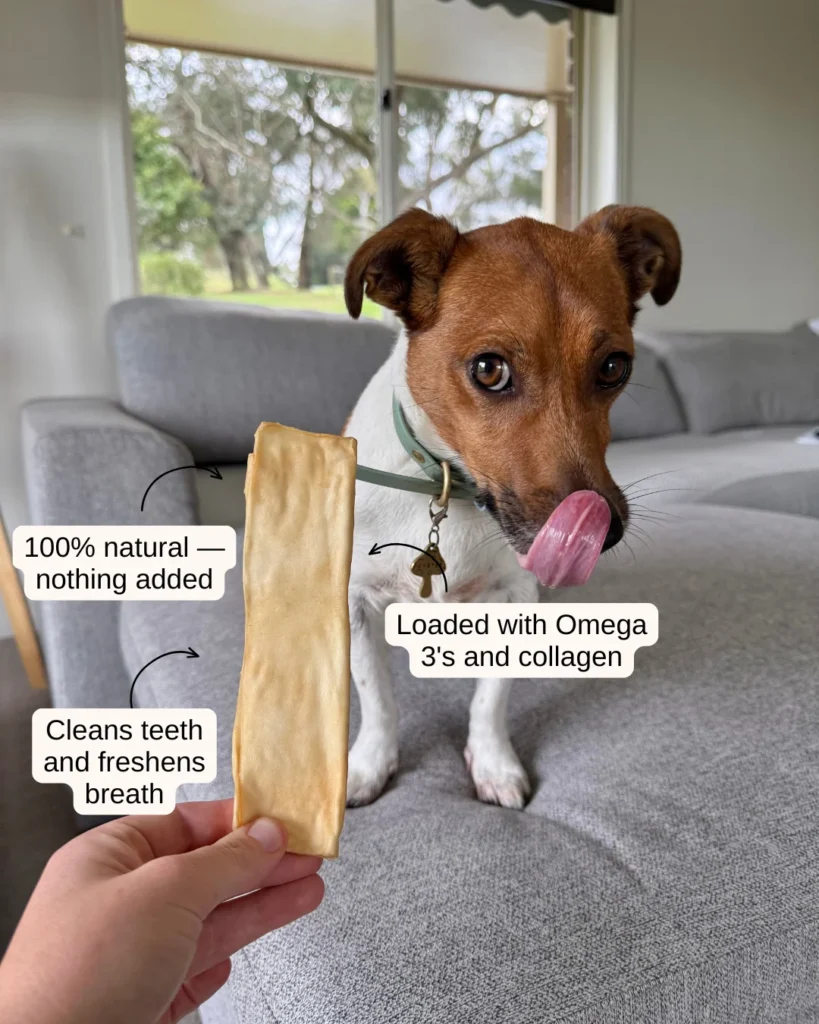
Venison is a great option for dogs with common protein sensitivities, and the bone broth soak adds extra flavor along with a boost of natural collagen. This combination gives the finished strips a slightly translucent look around the edges, along with a rich smell dogs seem to love.
Ingredients:
- 1 lb ground venison
- ¼ cup bone broth (unsalted)
- 1 tbsp gelatin powder
Steps:
- Warm the bone broth slightly and stir in the gelatin powder until dissolved.
- Mix the ground venison with the broth mixture in a bowl.
- Press the mixture flat onto a parchment-lined tray.
- Score into strips before drying.
- Dehydrate at 155°F for 6-8 hours until firm and slightly translucent at the edges.
- Snap into strips once fully cooled and dry.
Venison is naturally leaner and gamier than beef or chicken, so it tends to work well for dogs who need a novel protein because of allergies. If venison isn’t easy to find near you, ground bison or lamb can be swapped in with similar results. The gelatin helps bind the mixture and gives the finished strips a slightly chewier bite compared to plain meat jerky.
Storage: Refrigerate for up to a week or freeze for longer storage.
📸 Photo credit: Instagram @petsnacksonline
8. Simple Air-Dried Turkey Wing Chew
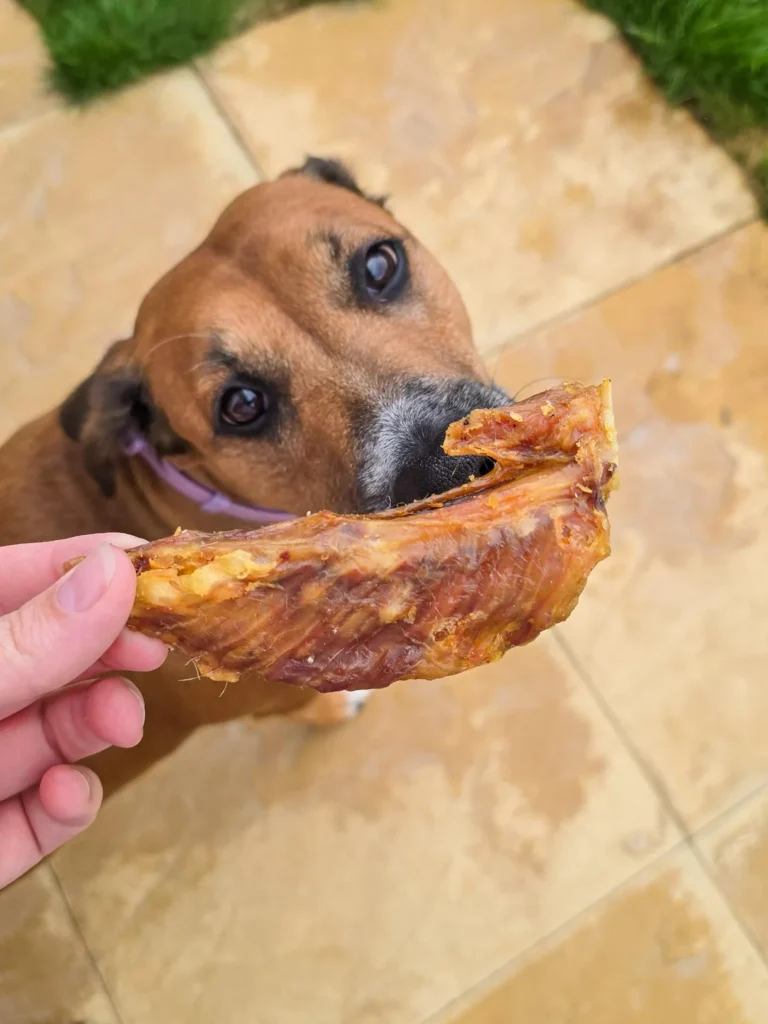
Sometimes the simplest option is the best one. A single ingredient, air-dried low and slow, gives you a long-lasting natural chew with zero additives. This is about as close as you can get to a raw-diet-style chew while still being fully cooked and shelf-stable.
Ingredients:
- 1 raw turkey wing
Steps:
- Rinse the turkey wing and pat it dry with paper towel.
- Place it on a wire rack set over a baking sheet.
- Dry in the oven at its lowest setting, around 160-170°F, for 6-8 hours.
- Flip halfway through to dry evenly on both sides.
- Check that the wing is fully dried and firm all the way through before cooling.
- Let cool completely before giving it to your dog.
Because this recipe includes bone, it’s naturally rich in calcium and phosphorus, which support strong teeth and bones over time. The slow drying process is what makes the bone safe to chew, since it becomes brittle enough to break down gradually rather than splintering the way raw or lightly cooked bone can. This one’s best suited to medium and large dogs who can handle the size and weight of a whole wing.
Storage: Refrigerate for up to a week or freeze for longer storage. Always supervise while your dog chews on bone-in treats.
📸 Photo credit: Instagram @amber_and_willow_the_dogs
9. Homemade Bone Broth Dental Sticks
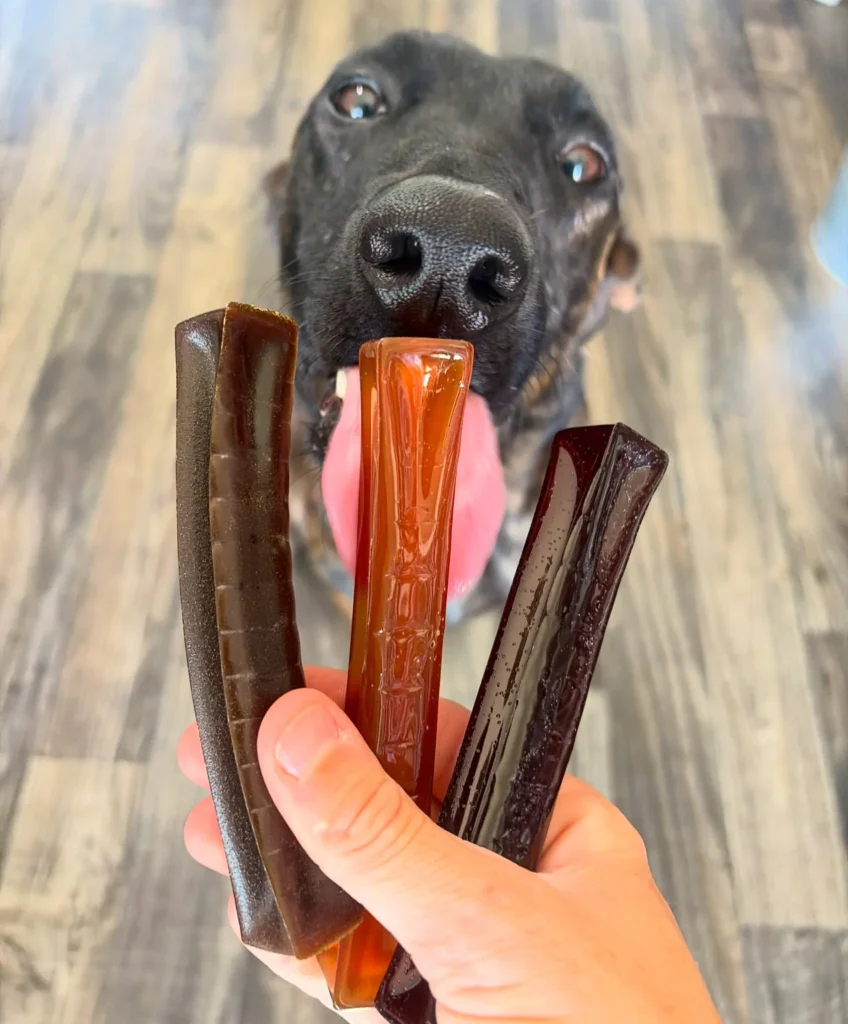
These glossy, jelly-like sticks are made from concentrated bone broth, gelatin, and a touch of natural flavor. They dry into a firm, chewy texture that dogs find hard to resist, and the process is a little different from the other recipes on this list since it starts as a liquid rather than a dough.
Ingredients:
- 2 cups bone broth (unsalted, well reduced)
- ¼ cup unflavored gelatin powder
- 1 tbsp peanut butter (unsalted, no xylitol)
Steps:
- Warm the bone broth gently in a saucepan without letting it boil.
- Whisk in the gelatin powder until fully dissolved.
- Stir in the peanut butter until the mixture is smooth.
- Pour the mixture into silicone stick molds or a shallow tray.
- Refrigerate for a few hours until set, then dehydrate at 145°F for several hours to firm up the texture further.
- Cool completely before serving.
The key to this recipe is reducing your bone broth down before you start, since a thin broth won’t set properly even with gelatin added. Simmer it uncovered for 20-30 minutes to concentrate the flavor and thicken it slightly before moving on to the next step. The finished sticks have a satisfying chew similar to a gummy candy, which is part of why dogs tend to go wild for them.
Storage: Keep refrigerated for up to a week.
📸 Photo credit: Instagram @chewswild
Tips for Making Dental Chews at Home
A few small choices can make a big difference in how well your homemade chews turn out, and most of it comes down to patience and paying attention to texture rather than following a strict clock.
Dehydrator vs. low-oven method. A dehydrator gives you more consistent results and better control over temperature, but a low oven setting works just as well if that’s what you have. Just keep the temperature low and the drying time long, since the goal is to remove moisture slowly without cooking the outside too fast. If you’re using the oven method regularly, it might be worth investing in a basic dehydrator down the line, since it frees up your oven and tends to dry treats more evenly.
Storing your chews. Most homemade chews last about a week in the fridge. For longer storage, freeze them in a single layer first, then transfer to a bag or container once solid. This keeps them from sticking together in one large clump. Label your containers with the date you made them, since it’s easy to lose track of freshness once a few different batches start piling up in the freezer.
Portioning by size. A large dog can handle a thicker, longer chew, while smaller breeds do better with thinner sticks that are easier to manage. If you’re unsure, check out this guide on homemade dog treats recipes for more portion ideas across different treat types. As a general rule, a chew shouldn’t be small enough to swallow whole, but it also shouldn’t be so large that your dog struggles to get a proper bite on it.
Batch cooking saves time. Since most of these recipes involve a long, hands-off drying period, it makes sense to double or triple a batch when you’re already set up to make one. That way you’re not starting from scratch every week, and you’ll always have a stash ready in the freezer.
Safety Tips When Giving Dental Chews
Homemade doesn’t automatically mean risk-free, so a little caution goes a long way, especially the first few times you try a new recipe with your dog.
Always supervise chew time. Even soft, homemade chews can pose a choking risk if a dog tries to swallow a large piece whole. Stay nearby, especially the first few times you introduce a new chew, so you can step in if a piece breaks off larger than expected.
Avoid choking hazards. Make sure chews are sized appropriately and don’t have small parts that could break off easily. Bone-in treats like the turkey wing chew should always be given under close watch, and it’s worth taking the chew away once it’s been gnawed down to a small piece, rather than letting your dog finish it off unsupervised.
Check with your vet first. If your dog has any existing health conditions, allergies, or is very young, it’s worth checking in with your vet before adding new treats. This is especially true for puppies, whose dental and digestive needs are still developing. You can learn more in this guide on puppy veterinary needs.
Introduce new treats slowly. Even natural, simple ingredients can occasionally cause an upset stomach if your dog isn’t used to them. Start with a small piece the first time you try a new recipe, and watch for any signs of discomfort before making it a regular part of the routine.
Other Natural Ways to Support Dental Health
Chews are a great tool, but they work best alongside a few other habits. Regular brushing, even just a couple of times a week, makes a noticeable difference over time. It doesn’t need to be a daily ritual to be effective, but consistency matters more than frequency.
Natural chews like rabbit ears or bully sticks can also help between homemade treat batches, giving your dog variety while you’re prepping the next round of dental sticks. Rotating between a few different textures keeps things interesting for your dog and covers more angles when it comes to actually reaching every tooth.
And don’t skip the basics: regular vet checkups catch dental issues early, before they turn into something more serious and expensive to treat. A vet can also spot early signs of gum disease that aren’t obvious just from looking at your dog’s teeth at home. If you’re also looking to improve your dog’s overall diet alongside their dental routine, this collection of homemade dog food recipes is a good place to start.
Conclusion
Making dog dental chews homemade doesn’t have to be complicated. With a handful of simple ingredients and a little patience, you can create treats that are just as effective as anything on the store shelf, minus the fillers and mystery additives.
Whether you go for the beef and spinach jerky sticks, the turkey wing chew, or one of the other seven ideas above, your dog gets a treat that’s good for their teeth and made exactly the way you want it. Each recipe brings something a little different to the table, so it’s worth trying a few before settling on your dog’s favorite.
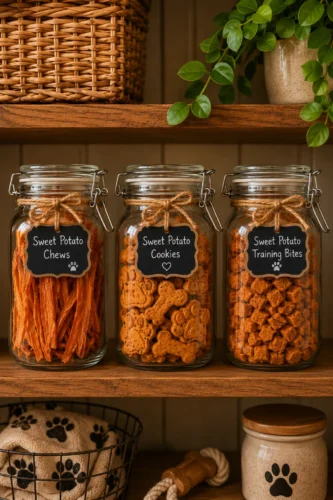
Once you’ve got a batch ready, a proper dog treat station can help you keep everything organized and easy to grab, whether it’s for daily dental chews or just general treat time.
Try one recipe this week and see how your pup responds. Chances are, it’ll become a regular in your treat rotation, and you’ll never look at store-bought dental chews the same way again.

Izzy is an experienced ranch worker who has a passion for exploring nature and getting up close to wildlife. With her connections to various animal organizations, Izzy is well-versed in animal care and rehabilitation.