Dog Popsicles Recipes Made with Yogurt, Fruit & Peanut Butter
When the temperature climbs, your dog needs more than just extra water and shade. That’s where dog popsicles recipes come in. These frozen treats are simple to make, safe for most dogs, and a fun way to beat the heat together.
Whether you call them pupsicles, ice lollies, or frozen dog treats, the idea is the same. You freeze dog-safe ingredients like yogurt, fruit, or broth into fun shapes. Then you hand your pup a cool, tasty treat that keeps them hydrated and entertained.
In this article, you’ll find 9 tested pupsicle recipes for dogs, straight from real dog parents and their pups. Each one uses simple, easy-to-find ingredients. Most take less than 10 minutes to prep. All you need after that is a freezer and a little patience.
We’ll also cover the basic safety rules every dog owner should know before trying any DIY dog popsicle recipes, plus tips on storing, serving, and customizing your frozen treats. Let’s get started.
9 Best Dog Popsicles Recipes to Try This Summer
Below are 9 popsicle recipes for dogs, each inspired by real pup parents who shared their frozen treat ideas. Every recipe uses simple ingredients you probably already have in your kitchen. Grab a silicone mold or ice cube tray, and let’s get freezing.
Recipe 1: Pumpkin, Blueberry & Peanut Butter Pup Pops
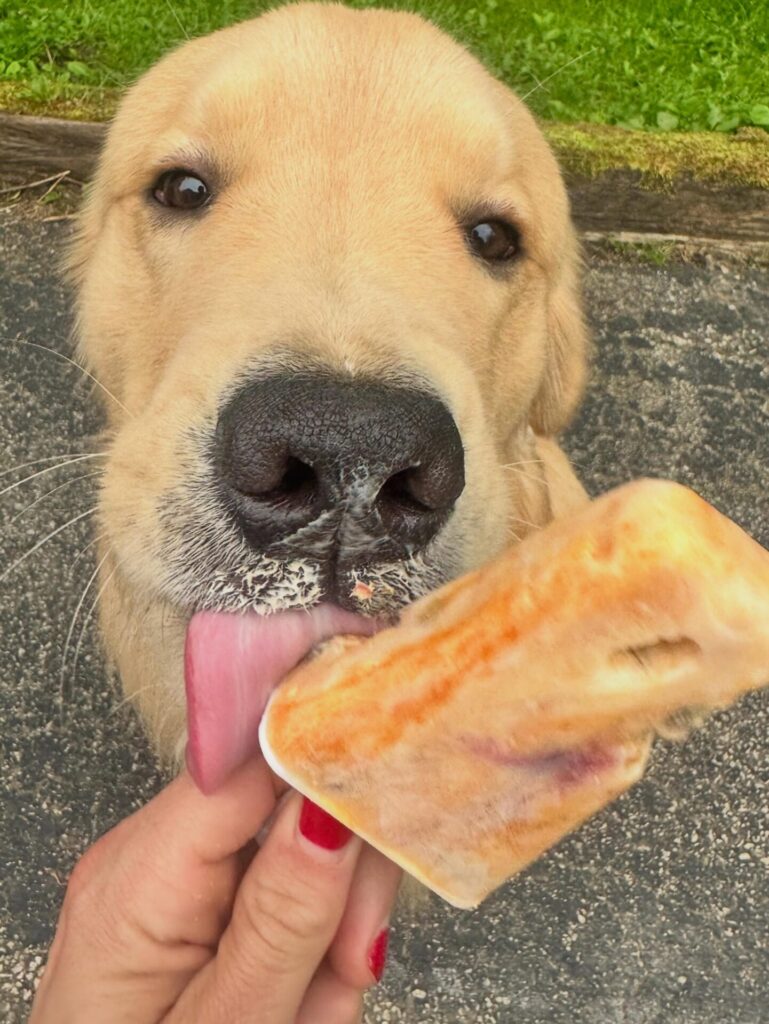
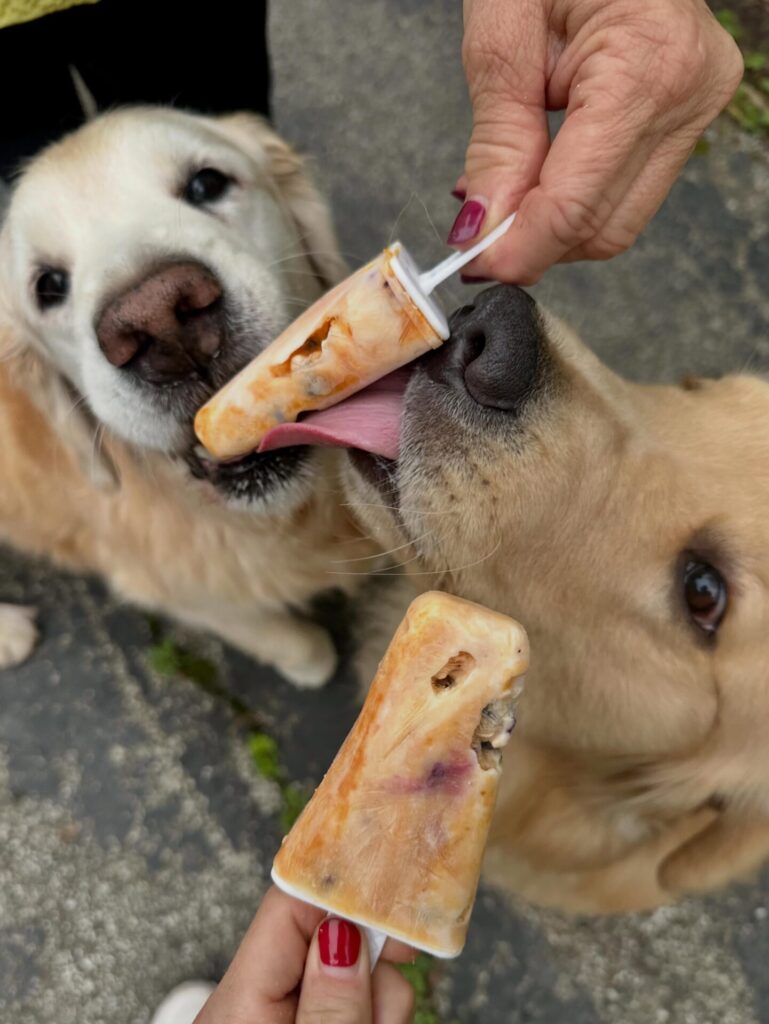
This colorful pop combines four dog-favorite ingredients into one treat, and it’s a great starting point if you’ve never made frozen dog treats before. Pumpkin is gentle on digestion and often used to help settle upset stomachs, blueberries add natural sweetness along with antioxidants, and peanut butter makes the whole thing irresistible to most dogs.
Ingredients:
- Plain canned pumpkin (not pumpkin pie filling, which contains added sugar and spices)
- Blueberries, fresh or frozen
- Dog-safe peanut butter (always check the label for xylitol or birch sugar)
- Plain Greek yogurt
How to make it:
- Mix the pumpkin, a spoonful of peanut butter, and a scoop of yogurt in a bowl until smooth and well combined.
- Fold in the blueberries, either whole or lightly mashed depending on how chunky you want the texture.
- Pour the mixture into silicone molds, tapping gently to remove any air pockets.
- Freeze for at least 4 hours, though overnight gives the firmest texture.
Why this combo works: Pumpkin has a mild flavor that blends well with almost anything, which makes it a forgiving base for dogs trying frozen treats for the first time. It also adds a bit of fiber, which some owners use to help support regular digestion during the summer months when routines and diets can shift with more outdoor activity.
Variations to try: If your dog isn’t a fan of peanut butter, you can leave it out entirely and simply increase the yogurt slightly to keep the texture creamy. You can also swap the blueberries for diced apple (with the seeds and core removed) for a different flavor profile. Some owners like to add a small pinch of cinnamon, which is safe for dogs in tiny amounts and adds a warm, fall-like aroma even in the middle of summer.
Serving idea: This one works especially well as a lick mat filler if you don’t have molds handy. Spread the mixture thin on a lick mat, freeze flat, and let your dog enjoy the slow, engaging licking experience. It’s a great option for food-motivated breeds like golden retrievers and labs, who tend to enjoy rich, hearty flavors over lighter, fruitier ones.
📸 Photo credit: Instagram @pawlywally
Recipe 2: Puppy-Sized Popsicle Lollies
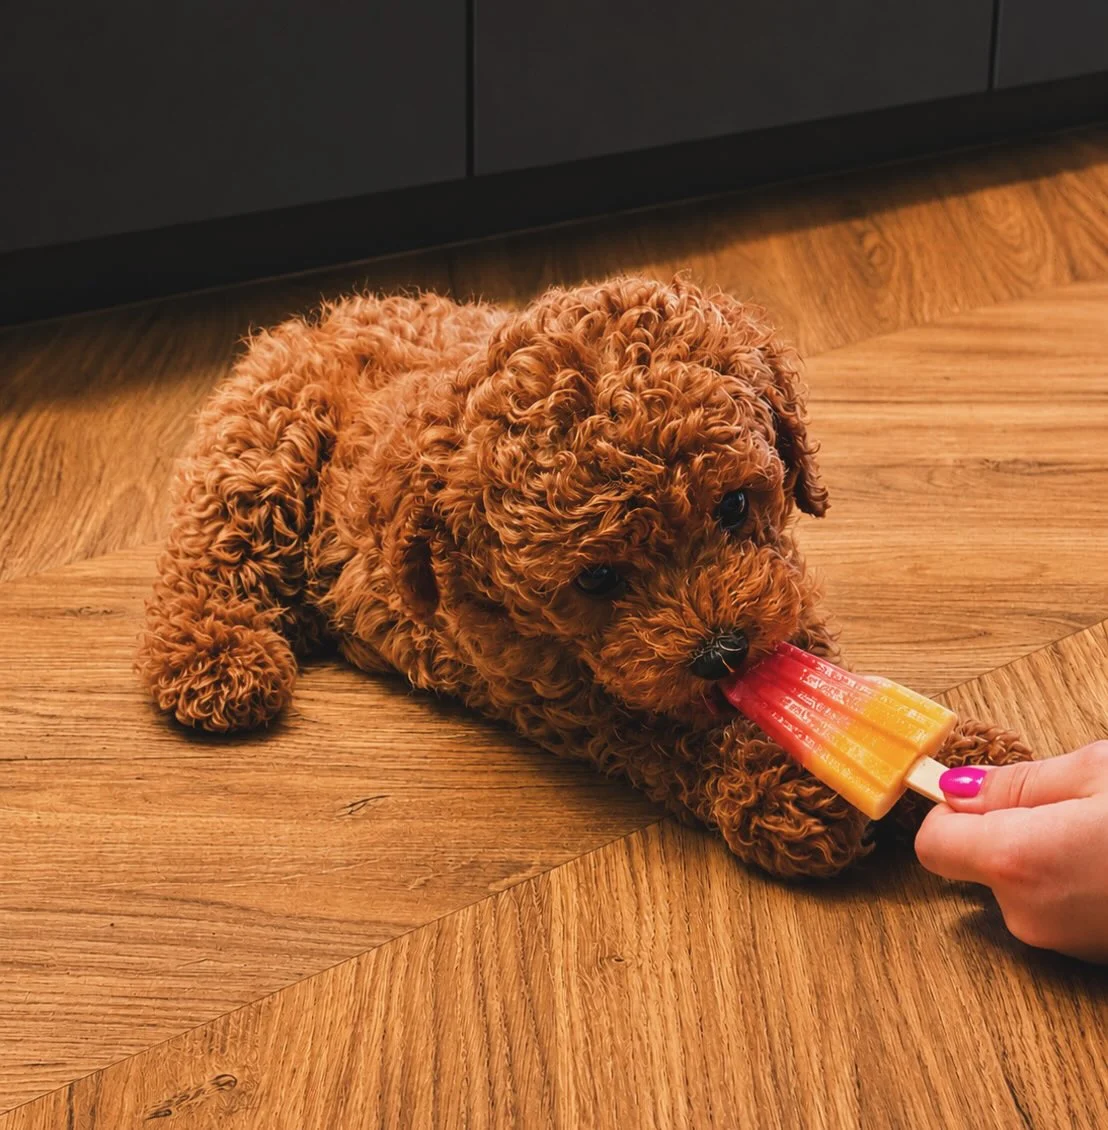
Not every dog needs a big frozen treat. Puppies and small or toy breeds do much better with a smaller version they can finish without it melting all over the floor, your furniture, or your dog’s paws. This recipe is designed specifically with smaller mouths and smaller appetites in mind.
Ingredients:
- Plain Greek yogurt
- Mashed fruit of your choice (strawberries or blueberries work particularly well)
- A splash of water to thin the mixture if needed
How to make it:
- Blend the yogurt and fruit together until smooth, with no large chunks that could be a choking risk for a small puppy.
- Thin slightly with water if the mixture feels too thick to pour easily.
- Pour into a small silicone mold, ideally a puppy-sized or mini ice cube tray designed for bite-sized treats.
- Freeze for 3 to 4 hours, checking that they’re fully solid before serving.
Why size matters here: Smaller pops freeze faster and melt slower once they’re out of the freezer, which means less mess on your floor and a more enjoyable experience for a young or small dog who might otherwise get overwhelmed by a large, dripping treat. It also naturally controls portion size, which is especially important for puppies who are still growing and don’t need excess calories from treats.
Variations to try: For very young puppies just being introduced to new textures, you can blend the mixture extra smooth with no fruit chunks at all, almost like a frozen smoothie. As your puppy gets more comfortable with frozen treats, you can start adding small soft chunks of fruit for texture and a bit of chewing practice.
A note on introducing new treats to puppies: Puppies have more sensitive stomachs than adult dogs, so it’s smart to introduce any new frozen treat slowly, starting with just a small taste to see how they react before making it a regular part of their routine.
📸 Photo credit: Instagram @teddybearzoomies
Recipe 3: Red, White & Blue Berry Coconut Pupsicles
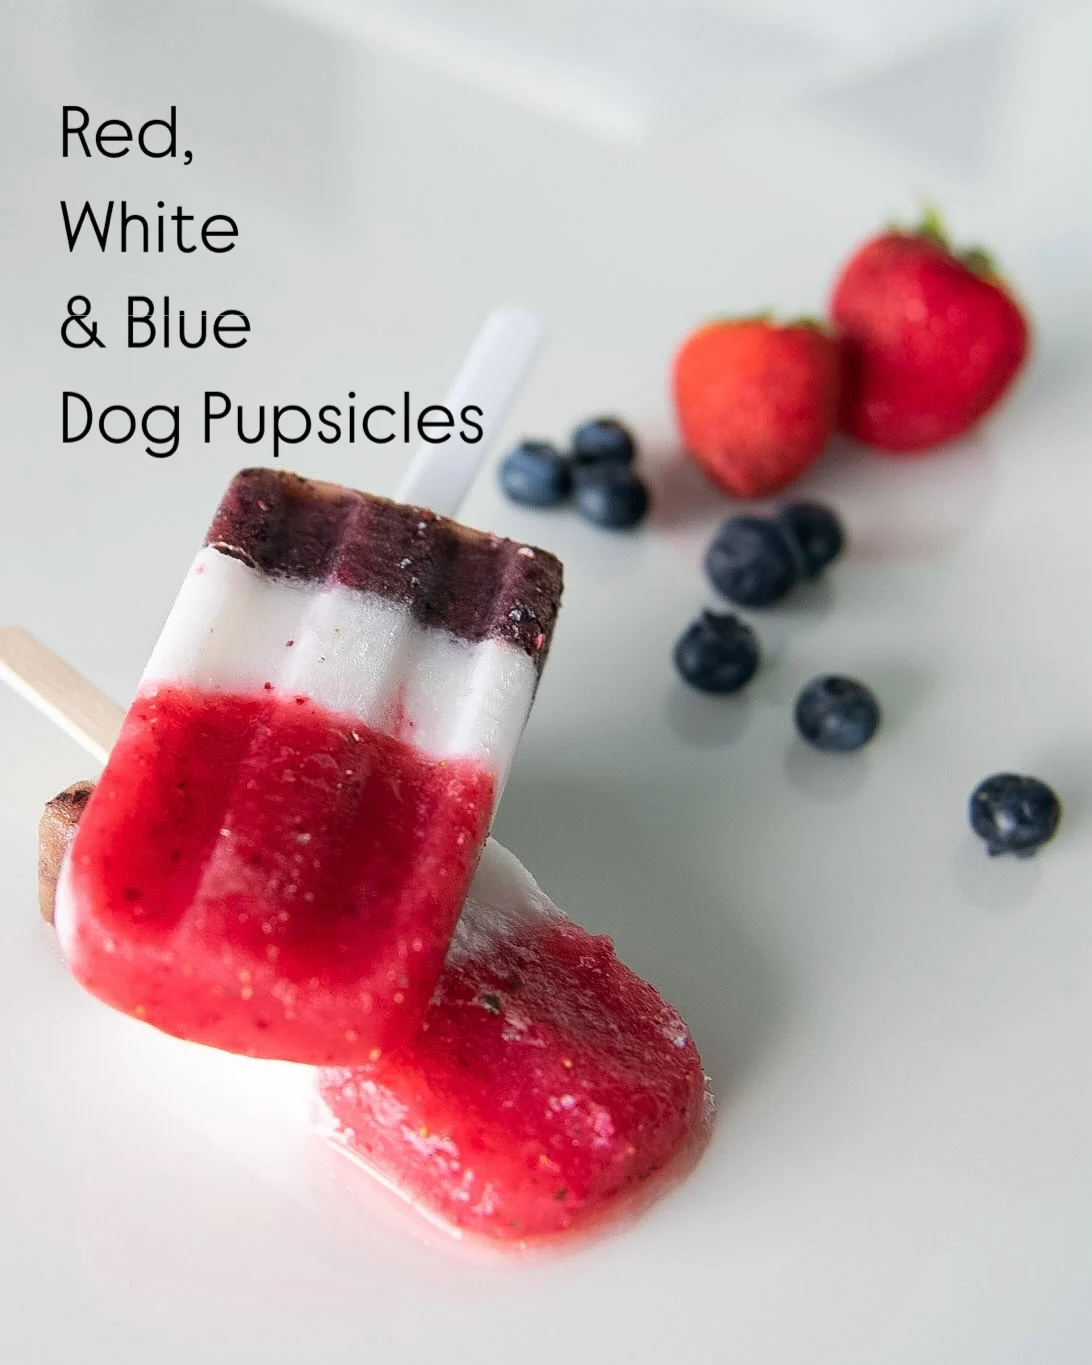
This one is perfect for summer holidays, patriotic celebrations, or just a fun, colorful treat any day of the year. It’s made with only three natural ingredients, contains no added sugar, and is completely dairy free, which makes it a good option for dogs who are sensitive to dairy but still love a creamy texture.
Ingredients:
- Strawberries
- Blueberries
- Coconut milk (unsweetened, full-fat works best for a creamier texture)
How to make it:
- Blend the strawberries separately until smooth, then set the puree aside in a small bowl or measuring cup for easy pouring.
- Blend the blueberries separately until smooth, then set that puree aside as well.
- Pour a thin layer of blueberry puree into the mold and freeze for about 30 minutes, or until just set.
- Add a layer of coconut milk on top and freeze again for another 30 minutes.
- Finish with a layer of strawberry puree on top.
- Freeze the entire mold for at least 4 hours, or overnight, until completely solid all the way through.
Why layering is worth the effort: While this recipe takes more patience than a simple one-step blend, the striped red, white, and blue effect looks genuinely impressive once it’s unmolded. It’s a great option if you’re hosting a summer get-together with other dog owners, or if you simply want a treat that photographs well for social media.
Variations to try: If coconut milk isn’t available or your dog doesn’t tolerate it well, you can substitute a middle layer of plain Greek yogurt instead, which will still give you the white stripe in the middle. For a firmer overall texture, some owners like to add a small spoonful of unflavored gelatin to the fruit purees before freezing, though this step is entirely optional.
Serving tip: Because this recipe is completely dairy free when made with coconut milk, it’s a good go-to option for dogs with known dairy sensitivities or for multi-dog households where one pup can’t have yogurt but the others can.
📸 Photo credit: Instagram @sharonandteddytakethecity
Recipe 4: Greek Yogurt, Peanut Butter & Blueberry Lollies
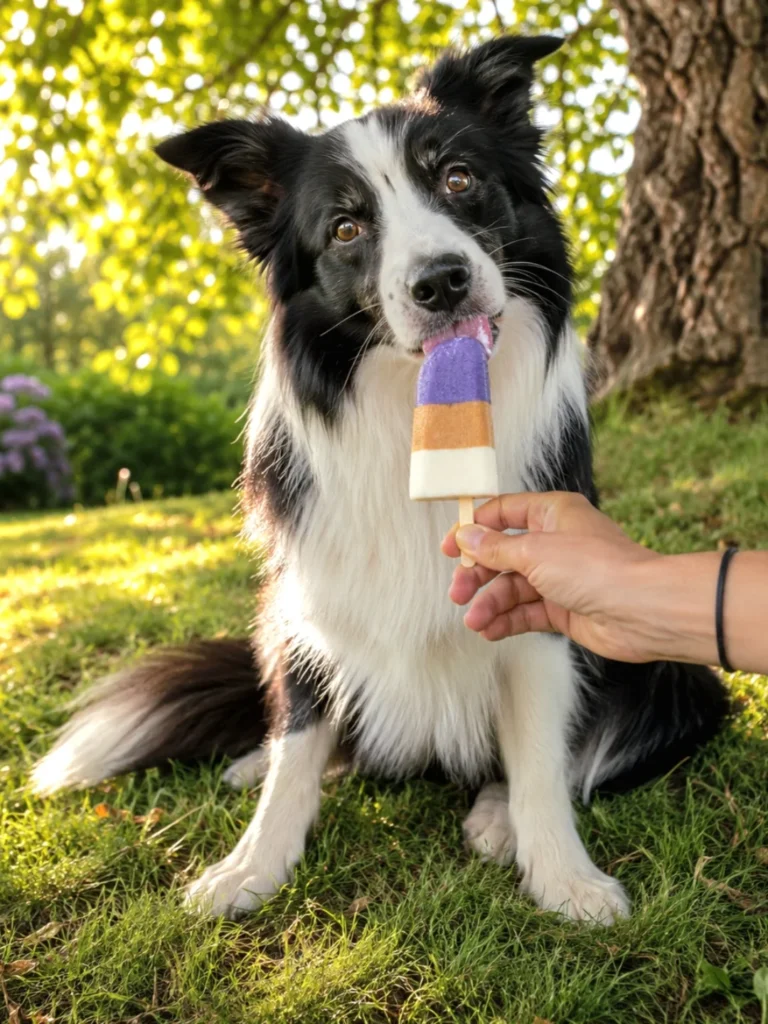
Frozen treats aren’t just a fun snack. They can also double as enrichment. This recipe is built around calming, focused licking, which can help lower arousal in dogs on hot, high-energy days when tempers and energy levels can run a little short.
Ingredients:
- Unsweetened, full-fat plain Greek yogurt
- Dog-safe, 100% natural peanut butter (always check the label carefully for xylitol or birch sugar)
- Fresh or frozen blueberries with a small splash of water
How to make it:
- Fill a silicone mold with Greek yogurt. Tap it gently on the counter to remove air pockets and level the surface before moving on.
- Add a thin layer of peanut butter. If it’s too thick to swirl easily, mix in a small splash of warm water to loosen it before drizzling or swirling it through the yogurt.
- Blend the blueberries with a touch of water, then spoon the mixture gently on top of the yogurt and peanut butter layer.
- Freeze for 3 to 4 hours, or overnight for the best, firmest results.
Why this recipe supports more than just cooling down: On hot days, this kind of enrichment can help dogs manage their body temperature while also encouraging calm, focused licking behavior, which is a simple but genuinely effective way to support both physical comfort and emotional regulation. It’s a favorite among dog daycare and boarding professionals for exactly this reason.
Serving and safety notes: Even healthy treats still count toward your dog’s daily calories. Aim for moderation, and remember that frozen treats should stay within roughly 10% of your dog’s daily calorie intake. For most dogs, this means small portions, or one small ice lolly per day, is plenty.
Safety reminder: Avoid wooden sticks, which can splinter and cause injury if your dog chews through them. Silicone molds are the safest choice, or you can simply pop the frozen treat straight into a bowl and skip the stick altogether.
Variations to try: If your dog has a peanut allergy or sensitivity, you can substitute a small amount of plain pumpkin puree in place of the peanut butter swirl. You’ll still get a nice contrast in color and flavor without the allergen risk.
If your dog tends to lick excessively even outside of treat time, it may be worth reading more about excessive licking in dogs to understand the difference between normal, healthy cooling behavior and something that might need a closer look.
📸 Photo credit: Instagram @pawtasticdogservices
Recipe 5: Strawberry, Blueberry & Bee Pollen Frozen Yogurt Bites
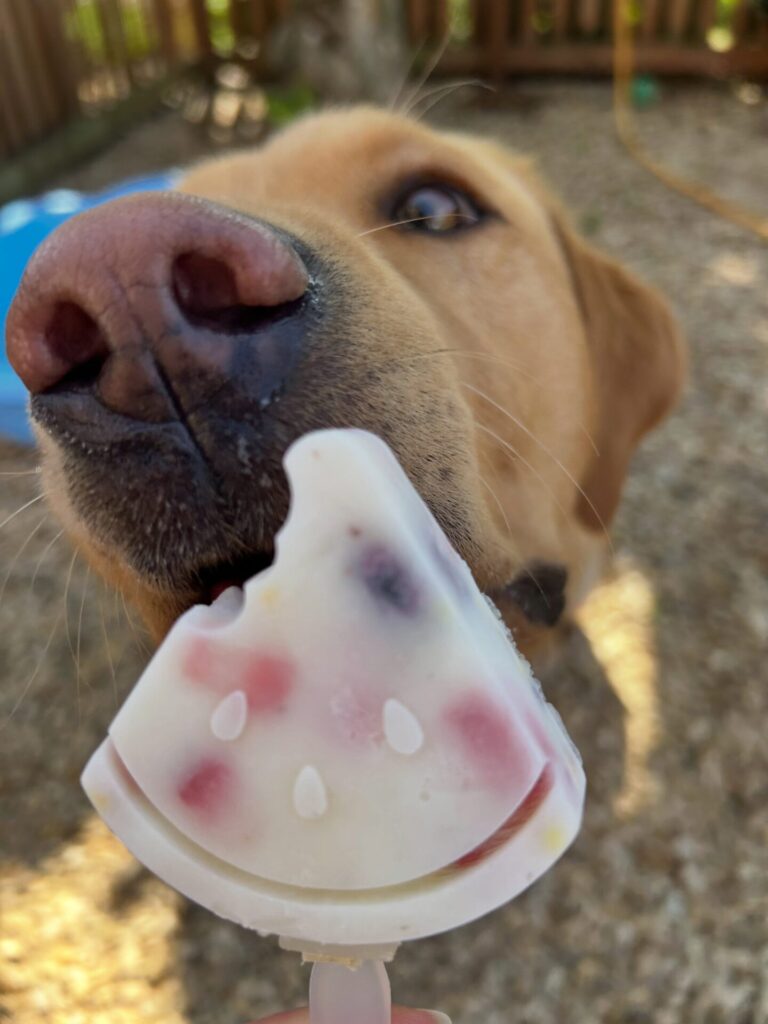
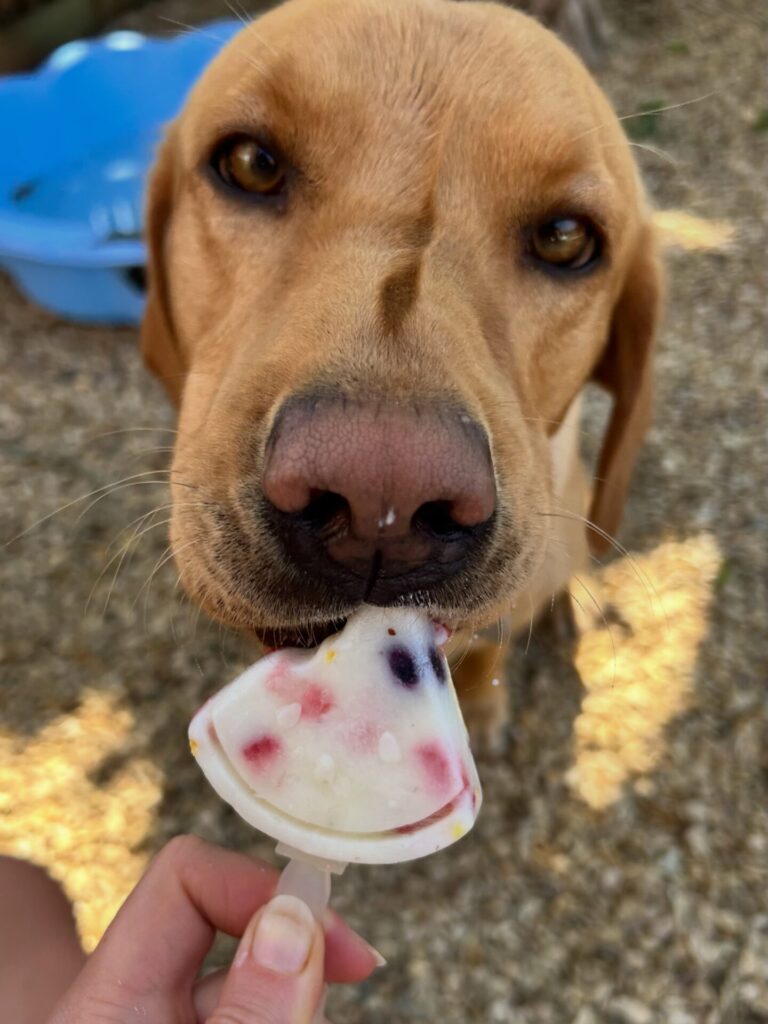
This recipe adds a small but interesting twist: bee pollen. Some dog owners use it as a natural topper for its flavor and texture, though as with any new ingredient, it’s always smart to introduce it slowly and watch for any reaction before making it a regular addition.
Ingredients:
- Plain or Greek yogurt
- Strawberries, chopped
- Blueberries
- A small amount of dog-safe peanut butter
- A pinch of bee pollen
How to make it:
- Mix the yogurt with a small spoon of peanut butter until smooth and fully combined.
- Fold in the chopped strawberries and blueberries, distributing them evenly throughout the mixture.
- Sprinkle a small amount of bee pollen on top for extra flavor and a bit of texture.
- Pour into ice lolly molds and freeze for 4 hours or more, until completely solid.
Why this works as a soft-serve alternative: This recipe essentially creates a homemade version of soft-serve ice cream for dogs. The combination of yogurt and peanut butter gives it a rich, creamy base, while the fruit adds natural sweetness and a slightly tart contrast. It’s easy to make in a bigger batch, which is helpful if you have multiple dogs in the house or want to prep a week’s worth of treats in one session.
A note on bee pollen: While many dogs tolerate small amounts of bee pollen just fine, it’s still a relatively unusual ingredient in dog treats. Start with a tiny pinch the first time you try this recipe, and watch for any signs of an upset stomach or allergic reaction before using it regularly.
Variations to try: If you’d rather skip the bee pollen entirely, this recipe works perfectly well without it. You can also swap in raspberries or diced mango in place of one of the berries for a slightly different flavor combination each time you make a batch.
Serving idea: Because this recipe has a soft-serve consistency, it thaws a bit faster than firmer, water-based popsicles. It’s best served immediately after removing from the freezer, especially on particularly hot days.
📸 Photo credit: Instagram @albiemontyandreggie
Recipe 6: Fourth of July Watermelon & Berry Frozen Cups
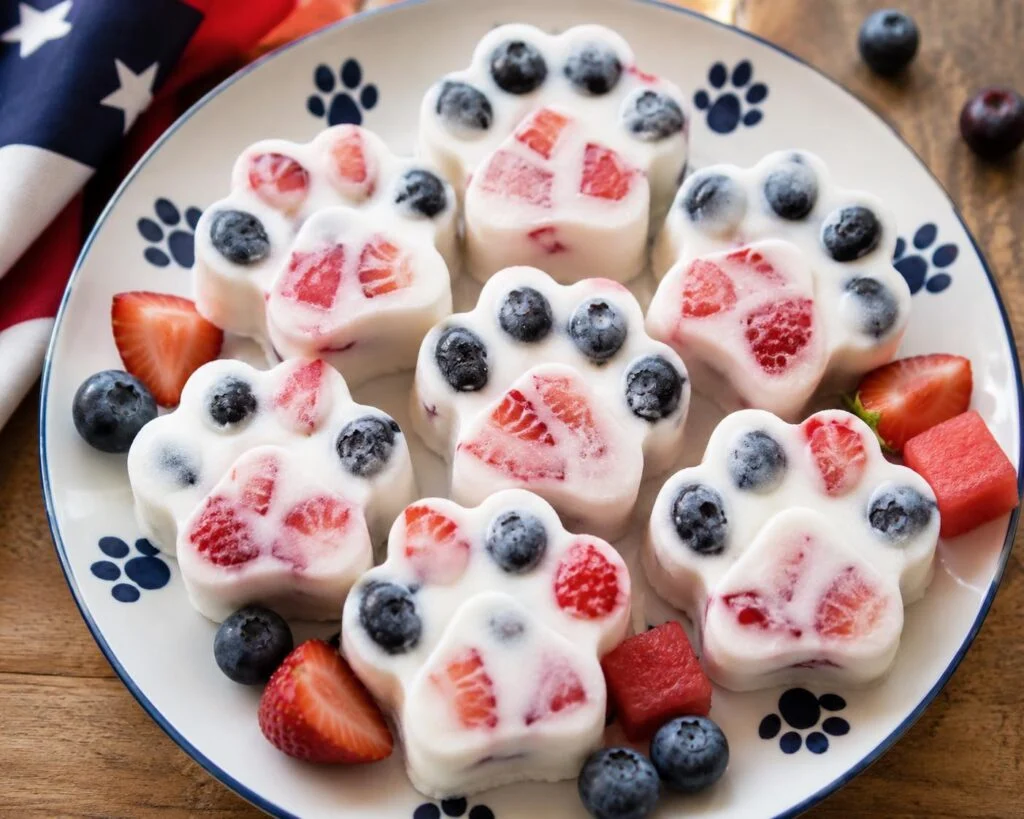
Perfect for warm holiday afternoons, this recipe uses fresh fruit layered with yogurt for a colorful, festive treat that looks great on a plate for a backyard party. It also comes with a clever savory variation for dogs who prefer something less sweet, or for dogs who need to avoid dairy.
Ingredients:
- Plain, unsweetened Greek yogurt
- Fresh blueberries
- Fresh strawberries, stems removed
- Seedless watermelon
How to make it:
- Wash all the fruit thoroughly to remove any dirt, pesticide residue, or debris.
- Dice the strawberries and watermelon into small, bite-sized pieces appropriate for your dog’s size.
- Place a few blueberries, strawberry pieces, and watermelon chunks into each mold, distributing the colors evenly for a nice visual effect.
- Spoon plain Greek yogurt over the fruit until each mold is completely full.
- Gently tap the mold on the counter to remove any air bubbles that might create gaps once frozen.
- Freeze for at least 4 to 6 hours, or ideally overnight for the firmest texture.
- Pop them out of the mold and serve your pup a cool, refreshing treat.
Optional savory twist: Instead of yogurt, try using low-sodium, onion- and garlic-free chicken broth for a savory frozen snack. This variation is especially useful for dogs who don’t tolerate dairy well, or for owners who simply want to offer a lighter, less sweet option during the summer months.
A few safety tips:
- Always use plain Greek yogurt with no added sugar or xylitol.
- Remove all watermelon seeds and rind before dicing, since both can cause digestive upset or, in the case of large seeds, a choking hazard.
- Offer treats in moderation, especially if it’s your dog’s first time trying a new combination of ingredients.
Why this recipe is great for gatherings: Because the fruit sits in visible chunks rather than being blended smooth, these frozen cups look especially appealing when served on a plate for a group of dogs at a holiday party or backyard gathering. The bright reds and blues against the white yogurt make for a festive presentation that’s easy to photograph and share.
Variations to try: If watermelon isn’t in season, you can substitute diced peaches or cantaloupe for a similarly juicy, refreshing base. Just make sure to remove any pits or seeds first.
📸 Photo credit: Instagram @bellesbudsrescue
Recipe 7: Watermelon Yogurt Rocket Pops with Celery
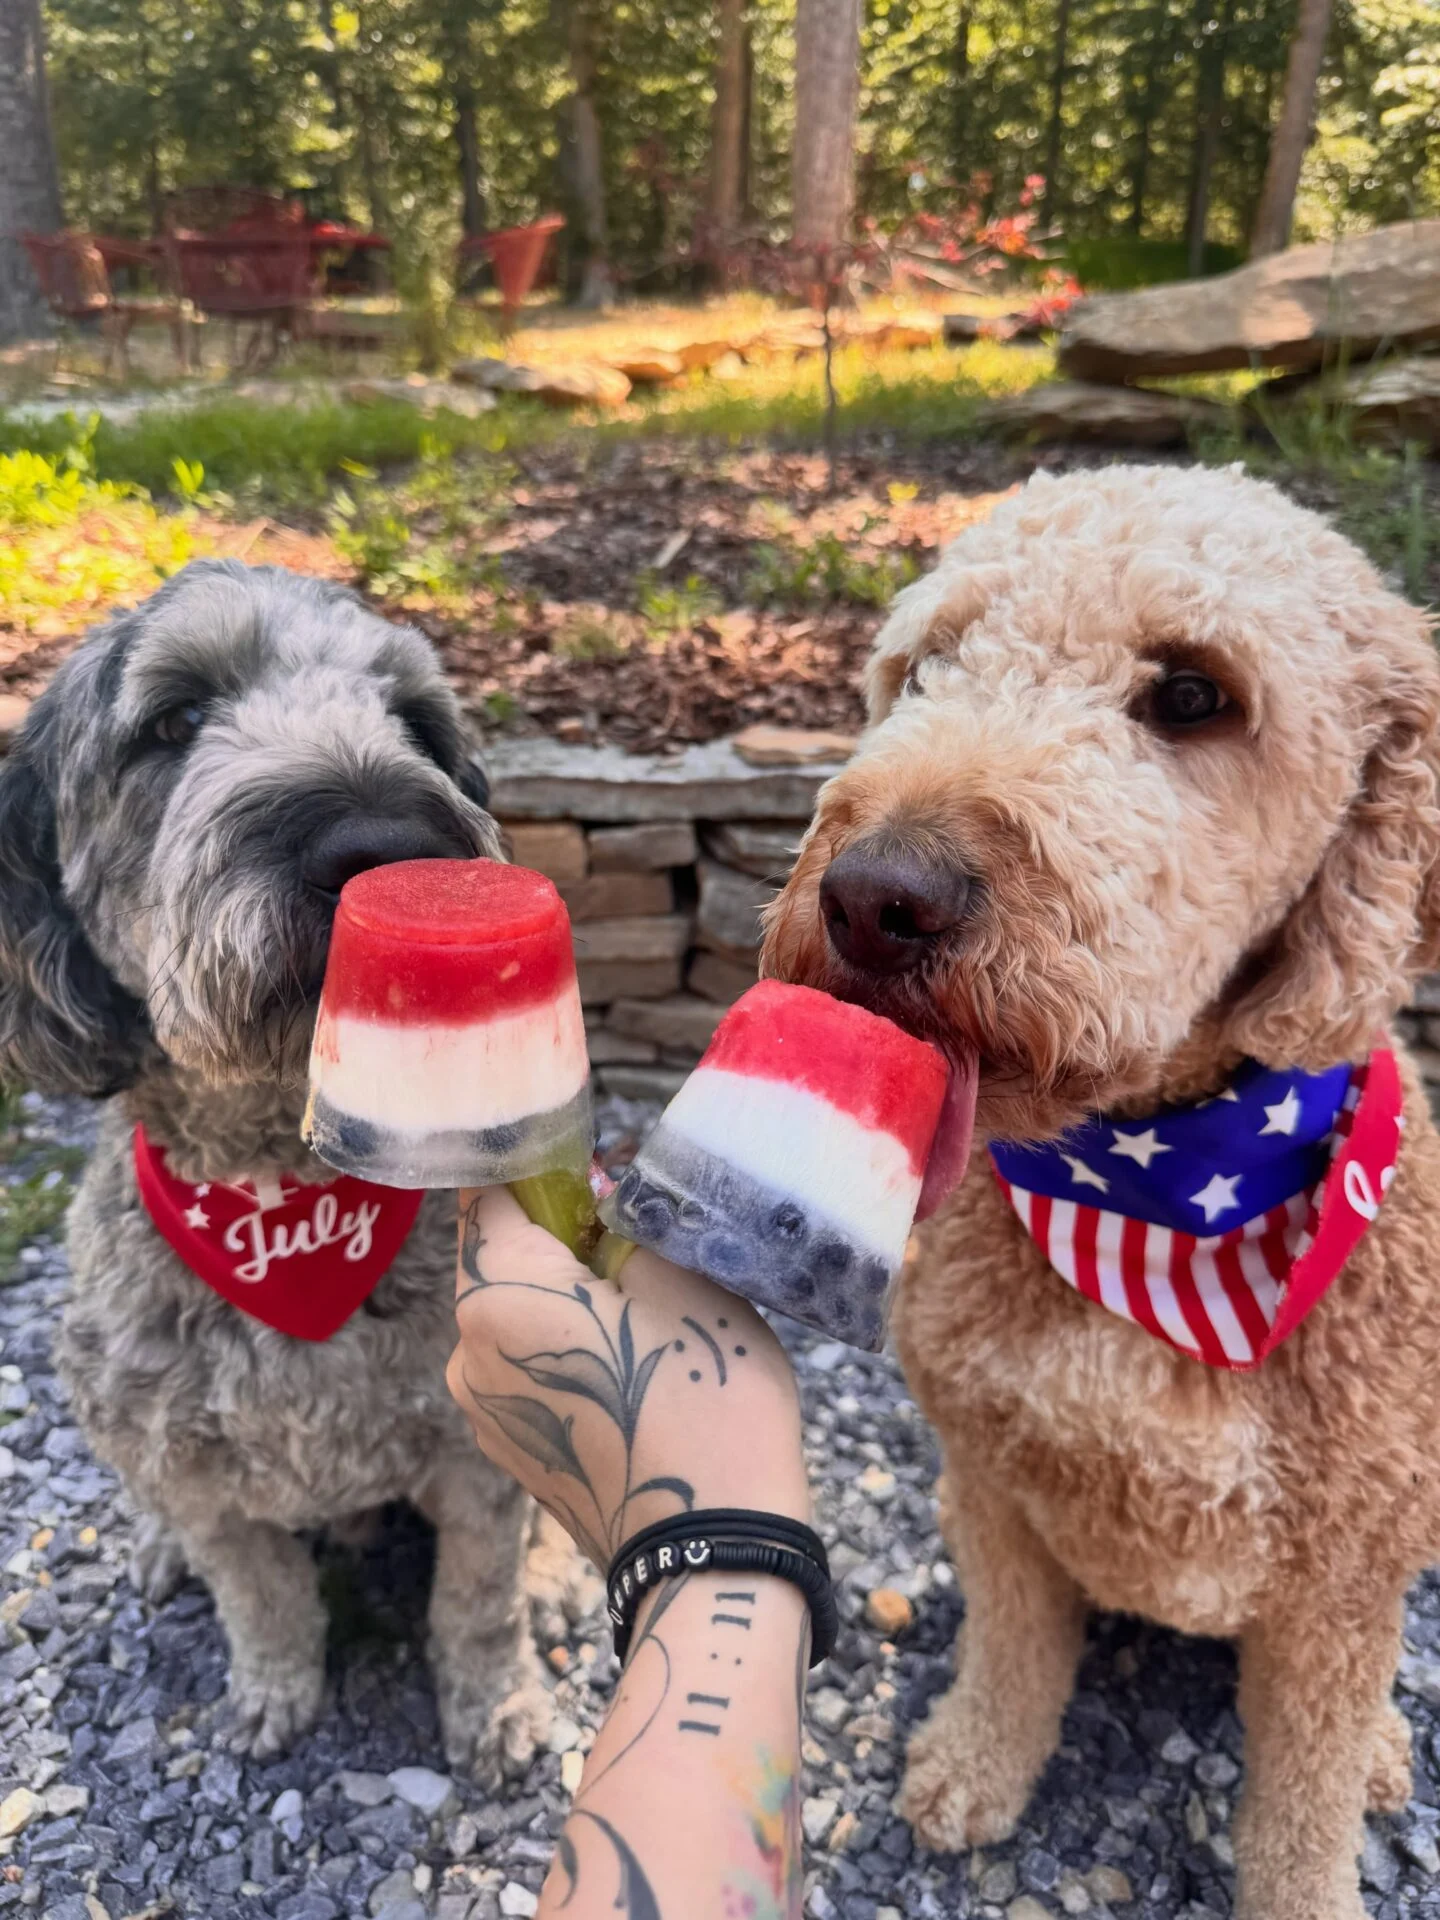
Shaped like little rockets, this recipe is a fun way to celebrate summer holidays with your dog. It layers three simple ingredients for a treat that’s both refreshing and easy on the stomach, with a bit of added crunch from the celery.
Ingredients:
- Watermelon, seedless and diced
- Plain Greek yogurt
- Blueberries
- A celery stalk, finely chopped
How to make it:
- Blend the watermelon until smooth and pour a layer into the mold. Freeze for about 30 minutes, or until just set to the touch.
- Add a layer of plain Greek yogurt on top of the watermelon layer. Freeze again for another 30 minutes.
- Mix the chopped celery and blueberries together, then press the mixture gently into the top layer before it fully sets.
- Freeze the full mold for at least 4 hours, or until completely solid throughout.
Why celery is a nice addition: Celery adds a light, satisfying crunch once the treat has thawed slightly, and it’s a low-calorie way to add texture without adding many extra calories to the overall treat. It also provides a bit of hydration on its own, since celery has a high water content.
Variations to try: If your dog isn’t a fan of celery’s texture, finely diced cucumber makes a good substitute and offers a similar crunch and hydration boost. You can also swap the watermelon layer for pureed cantaloupe if you want a slightly different flavor while keeping the same layered rocket-pop structure.
Serving idea: Because this recipe has three distinct layers, it’s a good one to make in a taller, narrow mold specifically designed for rocket pops or ice pops, rather than a flatter silicone tray. The taller shape shows off the layers nicely and gives your dog a more substantial treat to work through on a hot afternoon.
📸 Photo credit: Instagram @neighborhooddogtrainer
Recipe 8: Strawberry & Blueberry Rocket Popsicles
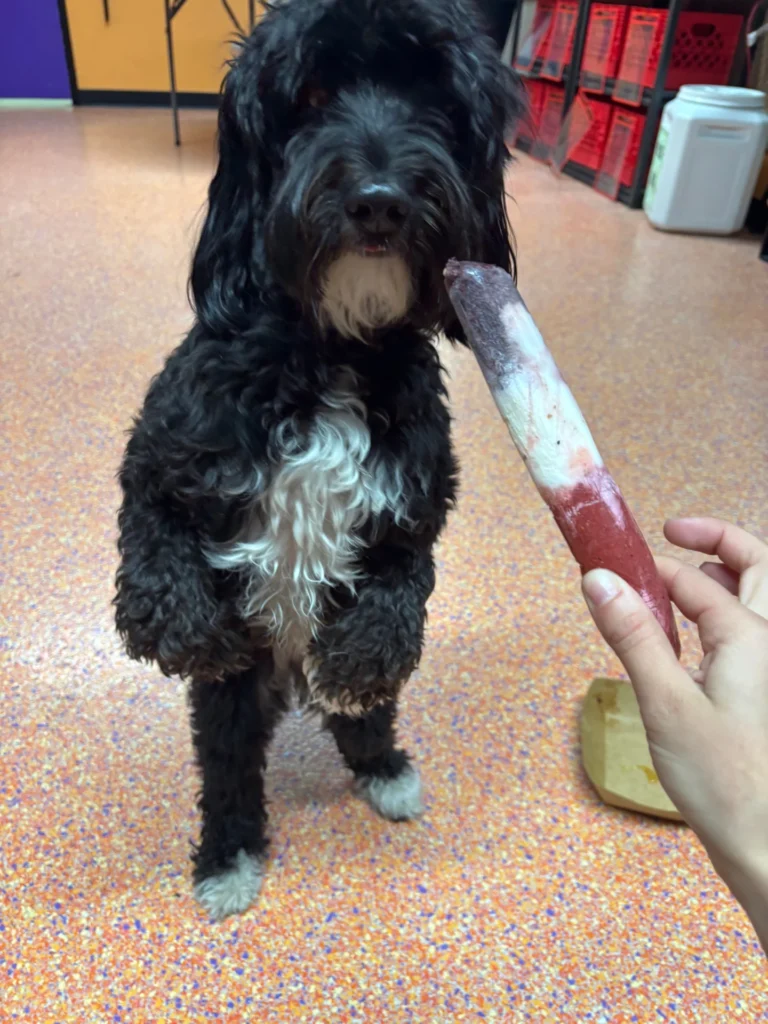
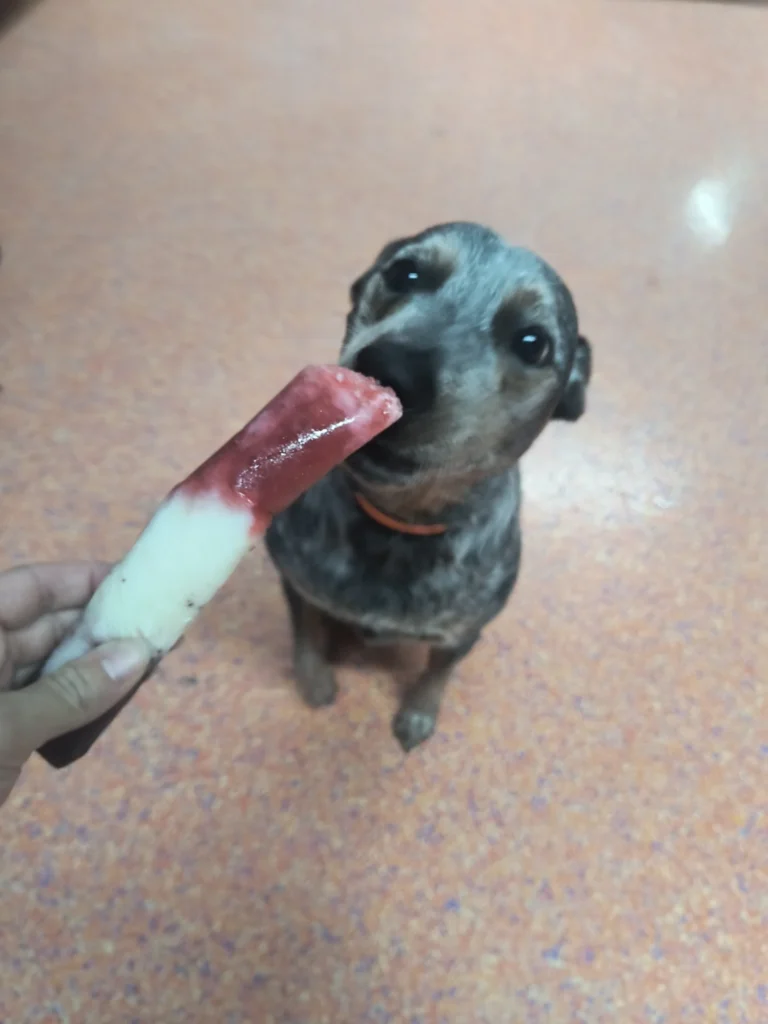
This simple three-ingredient recipe proves that you don’t need anything fancy to make a treat your dog will love. It’s easy enough for a tenth grader to make on a Saturday afternoon, and it comes together with almost no prep work.
Ingredients:
- Strawberries
- Plain Greek yogurt
- Blueberries
How to make it:
- Puree the strawberries until smooth and pour a layer into the mold as your base.
- Add a layer of plain Greek yogurt on top of the strawberry layer.
- Blend the blueberries separately and pour the puree as the final top layer.
- Freeze for at least 4 hours, or until the pop is solid all the way through from top to bottom.
Why simplicity works here: This recipe is easy to make in bulk since it only needs three ingredients, all of which are usually easy to find at any grocery store and fairly inexpensive, especially when berries are in season. It’s a great weekly staple if you want to keep a steady supply of frozen treats in the freezer without much planning.
Variations to try: For a slightly different flavor rotation, try swapping the strawberry layer for raspberry or the blueberry layer for blackberry. Both substitutions keep the same basic red-white-blue color scheme while giving your dog a bit of variety from batch to batch.
Batch-making tip: Because this recipe scales up easily, consider doubling or tripling the quantities and filling multiple molds at once. That way you’ll have a ready supply of frozen treats on hand throughout the week without needing to start from scratch every time your dog wants a cool snack.
📸 Photo credit: Instagram @paradisedogs247
Recipe 9: Pitaya (Dragon Fruit) Yogurt Frozen Bites
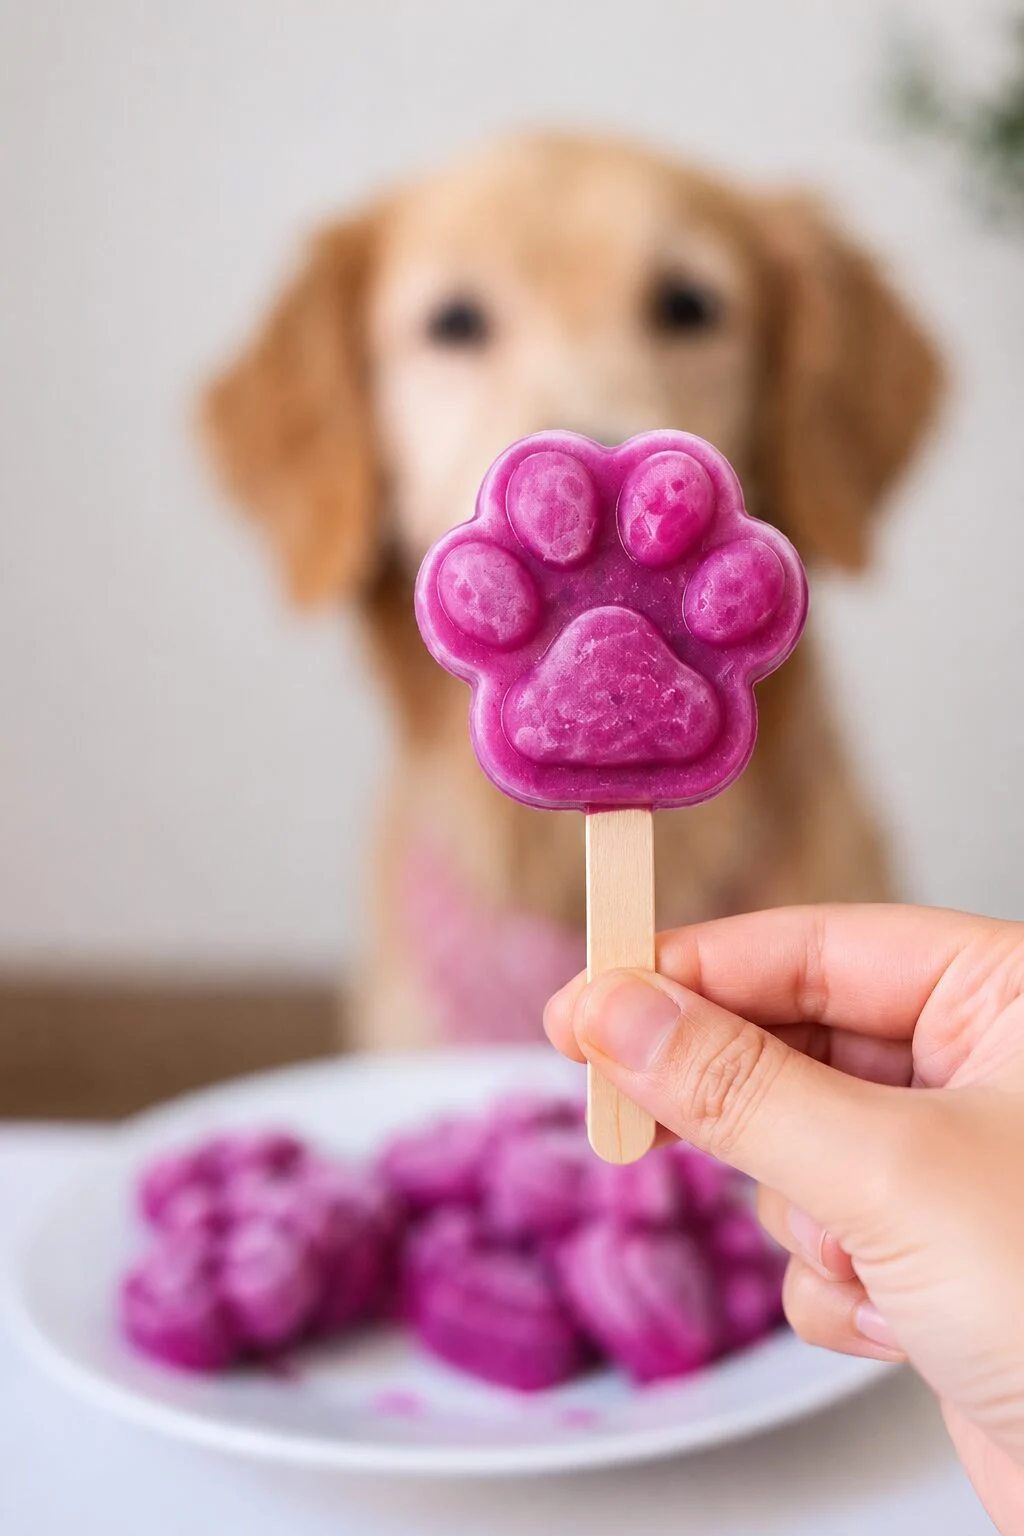
If you want something a little different from the usual berry combos, dragon fruit is a fun option to try. It’s naturally sweet, low in calories, and gives the treat a bright pink color that looks great in photos and stands out from more common berry-based recipes.
Ingredients:
- Dragon fruit (pitaya)
- Plain Greek yogurt, unsweetened
How to make it:
- Add the dragon fruit and Greek yogurt to a blender.
- Blend until smooth and creamy, with no large fruit chunks remaining.
- Pour into silicone molds or an ice cube tray, depending on the size treat you want to offer.
- Freeze for 3 to 4 hours, or until solid all the way through.
- Serve chilled and enjoy the happy tail wags.
Why dragon fruit stands out: Most homemade frozen dog treats rely on berries, pumpkin, or watermelon, so dragon fruit offers a nice change of pace both in flavor and in color. It has a very mild, slightly sweet taste that most dogs seem to enjoy, and its vivid pink color makes for an especially eye-catching treat when you’re taking photos to share.
A note on this recipe: Serve in moderation, and make sure your dog is comfortable with dairy before making this a regular treat, since the recipe relies heavily on yogurt as its base alongside the fruit.
Variations to try: If you want an even bigger nutritional boost, you can add a small spoonful of chia seeds to the blender before freezing. Chia seeds add a bit of texture and are often used in small amounts as a source of fiber, though they should always be used sparingly.
Serving idea: Because this recipe blends completely smooth with no chunks, it works particularly well in small, bite-sized molds for smaller dogs or for dogs who are just getting used to trying frozen treats for the first time.
Why Dog Popsicles Are the Perfect Summer Treat
Dog popsicles do more than just taste good. They serve a real purpose during hot weather.
Hydration support. Many of these recipes are built around yogurt, fruit, or broth, all of which contain water. This helps supplement your dog’s regular water intake on especially warm days.
Sensory enrichment. Frozen treats give dogs something to focus on. The different textures, from smooth yogurt to fruit chunks, keep their senses engaged.
Calming behavior. Steady, repetitive licking can have a soothing effect on dogs. It’s a simple way to help lower arousal and encourage calm behavior, especially useful if your dog tends to get restless or anxious in the heat.
Body temperature control. While a popsicle won’t replace shade or air conditioning, it does offer a quick way to help cool your dog down after playtime outside.
If you’ve noticed your dog licking more than usual, even outside of treat time, it’s worth learning more about excessive licking in dogs so you can tell the difference between a normal cooling habit and a behavior that might need attention.
Basic Rules Before You Start Making Pupsicle Recipes for Dogs
Before you start experimenting with your own dog popsicles recipes, keep these basic safety rules in mind.
Rule 1: Skip the Wooden Sticks
Wooden popsicle sticks can splinter once a dog starts chewing. Splinters can cause injury to the mouth or throat. Silicone molds are the safest choice. You can also simply serve the frozen treat straight from a bowl with no stick at all.
Rule 2: Watch the Portion Size
Frozen treats are still treats, and calories add up quickly. As a general guide, treats should make up no more than about 10% of your dog’s daily calorie intake. For most dogs, this means one small pop per day is plenty.
Rule 3: Double-Check Every Ingredient
Some ingredients that seem harmless to humans are dangerous for dogs. Always avoid:
- Xylitol or birch sugar (often hidden in peanut butter)
- Grapes and raisins
- Onions and garlic
- Chocolate
- Watermelon seeds and rind
Always read labels carefully, especially on peanut butter, since xylitol is becoming more common in “natural” and sugar-free brands.
Rule 4: Introduce New Ingredients Slowly
If your dog has never tried an ingredient like dragon fruit, bee pollen, or coconut milk, start with a small amount. Watch for any signs of an upset stomach before making it a regular part of their treat rotation.
If you’re still building out your dog’s basic care routine, it’s worth reviewing general puppy veterinary needs, especially if you’re introducing new treats to a younger dog for the first time.
Tips to Customize Your Homemade Dog Popsicle Recipes
Once you’ve tried a few of the recipes above, you can start putting your own spin on them. Here are some easy ways to customize your DIY dog popsicle recipes.
Swap the Base
Most recipes use Greek yogurt, but you can swap it for:
- Low-sodium, onion- and garlic-free chicken or bone broth
- Pureed pumpkin
- Mashed banana (in small amounts, since it’s higher in sugar)
Play with Layers
Layering different colors and flavors, like the red, white, and blue recipe above, creates a fun visual effect. Just remember to freeze each layer for about 30 minutes before adding the next one so they don’t mix together.
Try Different Mold Shapes
Paw-shaped molds, rocket pops, and mini ice cube trays all work well. Smaller shapes are better for puppies and small breeds, while larger molds suit bigger dogs who can handle a bigger treat.
Mix In Some Crunch
Small amounts of chopped celery, carrot, or cucumber can add texture without adding many calories. This works particularly well in the summer months when you want a lighter, more refreshing treat.
If you’re looking for more treat inspiration beyond popsicles, you might also enjoy browsing homemade dog treats recipes or trying a dog birthday cake recipe for a special occasion.
Storing and Serving Pupsicles Safely
Once your popsicles are made, proper storage keeps them safe and fresh for weeks.
How Long Do They Last?
Most homemade dog popsicles last about 2 to 3 weeks in the freezer if stored in an airtight container or freezer bag. Label the bag with the date you made them so you don’t lose track.
Serving Tips
- Let the popsicle sit for a minute or two before handing it over, especially in hot weather, so it’s not too hard to lick right away.
- Serve outside or in an easy-to-clean area, since melting treats can get messy fast.
- Supervise your dog while they enjoy the treat, especially if you used a mold with a stick.
Set Up a Treat Station
If frozen treats are becoming a regular part of your routine, it might help to set up a dedicated space for them. Check out these dog treat station ideas for inspiration on keeping treats organized and easy to grab on hot days.
Final Thoughts
Summer heat doesn’t have to mean a bored or overheated dog. With just a few simple ingredients and a silicone mold, you can whip up a batch of homemade dog popsicles recipes that keep your pup cool, hydrated, and happy.
From pumpkin and peanut butter pops to festive red, white, and blue treats, there’s a recipe here for every dog and every occasion. Start with one that matches ingredients you already have at home, then experiment with your own combinations once you get the hang of it.
Keep portions small, skip the wooden sticks, and always double-check new ingredients before introducing them. With those basics covered, you and your dog can enjoy a cool, tasty treat together all summer long.

Izzy is an experienced ranch worker who has a passion for exploring nature and getting up close to wildlife. With her connections to various animal organizations, Izzy is well-versed in animal care and rehabilitation.