Freeze Dried Dog Treats Recipe: 9 Crunchy Ways to Make It
Want a freeze dried dog treats recipe that gives you crunchy, lightweight bites your dog will beg for? You’re in the right place. Store-bought freeze dried treats can cost a small fortune. Making them at home costs a lot less per ounce, and you control every ingredient.
In this guide, you’ll get one full step-by-step recipe first. After that, you’ll see more treat styles you can make with the same machine, plus a no-machine option. At the end, you’ll find simple storage tips and fixes for the most common problems.
What you’ll learn:
- How to make the main recipe (Chicken & Sweet Potato Bites)
- 8 other ways to make freeze dried treats
- How to store, serve, and rehydrate your treats
- How to fix soft, chewy, or freezer-burned batches
Let’s get started.
1. What You Need Before You Start
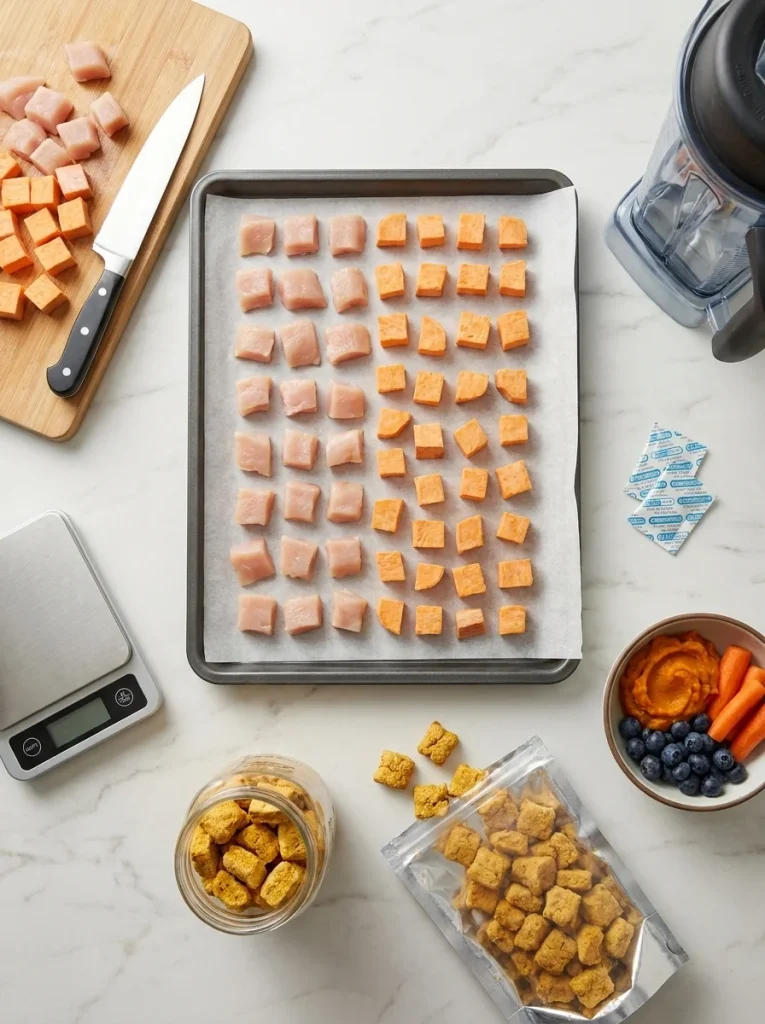
A little prep makes everything easier. Gather your gear and check your ingredients before you cook anything.
A. Equipment Checklist
Here’s what you’ll need for most recipes in this guide:
- A home freeze dryer (the most popular brands are Harvest Right and similar models)
- Freeze dryer trays (usually come with the machine)
- Parchment paper or silicone mats so treats don’t stick
- A sharp knife and cutting board
- A food scale (weighing food is more accurate than guessing)
- A blender or food processor for purees and pastes
- Airtight containers or mylar bags for storage
- Oxygen absorbers (small packets that keep treats fresh longer)
- A standard freezer (you’ll use it to pre-freeze trays)
Quick tip: Don’t own a freeze dryer yet? Skip ahead to the dry ice and dehydrator options in Section 3. You can still make crunchy treats.
B. Safe Ingredient Basics
Dogs can’t eat everything people eat. Before you start, make sure none of these end up in your treats:
- Xylitol (a sweetener found in some peanut butters and yogurts)
- Onions and garlic (in any form, including powder)
- Grapes and raisins
- Chocolate and caffeine
- Macadamia nuts
- Cooked bones (they can splinter)
- Heavy salt, sugar, or spices
Always read labels. Peanut butter is the biggest trap. Pick one that lists only peanuts, or peanuts and a pinch of salt.
C. Cleanliness and Safety Rules
Raw meat carries germs like salmonella. Freeze drying does not kill all of them. Because of this, follow these simple rules:
- Wash your hands, tools, and counters after touching raw meat.
- Cook poultry and pork before freeze drying. This is the safest choice for most households.
- Use fresh ingredients and keep everything cold until you’re ready to prep.
- Store finished treats away from your own food.
If you have a puppy, a senior dog, or a dog with health problems, ask your vet before switching to raw-style treats. Our guide on puppy vet needs covers what to ask at checkups.
2. Freeze Dried Dog Treats Recipe: Chicken & Sweet Potato Bites (Main Recipe)
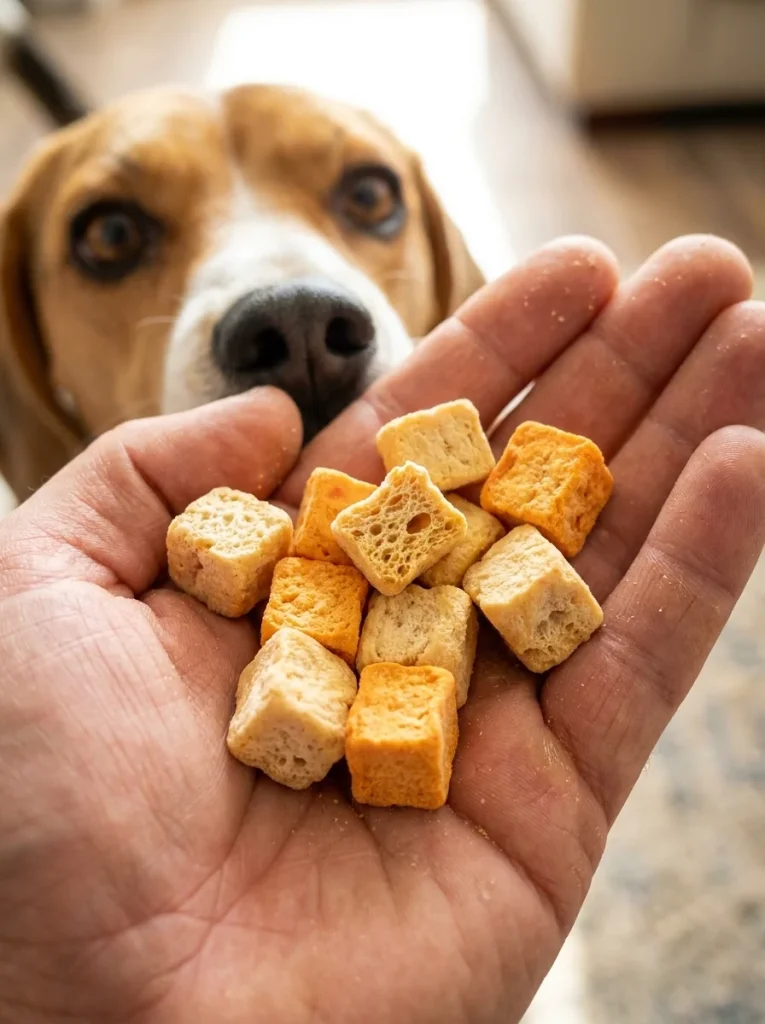
This is the base recipe. It uses two simple ingredients most dogs love. Chicken gives protein and sweet potato adds fiber and natural sweetness. Once you learn this one, every other recipe in this guide will feel easy.
A. The Recipe Card
Chicken & Sweet Potato Freeze Dried Dog Treats
Prep Time: 25 minutes
Cook Time: 20 minutes
Freeze Time (pre-freeze): 4-6 hours
Freeze Dryer Time: 24-36 hours (varies by machine and load)
Yield: About 60-80 small bites (roughly 8 ounces after drying)
Ingredients:
- 1 pound boneless, skinless chicken breast
- 1 large sweet potato (about 12 ounces), peeled
- 1/2 cup low-sodium chicken broth (no onion or garlic)
Instructions:
- Cut the chicken into 1/2-inch cubes.
- Cut the sweet potato into 1/2-inch cubes.
- Simmer the chicken in water for 10-12 minutes until cooked through. Drain and cool.
- Steam or boil the sweet potato for 8-10 minutes until fork-tender. Drain and cool.
- Toss the chicken and sweet potato in the broth for 30 seconds, then drain well.
- Line your freeze dryer trays with parchment paper.
- Spread the pieces in a single layer. Leave a little space between them.
- Pre-freeze the trays in your regular freezer for 4-6 hours, or until rock solid.
- Move the frozen trays into the freeze dryer and start the cycle.
- Run the full cycle, then check for doneness (see Section 2C).
- Cool, bag, and store.
Notes:
- Keep pieces the same size so they dry at the same speed.
- Thicker pieces take longer. Never go over 3/4 inch.
- Treats should be dry, light, and snap or crumble easily.
- Feed in small amounts. Treats should make up no more than 10% of your dog’s daily calories.
B. Step-by-Step Tips That Make It Better
The recipe card gives you the basics. These tips help you get great results on your first try.
Cut evenly. Uneven pieces are the number one reason batches fail. A small piece dries fast, but a big one stays damp in the middle. Use a ruler once, and your eye will learn the size.
Cook gently. Don’t fry or brown the chicken. Simmering keeps it tender and avoids burnt flavors that your dog may refuse.
Drain well. Extra water adds hours to the drying time. Pat the pieces with a paper towel before they go on the trays.
Don’t overload the trays. A crowded tray blocks airflow. It’s better to run two lighter trays than one jammed tray.
Pre-freeze every time. Starting with frozen food helps the machine move faster and saves energy. It also helps the treats keep their shape.
C. How to Tell When Treats Are Done
This step matters. A treat that looks dry on the outside can still hide moisture inside. That moisture leads to mold in storage.
Use this quick test:
- Snap test: Break a few of the biggest pieces in half. The inside should look dry and uniform.
- Cold spot test: Hold a piece in your hand. If any part feels cold, there’s still ice inside.
- Texture test: The piece should feel light and crisp, not rubbery.
- Weight check: Weigh the whole batch. Run an extra 2-4 hours, then weigh again. If the weight hasn’t dropped, you’re done.
When in doubt, run an extra dry time. It costs a few cents in power and saves a whole batch.
Once your treats pass the tests, let them sit on the trays for a few minutes. Then move them into storage quickly, because freeze dried food soaks up moisture from the air.
3. More Ways to Make Freeze Dried Dog Treats
Once you know the basic process, you can make many different treat styles. Each one below has its own recipe card in the same format as the main recipe, so you can scan and compare easily.
Pick the ones that fit your dog’s taste and your own schedule.
A. Meat Chunks and Strips
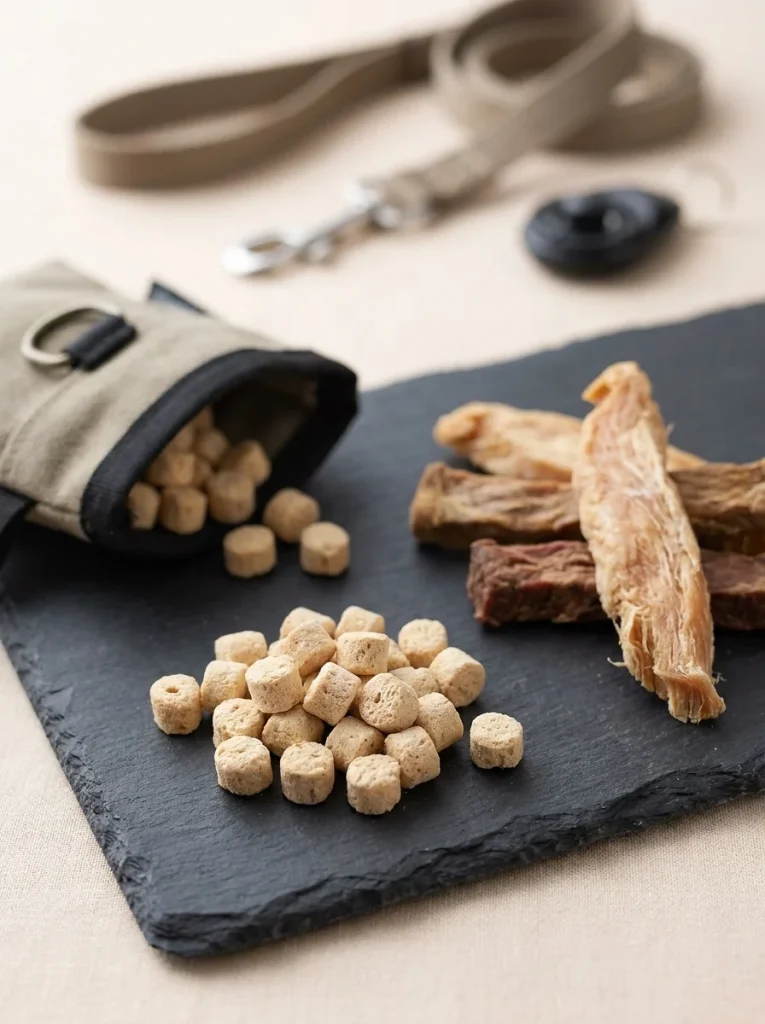
Best for: Training rewards and everyday snacks.
Plain meat treats are the simplest way to get started. You can use chicken, turkey, lean beef, or white fish. Cut them small for training, or bigger for a chewy-crunchy snack.
Freeze Dried Turkey Training Bites
Prep Time: 15 minutes
Cook Time: 15 minutes
Freeze Time (pre-freeze): 4 hours
Freeze Dryer Time: 24-30 hours
Yield: About 100 pea-sized bites
Ingredients:
- 1 pound lean ground turkey (plain, no seasoning)
- 1/4 cup water
Instructions:
- Cook the turkey in a pan with the water, breaking it into tiny crumbles.
- Drain and cool completely.
- Spread the crumbles in a thin layer on lined trays.
- Pre-freeze for 4 hours.
- Freeze dry until crisp and fully dry.
Notes:
- Tiny pieces are perfect for training sessions.
- Use lean meat. Fat shortens shelf life and can go rancid.
- Looking for tips on rewards? Our post on positive reinforcement explains why small, tasty rewards work so well.
B. Organ Treats (Liver and Heart)
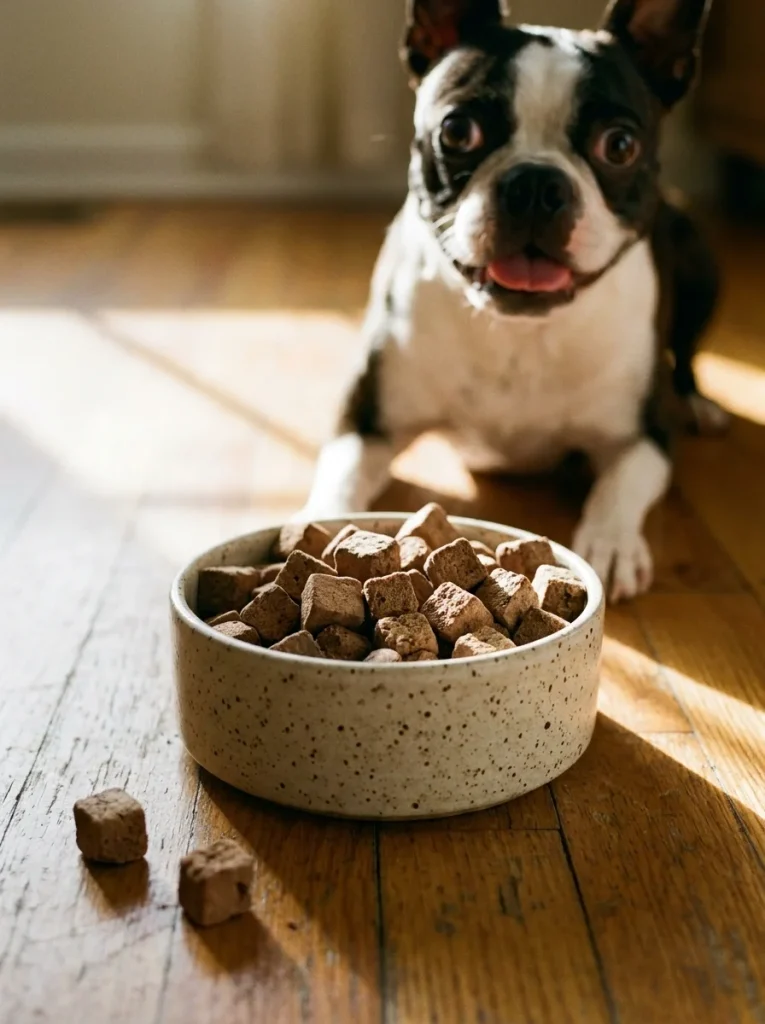
Best for: Picky eaters and high-value rewards.
Organ meats are strong-smelling and dogs go wild for them. Liver and heart are the most common. They are rich in nutrients, so feed them in small amounts.
Freeze Dried Beef Liver Cubes
Prep Time: 15 minutes
Cook Time: 10 minutes
Freeze Time (pre-freeze): 4-6 hours
Freeze Dryer Time: 24-34 hours
Yield: About 50 cubes
Ingredients:
- 1 pound fresh beef liver
Instructions:
- Rinse the liver and pat dry.
- Simmer in plain water for 8-10 minutes until firm.
- Cool, then cut into 1/2-inch cubes.
- Place on lined trays in a single layer.
- Pre-freeze until solid.
- Freeze dry until crisp.
Notes:
- Liver is very rich in vitamin A. Too much can harm your dog over time, so treat it like a special reward.
- Cooked liver is firmer and much easier to cut than raw.
- Expect a strong smell. Your dog will love it. You may not.
C. Fruit and Veggie Crisps
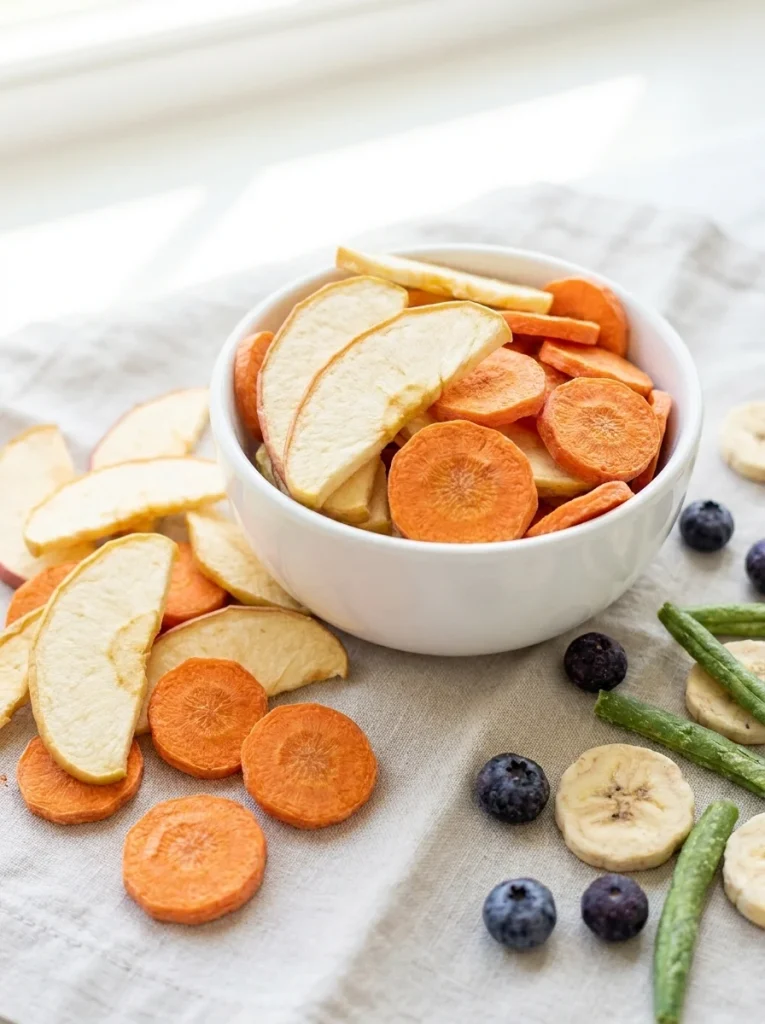
Best for: Light, low-calorie snacks.
Many dogs enjoy crunchy fruit and veggie bites. They’re great as a low-calorie reward for dogs who are watching their weight. Safe options include apples (no seeds), blueberries, bananas, carrots, green beans, and pumpkin.
Freeze Dried Apple & Carrot Crisps
Prep Time: 15 minutes
Cook Time: None
Freeze Time (pre-freeze): 3-4 hours
Freeze Dryer Time: 20-28 hours
Yield: About 4 cups of crisps
Ingredients:
- 2 medium apples, cored, seeds removed
- 3 medium carrots, peeled
Instructions:
- Slice the apples into thin 1/4-inch wedges.
- Slice the carrots into thin coins.
- Arrange on lined trays without overlapping.
- Pre-freeze for 3-4 hours.
- Freeze dry until crunchy.
Notes:
- Always remove apple seeds and cores.
- Thin slices dry faster and crunch better.
- Fruit has natural sugar, so keep portions small.
D. Yogurt Melts and Drops
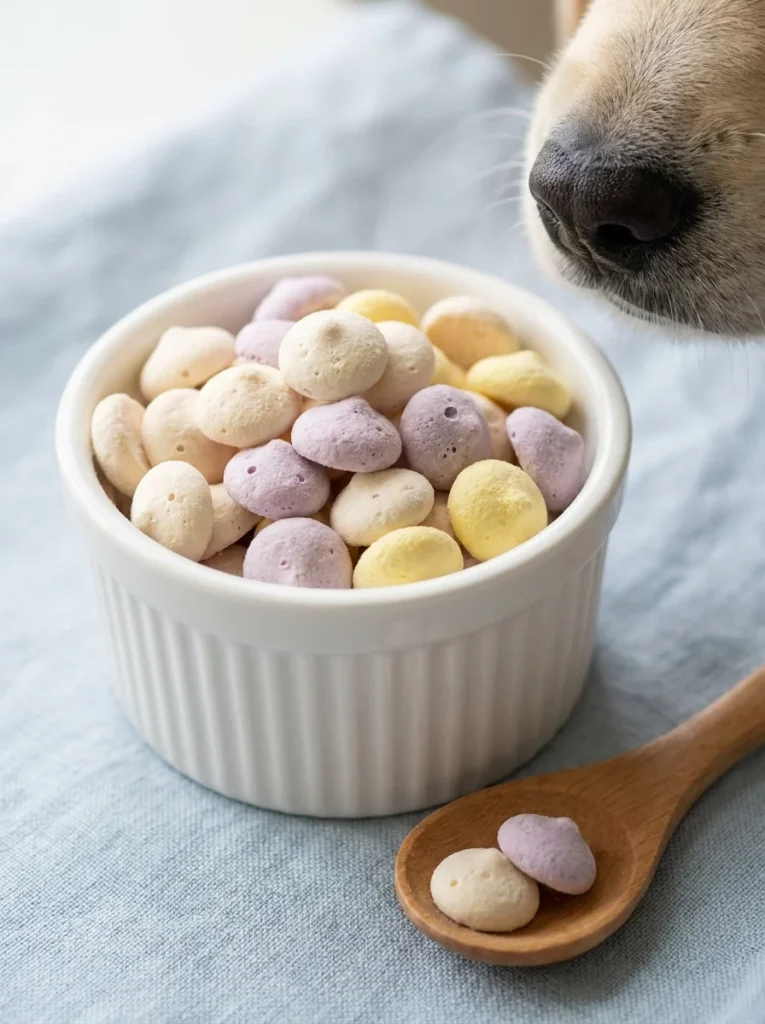
Best for: A creamy, melt-in-the-mouth snack.
Yogurt drops are fun to make and look like tiny meringues. You pipe or spoon small dots onto the tray and freeze dry them. Use plain yogurt with no added sugar and no xylitol.
Freeze Dried Yogurt Drops
Prep Time: 10 minutes
Cook Time: None
Freeze Time (pre-freeze): 3 hours
Freeze Dryer Time: 20-26 hours
Yield: About 80 small drops
Ingredients:
- 1 cup plain, unsweetened yogurt (Greek or regular)
- 1/4 cup mashed banana or blueberries (optional)
Instructions:
- Mix the yogurt and fruit together until smooth.
- Spoon the mix into a zip bag and snip a tiny corner.
- Pipe small dots onto a lined tray.
- Pre-freeze for 3 hours.
- Freeze dry until fully crisp.
Notes:
- Check the label for xylitol. It’s toxic to dogs.
- Some dogs have trouble with dairy. Start with just a few drops.
- Yogurt drops are fragile. Store them in a hard container, not a soft bag.
E. Raw-Style Patties and Medallions
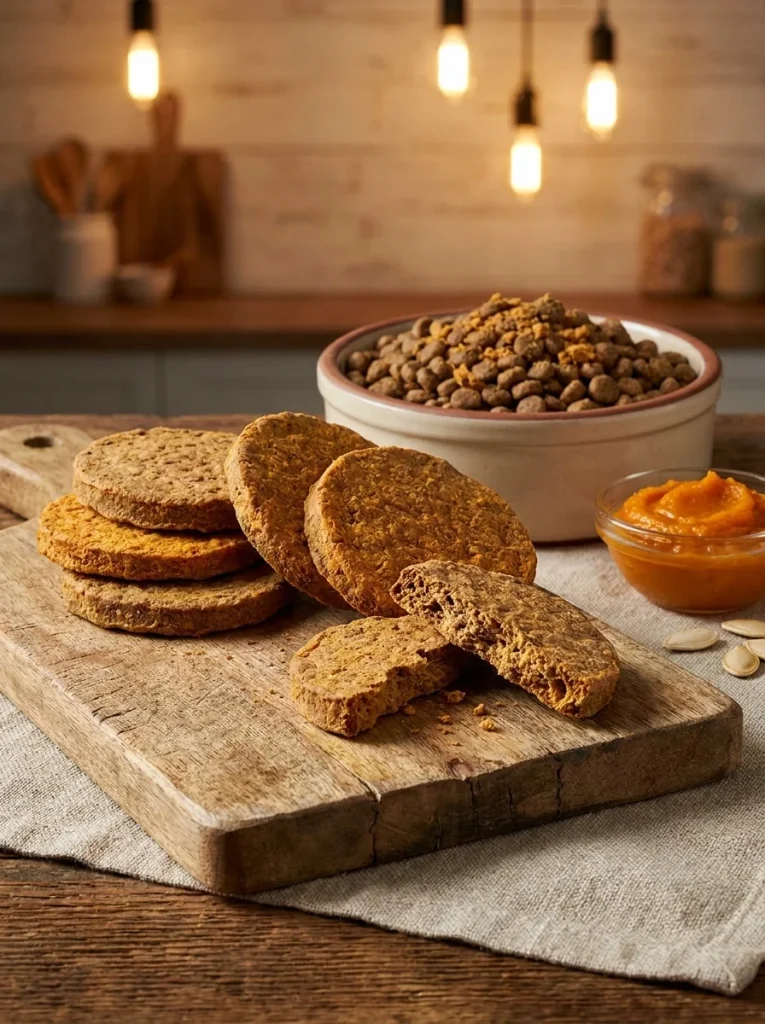
Best for: Dogs who love bigger, meal-like treats.
Patties give you a thick, hearty treat that can double as a meal topper. They take longer to dry because they’re thicker. Many owners use them as a “toppers” bonus on top of kibble.
Freeze Dried Beef & Pumpkin Medallions
Prep Time: 20 minutes
Cook Time: 12 minutes
Freeze Time (pre-freeze): 6 hours
Freeze Dryer Time: 30-40 hours
Yield: About 12 medallions
Ingredients:
- 1 pound lean ground beef
- 1/2 cup plain canned pumpkin (not pie filling)
- 1 egg
Instructions:
- Mix the beef, pumpkin, and egg in a bowl.
- Shape into flat discs about 1/2 inch thick.
- Cook in a pan for 5-6 minutes per side until cooked through.
- Cool completely.
- Place on lined trays and pre-freeze for 6 hours.
- Freeze dry until fully dry through the center.
Notes:
- Keep the discs under 3/4 inch thick.
- Break one in half to check the middle before you stop the cycle.
- Medallions are great crumbled over dinner.
F. Broth Pucks and Meal Toppers
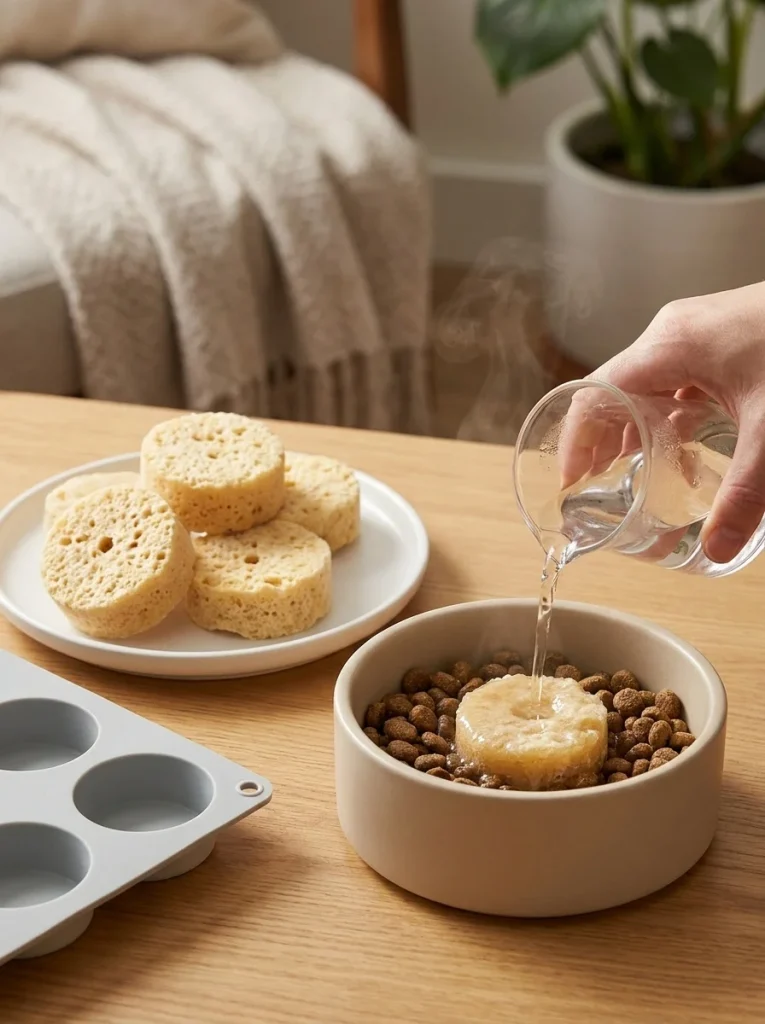
Best for: Adding flavor and moisture to dry food.
Broth pucks are a clever way to use leftover bone broth. You freeze the broth in small molds, then freeze dry them. When you add warm water later, the puck turns back into tasty broth.
Freeze Dried Bone Broth Pucks
Prep Time: 10 minutes
Cook Time: None (using ready-made broth)
Freeze Time (pre-freeze): 6-8 hours
Freeze Dryer Time: 24-32 hours
Yield: About 12 pucks
Ingredients:
- 3 cups dog-safe bone broth (no onion, no garlic, low sodium)
Instructions:
- Pour the broth into silicone molds or a muffin tin.
- Freeze in your regular freezer until solid.
- Pop the pucks out and place them on trays.
- Freeze dry until completely dry.
Notes:
- Make sure your broth has no onion, garlic, or heavy salt.
- Drop a puck in a bowl and add warm water to rehydrate.
- Great for dogs who forget to drink enough water.
- Our homemade dog food recipes pair well with these pucks as mix-ins.
G. Stuffed or Layered Treats
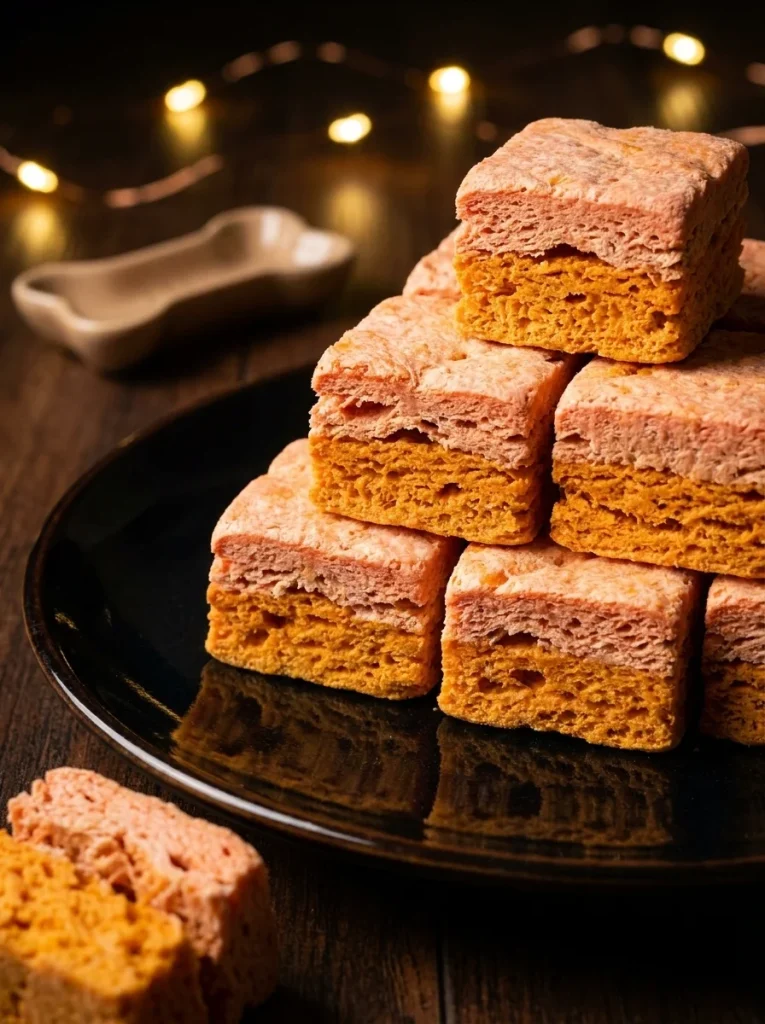
Best for: Fun party snacks and show-off batches.
Layered treats look amazing and give your dog different flavors in every bite. The trick is to freeze each layer before adding the next one. That keeps the layers neat.
Freeze Dried Salmon & Sweet Potato Layer Bites
Prep Time: 30 minutes
Cook Time: 20 minutes
Freeze Time (pre-freeze): 6-8 hours
Freeze Dryer Time: 28-36 hours
Yield: About 24 bites
Ingredients:
- 8 ounces cooked, boneless salmon, flaked
- 1 cup mashed sweet potato (plain)
- 1 tablespoon plain pumpkin puree
Instructions:
- Press the mashed sweet potato into a small, lined baking dish as a thin base layer.
- Freeze for 1 hour.
- Mix the salmon and pumpkin, then spread over the sweet potato layer.
- Freeze until solid.
- Cut into 1-inch squares.
- Place on lined trays and freeze dry until fully dry.
Notes:
- Check salmon carefully for bones.
- Use cooked salmon only. Raw salmon can carry a parasite that is dangerous to dogs.
- Keep layers thin so the center dries all the way through.
H. No-Machine Options: Dry Ice and Dehydrator
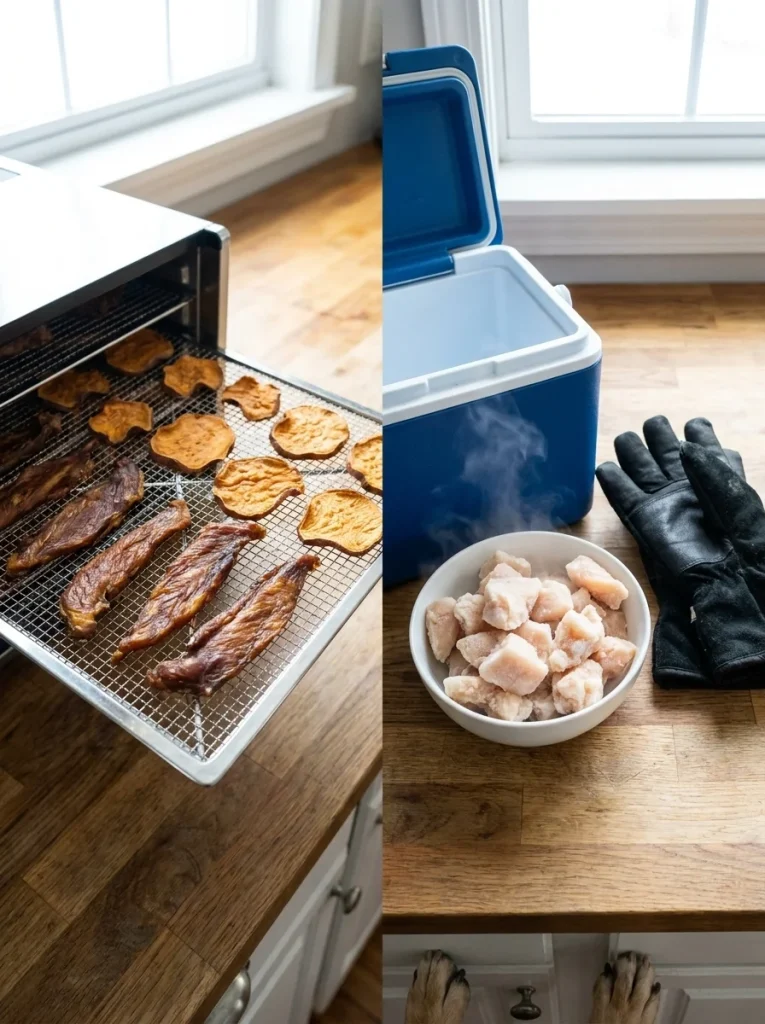
Don’t have a freeze dryer? You still have two choices. Both give you a crunchy treat, but neither is exactly the same as true freeze drying.
Option 1: The Dry Ice Method
This method uses very cold dry ice to freeze food solid and slowly pull out moisture. It takes more time, and results can be uneven. Treat it as a fun experiment, not a perfect replacement.
Dry Ice Freeze Dried Chicken Bites
Prep Time: 20 minutes
Cook Time: 15 minutes
Freeze Time: 24-48 hours
Yield: About 40 bites
Ingredients:
- 1 pound cooked chicken breast, cut into small cubes
- Dry ice (about 5 pounds per batch)
- A cooler with a loose-fitting lid
Instructions:
- Place the chicken cubes in a freezer-safe, open container.
- Set the container in the cooler.
- Wearing thick gloves, surround the container with dry ice.
- Rest the lid on top. Do not seal it airtight.
- Leave it in a ventilated place for 24-48 hours.
- Once the dry ice is gone, move the chicken to your regular freezer for another day.
- Check for dryness before serving.
Notes:
- Never touch dry ice with bare hands. It causes burns.
- Never seal dry ice in a closed container. Gas buildup can make it burst.
- Work in a well-ventilated area.
- Results are less reliable than a machine. Break a piece open to check for ice.
Option 2: The Dehydrator Method
A food dehydrator uses gentle heat and airflow to remove moisture. The result is chewier and denser than freeze dried food, but it’s easy and cheap. It’s a good middle ground.
Dehydrated Chicken & Sweet Potato Crisps
Prep Time: 20 minutes
Cook Time: 8-12 hours (dehydrating)
Freeze Time: None
Yield: About 40 crisps
Ingredients:
- 1 pound chicken breast, sliced thin
- 1 sweet potato, sliced thin
Instructions:
- Cook the chicken until done, then slice into thin strips.
- Slice the sweet potato into thin 1/4-inch rounds.
- Spread on dehydrator trays in a single layer.
- Dry at 160°F (71°C) for 8-12 hours.
- Check that pieces are firm and dry with no soft spots.
- Cool fully before storing.
Notes:
- Dehydrated treats are chewier and store for a shorter time.
- Keep them in the fridge or freezer if you won’t use them within a couple of weeks.
- Want crunchy bone-style snacks? Check out our post on the dog bones treat for more ideas.
Quick Comparison: Which Method Fits You?
| Method | Texture | Cost | Time | Shelf Life |
|---|---|---|---|---|
| Home freeze dryer | Light and crisp | High upfront | 1-2 days | Longest |
| Dry ice | Crisp, uneven | Low | 2-3 days | Medium |
| Dehydrator | Chewy or firm | Low | 8-12 hours | Shortest |
If you plan to make treats often, a freeze dryer pays for itself over time. If you just want to try it, a dehydrator is a safe place to start.
4. Storage, Rehydration, and Serving Tips
You’ve made a beautiful batch. Now let’s keep it fresh, safe, and delicious.
A. How to Store Freeze Dried Treats
Moisture is the enemy. Even a little humidity can turn crisp treats soft and moldy. Follow these steps:
- Cool the treats completely before bagging them.
- Work quickly. Freeze dried food soaks up moisture from the air in minutes.
- Use mylar bags or airtight glass jars.
- Add an oxygen absorber to each bag or jar.
- Seal tightly and label with the date and ingredients.
- Store in a cool, dark place like a pantry or cabinet.
How long will they last?
- Lean meats and veggies: 6-12 months with oxygen absorbers
- Fruit crisps: 6-12 months
- Fatty treats like salmon: 2-4 months
- Yogurt drops: 3-6 months
Always check treats before feeding. If they smell sour, look moldy, or feel soft, throw them away.
Pro tip: Split big batches into small bags. That way you only open one at a time, and the rest stay fresh.
B. How to Rehydrate Treats
Some dogs prefer treats soft, and rehydrating is perfect for senior dogs or dogs with sensitive teeth. Here’s how:
- Place treats in a bowl.
- Add warm (not hot) water or low-sodium broth.
- Let them soak for 2-5 minutes.
- Drain extra liquid and serve.
Small pieces rehydrate in about two minutes. Medallions can take up to five.
You can also rehydrate broth pucks by dropping them into a bowl of warm water. They turn into a tasty topper in seconds.
C. Serving Sizes and Safe Portions
Treats are fun, but they should never replace meals. A good rule of thumb is that treats should be no more than 10% of your dog’s daily calories.
Here’s a rough guide for a single day:
- Small dogs (under 20 lbs): 3-5 small bites
- Medium dogs (20-50 lbs): 6-10 small bites
- Large dogs (over 50 lbs): 10-15 small bites
These numbers are only a starting point. Adjust based on your dog’s size, age, and activity. If your dog has health problems, ask your vet.
Introduce new treats slowly. Give a tiny amount first. Then watch for stomach upset, itchy skin, or loose stools for 24 hours.
D. Fun Ways to Use Your Treats
Freeze dried treats are so light that you can use them almost anywhere:
- Training pouch: Tiny bites are perfect for rewards.
- Travel snacks: They’re lightweight and don’t spoil. Our travel essentials for dogs list covers what else to pack.
- Food toppers: Crumble a few over dinner.
- Puzzle toys: Hide a few inside for a fun challenge.
- Treat station: Keep jars of different flavors in a treat station so everything stays organized.
- Party treats: Pack bite-sized bags for dog birthday gifts.
5. Common Mistakes and Fixes
Even experienced makers run into problems. Here are the most common ones and how to fix them fast.
A. Treats Are Chewy or Soft
Why it happens: They didn’t finish drying, or they soaked up moisture after.
How to fix it:
- Put them back in the machine for 2-4 more hours.
- Check that your pieces weren’t too thick.
- Store in airtight containers right away.
- Add an oxygen absorber.
B. Treats Have a Strange Smell
Why it happens: Fat can go rancid, or the batch wasn’t dry enough.
How to fix it:
- Use leaner cuts of meat.
- Trim visible fat before cooking.
- Don’t keep fatty treats longer than a few months.
- If the smell is sour or rotten, throw the batch away.
C. Pieces Stuck to the Tray
Why it happens: No parchment paper or silicone mats.
How to fix it:
- Always line your trays.
- Lightly dust with a little dog-safe flour if needed.
- Gently peel the paper away, not the treat.
D. Uneven Drying
Why it happens: Pieces were different sizes, or trays were overloaded.
How to fix it:
- Cut everything to the same size.
- Spread pieces in a single layer.
- Sort finished treats and put any that still feel cold back in for another run.
E. Batch Takes Forever
Why it happens: Too much water, thick pieces, or a full machine.
How to fix it:
- Pat food dry before pre-freezing.
- Slice thinner.
- Run smaller batches.
- Always pre-freeze.
F. Dog Won’t Eat the Treats
Why it happens: Some dogs are picky about texture or flavor.
How to fix it:
- Try rehydrating the treats.
- Switch proteins (many dogs love liver or salmon).
- Crumble a few over their regular food.
- Offer a few tiny pieces at a time so they don’t get bored.
If your dog suddenly refuses treats they once loved, or you see signs like excessive licking, mention it to your vet.
6. Final Thoughts
Making your own freeze dried dog treats takes a bit of practice, but the payoff is huge. You’ll know exactly what’s in every bite, you’ll save money over time, and your dog will thank you with a wagging tail.
Start with the Chicken & Sweet Potato Bites. Once you feel comfortable, try the liver cubes, yogurt drops, or broth pucks. Cut pieces evenly, pre-freeze everything, and always test for doneness before you store.
For more ideas, browse our collection of homemade dog treat recipes and keep experimenting. Your dog is the best taste tester you’ll ever have.

Izzy is an experienced ranch worker who has a passion for exploring nature and getting up close to wildlife. With her connections to various animal organizations, Izzy is well-versed in animal care and rehabilitation.